Vissani VAP09R1AWT
Vissani 3-in-1 Portable Air Conditioner User Manual
Model: VAP09R1AWT
Sarrera
This manual provides essential instructions for the safe operation, installation, and maintenance of your Vissani 3-in-1 Portable Air Conditioner, Model VAP09R1AWT. This unit is designed to provide cooling, dehumidification, and fan functions for rooms up to 150 square feet. Please read all instructions thoroughly before initial use.
Segurtasun-argibide garrantzitsuak
Please read all instructions carefully before using this appliance. Failure to follow these instructions may result in electric shock, fire, or personal injury. Keep this manual for future reference.
- Always connect the unit to a grounded 3-prong outlet. Do not remove the grounding prong or use an adapter.
- Ez erabili unitatea kable edo entxufe hondatuta badago. Kablea hondatuta badago, fabrikatzaileak, bere zerbitzu-agenteak edo antzeko kualifikaziodun pertsonek ordezkatu beharko dute arriskuak saihesteko.
- Do not block air vents or exhaust openings. Ensure adequate clearance around the unit for proper airflow.
- Keep flammable materials, such as aerosols, away from the unit.
- Unplug the unit from the power outlet before cleaning, performing maintenance, or moving it.
- Do not use the unit in wet areas such as bathrooms or laundries where it may come into contact with water.
- Ensure proper installation of the exhaust hose to prevent hot air recirculation and maintain cooling efficiency.
- Tresna hau ez da gaitasun fisiko, sentsorial edo mental murriztua duten edo esperientzia eta ezagutza falta duten pertsonek (haurrak barne) erabiltzeko, baldin eta haien segurtasunaz arduratzen den pertsona batek gailuaren erabilerari buruz gainbegiratu edo jarraibiderik eman ez badu.
Paketearen edukia
Egiaztatu elementu guztiak paketean daudela kutxa irekitzean:
- Vissani Portable Air Conditioner Unit
- Urruneko Kontrola
- Window Installation Kit (includes exhaust hose, window slider kit, and adapters)
- Erabiltzailearen eskuliburua (dokumentu hau)
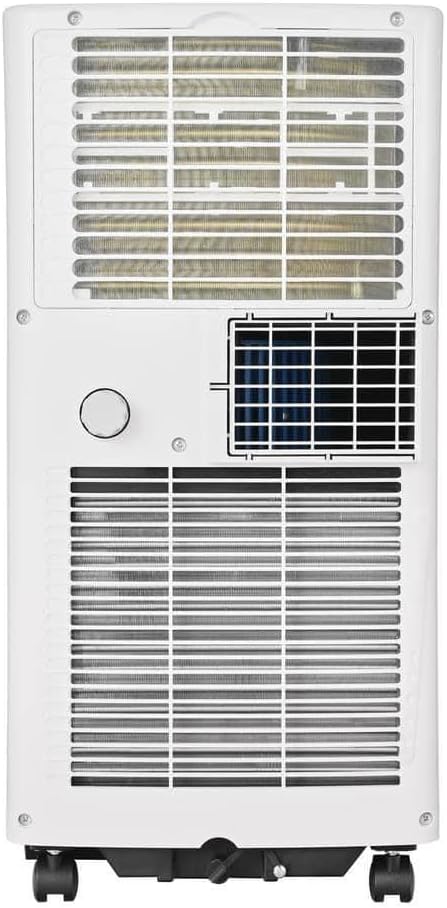
Produktua amaituview
Familiarize yourself with the main components and general appearance of your portable air conditioner.

The unit features a compact design with integrated caster wheels for easy mobility between rooms.


Konfigurazioa eta Instalazioa
The Vissani portable air conditioner requires proper installation of the window kit to vent hot exhaust air outside. Correct installation is crucial for efficient cooling performance.
Leiho Kit Muntaketa
- Attach one end of the exhaust hose to the unit's exhaust port. Twist or click into place until secure.
- Connect the window exhaust adapter to the other end of the exhaust hose.
- Adjust the window slider kit to fit your window opening. Extend or retract the panels as needed.
- Place the assembled window slider kit securely in the window frame. Close the window against the kit to seal it.
- Insert the window exhaust adapter into the opening of the window slider kit.
- Ensure all connections (unit to hose, hose to adapter, adapter to window kit) are secure to prevent air leakage, which can reduce efficiency.


Funtzionamendu-argibideak
Your Vissani portable AC offers three operating modes: Cool, Dehumidify, and Fan. It can be controlled via the unit's control panel or the included remote control.
Kontrol Panela eta Urruneko Kontrola
The control panel on top of the unit allows direct access to all functions. The remote control provides convenient operation from a distance. Ensure batteries are correctly inserted into the remote control.
Funtzionamendu moduak
- Cool modua: Select this mode for air conditioning. Use the temperature adjustment buttons to set your desired room temperature. The unit will cool the room to the set temperature and cycle on/off to maintain it.
- Deshezetatzeko modua: This mode removes excess moisture from the air. The fan speed is typically fixed at a low setting in this mode. For continuous dehumidification, ensure the continuous drainage option is set up (refer to the Maintenance section).
- Fan modua: Circulates air without cooling. Select desired fan speed (low, medium, high) to provide a refreshing breeze.
Tenporizadorearen funtzioa
The 24-hour programmable timer allows you to set the unit to turn on or off automatically after a specified period. To set the timer, press the 'Timer' button on the control panel or remote, then use the temperature adjustment buttons to select the desired delay time (in hours). Press 'Timer' again to confirm.
Mantentzea
Regular maintenance ensures optimal performance, improves air quality, and extends the lifespan of your portable air conditioner.
Aire iragazkien garbiketa
The air filter should be cleaned every two weeks or more frequently depending on usage and air quality. A dirty filter can significantly reduce cooling efficiency and airflow.
- Deskonektatu unitatea korronte-hartunetik garbitu aurretik.
- Locate and remove the air filter (typically found on the back or side of the unit).
- Wash the filter with warm, soapy water. Rinse thoroughly to remove all dirt and debris.
- Allow the filter to air dry completely before reinstalling. Do not expose to direct sunlight or heat.
- Reinsert the dry filter into the unit, ensuring it is properly seated.
Drainatzea
The unit collects condensate during cooling and dehumidifying operations. Periodically drain the collected water from the drainage port at the bottom rear of the unit. For continuous dehumidification, connect a standard garden hose (not included) to the continuous drainage port and direct it to a floor drain or suitable receptacle.
Biltegiratzea
Before storing the unit for an extended period (e.g., during off-season):
- Drain all accumulated water completely from the unit.
- Clean the air filter as described above.
- Run the unit in fan-only mode for a few hours to ensure internal components are thoroughly dry.
- Unplug the unit and carefully coil the power cord.
- Store the unit in a dry, upright position, preferably in its original packaging, away from extreme temperatures.
Arazoak konpontzeko gida
Bezeroarentzako arreta-zerbitzuarekin harremanetan jarri aurretik, berriroview honako arazo ohikoenak eta haien balizko irtenbideak.
| Arazoa | Kausa posiblea | Irtenbidea |
|---|---|---|
| Unitatea ez da pizten | No power supply; power cord unplugged; circuit breaker tripped; unit's internal safety switch activated. | Ensure unit is securely plugged into a functional, grounded outlet; check and reset the circuit breaker if tripped; press the reset button on the plug if available. |
| Hozte nahikoa | Dirty air filter; blocked air intake/exhaust; room size exceeds capacity; windows/doors open; exhaust hose not properly installed or kinked. | Clean the air filter; clear any obstructions from air inlets and outlets; ensure the room size is within 150 sq. ft.; close all windows and doors; verify exhaust hose installation and ensure it is straight. |
| Unit is noisy or vibrating excessively | Unit not on a level surface; fan obstruction; loose components. | Place the unit on a flat, stable surface; check for foreign objects in the fan area; contact support if noise persists after checking. |
| Ur-ihesak | Drain plug not securely closed; unit tilted; internal water tank full (if applicable and not continuously drained). | Ensure the drain plug is securely closed; place the unit on a level surface; drain accumulated water from the unit. |
| Urruneko kontrola ez dabil | Dead batteries; obstruction between remote and unit; remote not pointed at receiver. | Replace batteries with new ones; remove any obstructions; ensure remote is pointed directly at the unit's receiver. |
Produktuaren zehaztapenak
| Ezaugarri | Xehetasuna |
|---|---|
| Modelo zenbakia | VAP09R1AWT |
| Hozte-ahalmena (DOE) | 5,000 BTU |
| Estaldura Eremua | Gehienez 150 sq. |
| Funtzioak | Aire girotua, hezetasun-kentzailea, haizagailua |
| liburukiatage | 115 Volt |
| Wattage | 450 watt |
| Zarata Maila | 50-52 dBA |
| Elementuaren pisua | 45.9 kilo |
| Produktuaren neurriak (L x W x H) | 15 x 16 x 12 hazbete inguru |
| Kolorea | Zuria |
| Dakarten osagaiak | Remote Control, Window Installation Kit |
Bermea eta Bezeroarentzako Arreta
For specific warranty information regarding your Vissani Portable Air Conditioner, Model VAP09R1AWT, please refer to the warranty card included with your product packaging. It is recommended to retain your purchase receipt as proof of purchase for any warranty claims.
For technical assistance, troubleshooting beyond this guide, or to inquire about replacement parts, please contact Vissani customer support. Contact details can typically be found on the product packaging, the official Vissani webgunea edo barneko berme-dokumentazioa.
Ask a question about this manual
Ask about setup, troubleshooting, compatibility, parts, safety, or missing instructions. Manuals+ will review the question and use this page’s manual context to help answer it.