1. Sarrera
Thank you for choosing the SENIX Electric Corded Garden Tiller & Cultivator, Model TLE13-M. This manual provides essential information for the safe operation, assembly, maintenance, and troubleshooting of your new garden tool. Please read this manual thoroughly before operating the tiller to ensure proper use and to prevent injury or damage.
This electric tiller is designed for cultivating soil in gardens, flower beds, and for lawn renovation. Its powerful motor and durable steel tines make it suitable for breaking through tough soil and preparing seedbeds.
2. Segurtasun informazio garrantzitsua
OHARRA: Irakurri segurtasun-abisu eta argibide guztiak. Abisuak eta argibideak ez betetzeak deskarga elektrikoa, sutea eta/edo lesio larriak eragin ditzake.
- Beti erabili babes pertsonaleko ekipamendu (EPI) egokia, segurtasun-betaurrekoak, eskularruak eta oinetako sendoak barne.
- Keep children and bystanders at a safe distance (at least 50 feet / 15 meters) from the operating area.
- Lan-eremua ikuskatu harriak, hondakinak edo hortzek jaurti ditzaketen bestelako objekturik dagoen ikusteko.
- Ensure the power cord is in good condition and positioned to avoid entanglement with the tines. Use only outdoor-rated extension cords.
- Never operate the tiller in wet conditions or rain.
- Always disconnect the power supply before performing any adjustments, cleaning, or maintenance.
- Use the dual safety switch mechanism for safe startup and to prevent accidental activation.

2.1. irudia: The dual safety switch requires pressing the lock-off button (Step 1) before engaging the switch lever (Step 2) to start the tiller, ensuring safe operation.
3. Produktua amaitu daview
The SENIX Electric Corded Garden Tiller & Cultivator is designed for efficient soil preparation. Key features include:
- 13.5 indartsuaAmp Motorra: Delivers strong power for breaking through tough soil.
- 16-inch Tilling Width & 8-inch Tilling Depth: Cultivates a significant area in a single pass.
- 6 Durable Steel Tines: Built for longevity and effective soil churning.
- 3-Position Wheel Adjustment: Allows customization of tilling depth and speed.
- Foldable Handle Design: Biltegiratze trinkoa eta garraio erraza lortzeko.
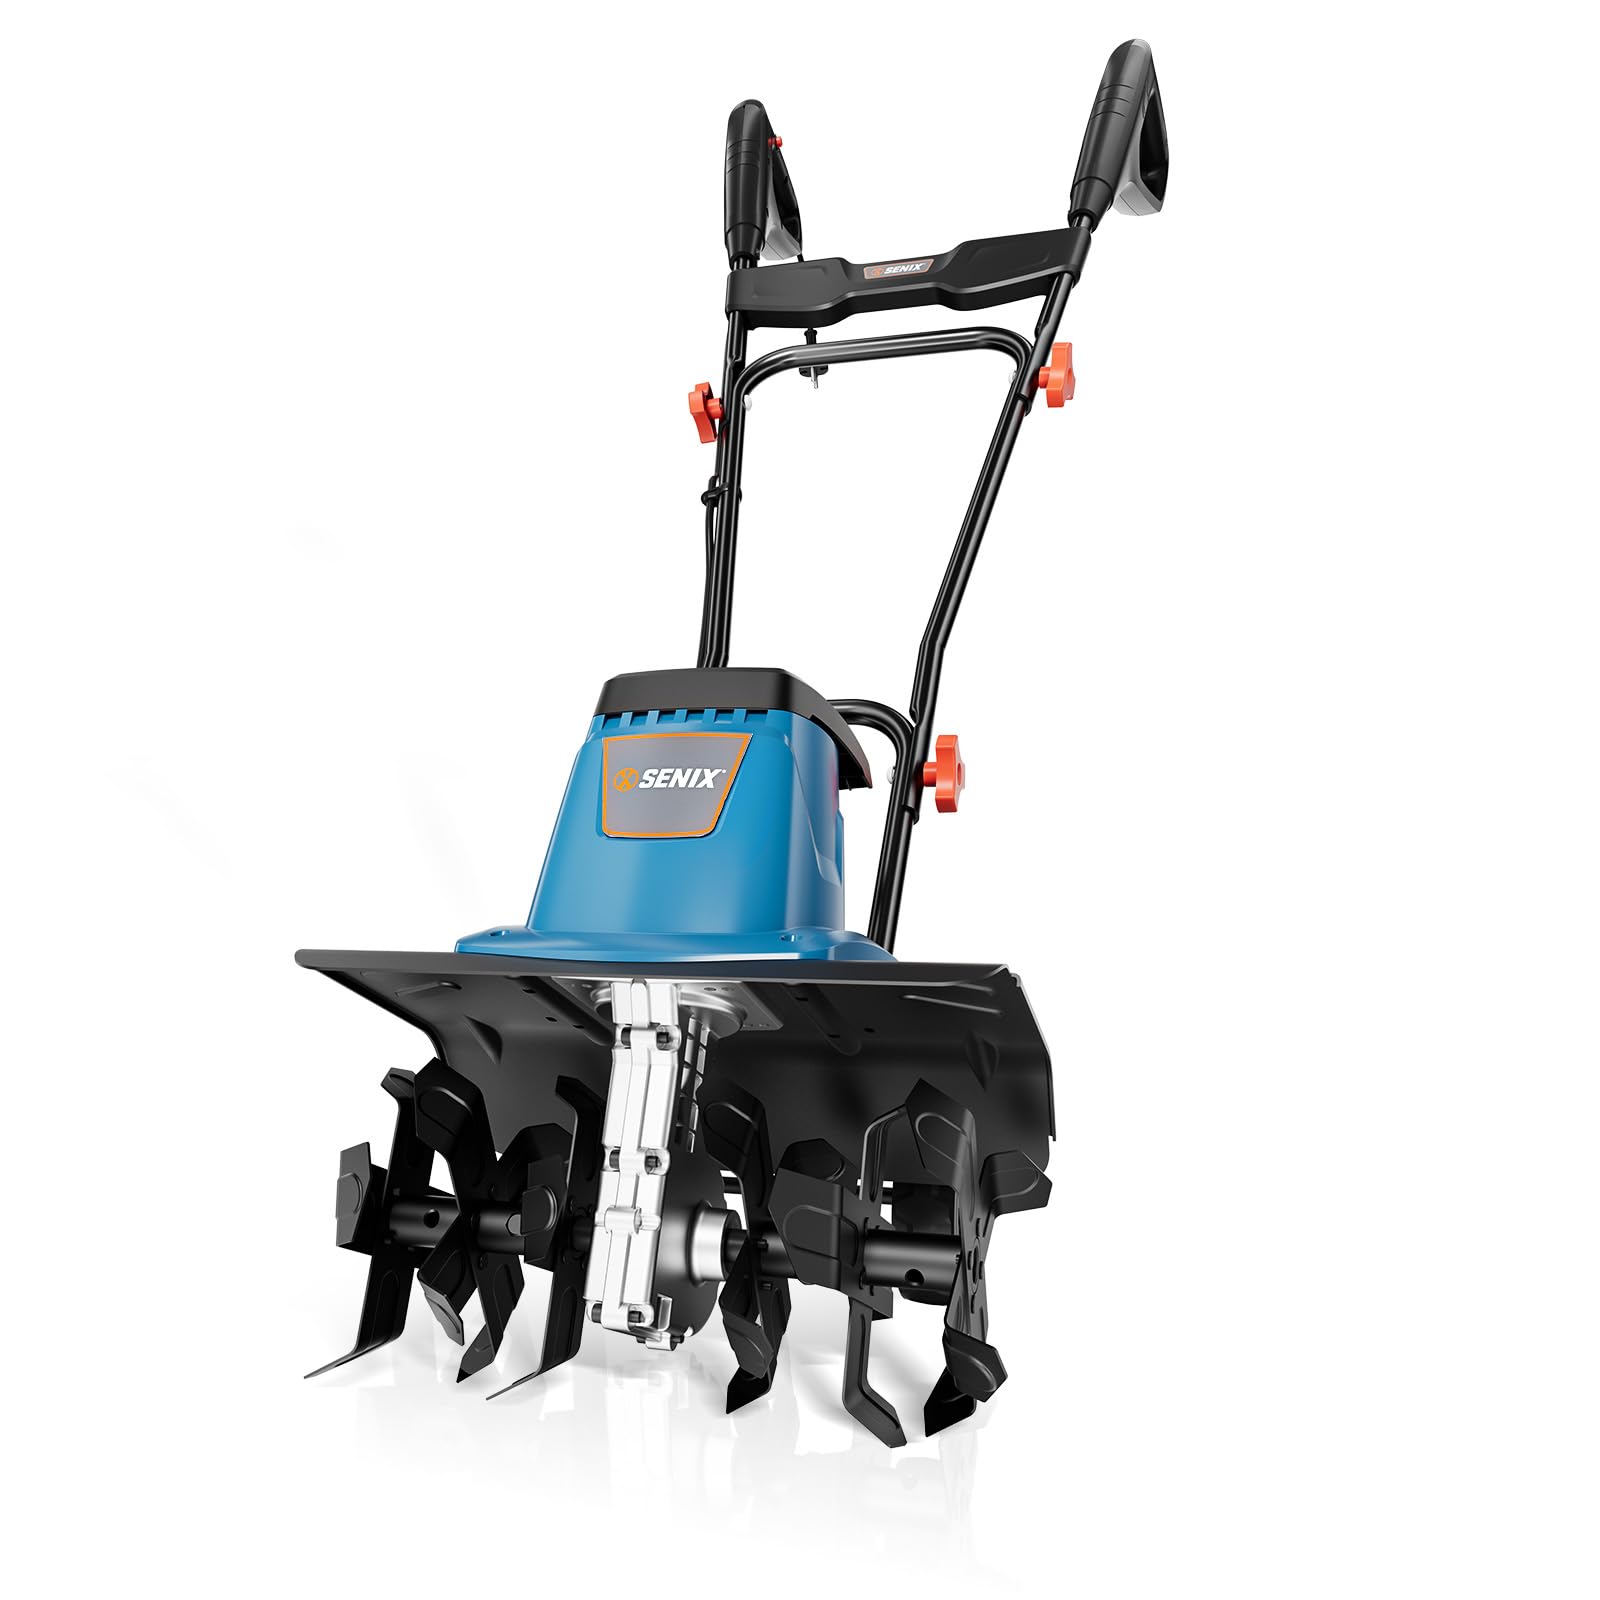
3.1. irudia: Amaituview of the SENIX Electric Tiller highlighting its powerful motor, steel tines, foldable handles, and 3-position wheel adjustment.

3.2. irudia: Illustration of the tiller's 16-inch wide and 8-inch deep tilling capacity in soil.

3.3. irudia: Visual representation of the 13.5 Amp high-power motor and 370 RPM tilling speed for efficient soil cutting and aeration.
4. Konfigurazioa eta Muntaketa
The SENIX TLE13-M tiller requires minimal assembly. Follow these steps:
- Deskonprimitu osagaiak: Kontu handiz atera pieza guztiak ontzitik. Egiaztatu ontziratze-zerrendan zerrendatutako osagai guztiak daudela.
- Heldulekuaren muntaia: Lotu goiko heldulekua beheko heldulekuari emandako heldulekuak eta torlojuak erabiliz. Ziurtatu heldulekua ondo lotuta dagoela.
- Kablearen kudeaketa: Secure the power cord along the handle using the provided clips to prevent it from interfering with operation or getting caught in the tines.
- Gurpilen doikuntza: Adjust the wheels to the desired height for transport or initial tilling. Refer to the "Operating Instructions" section for details on wheel positions.

4.1. irudia: The tiller features a foldable handle design, allowing for compact storage and easy transport. Dimensions shown are for the folded state.
5. Funtzionamendu-argibideak
Before starting, ensure you have read and understood all safety warnings.
5.1 Lehorgailua martxan jartzea eta gelditzea
- Konektatu energia: Plug the tiller's power cord into a suitable outdoor-rated extension cord, then plug the extension cord into a grounded 120V AC outlet.
- Hasi: Press and hold the lock-off button (refer to Figure 2.1) with your thumb, then squeeze the switch lever with your fingers. The tines will begin to rotate.
- Gelditu: Release the switch lever. The tines will stop rotating.
5.2 Adjusting Wheel Position
The tiller features a 3-position wheel adjustment system to control tilling depth and ease of transport.

5.1. irudia: The 3-position adjustable wheels allow for different tilling depths and transport modes.
- Goi postua: For easy transport over uneven ground or very light cultivation.
- Erdiko posizioa: Ideal for general soil tilling and preparing seedbeds.
- Posizio baxua: For deep tine penetration and intensive cultivation in tougher soil.
To adjust, lift the tiller slightly and reposition the wheels into the desired slot. Ensure both wheels are set to the same position.
5.3 Tilling Techniques
- Hasierako pasea: For hard-packed soil, start with a shallow depth setting (higher wheel position) and make several passes, gradually increasing the depth.
- Gainjartzea: Overlap each pass by a few inches to ensure complete cultivation of the area.
- Kontrola: Hold the tiller firmly with both hands. Allow the tiller to pull itself forward; do not force it. Guide it gently.
- Oztopoak: If the tines strike a hard object, release the switch lever immediately. Disconnect power, then inspect the tines for damage and remove the obstruction.
6. Mantentzea
Regular maintenance ensures optimal performance and extends the life of your tiller.
WARNING: Always disconnect the power supply before performing any maintenance or cleaning.
- Garbiketa: After each use, clean soil and debris from the tines and housing. Use a stiff brush or cloth. Do not use water directly on the motor housing.
- Hortzen ikuskapena: Regularly inspect the steel tines for wear, damage, or bending. Replace damaged tines promptly.
- Kableen ikuskapena: Check the power cord and extension cord for cuts, fraying, or damage. Replace damaged cords immediately.
- Biltegiratzea: Store the tiller in a dry, secure location, out of reach of children. The foldable handle allows for compact storage.
7. Arazoak
This section addresses common issues you might encounter with your SENIX TLE13-M tiller.
| Arazoa | Kausa posiblea | Irtenbidea |
|---|---|---|
| Tiller does not start. |
|
|
| Tiller stops during operation. |
|
|
| Tiller vibrates excessively. |
|
|
8. Zehaztapenak
| Ezaugarri | Xehetasuna |
|---|---|
| Modelo zenbakia | TLE13-M |
| Energia iturria | Kable bidezko elektrizitatea (AC) |
| Motorra | 13.5 Amp |
| Zabaltzea | 16 hazbetekoa |
| Laburpena | 8 hazbetekoa |
| Tine Speed | 370 RPM |
| Tines kopurua | 6 Steel Tines |
| Materiala | Altzairua |
| Produktuaren neurriak (L x W x H) | 19.3" x 17.7" x 17" |
9. Bermea eta Laguntza
The SENIX Electric Corded Garden Tiller & Cultivator (Model TLE13-M) is backed by a 3 urteko berme mugatua. Berme honek ohiko erabileran materialen eta eskulanen akatsak estaltzen ditu.
For warranty claims, technical assistance, or to purchase replacement parts, please contact SENIX Tools customer service. Keep your proof of purchase for warranty validation.
Fabrikatzailea: SENIX
Saltzailea: SENIX Tools
For the most up-to-date contact information, please refer to the official SENIX webgunea edo zure erosketa-dokumentazioa.