1. Sarrera
This manual provides detailed instructions for the setup, operation, maintenance, and troubleshooting of your IBKINXX DLN-12 12-Egg Automatic Incubator. Please read this manual thoroughly before operating the device to ensure optimal performance and successful hatching results. This incubator is designed for hatching various poultry eggs, including chicken, duck, and quail eggs, by providing a stable and controlled environment.

2. Segurtasun-argibideak
- Always place the incubator on a stable, level surface away from direct sunlight, drafts, or extreme temperature fluctuations.
- Ziurtatu elikatze-kablea ez dagoela kaltetuta eta lurrera konektatutako entxufe batera behar bezala konektatuta dagoela.
- Do not immerse the incubator's electrical components in water or any other liquid.
- Keep the incubator out of reach of children and pets.
- Unplug the incubator from the power source before cleaning or performing any maintenance.
- Erabili emandako korronte-egokigailua soilik.
3. Paketearen edukia
Egiaztatu osagai guztiak paketean daudela:
- Incubator Cover
- Water Bottle (x2)
- Removable Egg Tray
- Elikatze-moldagailua
- Erabiltzailearen eskuliburua

4. Konfigurazioa
- Assemble the Incubator: Place the egg tray inside the base. Ensure the automatic egg turning mechanism is correctly aligned.
- Place Fertilized Eggs: Carefully arrange the fertilized eggs on the egg tray. The incubator can hold up to 12 chicken eggs.
- Connect Water Bottles: Fill the provided water bottles with distilled water and attach them to the external water filling system. This system allows for humidity maintenance without opening the incubator.
- Ziurtatu estalkia: Place the transparent cover securely over the base.
- Piztu: Connect the power adapter to the incubator and then to a power outlet. The LED display will illuminate.
- Hasierako ezarpenak: The incubator will display default temperature and humidity settings. Allow the incubator to stabilize for at least 2-3 hours before placing eggs, ensuring the internal environment reaches the desired conditions.
5. Funtzionamendu-argibideak
5.1. Kontrol panela baino gehiagoview
The incubator features an LED display and control buttons for easy monitoring and adjustment of settings.

5.2. Tenperatura eta Hezetasuna Kontrola
The LED display shows the current temperature in Fahrenheit and humidity percentage. The incubator maintains a constant temperature and humidity level. You can adjust the temperature using the control buttons. The adjustable temperature range is 68-104°F. An alarm will sound if the temperature deviates by more than 2°F from the set point.
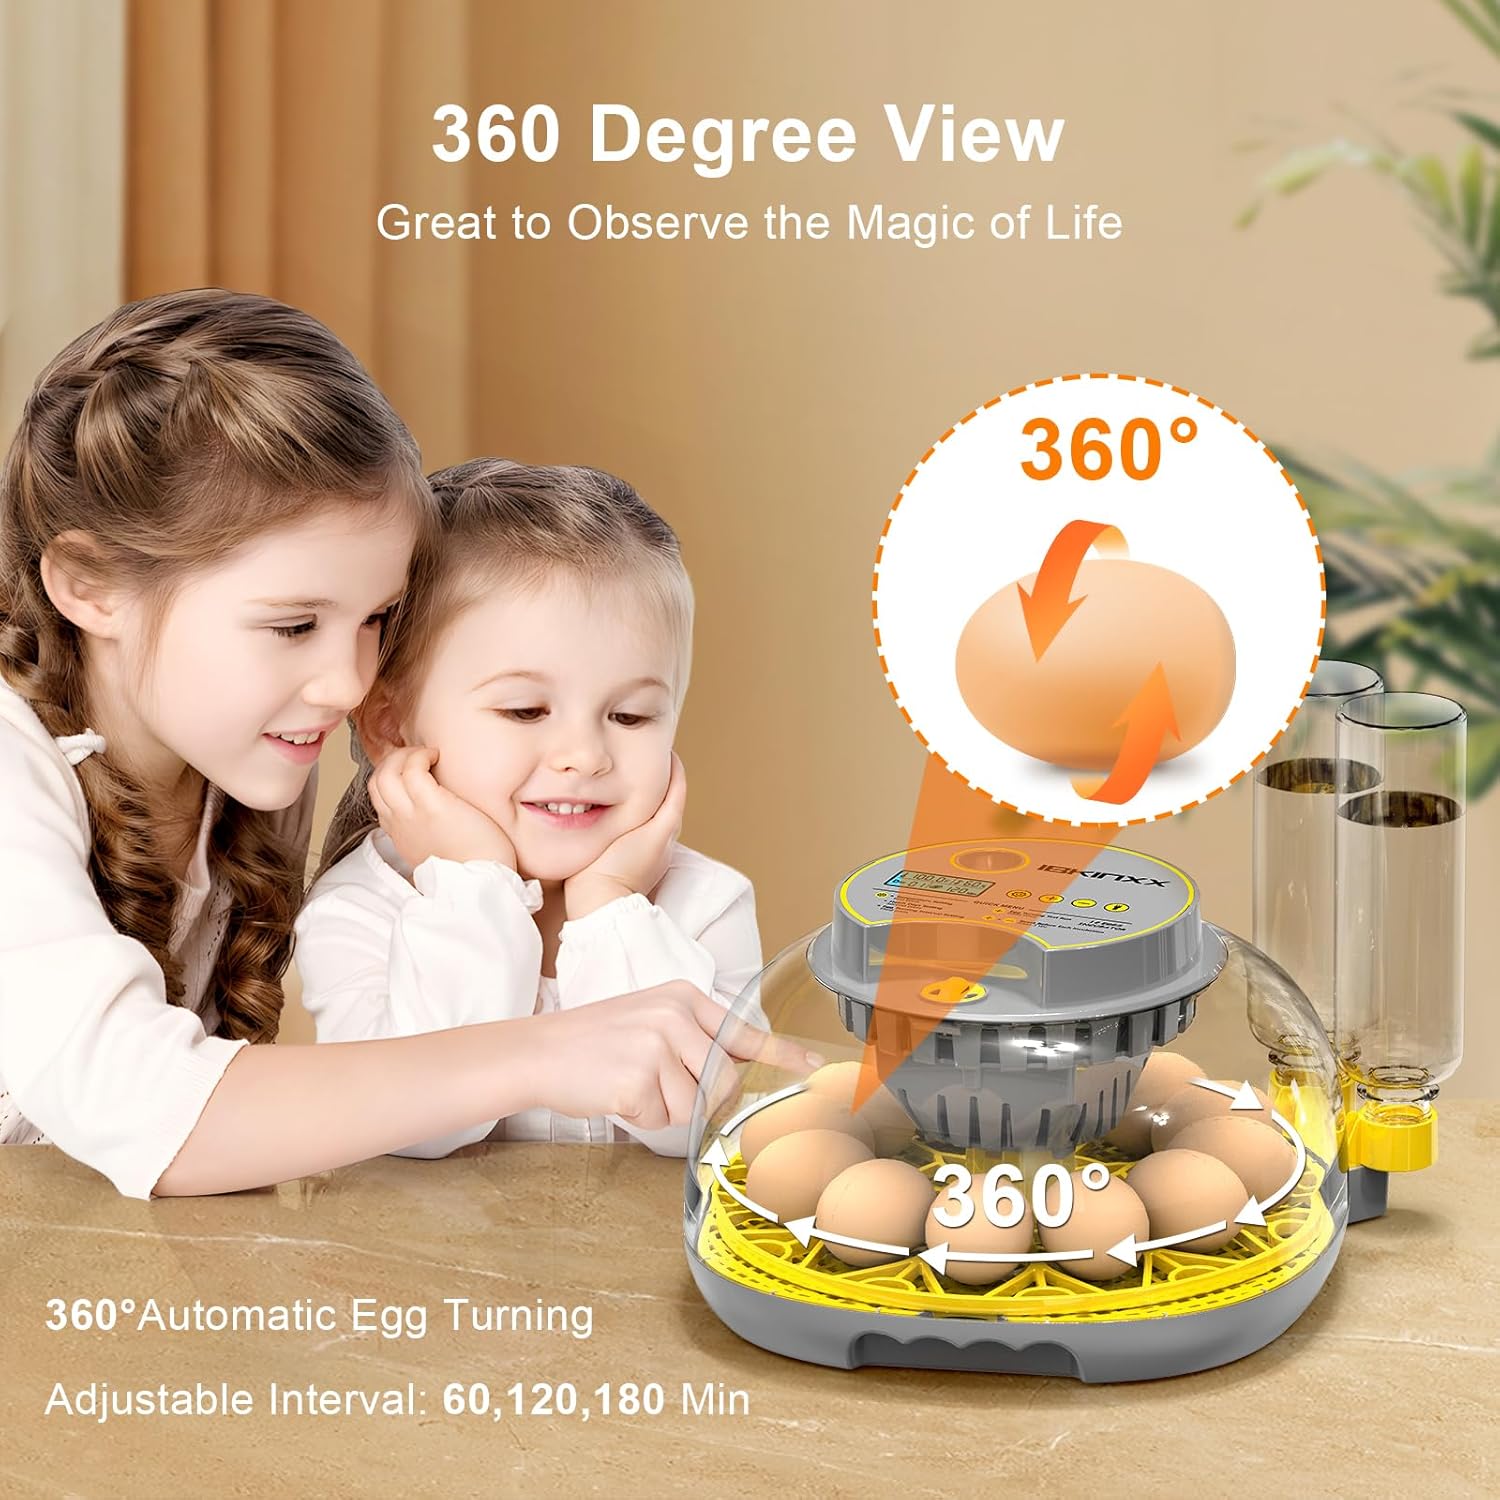
5.3. Automatic Egg Turning
The incubator includes an automatic egg turning system that mimics natural incubation. This system rotates the eggs at set intervals to ensure even heating and proper embryonic development. The turning frequency can be set to once every 60, 120, or 180 minutes. The egg turning function should be stopped three days before the expected hatch date.
5.4. External Water Refill System
The external water filling system allows you to add water to maintain humidity without opening the incubator. This helps to keep the internal environment stable, which is crucial for successful hatching. Simply fill the water bottles and ensure they are properly connected to the incubator's water channels.
5.5. Built-in Egg Candling
A built-in egg candler allows you to monitor the development of the embryos without removing the eggs from the incubator. This feature helps identify infertile eggs or those with developmental issues at various stages of incubation.

5.6. Produktuaren bideo ofiziala
Bideo honek laburpen bat eskaintzen duview of the IBKINXX Incubator for Hatching Eggs, demonstrating its features and ease of use.
6. Incubation Conditions
Optimal incubation conditions vary by egg type. The following table provides general guidelines:

| Egg Type | Tenperatura | Hezetasun-barrutia | Inkubazio-aldia |
|---|---|---|---|
| Chicken Eggs | 99.5-100.5 °F (37.5-38.1 °C) | 50-60% (Days 1-18), 65-75% (Days 19-21) | 21 Egun |
| Duck Eggs | 99.5-100.5 °F (37.5-38.1 °C) | 60-70% (Days 1-25), 70-80% (Days 26-28) | 28 Egun |
| Quail Eggs | 99.5-100.5 °F (37.5-38.1 °C) | 50-60% (Days 1-15), 65-75% (Days 16-18) | 18 Egun |
Note: These are general guidelines. Specific breeds may require slight adjustments. Always research the optimal conditions for the specific eggs you are incubating.
7. Mantentzea eta Garbiketa
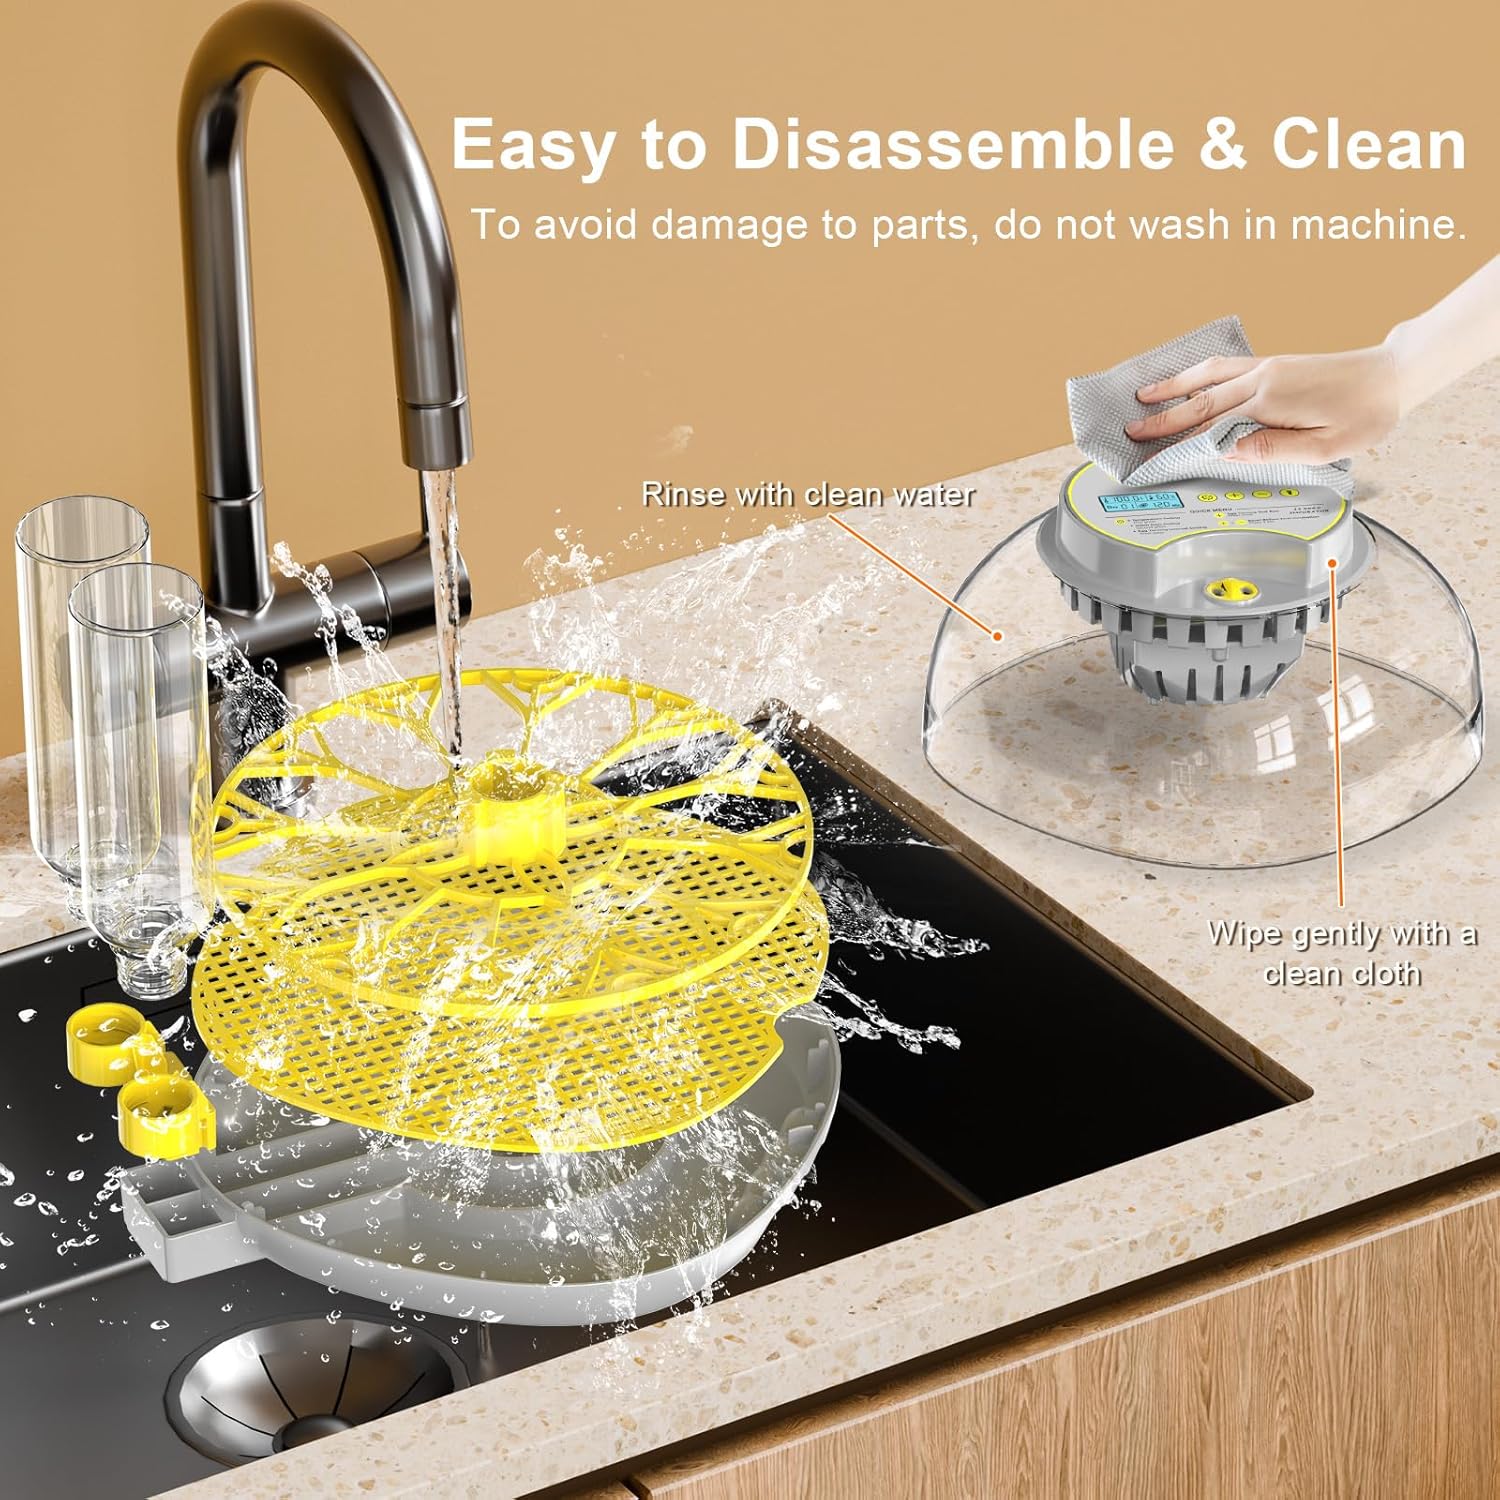
Regular cleaning of your incubator is essential to prevent bacterial growth and ensure successful hatches. The incubator is designed for easy disassembly and cleaning.
- Deskonektatu: Always unplug the incubator before cleaning.
- Desmuntatu: Carefully remove the top cover, egg turning mechanism, and egg tray from the base.
- Osagai garbiak: Rinse the removable tray and cover with clean water. Use a soft cloth and mild disinfectant to wipe down all surfaces. Avoid harsh chemicals that could leave residues.
- Ondo lehortu: Ensure all parts are completely dry before reassembling the incubator.
- Biltegiratzea: When not in use, store the incubator in a clean, dry place.
Garrantzitsua: Do not wash any electrical components in a machine or immerse them in water.
8. Arazoak
If you encounter issues with your incubator, refer to the following common problems and solutions:
- Potentziarik gabe: Check if the power adapter is securely connected to both the incubator and the power outlet. Ensure the outlet is functional.
- Tenperaturaren gorabeherak: Verify that the incubator is placed in a stable environment away from drafts or direct heat sources. Ensure the lid is properly sealed. If fluctuations persist, contact customer support.
- Humidity Too Low: Ensure the water bottles are filled and properly connected. Check for any blockages in the water channels.
- Humidity Too High: Ensure proper ventilation. If the humidity remains excessively high, you may need to adjust the amount of water or the ventilation openings slightly.
- Egg Turner Not Working: Check if the egg turning function is enabled on the control panel. Ensure the egg tray is correctly installed and not obstructed.
- Alarma soinuak: The alarm indicates a deviation from the set temperature or humidity. Check the display for the specific alert and address the underlying issue.
For issues not covered here, please contact IBKINXX customer support.
9. Zehaztapenak
| Ezaugarri | Xehetasuna |
|---|---|
| Modelo zenbakia | DLN-12 |
| Marka | IBKINXX |
| Egg Capacity | 12 Chicken Eggs (approximate, varies by egg size) |
| Produktuaren neurriak | 10"L x 6"Z x 10"A (25.4 x 15.24 x 25.4 cm) |
| Elementuaren pisua | 3.69 libra (1.67 kg) |
| Materiala | Akrilonitrilo Butadieno Estirenoa (ABS) |
| Tenperatura Kontrola | Automatic, LED display, Adjustable range 68-104°F |
| Hezetasunaren Kontrola | Automatic, External water refill system |
| Egg Turning | Automatic, Adjustable intervals (60, 120, 180 minutes) |
| Viewing | 360° Transparent View |
| Ezaugarri bereziak | Built-in Egg Candler, Easy Disassembly for Cleaning |
10. Bermea eta Laguntza
Your IBKINXX DLN-12 Incubator comes with a standard manufacturer's warranty. For specific warranty details, including coverage and duration, please refer to the warranty card included in your product packaging or contact IBKINXX customer service directly.
For technical support, troubleshooting assistance, or to inquire about replacement parts, please visit the official IBKINXX website or contact their customer support team using the contact information provided with your purchase.