1. Berme garrantzitsuak
Please read all instructions carefully before using your Acekool Espresso Machine. Keep this manual for future reference.
- Ensure the appliance is placed on a stable, level surface away from water sources.
- Ez murgildu gailua, kablea edo entxufea uretan edo beste likido batzuetan.
- Unplug from the outlet when not in use and before cleaning. Allow to cool before adding or removing parts.
- Ez erabili aparaturik kablea edo entxufea hondatuta dagoenean, edo aparatuak gaizki funtzionatzen duenean edo nolabait hondatu ondoren.
- Gainbegiratzea beharrezkoa da aparaturen bat umeek edo umeen ondoan erabiltzen dutenean.
- Erabili fabrikatzaileak gomendatutako osagarriak soilik.
- Saihestu pieza mugikorrekin kontaktua.
- Ez erabili kanpoan.
- Ziurtatu beti ur-depositua maila egokira beteta dagoela erabili aurretik.
- Kontuz ibili gainazal beroak eta lurruna manipulatzean.
2. Produktua amaitu daview
The Acekool Espresso Machine is designed to provide a professional coffee experience at home or in the office. It features a 20-bar Italian pump, a built-in grinder with 30 adjustable settings, and a powerful steam wand for milk frothing.
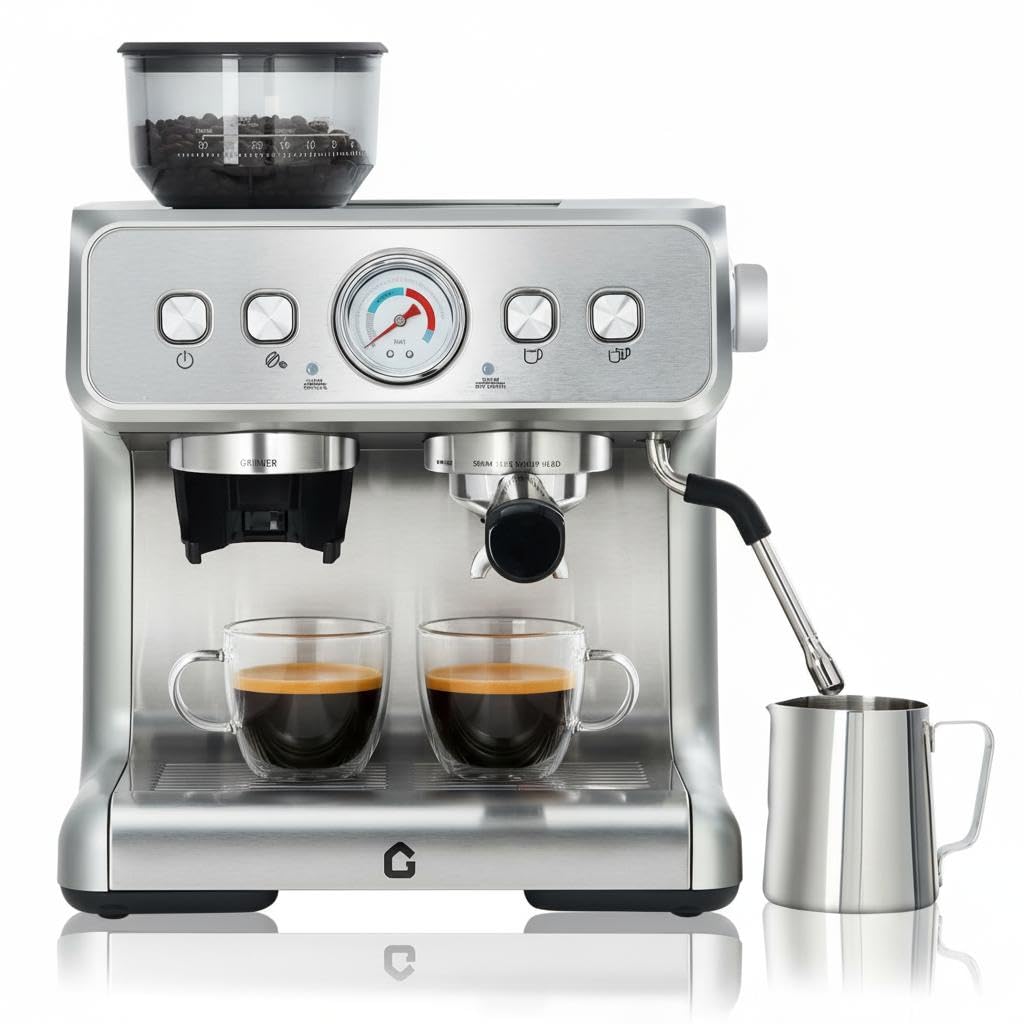
Aurrealdea view of the Acekool Espresso Machine, showcasing its sleek design and a pressure gauge indicating 20 Bar high pressure extraction.
Ezaugarri nagusiak:
- 20-Bar Professional Pump: Delivers optimal pressure for rich espresso with perfect crema.
- Artezteko integratua: Features 30 adjustable settings for fresh grounds directly into the portafilter.
- 1450W Powerful Steam System: Creates silky and dense milk foam for lattes and cappuccinos.
- Customizable Coffee Experience: Adjust grind coarseness and shot volume for personalized brews.
- Removable Water Tank (0.74 Gallon / 2.8 Liters): Bete eta garbitzeko erraza.
- Tanta-erretilu desmuntagarria: Garbiketa eta mantentze-lanak errazten ditu.
- Garbiketa automatikoaren funtzioa: Mantentze-lan erosoetarako.
Dakarten osagaiak:

Image showing all components included with the Acekool Espresso Machine, such as the portafilter, filter baskets, tamper, milk jug, and cleaning brush.
- Pressure Funnel
- Single Cup Filter Screen
- Double Cup Filter Screen
- Altzairu herdoilgaitzezko esne-pitxera
- Tamper
- Kutxa Antolatzailea
- Brewing Head Cleaning Brush
- Argibide eskuliburua (dokumentu hau)
3. Konfigurazioa
Follow these steps for initial setup of your espresso machine.

Visual guide for the initial setup process, including adding water, coffee beans, adjusting grind, and starting the preheating cycle.
- Despaketatzea: Carefully remove all packaging materials and place the machine on a stable, flat, heat-resistant surface.
- Ur depositua: Remove the 0.74 Gallon (2.8 Liters) water tank from the back of the machine. Fill it with fresh, cold water up to the MAX line. Replace the tank securely.
- Potentzia-konexioa: Entxufatu korronte-kablea lurreko hartune elektriko batean.
- Aurreberotzea: Press the power button to turn on the machine. The machine will begin to preheat. Wait until the indicator lights signal that the machine has reached the optimal temperature.
- Hasierako garbiketa: Before first use, run a few cycles of hot water through the brewing head and steam wand without coffee to clean the internal components.
- Artezteko konfigurazioa: Open the lid of the bean hopper and fill it with fresh whole coffee beans. Ensure the lid is securely closed.
4. Funtzionamendu-argibideak
4.1 Kafea ehotzea

Illustration of the 30 grind settings available on the built-in grinder, ranging from coarse to fine, with recommendations for extraction speed.
- The machine features a built-in conical burr grinder with 30 adjustable settings.
- Rotate the grind size selector dial to choose your desired fineness. Finer settings (lower numbers) are for espresso, while coarser settings (higher numbers) are suitable for pour-over or French press.
- Place the portafilter under the grinder chute. Press the grind button to dispense fresh grounds directly into the portafilter.
- Erabili barneko t-aamper to compress the coffee grounds evenly.
4.2 Espresso erauzketa

Diagram illustrating the benefits of 20 Bar extraction and pre-infusion for optimal coffee flavor and complete extraction.
- Insert the prepared portafilter into the brewing head and lock it into place.
- Place your espresso cup(s) on the drip tray beneath the portafilter spouts.
- Select your desired shot volume (single or double) using the control panel. The machine will automatically perform a pre-infusion cycle, followed by 20-bar pressure extraction.
- The built-in pressure gauge will display the extraction pressure during the process. Aim for the optimal pressure range for best results.
4.3 Steam Wand Operation (Milk Frothing)

Image demonstrating the 1400W powerful steam system, showing the steam wand in action and options for hot water and adjustable steam.
- Fill the stainless steel milk jug with cold milk (dairy or non-dairy).
- Turn the steam knob to activate the steam function. Wait for the steam indicator light to illuminate, indicating the steam is ready.
- Submerge the steam wand tip just below the surface of the milk. Open the steam valve to release steam.
- Move the jug up and down gently to create microfoam. Once desired texture and temperature are reached, close the steam valve.
- Berehala garbitu lurrun-hagatxoa sprayarekinamp oihal bat esne-hondakinak lehortzea saihesteko.
4.4 Ur beroaren funtzioa
- The machine can dispense hot water for tea or Americanos.
- Refer to your machine's control panel for the specific hot water button or setting.
5. Mantentzea
Garbiketa eta mantentze erregularrak zure espresso makinaren errendimendu optimoa eta iraupena bermatzen dituzte.

Image highlighting the removable water tank and drip tray for easy cleaning, along with descaling instructions.
5.1 Eguneko garbiketa
- Tantaketarako erretilua: Empty and clean the removable drip tray daily. Wash with warm, soapy water and rinse thoroughly.
- Portafiltroa eta iragazki-saskiak: After each use, remove spent coffee grounds and rinse the portafilter and filter baskets under warm water.
- Lurrun-makila: Always wipe the steam wand immediately after frothing milk with a damp cloth. Purge the wand briefly to clear any internal milk residue.
- Kanpoaldea: Garbitu makinaren kanpoaldea leun batekin, damp oihal. Ez erabili garbitzaile urratzaileak.
5.2 Ur depositua garbitzea
- Remove the water tank and wash it with mild detergent and warm water. Rinse thoroughly to remove any soap residue.
- Refill with fresh, cold water.
5.3 Kalifikatzailea
- Descaling is essential to remove mineral buildup and should be performed regularly (e.g., every 2-3 months, depending on water hardness).
- Erabili espresso makinetarako bereziki diseinatutako kalka kentzeko soluzio komertzial bat, fabrikatzailearen argibideak jarraituz.
- Bestela, ozpin zuriaren eta uraren disoluzio bat erabil daiteke (1:1 proportzioan).
- Run the descaling solution through the machine's brewing head and steam wand.
- After descaling, run several cycles of fresh water through the machine to rinse thoroughly.
5.4 Grinder Cleaning
- Periodically clean the grinder burrs to prevent oil buildup and ensure consistent grinding.
- Refer to the machine's specific instructions for removing and cleaning the grinder burrs. Use the provided cleaning brush to remove coffee grounds.
6. Arazoak
If you encounter issues with your Acekool Espresso Machine, refer to the following common problems and solutions.
| Arazoa | Kausa posiblea | Irtenbidea |
|---|---|---|
| Ez dago kafe-banaketarik | Water tank empty; Clogged filter; Machine not preheated | Bete ur-depositua; Garbitu iragazki-saskia; Utzi makina guztiz berotzen |
| Weak espresso / Too fast extraction | Coffee grounds too coarse; Not enough coffee; Insufficient tamping | Adjust grinder to a finer setting; Increase coffee dose; Tamp sendoago. |
| Bitter espresso / Too slow extraction | Coffee grounds too fine; Too much coffee; Over-tamping | Adjust grinder to a coarser setting; Reduce coffee dose; Tamp with less force |
| Ez dago lurrunik makiletik | Steam wand clogged; Machine not at steam temperature | Clean steam wand hole; Wait for steam indicator light |
| Makinatik ura isurtzen | Ur-depositua ez dago ondo kokatuta; tanta-ontzia beteta; zigilu-arazoa | Ensure water tank is properly inserted; Empty drip tray; Contact customer support if issue persists |
Irtenbide hauek saiatu ondoren arazoa konpontzen ez bada, jarri harremanetan Acekool bezeroarentzako arreta-zerbitzuarekin.
7. Zehaztapenak
Detailed technical specifications for the Acekool Espresso Machine.
| Ezaugarri | Xehetasuna |
|---|---|
| Marka | Acekool |
| Ereduaren izena | 8414234206350 |
| Elementuaren eredu-zenbakia | ZlzuMUw6KjChKeiuzu5nOQ7vaG4X |
| Kolorea | Zilarrezkoa |
| Produktuaren neurriak (L x W x H) | 15.67" x 16.61" x 18.86" |
| Elementuaren pisua | 25.4 kilo |
| Edukiera | 2.8 litro (ur-depositua) |
| Ponpa Presioa | 20 Taberna |
| Boterea | 1450W |
| Ezaugarri Berezia | Auto Clean Function, Built-in Grinder, Steam Wand |
| Dakarten osagaiak | Milk Frother (Stainless Steel Milk Jug) |
| UPC | 820567835323 |
| GTIN | 820567835323 |
8. Bermea eta Laguntza
Your Acekool Espresso Machine is built for reliable performance and comes with comprehensive support.
- Bermea: Produktu hau erosketa-datatik aurrera 1 urteko berme mugatu batek estaltzen du.
- Laguntza teknikoa: Acekool provides lifetime technical support for this product.
- Ziurtagiriak: The machine is ETL-certified, ensuring it meets recognized safety standards.
- Jarri harremanetan laguntzarekin: For warranty claims, technical assistance, or any questions regarding your machine, please visit the official Acekool Store or contact their customer service directly. You can find more information at Acekool denda Amazonen.