
Sarrera
Eskerrik asko erosketagatik.asing the FERIETELF T29 Drone with Camera. This manual provides essential information for the safe operation, setup, and maintenance of your drone. Please read this manual thoroughly before operating the drone to ensure proper use and to prevent damage or injury.
The T29 Drone features a 1080P HD camera, WiFi FPV live video transmission, voice and gesture control, and a foldable design for portability. It comes with two batteries and a carrying case for convenience.
Segurtasun Jarraibideak
Always prioritize safety when operating your drone. Failure to follow these guidelines may result in injury, damage to the drone, or property damage.
- Erabili drone-a gune irekietan, pertsonen, animalien, eraikinen eta oztopoen urrun.
- Do not fly near airports or restricted airspace. Check local regulations before flying.
- Maintain a visual line of sight with the drone at all times.
- Saihestu haize bortitzetan edo eguraldi txarra dagoenean hegan egitea.
- Ziurtatu bateriak guztiz kargatuta eta behar bezala instalatuta daudela hegaldi bakoitzaren aurretik.
- Mantendu hatzak eta arropa solteak biratzen ari diren helizeetatik urrun.
- Do not operate the drone under the influence of alcohol or drugs.
- Haurrek drone-a heldu baten zuzeneko gainbegiratzeapean bakarrik erabili behar dute.
Paketearen edukia
Egiaztatu elementu guztiak zure paketean daudela:
- FERIETELF T29 Drone
- Urruneko kontrolagailua
- 1080P HD Camera (integrated)
- Droneentzako bateria kargagarriak (x2)
- USB kargatzeko kablea
- Ordezko Helizeak
- Helizearen zaindariak
- Bihurkin
- Erabiltzailearen eskuliburua (dokumentu hau)
- Eramateko zorroa
Konfigurazioa
1. Dronea zabaltzea
Gently unfold the drone arms until they lock into position. Ensure all four arms are fully extended.
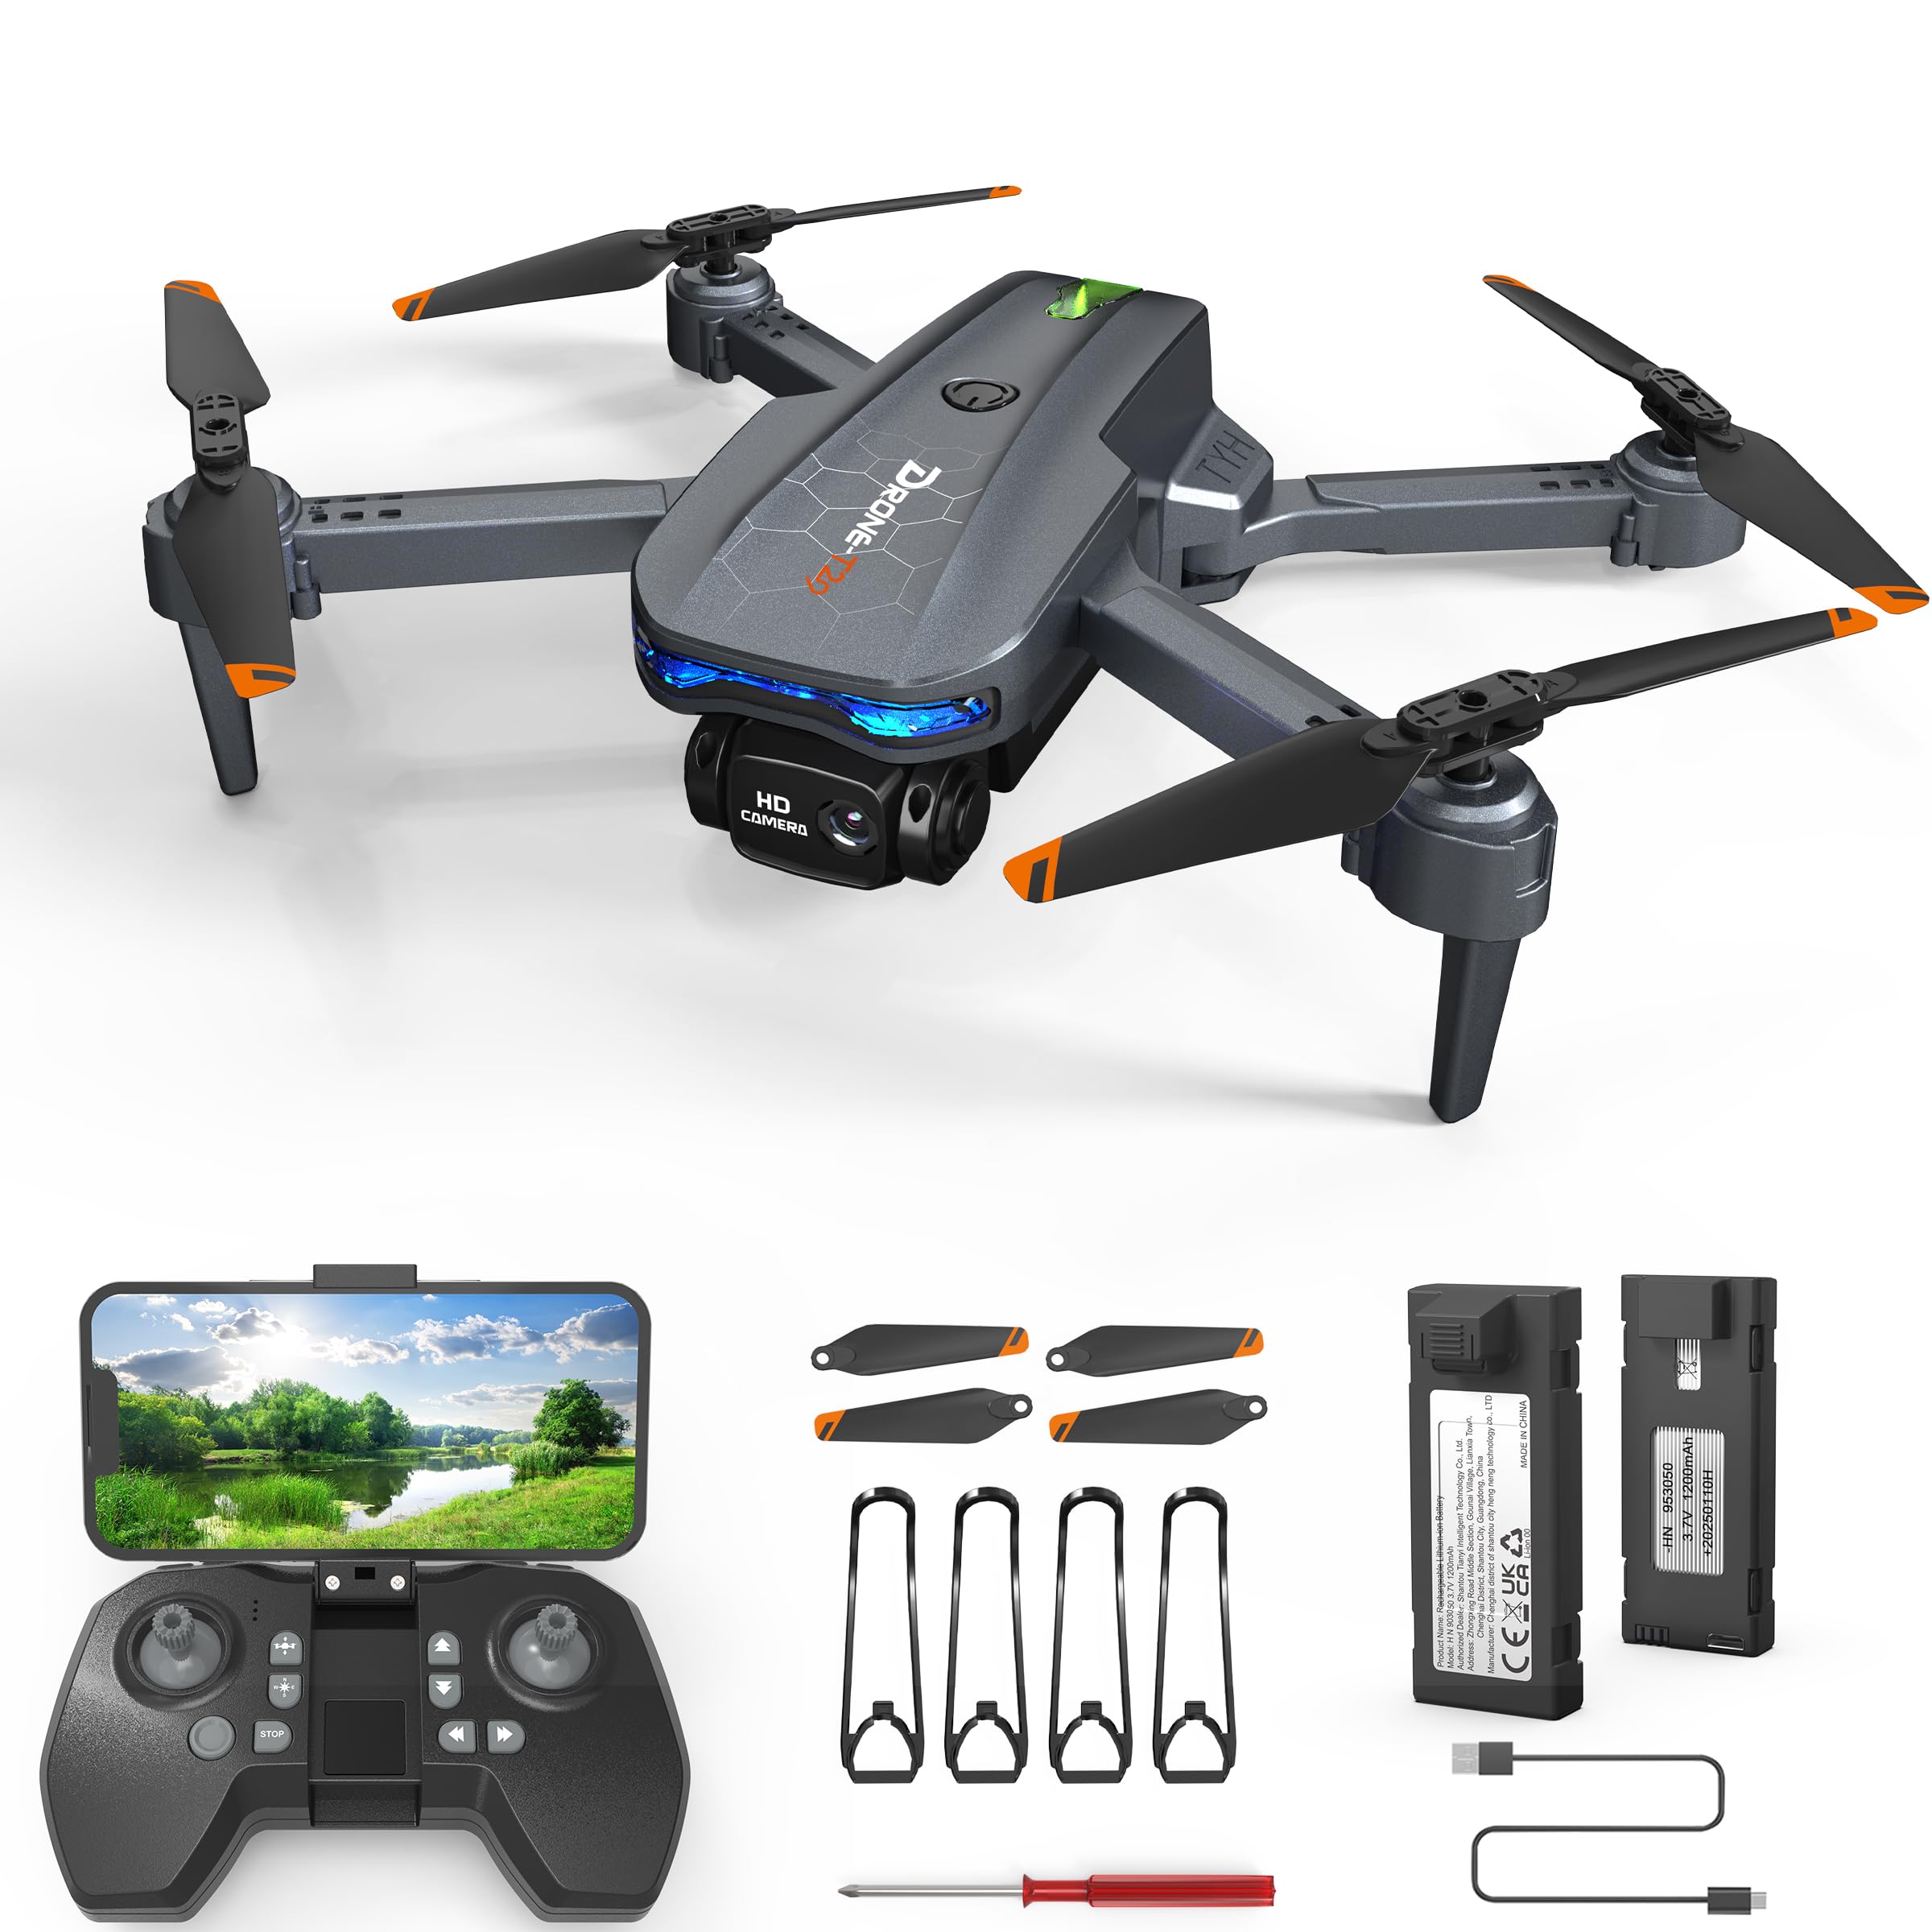
Image: The FERIETELF T29 Drone with its arms unfolded, ready for flight. The propellers are visible at the end of each arm.
2. Installing Propeller Guards
For beginner pilots, it is recommended to install the propeller guards. Attach each guard to the corresponding motor arm by snapping it into place.
3. Dronearen bateria kargatzea
Connect the drone battery to the USB charging cable. Plug the USB cable into a 5V/1A USB adapter (not included). The indicator light on the cable will show charging status. A full charge typically takes 60-90 minutes.
- Kargatzeko adierazlea: Red light ON during charging, OFF when fully charged.
Garrantzitsua: Always use the provided charging cable. Do not leave batteries unattended while charging. Disconnect once fully charged.
4. Installing the Drone Battery
Insert the fully charged battery into the battery compartment on the back of the drone until it clicks securely into place.
5. Urrutiko agintearen bateriak instalatzea
Open the battery cover on the back of the remote controller. Insert 3 x AAA batteries (not included) according to the polarity markings. Close the battery cover.
Funtzionamendu-argibideak
1. Piztea eta parekatzea
- Jarri drona gainazal lau eta lauen gainean.
- Press and hold the power button on the drone until the indicator lights flash.
- Turn on the remote controller. The indicator light on the remote will flash.
- Push the left joystick (throttle) up to the maximum position, then pull it down to the minimum position. The drone and remote lights will become solid, indicating successful pairing.
2. Calibrating the Gyroscope
After pairing, place the drone on a flat surface. Push both joysticks down and to the right simultaneously for 2-3 seconds. The drone lights will flash rapidly and then become solid, indicating successful calibration.
3. Connecting to WiFi FPV (First Person View)
- Download the "FERIETELF Drone" app from your smartphone's app store (iOS/Android).
- Piztu dronea.
- Go to your smartphone's WiFi settings and connect to the network named "FERIETELF-T29-XXXXXX".
- Open the FERIETELF Drone app. You should see the live video feed from the drone's camera.
4. Aireratzea eta lurreratzea
- Abiarazte giltza bakarrekoa: Press the One-Key Take-off button on the remote controller. The drone will automatically ascend to a certain height and hover.
- Eskuzko aireratzea: Push both joysticks down and outwards to start the propellers. Then, gently push the left joystick (throttle) upwards to ascend.
- Gako bakarreko lurreratzea: Press the One-Key Landing button. The drone will slowly descend and land automatically.
- Eskuzko lurreratzea: Gently pull the left joystick (throttle) downwards to descend. Once landed, pull both joysticks down and inwards to stop the propellers.
5. Oinarrizko hegaldi-kontrolak
| Joystick/Button | Funtzioa |
|---|---|
| Ezkerreko joystick-a (Gora/Behera) | Ascend / Descend (Throttle) |
| Ezkerreko joystick-a (Ezkerra/Eskuina) | Rotate Left / Rotate Right (Yaw) |
| Eskuineko joystick-a (Gora/Behera) | Fly Forward / Fly Backward (Pitch) |
| Eskuineko joystick-a (ezkerra/eskuina) | Fly Left / Fly Right (Roll) |
| Moztu botoiak | Adjust drone drift (forward/backward, left/right) |
6. Ahots kontrola
With the app connected, activate voice control. Speak commands such as "Take off", "Land", "Forward", "Backward", "Left", "Right". Ensure you are in a quiet environment for best results.
7. Keinuen kontrola
In the app, enable gesture control. Perform specific hand gestures in front of the drone's camera to trigger actions:
- "V" Gesture: Atera argazki bat.
- Palmaren keinua: Hasi/gelditu bideo-grabaketa.
Ensure good lighting and a clear view of your hand for accurate gesture recognition.
8. Bururik gabeko modua
Press the Headless Mode button on the remote. In this mode, the drone's orientation is relative to the pilot, making it easier to control regardless of which way the drone is facing. Press again to exit.
9. Abiaduraren doikuntza
Press the Speed button to cycle through different speed modes (low, medium, high). Adjust according to your skill level and flying environment.
Mantentzea
- Garbiketa: Use a soft, dry cloth to clean the drone and remote controller. Do not use water or solvents.
- Helizearen ikuskapena: Regularly check propellers for damage (cracks, bends). Replace damaged propellers immediately using the provided screwdriver and spare parts.
- Bateria zaintzea:
- Gorde bateriak leku fresko eta lehor batean.
- Ez kargatu edo gehiegi deskargatu bateriak.
- If not used for an extended period, charge batteries to about 50% capacity.
- Biltegiratzea: When not in use, fold the drone and store it in its carrying case to protect it from dust and damage. Remove batteries from the remote controller if storing for long periods.
Arazoak konpontzea
| Arazoa | Kausa posiblea | Irtenbidea |
|---|---|---|
| Droneak ez du erantzuten urrutiko aginteari. | Not paired; low battery (drone/remote). | Re-pair drone and remote. Charge drone battery. Replace remote batteries. |
| Dronea noraezean dabil hegaldian zehar. | Gyroscope not calibrated; uneven surface at take-off; wind interference. | Recalibrate gyroscope on a flat surface. Use trim buttons to adjust. Fly in calm conditions. |
| Helizeek ez dute biratzen. | Drone not powered on; propellers obstructed; motor issue. | Ensure drone is on. Check for obstructions. Contact support if motors are faulty. |
| Ez dago FPV bideo-jariorik. | Not connected to drone's WiFi; app not open; weak signal. | Verify WiFi connection. Restart app. Move closer to drone. |
| Hegaldi denbora laburra. | Bateria ez dago guztiz kargatuta; bateria zaharra; hegaldi oldarkorra. | Ensure full charge. Consider replacing old batteries. Fly more conservatively. |
Zehaztapenak
- Eredua: TY29
- Marka: FERIETELF
- Neurriak (tolestuta): 30.5 x 25.4 x 4.8 cm (12 x 10 x 1.9 hazbete)
- Pisua: 185 gramo
- Kamera: 1080P HD
- Konektibitatea: Wi-Fi FPV
- Kontrol Ezaugarriak: Voice Control, Gesture Control, Headless Mode, One-Key Take-off/Landing
- Pilak: 2 x Lithium Ion (P76 type, included)
- Urruneko kontrolagailuaren bateriak: 3 x AAA (ez dago barne)
- Fabrikatzailea: SHANTOU TIANYI INTELLIGENT TECHNOLOGY CO.,LTD.
Bermearen informazioa
This product comes with a standard manufacturer's warranty. For specific details regarding warranty coverage, duration, and claims process, please refer to the warranty card included in your product packaging or contact FERIETELF customer support directly. Keep your proof of purchase for warranty validation.
Bezeroarentzako Arreta
If you encounter any issues or have questions not covered in this manual, please contact FERIETELF customer support. For the most up-to-date contact information, please visit the official FERIETELF webgunea edo kontsultatu zure produktuaren ontzian emandako harremanetarako datuak.
Sareko baliabideak: For additional tips, FAQs, and video tutorials, please visit the official FERIETELF support page.
