
1. Sarrera
Thank you for choosing the Ortis Above Ground Smart Pool Timer. This device is designed to automate the operation of your pool pump and salt system, enhancing energy efficiency and simplifying your pool maintenance routine. Featuring dual waterproof outlets, a clear LCD display, and flexible timing functions, this timer is built for reliable outdoor performance. Please read this manual thoroughly before installation and operation to ensure proper use and to maximize the lifespan of your product.
2. Segurtasun informazioa
- Segurtasun elektrikoa: Always ensure the timer is connected to a properly grounded outlet. Do not immerse the timer in water.
- Gehienezko karga: The total current for all connected appliances must not exceed 15 Amperes (15A). Overloading can cause damage to the timer and connected devices, and poses a fire hazard.
- Kanpoko erabilera: This timer is designed for outdoor use and features waterproof outlets. However, ensure all connections are secure and protected from direct water spray.
- Deskonexioa: Disconnect power before performing any maintenance or when the timer is not in use for extended periods.
- Haurrak: Ez utzi haurren eskura. Hau ez da jostailu bat.
- Kalteak: Do not operate the timer if the cord, plug, or housing is damaged. Contact customer support for assistance.
3. Paketearen edukia
Mesedez, egiaztatu paketea elementu hauek dituen:
- Ortis Above Ground Smart Pool Timer (Model KJ-139)
- Argibide eskuliburua
4. Produktua amaitu daview
Familiarize yourself with the components of your Ortis Smart Pool Timer.
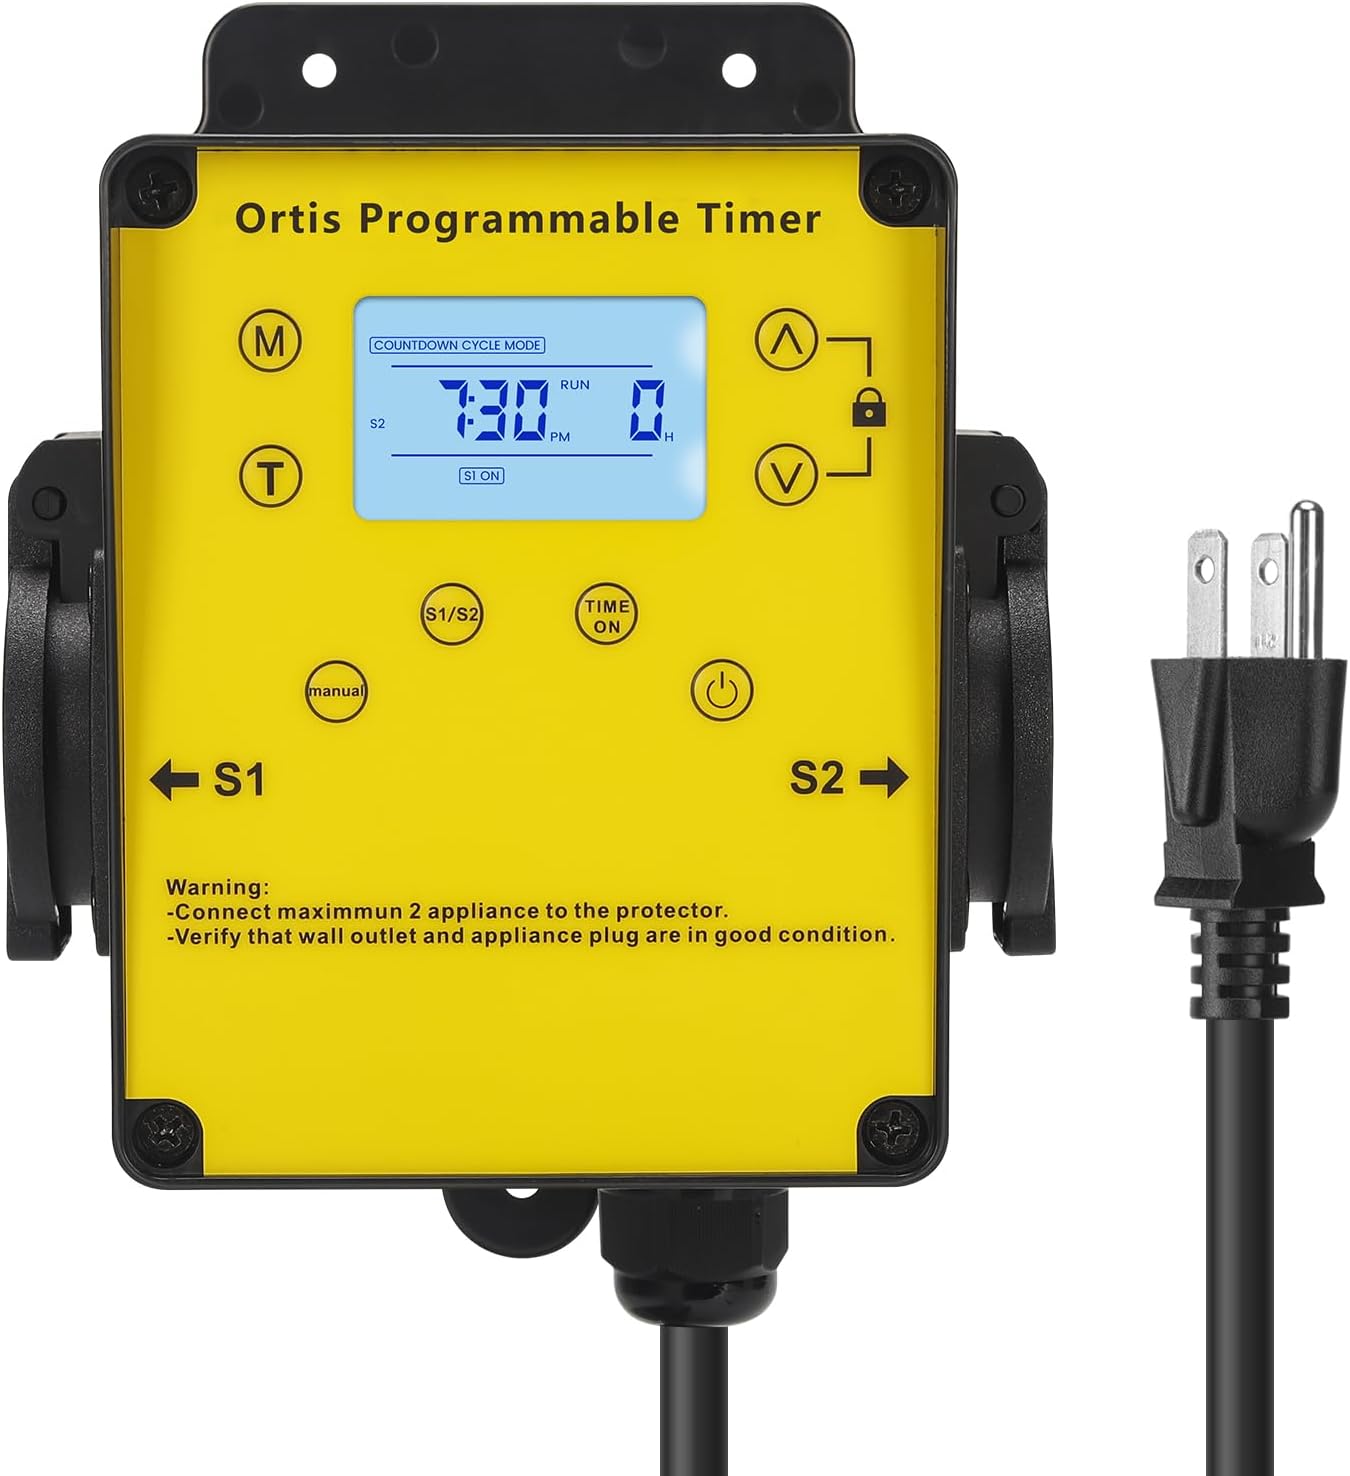
4.1. irudia: Aurrealdea view of the Ortis Smart Pool Timer, showing the LCD display, control buttons, and dual outlets (S1 and S2).
4.1. Osagaiak
- LCD pantaila: Shows current time, mode, and operational status.
- (M) Mode Button: Cycles through different operating modes (Countdown, 24H Auto Cycle).
- (T) Time Button: Uneko ordua ezartzeko erabiltzen da.
- (^) Up Button: Adjusts values upwards.
- (V) Down Button: Adjusts values downwards.
- Blokeatzeko botoia: Locks/unlocks the display to prevent accidental changes.
- (Manual) Button: Manually turns outlets S1/S2 ON or OFF.
- (Time ON) Button: Used in 24H Auto Cycle mode to set ON times.
- (Pizteko) botoia: Turns the timer unit ON/OFF.
- S1 & S2 Outlets: Dual waterproof outlets for connecting appliances.
- Elikatze kablea: Tenporizadorea hormako entxufe batera konektatzen du.

4.2. irudia: Xehetasuna view of the LCD screen, showing time, mode, and status indicators.

4.3. irudia: View of the waterproof outlet covers, designed for outdoor protection.
5. Konfigurazioa
5.1. Tenporizadorea muntatzea
- Choose a suitable location near your pool or water feature, ensuring it is within reach of a grounded outdoor power outlet and your appliances.
- Mount the timer securely to a wall or sturdy post using appropriate screws (not included). Ensure it is at a height that allows for easy access to the display and buttons, and that the outlets face downwards to prevent water ingress.
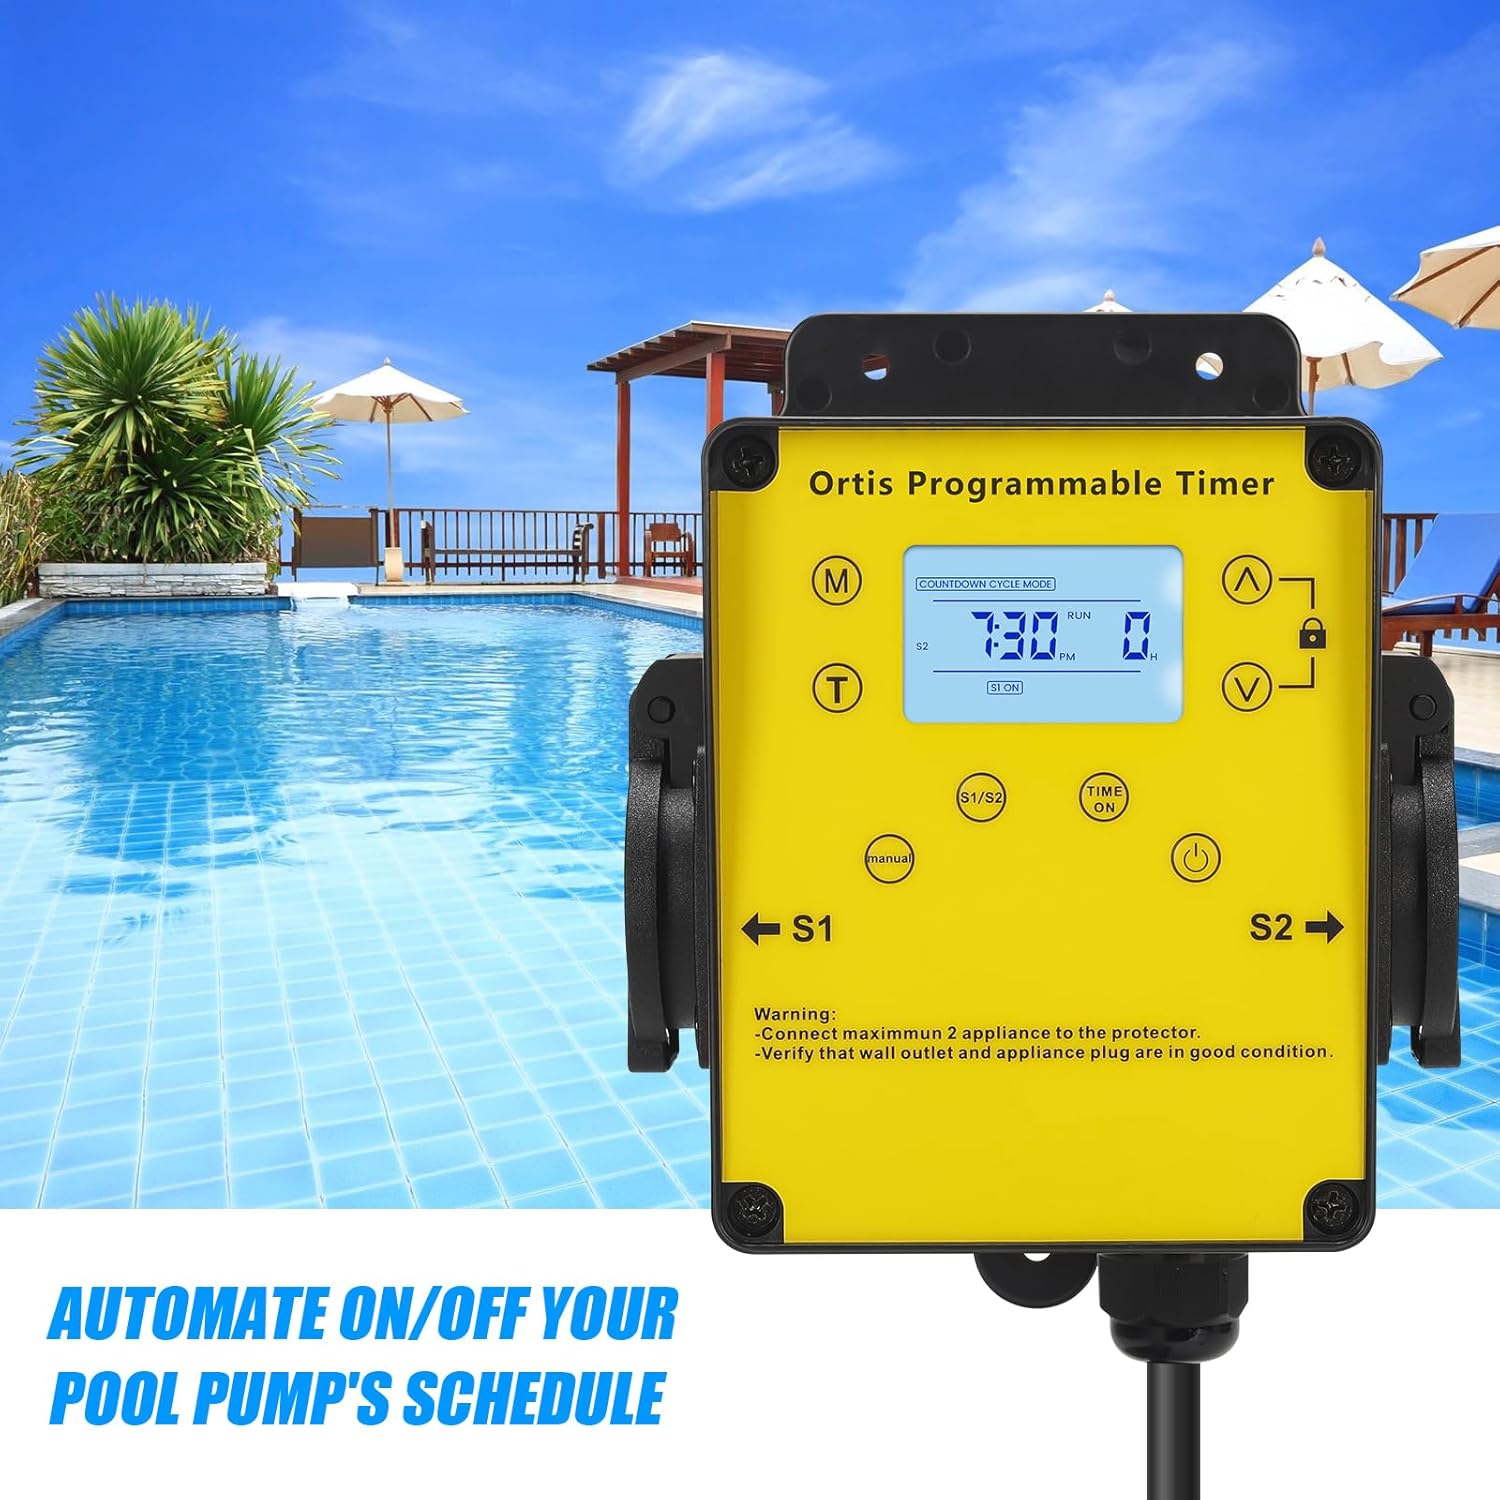
5.1. irudia: The timer mounted on a wall, positioned for convenient access near a pool.
5.2. Potentziara konektatzen
- Entxufatu tenporizadorearen kablea lurrera konektatutako 120V AC kanpoko entxufe elektriko batera.
- The LCD display should illuminate. If not, press the Power button.
5.3. Etxetresna elektrikoak konektatzea
- Open the waterproof covers for outlets S1 and S2.
- Plug your pool pump into one outlet (e.g., S1) and your salt system or other appliance into the other outlet (e.g., S2).
- Ensure the total current draw of all connected appliances does not exceed 15A.
- Close the waterproof covers securely around the appliance plugs to maintain weather resistance.

5.2. irudia: The timer with a pool pump and salt chlorinator connected to its dual outlets.
6. Funtzionamendu-argibideak
6.1. Uneko ordua ezartzea
- Eduki sakatuta (T) Time botoia orduko digituak keinuka hasi arte.
- Erabili (^) Up eta (V) Down buttons to adjust the hour. Pay attention to AM/PM.
- Sakatu (T) Time botoia berriro sakatu minutuen doikuntzara joateko. Erabili botoia berriro sakatuz minutuen doikuntzara joateko. (^) Up eta (V) Down minutuak ezartzeko.
- Sakatu (T) Time button one more time to confirm and exit time setting.
6.2. Atzerako kontaketa modua
This mode allows you to set a specific duration for the connected appliances to run before automatically turning off.
- Sakatu (M) Modua button until "COUNTDOWN CYCLE MODE" appears on the display.
- The hour digits for the countdown will flash. Use the (^) Up eta (V) Down buttons to set the desired running hours.
- Sakatu (M) Modua botoia berriro sakatu minutuen doikuntzara joateko. Erabili botoia berriro sakatuz minutuen doikuntzara joateko. (^) Up eta (V) Down to set the desired running minutes.
- Sakatu (M) Modua button once more to confirm the countdown duration.
- The timer will now display the countdown. The connected appliances will turn ON and run for the set duration, then turn OFF automatically.
6.3. 24H Auto Cycle Mode
This mode allows you to program daily ON/OFF schedules for your appliances.
- Sakatu (M) Modua button until "24H AUTO CYCLE MODE" appears on the display.
- Sakatu (Time ON) button to enter program setting. The display will show "1 ON".
- Erabili (^) Up eta (V) Down buttons to set the desired ON time (hour and minute). Press (Time ON) orduaren eta minutuaren artean aldatzeko.
- After setting the ON time, press (Time ON) berriro. Pantailak "1 OFF" erakutsiko du.
- Erabili (^) Up eta (V) Down buttons to set the desired OFF time (hour and minute). Press (Time ON) orduaren eta minutuaren artean aldatzeko.
- You can set multiple ON/OFF programs (e.g., 2 ON, 2 OFF, etc.) by repeating steps 3-5. The timer supports multiple programs.
- Once all programs are set, press the (M) Modua button to exit program setting and activate the 24H Auto Cycle mode. The timer will now follow your programmed schedule daily.
6.4. Eskuzko gainidaztea
To manually turn the connected appliances ON or OFF, regardless of the programmed schedule:
- Sakatu (Eskuzkoa) button. Each press will cycle through ON, OFF, and AUTO modes for the outlets.
- In AUTO mode, the timer will follow the programmed schedule.
6.5. Blokeo funtzioa
Ezarpenetan ustekabeko aldaketak saihesteko:
- Eduki sakatuta Blokea button for approximately 3 seconds to lock the keypad. A lock icon will appear on the display.
- Repeat the action to unlock the keypad. The lock icon will disappear.
7. Mantentzea
- Garbiketa: Deskonektatu tenporizadorea korrontetik garbitu aurretik. Garbitu kanpoaldea zapi leun eta lehor batekin.amp oihal. Ez erabili garbitzaile edo disolbatzaile urratzailerik.
- Ikuskapena: Regularly inspect the power cord, plug, and outlets for any signs of damage or wear. Ensure waterproof covers are intact and properly sealed.
- Biltegiratzea: If storing the timer for an extended period, disconnect it from power, clean it, and store it in a dry, cool place away from direct sunlight.
8. Arazoak
| Arazoa | Kausa posiblea | Irtenbidea |
|---|---|---|
| Timer display is off or not responding. | No power; Timer is off; Internal battery low. | Ensure the timer is plugged into a live outlet. Press the Boterea button. If the problem persists, contact support. |
| Appliances not turning ON/OFF as programmed. | Incorrect program settings; Timer in Manual mode; Appliances not properly connected. | Verify program settings in 24H Auto Cycle mode. Ensure the timer is in AUTO mode (not Manual). Check appliance plugs are fully inserted into the timer outlets. |
| Appliances not receiving power in any mode. | Overload; Faulty appliance; Timer malfunction. | Check if the total load exceeds 15A. Test appliances directly in a wall outlet. If they work, the timer may be faulty. Contact support. |
| Teklatuak ez du erantzuten. | Teklatua blokeatuta dago. | Eduki sakatuta Blokea button for 3 seconds to unlock the keypad. |
9. Zehaztapenak
- Eredua: KJ-139
- Sarrera boltage: 120V AC 60Hz
- Gehienezko karga: 15A / 1800W
- Saltokiak: 2 Lurratutako Saltokia
- Eragiketa moduak: Countdown, 24H Auto Cycle, Manual
- Pantaila: LCDa
- Neurriak (H x W x D): Gutxi gorabehera 4.9 cm x 3.3 cm x 3.9 cm
- Elikatze-kablearen luzera: Gutxi gorabehera 4.7 oin
- Ingurumen-balorazioa: Outdoor Rated, Waterproof Outlets

9.1. irudia: Product dimensions of the Ortis Smart Pool Timer.
10. Bermea eta Laguntza
10.1. Bermearen informazioa
Ortis products are manufactured to high-quality standards. This product is covered by a limited warranty against defects in materials and workmanship from the date of purchase. Please retain your proof of purchase for warranty claims. The warranty does not cover damage caused by misuse, improper installation, unauthorized repairs, or natural disasters.
10.2. Bezeroarentzako arreta
If you have any questions, require assistance with setup, or encounter any issues not covered in this manual, please contact Ortis customer support. Refer to the product packaging or the Ortis brand store on Amazon for contact details.