Sarrera
This manual provides detailed instructions for the proper setup, operation, and maintenance of your Orion 07212 9x50 Right-Angle Correct-Image Finder. Designed for astronomical observation, this finder scope assists in locating celestial objects with ease and comfort.

Figure 1: Orion 9x50 Right-Angle Correct-Image Finder.
Ezaugarriak
- Handipen indartsua: A 9x crosshair finder scope for enhanced object location.
- Erosoa Viewesan: Angelu zuzena viewing orientation eliminates the need for awkward neck positions.
- Bright Image: 50mm diameter objective lens provides a bright image, aiding in finding faint objects.
- Correct Image Optics: Internal correct-image prism ensures a non-inverted, non-reversed view, matching star charts for easier navigation.
- Kalitate handiko optika: Fully coated glass elements reduce reflection, delivering crisp, bright images with a 5-degree field of view.
Konfigurazioa eta Instalazioa
Proper installation and alignment are crucial for the effective use of your finder scope.
- Mounting the Finder Scope:
Slide the finder scope's dovetail base into the dovetail shoe on your telescope. Ensure it is securely seated. Some mounts may require tightening a thumbscrew to hold the base firmly in place.
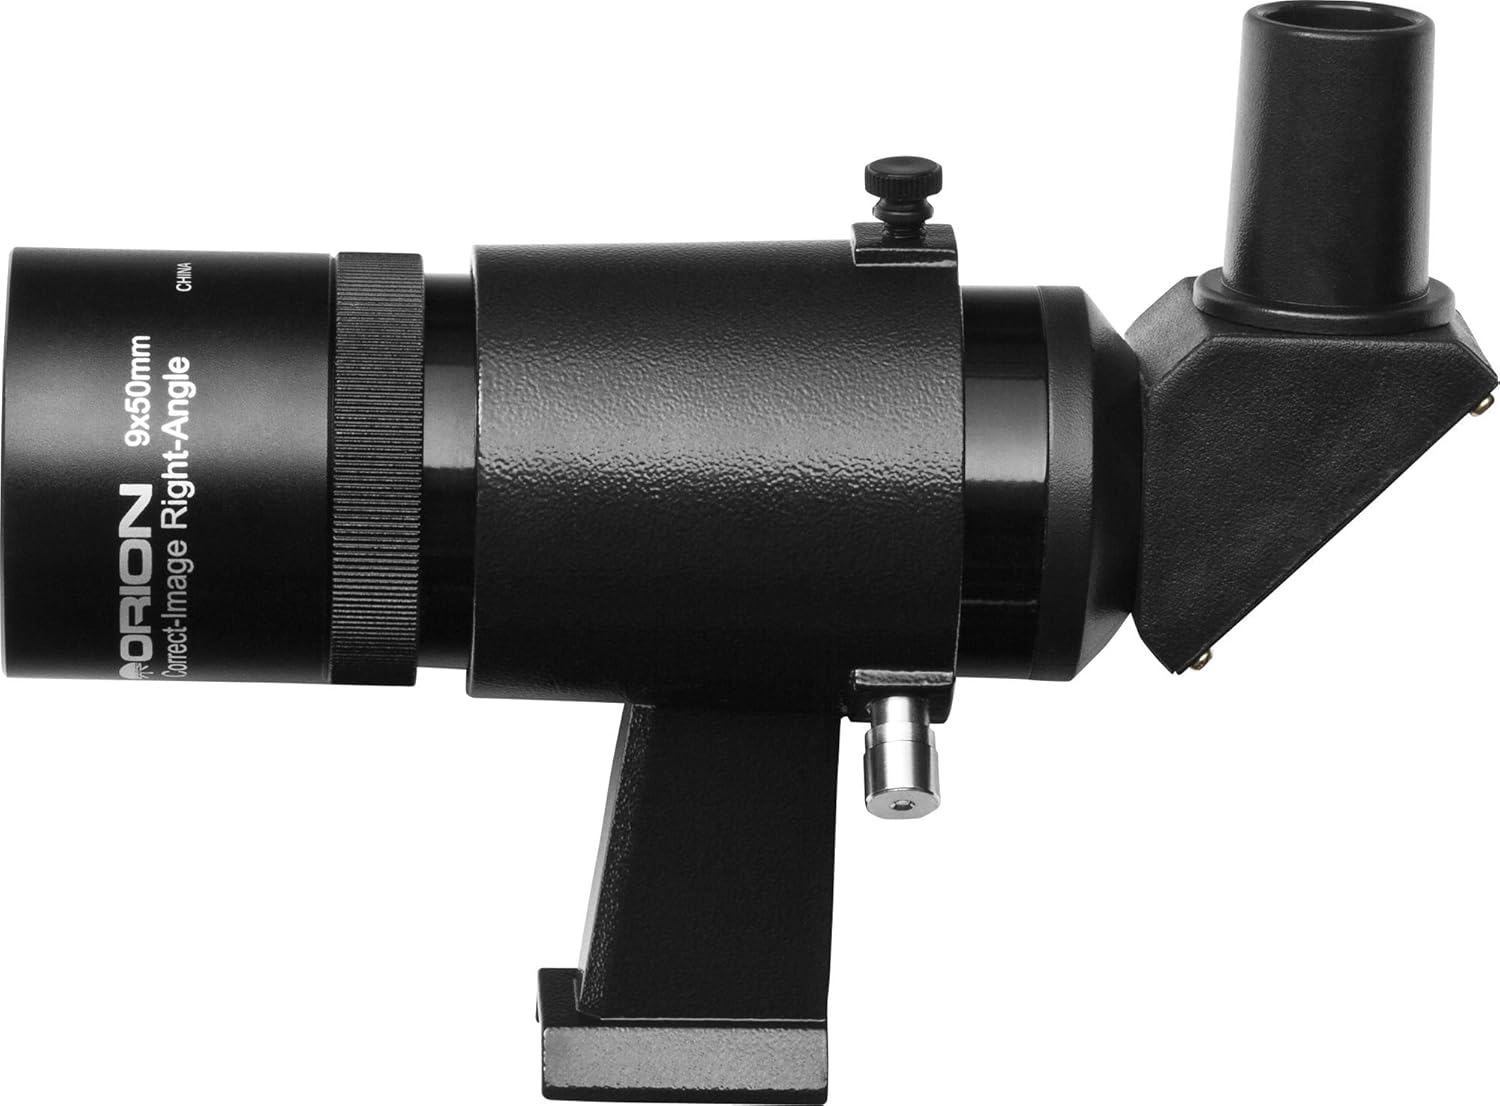
Figure 2: Finder scope showing mounting base and adjustment screws.
- Focusing the Finder Scope:
Point your main telescope at a distant terrestrial object (e.g., a distant tree or building) during daylight hours. Look through the finder scope's eyepiece. If the image is blurry, gently rotate the eyepiece or the objective lens housing until the image is sharp. Some models may have a locking ring that needs to be loosened first.
- Bilatzailearen esparrua lerrokatzea:
Once the finder scope is focused, center the same distant object in your main telescope's lowest power eyepiece. Then, adjust the two alignment screws on the finder scope bracket until the object is also centered in the finder scope's crosshairs. The third point of contact is typically a spring-loaded plunger. This process ensures that what you see in the finder scope is precisely what your main telescope is pointed at.
Produktua amaituview Bideoa
1. bideoa: Over batview of the Orion 9x50 Right-Angle Correct-Image Finder, demonstrating its features and benefits for astronomical observation.
Funtzionamendu-argibideak
Using your finder scope effectively will enhance your stargazing experience.
- Objektuak kokatzea:
After alignment, use the finder scope to scan the sky for your desired celestial object. The wide field of view and correct image orientation make it easier to match what you see in the finder with star charts.
- Centering the Object:
Once you spot the object in the finder scope, use your telescope's slow-motion controls to move the object to the center of the finder's crosshairs. It should then appear in the field of view of your main telescope's eyepiece.
- Fokua doitzea:
If the image in the finder scope appears slightly out of focus during observation, re-adjust the eyepiece or objective lens as described in the "Focusing the Finder Scope" section.
Mantentzea
Proper care will ensure the longevity and performance of your finder scope.
- Lenteak garbitzea:
Use a soft, lint-free cloth specifically designed for optical lenses. For stubborn smudges, a small amount of optical cleaning fluid can be applied to the cloth, not directly to the lens. Avoid touching the lens surfaces with your fingers.
- Biltegiratzea:
When not in use, store the finder scope in a clean, dry environment. Use the provided dust caps for both the objective lens and the eyepiece to protect them from dust and moisture.
- Ingurumena babestea:
Avoid exposing the finder scope to extreme temperatures or sudden temperature changes, which can lead to condensation. If condensation occurs, allow the scope to air dry naturally in a warm, dry place.
Arazoak konpontzea
Hona hemen aurki ditzakezun arazo ohikoen irtenbideak:
- Irudia lausoa da:
Adjust the focus by rotating the eyepiece or objective lens housing until the image is sharp. Ensure any locking rings are properly tightened after focusing.
- Object in finder scope is not in main telescope:
The finder scope needs to be realigned with the main telescope. Follow the "Aligning the Finder Scope" steps in the Setup section.
- Dew on lenses:
If observing in humid conditions, dew can form on the lenses. Use a dew shield or a gentle, lint-free cloth to carefully wipe away moisture. Allow the scope to acclimate to ambient temperature before use to minimize condensation.
Zehaztapenak
| Modelo zenbakia | 07212 |
| Handitzea | 9x |
| Lente objektiboaren diametroa | 50 mm |
| Diseinu Optikoa | Right-Angle, Correct-Image |
| ren eremua View | 5 gradu |
| Lenteen estaldura | Estaldura anitzeko guztizkoa |
| Produktuaren neurriak | 24 x 24 x 34 hazbete |
| Elementuaren pisua | 1.16 libra (527 gramo) |
| Fabrikatzailea | Optronic Technologies, Inc |
Segurtasun informazio garrantzitsua
NEVER look directly at the Sun through your telescope or its finder scope - even for an instant - without a professionally made solar filter that completely covers the front of the instrument, or permanent eye damage could result.


