1. Sarrera
This manual provides essential instructions for the safe and effective use of your Leica V-LUX 20 digital camera. Please read it thoroughly before operating the camera and keep it for future reference. The Leica V-LUX 20 is a 12.1-megapixel digital camera featuring a 12x optical zoom lens and a 3.0-inch LCD, designed for high-quality photography and HD video recording.
2. Segurtasun informazioa
- Bateriaren segurtasuna: Use only the specified Lithium-Ion battery and charger. Do not expose batteries to excessive heat, direct sunlight, or dispose of them in fire. Keep batteries out of reach of children.
- Uraren erresistentzia: Kamera hau da ez water resistant. Avoid exposure to water or high humidity.
- Lenteen zainketa: Do not touch the lens surface directly. Clean with a soft, lint-free cloth designed for optical lenses.
- Ingurune operatiboa: Avoid using the camera in extreme temperatures, dusty environments, or near strong magnetic fields.
- Desmihiztatu: Ez saiatu kamera desmuntatzen edo aldatzen. Mantendu konponketa guztiak langile kualifikatuen esku.
3. Hasteko urratsak eta konfigurazioa
3.1. Bateria kargatzea
Insert the Lithium-Ion battery into the supplied charger and connect the charger to a power outlet. The charging indicator will show the charging status. Ensure the battery is fully charged before first use.
3.2. Memoria txartela sartzea
The camera supports SD, SDHC, and SDXC memory cards. Open the battery/card compartment cover. Insert the memory card into the slot with the contacts facing the correct direction until it clicks into place. Close the cover securely.
Note: A memory card is not included with the camera and must be purchased separately.
3.3. Hasierako piztea eta ezarpenak
Slide the ON/OFF switch to the ON position. Upon first power-on, you may be prompted to set the language, date, and time. Follow the on-screen instructions using the directional pad and MENU/SET button.

Irudia: Goiena view of the Leica V-LUX 20 camera. This image displays the camera's top panel, highlighting the ON/OFF slide switch on the right, the shutter button, and the mode dial with various shooting options like P, A, S, M, SCN, MS1, MS2, and CUST. The zoom lever (W/T) is integrated around the shutter button.
4. Kameraren funtzionamendua
4.1. Camera Controls Overview
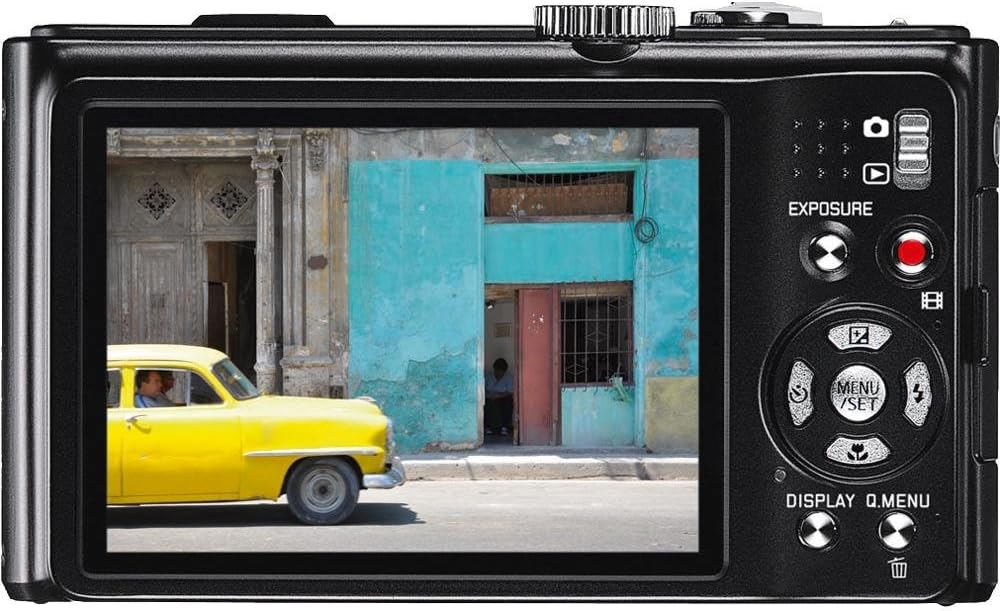
Irudia: Atzekoa view of the Leica V-LUX 20 camera. This image shows the 3.0-inch LCD screen, the exposure compensation button, the dedicated video record button, and the directional pad with MENU/SET, DISPLAY, and Q.MENU functions. The zoom controls are also visible on the right side of the screen.
Ezagutu kontrol nagusiekin:
- ON / OFF etengailua: Located on the top panel, used to power the camera on or off.
- Obturadorearen botoia: Sakatu erdiraino fokatzeko, eta guztiz argazkia ateratzeko.
- Zoom Lever (W/T): Surrounds the shutter button, used to adjust the 12x optical zoom (W for wide, T for telephoto).
- Modu marka: Selects various shooting modes (Program, Aperture Priority, Shutter Priority, Manual, Scene, Custom).
- MENU/SET Button: Accesses the camera's menu system and confirms selections.
- Norabideko Pad: Navigates through menus and settings. Also controls flash, self-timer, and exposure compensation in shooting mode.
- DISPLAY/Q.MENU Button: Toggles display information or accesses the Quick Menu for common settings.
- Bideoa grabatzeko botoia: Dedicated button for starting and stopping video recording.
4.2. Autofocus and Exposure
The camera features automatic exposure control and various autofocus modes including Multi, Center-weighted, and Spot metering. The autofocus system uses TTL (Through-The-Lens) detection with 11 autofocus points. For optimal focus, press the shutter button halfway until the focus indicator appears.
4.3. Flash moduak
The built-in flash offers several modes, including Auto and scene-specific flash modes. Access flash settings via the directional pad or Quick Menu to select the appropriate mode for your lighting conditions.
5. Filmatzeko moduak
The mode dial on the top of the camera allows you to select different shooting modes:
- Modu automatikoa: The camera automatically sets all parameters for optimal results.
- AE Programa (P): Kamerak diafragma eta obturazio-abiadura ezartzen ditu, baina beste ezarpen batzuk ere doi ditzakezu.
- Irekidura Lehentasunezko AE (A): Zuk diafragma ezartzen duzu, eta kamerak obturazio-abiadura ezartzen du.
- Lehentasun obturadorearen AE (S): Zuk ezartzen duzu obturazio-abiadura, eta kamerak ezartzen du diafragma.
- Eskuzko Esposizioa (M): Irekidura eta obturazio-abiadura biak kontrolatzen dituzu.
- Scene Modes (SCN): Pre-set modes for specific situations (e.g., Portrait, Landscape, Sports) to optimize settings automatically.
- Custom Modes (CUST, MS1, MS2): Allows you to save and quickly recall your preferred camera settings.
The camera captures images at 12.1 megapixels and supports JPEG file format. Optical Image Stabilization helps reduce blur from camera shake.
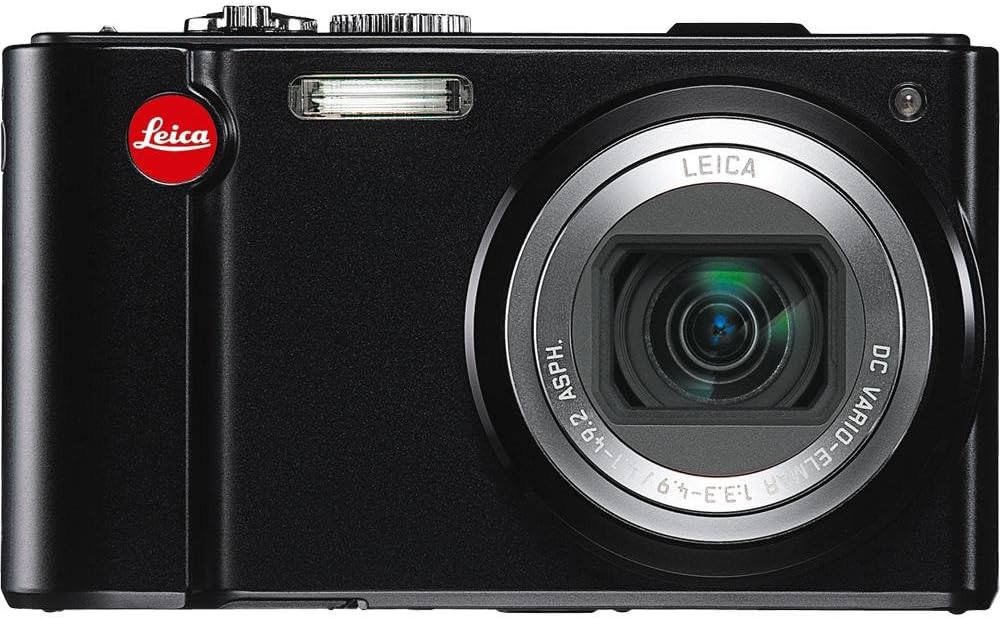
Irudia: Aurrealdea view of the Leica V-LUX 20 camera. This image showcases the camera's 12x Leica DC Vario-Elmar optical zoom lens, the built-in flash, and the Leica branding. The lens is shown in an extended position, indicating its zoom capability.
6. Bideo Grabaketa
The Leica V-LUX 20 can record high-definition video. To start recording, press the dedicated red video record button on the back of the camera. Press it again to stop recording.
- Bideoaren bereizmena: Supports 720p HD video at 60 frames per second (1280 x 720), as well as lower resolutions like 848 x 480 (30 fps), 640 x 480 (30fps), and 320 x 240 (30 fps).
- Zoom during Video: The 12x optical zoom can be used while recording video.
- File Formatua: Bideoak MJPEG formatuan gordetzen dira.
7. Erreprodukzioa
To view your photos and videos, slide the power switch to the 'Play' position (or press the playback button if available, though the review mentions a slide switch for viewing stored pictures). Use the directional pad to navigate through your captured media. You can zoom in on photos or play videos using the controls.
8. Beste gailu batzuetara konektatzea
8.1. USB konexioa
Connect the camera to a computer using a USB cable (not included) to transfer photos and videos. The camera is compatible with USB 2.0 devices. Your computer will recognize the camera as a removable storage device.
8.2. HDMI irteera
Use an HDMI cable (not included) to connect the camera to an HDTV or monitor for viewing your media on a larger screen. The camera features a built-in HDMI port.
9. Mantentzea eta Zainketa
- Kameraren gorputza garbitzea: Wipe the camera body with a soft, dry cloth. For stubborn dirt, use a slightly damp zapi eta gero ondo lehortu.
- Lentea garbitzea: Use a lens brush to remove dust, then gently wipe with a lens cleaning cloth. Avoid using abrasive materials.
- LCD pantaila garbitzea: Erabili zapi leun eta lehor bat. Orbanak kentzeko, erabili LCD pantailetarako bereziki diseinatutako pantaila-garbitzaile bat.
- Bateria biltegiratzea: If storing the camera for an extended period, remove the battery. Store batteries in a cool, dry place.
- Biltegiratzea: Gorde kamera leku lehor eta ondo aireztatu batean, eguzki-argitik eta muturreko tenperaturetatik urrun.
10. Arazoak
| Arazoa | Balizko Kausa / Irtenbidea |
|---|---|
| Kamera ez da pizten. | Battery may be depleted. Recharge the battery. Ensure the battery is inserted correctly. |
| Ezin dira argazkiak atera. | Memory card may be full or not inserted correctly. Check card status or replace. Battery may be low. |
| Irudiak lausoak dira. | Ensure optical image stabilization is active. Check focus. Use a faster shutter speed in low light. |
| Flasha ez da pizten. | Flash mode may be set to 'Off' or 'Red-eye Reduction' (which delays firing). Check flash settings. |
| Ezin da ordenagailura konektatu. | Ensure USB cable is securely connected. Check computer's USB port. Try a different USB cable. |
11. Zehaztapenak
- Ereduaren izena: V-LUX 20
- Argazki-sentsorearen bereizmena: 12.1 MP
- Sentsore mota: CCD (1/2.33 hazbete)
- Zoom optikoa: 12x
- Lentea: Leica DC Vario-Elmar 1:3.3-4.9 / 4.1-49.2mm ASPH (25-300mm equivalent in 35mm format)
- Irudiaren egonkortzea: Optikoa
- Pantailaren tamaina: 3.0 hazbeteko LCD pantaila (460,800 puntu)
- Onartua File Formatuak: JPEG (Stills), MJPEG (Video)
- Bideoaren bereizmena: Gehienez 1280 x 720 (60 fps)
- Biltegiratze euskarria: SD/SDHC/SDXC cards
- Konektibitatea: HDMI, USB 2.0
- Bateria mota: Litio ioia
- Elementuaren pisua: 7.68 ontza
- Ezaugarri bereziak: GPS module for geographical data registration.
12. Bermea eta Laguntza
For warranty information and technical support, please refer to the documentation provided at the time of purchase or visit the official Leica website. Contact Leica customer service for assistance with product issues or repairs.


