1. Sarrera
This manual provides comprehensive instructions for the installation, operation, and maintenance of your Weiser Augusta/Troy Single Cylinder Handleset. This handleset is designed for residential and light commercial applications, offering security and durability with an ANSI Grade 2 rating. Please read all instructions carefully before beginning installation to ensure proper function and safety.
2. Segurtasun informazioa
- Instalazioan zehar, beti erabili segurtasun-ekipo egokia, hala nola segurtasun-betaurrekoak.
- Mantendu pieza txikiak haurrengandik urrun itotzeko arriskuak saihesteko.
- Use only the tools specified or recommended in this manual.
- Ensure all screws are tightened securely, but do not overtighten, as this may damage components.
- If you are unsure about any part of the installation process, consult a qualified locksmith or professional installer.
3. Paketearen edukia
Instalazioa hasi aurretik, egiaztatu osagai guztiak daudela:
- Exterior Handleset Assembly (Augusta/Troy Trim)
- Interior Knob Trim
- Deadbolt Latch
- Spring Latch
- Strike Plates (Full Lip)
- Muntatzeko Torlojuak
- Giltzak
- Instalazio txantiloia (barne badago)
4. Instalazioa
Beharrezko tresnak: Phillips head screwdriver, tape measure, pencil, drill (optional for new installations).
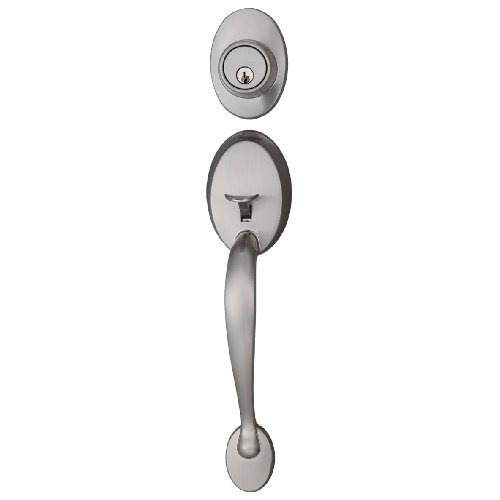
1 Irudia: Gainetikview of the Weiser Augusta/Troy Single Cylinder Handleset components, including the exterior handle, interior knob, and associated hardware.
- Atea prestatu: Ensure your door has the correct bore holes and backset. This handleset is designed for doors with a 2-1/8 inch cross bore and an adjustable backset of 2-3/8 inches or 2-3/4 inches.
- Install the Deadbolt Latch: Insert the deadbolt latch into the edge bore hole, ensuring the bolt faces the correct direction. Secure it with the provided screws.
- Install the Spring Latch: Insert the spring latch into the lower edge bore hole, ensuring the bevel faces the door frame. Secure it with the provided screws.
- Kanpoko heldulekua instalatzea: Place the exterior handleset assembly onto the door, aligning the posts with the bore holes.
- Install the Interior Knob Trim: Attach the interior knob trim to the exterior handleset, ensuring the spindle engages with the spring latch mechanism. Secure with the long mounting screws, tightening evenly.
- Proba funtzionamendua: Before closing the door, test the deadbolt and spring latch mechanisms to ensure smooth operation. The deadbolt should extend and retract fully with the key from either side. The lower trim is non-locking.
- Instalatu greba-plakak: Mark and chisel out recesses for the strike plates on the door frame, aligning them with the latches. Secure the strike plates with the provided screws.
5. Funtzionamendua
- Locking the Deadbolt: Insert the key into the exterior cylinder and turn to extend the deadbolt. From the interior, turn the thumbturn to extend the deadbolt.
- Unlocking the Deadbolt: Insert the key into the exterior cylinder and turn to retract the deadbolt. From the interior, turn the thumbturn to retract the deadbolt.
- Operating the Lower Latch: The lower handle operates a spring latch for entry and exit. This latch does not lock and is always accessible from both sides.
6. Mantentzea
- Garbiketa: Garbitu heldulekua oihal leun batekin,amp oihal. Saihestu garbitzaile urratzaileak, disolbatzaileak edo produktu kimiko gogorrak, hauek akabera kaltetu baitezakete.
- Lubrifikazioa: Periodically apply a small amount of graphite lubricant or a silicone-based spray to the keyway and internal mechanisms to ensure smooth operation. Do not use oil-based lubricants.
- Ikuskapena: Regularly check all screws for tightness and ensure the handleset operates smoothly. Tighten any loose screws as needed.
7. Arazoak
- Handleset is stiff or difficult to operate:
- Check if mounting screws are overtightened. Loosen slightly if necessary.
- Apply lubricant to the latch and cylinder mechanisms.
- Ensure the door is properly aligned and not binding against the frame.
- Deadbolt does not extend or retract fully:
- Verify the strike plate alignment. Adjust if the deadbolt is hitting the frame or strike plate.
- Check for obstructions in the door frame.
- Key is difficult to insert or turn:
- Aplikatu grafito lubrifikatzailea giltza-zuloan.
- Ensure the key is not bent or damaged.
8. Zehaztapenak
| Modelo zenbakia | A9470A/T17AB |
| Marka | Weiser |
| Materiala | Zinc (Handle), Nickel (Finish) |
| Amaitu | Antzinako nikela |
| Blokeo mota | Single Cylinder Key Lock |
| Atzealdea | Adjustable 2-3/8" or 2-3/4" |
| ANSI Rating | 2. maila |
| Dakarten osagaiak | Knob, Latch, Lock |
9. Bermea eta Laguntza
Weiser products are manufactured to the highest standards and are backed by a limited lifetime warranty on mechanical components and finish. For detailed warranty information, technical support, or to purchase replacement parts, please visit the official Weiser webwebgunera edo jarri harremanetan bezeroarentzako arreta-zerbitzuarekin. Gorde erosketaren frogagiria berme-erreklamazioetarako.


