1. Sarrera
This manual provides detailed instructions for the installation, operation, and maintenance of your Advance Darkside 8303B30 Micro ATX PC Case. Please read this manual thoroughly before beginning installation to ensure proper setup and to maximize the performance and longevity of your system components.
The Advance Darkside ATX Mid-Tower PC case features a top panel with a 2.5/3.5 inch SATA HDD docking station, 2 USB 3.0 ports, and 1 USB 2.0 port. It is designed to accommodate Micro ATX motherboards and offers efficient cooling solutions.
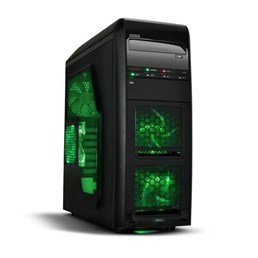
1. irudia: Aurrealdea view of the Advance Darkside 8303B30 PC Case, showcasing its design and front panel features.
2. Produktuaren ezaugarriak
- Eredua: Advance Darkside 8303B30
- Txasisaren materiala: SGCC Steel
- Kolorea: Black (interior and exterior)
- Plakaren bateragarritasuna: Mikro ATX
- Aurreko panelaren konektibitatea: 2 x USB 3.0, 1 x USB 2.0, Audio Jacks
- Biltegiratze ezaugarriak: Top panel 2.5/3.5 inch SATA HDD docking station
- Hozteko sistema: Five 120mm fans included (two LED fans at the front, one LED fan on the side, one fan at the rear, and one fan at the top). Water cooling ready.
- Graphics Card Support: Designed for King Size graphics cards
- Alboko panela: Plexiglass window
3. Konfiguratzeko argibideak
3.1. Kasua prestatzea
- Unpack the PC case carefully and remove all packaging materials.
- Jarri zorroa gainazal egonkor eta lau batean.
- Kendu alboko panelak kaxaren atzealdeko torlojuak askatuz eta panelak atzerantz irristatuz.
3.2. Elikatze-horniduraren instalazioa
- Locate the power supply mounting area at the rear bottom of the case.
- Secure the power supply unit (PSU) using the provided screws. Ensure the PSU fan faces the bottom or top, depending on your PSU and case design for optimal airflow.
3.3. Plaka amaren instalazioa
- Instalatu S/I babeskia kaxaren atzealdeko mozketan.
- Align the motherboard with the standoffs inside the case. Ensure all standoffs match the motherboard's screw holes.
- Secure the motherboard with the appropriate screws.
3.4. Biltegiratze unitatearen instalazioa
- For 3.5-inch HDDs, slide the drive into the drive bay trays. The trays are designed to flex slightly to accommodate the drive without screws in some configurations.
- For 2.5-inch SSDs/HDDs, secure them to the designated mounting points or use adapters if necessary.
- Utilize the top panel SATA docking station for quick access to 2.5/3.5 inch SATA drives. Simply insert the drive into the slot until it clicks into place.
3.5. Grafiko Txartelaren eta Hedapen Txartelaren Instalazioa
- Kendu beharrezko hedapen-zirrikituen estalkiak kaxaren atzealdean.
- Insert the graphics card or other expansion cards into the appropriate PCIe slots on the motherboard.
- Secure the cards with screws or retention clips.
3.6. Kableen kudeaketa
Route all cables (power, SATA, front panel connectors) through the designated cutouts and tie-down points behind the motherboard tray to ensure clean airflow and an organized interior.
4. Funtzionamendu-argibideak
4.1. Powering On Your System
- Ensure all components are correctly installed and cables are securely connected.
- Konektatu elikatze-kablea PSUra eta hormako entxufe batera.
- Press the power button located on the front panel of the case.
4.2. Using Front Panel Ports
- USB 3.0/2.0 atakak: Connect USB devices such as keyboards, mice, external drives, or flash drives.
- Audio-konektoreak: Connect headphones, microphones, or speakers.
- HDD Docking Station: Insert a 2.5-inch or 3.5-inch SATA HDD/SSD into the top docking slot for quick data access. Ensure the drive is properly seated.
5. Mantentzea
5.1. Kaxa garbitzea
- Garbitu aldizka kaxaren kanpoaldea zapi leun eta lehor batekinamp oihal. Saihestu garbitzaile urratzaileak.
- Erabili aire konprimitua haizagailuaren iragazkietatik eta barneko osagaietatik hautsa kentzeko.
5.2. Fan Mantentzea
- Periodically check the case fans for dust buildup. Clean them gently with compressed air or a soft brush.
- Ziurtatu kableek ez dutela haizagailuaren palak oztopatzen.
6. Arazoak
6.1. Sistemak ez du pizten
- Check if the power cable is securely connected to both the PSU and the wall outlet.
- Ziurtatu PSU etengailua 'ON' posizioan dagoela.
- Verify that the front panel power button cable is correctly connected to the motherboard.
6.2. Gehiegi berotzeko arazoak
- Ensure all case fans are spinning correctly and are not obstructed.
- Check for excessive dust buildup on fans and heatsinks.
- Verify proper cable management to allow for unobstructed airflow.
6.3. Front Panel USB/Audio Not Working
- Confirm that the front panel USB and audio cables are correctly connected to the corresponding headers on the motherboard.
- Check motherboard drivers for USB and audio.
7. Zehaztapenak
| Ezaugarri | Xehetasuna |
|---|---|
| Marka | Aurrera |
| Modelo zenbakia | 8303B30 |
| Kolorea | Beltza |
| Xasisaren materiala | Alloy Steel (SGCC Steel) |
| Plaka amaren bateragarritasuna | Mikro ATX |
| Neurriak (L x W x H) | 48 x 19.5 x 48.2 cm |
| Produktuaren pisua | 5.8 kg |
| Aurrealdeko paneleko atakak | 2 x USB 3.0, 1 x USB 2.0, Audio Jacks |
| Biltegiratze kaia | Top panel 2.5/3.5 inch SATA HDD docking station |
| Zaleak barne | 5 x 120mm (2 front LED, 1 side LED, 1 rear, 1 top) |
| Hozteko euskarria | Water cooling ready |
| Alboko Panela | Plexiglass |
| Erabilera gomendatua | Jolasa |
8. Bermea eta Laguntza
8.1. Fabrikatzailearen Bermea
This product comes with a manufacturer's warranty of 1 year from the date of purchase. Please retain your proof of purchase for warranty claims. The warranty covers defects in materials and workmanship under normal use.
8.2. Bezeroarentzako arreta
For technical assistance, troubleshooting, or warranty inquiries, please contact Advance customer support. Refer to the official Advance webgunea, kontaktu-informazio eta laguntza-baliabide eguneratuenak lortzeko.


