1. Sarrera
This manual provides essential information for the safe and efficient use of your Hitachi CP-EX251N XGA 3LCD Projector. Please read this manual thoroughly before operating the projector and keep it for future reference. The CP-EX251N is designed for clear, bright projections with 2700 lumens brightness and XGA (1024x768) native resolution, featuring 3LCD technology and a long-life lamp.
2. Segurtasun informazioa
Jarraitu segurtasun neurri hauek suteak, deskarga elektrikoak edo lesioak saihesteko.
- Energia iturria: Use only the power supply specified for this unit. Ensure the power cord is securely plugged into an outlet.
- Aireztapena: Ez blokeatu aireztapen-irekidurak. Ziurtatu proiektorearen inguruan nahikoa leku dagoela aire-fluxu egokia izan dadin eta gehiegi berotzea saihesteko.
- Beroa: Proiektorea lamp becomes very hot during operation. Allow the projector to cool down before handling or performing maintenance.
- Lamp: Ez begiratu zuzenean proiektorearen lenteari l dagoenean.amp piztuta dago, argi distiratsuak begiak kaltetu ditzakeelako.
- Hezetasuna: Ez jarri proiektorea euri edo hezetasunera sua edo deskarga elektrikoa saihesteko.
- Zerbitzua: Konponketa guztiak zerbitzu-langile kualifikatuei eskatu. Ez saiatu proiektorea zeuk irekitzen edo konpontzen.
3. Paketearen edukia
Egiaztatu elementu guztiak paketean daudela:
- Hitachi CP-EX251N Projector
- Elikatze kablea
- Urruneko agintea pilekin
- VGA kablea
- Erabiltzailearen eskuliburua (dokumentu hau)
4. Produktua amaitu daview

4.1. irudia: Angeludun view of the Hitachi CP-EX251N Projector, showing the lens, control panel, and ventilation.
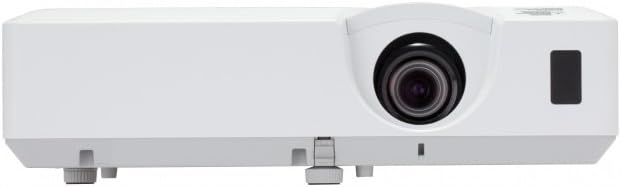
4.2. irudia: Aurrealdea view of the Hitachi CP-EX251N Projector, highlighting the projection lens and front IR receiver.
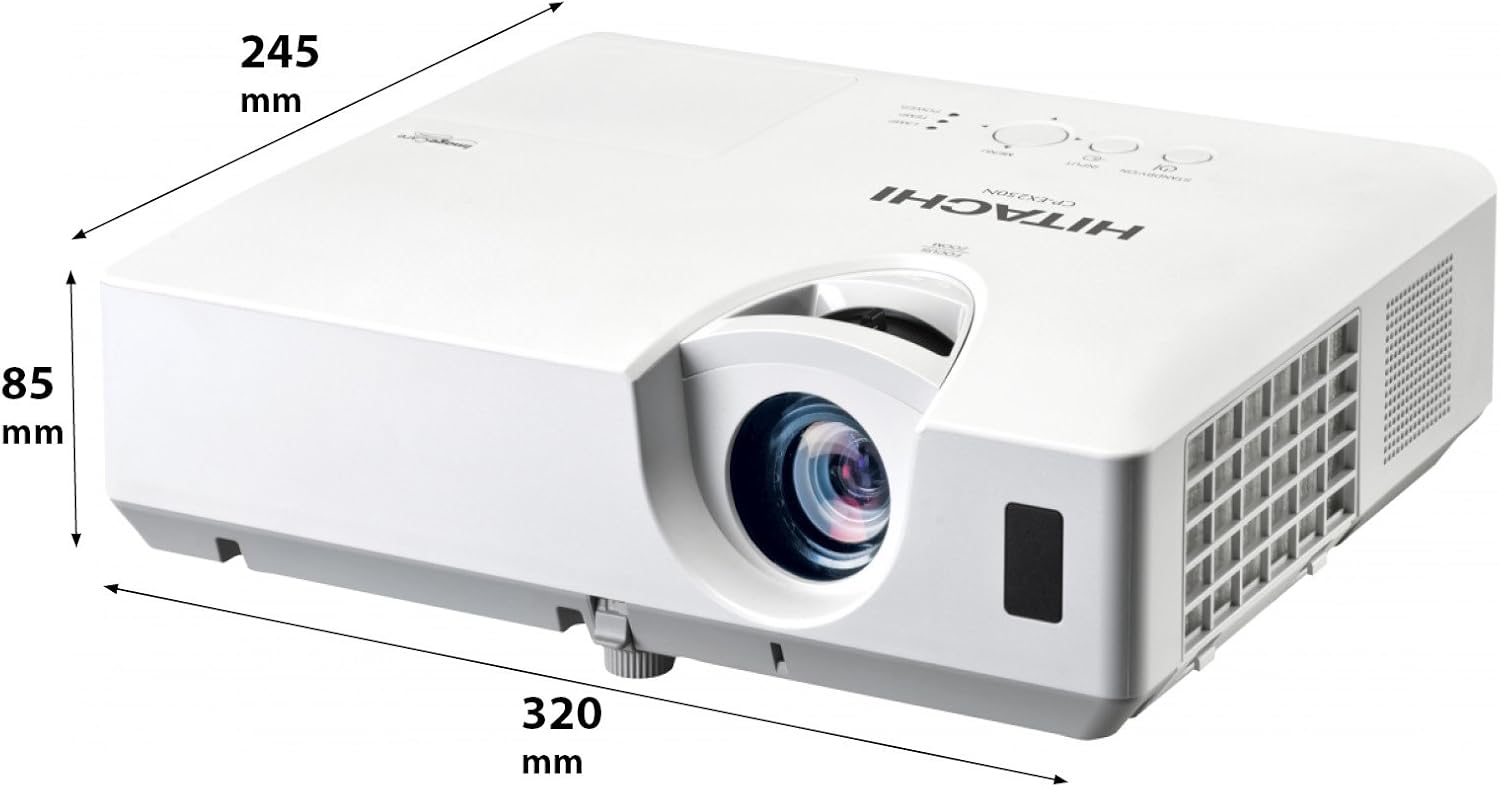
4.3. irudia: Angeludun view of the projector illustrating its approximate dimensions (320mm length, 245mm width, 85mm height).
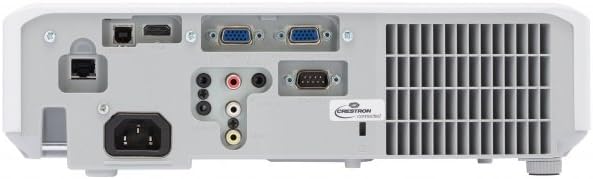
Figure 4.4: Rear panel of the projector, showing various input and output ports including HDMI, VGA, Composite, RS232C, and RJ45.
5. Konfigurazioa
5.1 Jartzea
Position the projector on a stable, flat surface or mount it securely. Ensure the projector is at an appropriate distance from the screen to achieve the desired image size. Maintain clear space around the projector for ventilation.
5.2 Potentzia konektatzea
- Konektatu elikatze-kablea proiektorearen korronte alternoko sarrerara.
- Entxufatu korronte-kablearen beste muturra lurreko hartune elektriko batean.
5.3 Sarrera iturriak konektatzea
The CP-EX251N offers multiple connectivity options:
- HDMI: Connect an HDMI cable from your source device (e.g., laptop, Blu-ray player) to the projector's HDMI port.
- VGA: Connect a VGA cable from your computer to one of the projector's VGA ports (VGA1 or VGA2).
- Bideo konposatua: Use an RCA composite video cable to connect devices like DVD players to the composite video input.
- Audioa: Connect audio cables to the corresponding audio input jacks if using analog video sources.
- Kontrola: For remote control and monitoring, connect an RS232C serial cable or an RJ45 Ethernet cable to a control system.
5.4 Hasierako piztea eta irudiaren doikuntza
- Press the Power button on the projector or remote control. The power indicator will light up.
- Egokitu Foku eraztuna on the lens until the image is sharp.
- Egokitu Zoom Eraztuna on the lens to achieve the desired image size.
- Irudia trapezoidala bada, erabili Keystone zuzenketa function (usually found in the projector menu or via dedicated buttons on the remote) to square the image.
6. Funtzionamendua
6.1 Piztu/Itzali
- Pizteko: Sakatu pizteko botoia behin.
- Itzaltzeko: Press the Power button twice. The projector will enter a cooling cycle before shutting down completely. Do not unplug the projector during the cooling cycle.
6.2 Sarrera hautatzea
Press the 'Input' or 'Source' button on the remote control or projector control panel to cycle through available input sources (HDMI, VGA1, VGA2, Composite).
6.3 Menu Nabigazioa
Use the 'Menu' button to access the on-screen display (OSD) menu. Navigate using the arrow buttons and confirm selections with the 'Enter' button. The menu allows adjustment of picture settings, audio, display options, and system settings.
6.4 Irudiaren doikuntzak
OSD menuan, honako hauek doi ditzakezu:
- Distira: Doitu irudiaren argitasun edo iluntasun orokorra.
- Kontrastea: Adjust the difference between the light and dark areas of the image.
- Kolore modua: Select from various preset modes (e.g., Standard, Dynamic, Cinema, sRGB) or customize settings.
- Aspektu-erlazioa: Aldatu pantailaren erlazioa (adibidez, 4:3, 16:9).
6.5 Modu ekologikoa
Activate Eco Mode to reduce lamp brightness, conserve energy, and extend lamp life up to 10,000 hours. This setting can be found in the projector's OSD menu.
7. Mantentzea
7.1 Lentea garbitzea
Garbitu proiektorearen lentea astiro-astiro gainazal optikoetarako bereziki diseinatutako zapi leun eta lint-gabe batekin. Ez erabili garbitzaile urratzailerik edo indar gehiegirik.
7.2 Aire-iragazkia garbitzea
Regularly clean the air filter to maintain optimal performance and prevent overheating. Refer to the projector's OSD menu for filter usage time. Remove the filter cover and gently clean the filter with a soft brush or vacuum cleaner. Replace the filter if it is damaged or excessively dirty.
7.3 lamp Ordezkoa
Proiektorea lamp has a long lifespan, but will eventually require replacement. When the lamp indicator lights up or the image becomes dim, replace the lamp. Always use a genuine Hitachi replacement lamp. Allow the projector to cool completely before attempting lamp replacement. Consult the full service manual for detailed lamp ordezkatzeko argibideak.
7.4 Biltegiratzea
When storing the projector for an extended period, ensure it is powered off and cooled down. Store it in a cool, dry place, away from direct sunlight and extreme temperatures.
8. Arazoak
| Arazoa | Kausa posiblea | Irtenbidea |
|---|---|---|
| Botererik ez | Power cord disconnected; Power outlet faulty; Projector in standby mode. | Check power cord connection; Try a different outlet; Press the Power button. |
| Ez da irudirik bistaratzen | Input source not selected; Cable not connected properly; Source device not outputting signal. | Select correct input source; Reconnect video cable; Check source device settings. |
| Image distorted or blurry | Focus/Zoom not adjusted; Keystone not corrected; Projector not perpendicular to screen. | Adjust Focus and Zoom rings; Use Keystone correction; Reposition projector. |
| Soinurik ez | Audio cable not connected; Volume too low; Mute function active. | Connect audio cable (if applicable); Increase volume; Deactivate mute. |
| Urruneko kontrola ez dabil | Batteries depleted; Obstruction between remote and projector; Remote sensor blocked. | Replace batteries; Remove obstructions; Ensure clear line of sight to IR sensor. |
9. Zehaztapenak
| Ezaugarri | Zehaztapena |
|---|---|
| Modelo zenbakia | CP-EX251N |
| Bistaratzeko Teknologia | 3LCD |
| Distira | 2700 lumen |
| Berezko Ebazpena | XGA (1024 x 768) |
| Lamp Bizitza | Up to 10,000 hours (in Eco Mode) |
| Konektibitatea | HDMI x 1, VGA x 2, Component (Shared) x 2, Composite x 1, RS232C, RJ45 |
| Audio Irteera | 16W bozgorailua |
| Elementuaren pisua | 6.83 libra (gutxi gorabehera 3.1 kg) |
| Produktuaren neurriak | 6 x 12 x 14 hazbete (gutxi gorabehera 15.2 x 30.5 x 35.6 cm) |
| Gomendatutako Erabilerak | Negozioak, Hezkuntza, Jokoak, Etxeko Zinema |
| Ezaugarri Berezia | Eramangarria |
10. Bermea eta Laguntza
Bermeari buruzko informazioa lortzeko, kontsultatu zure produktuarekin batera datorren berme-txartela edo bisitatu Hitachi-ren webgune ofiziala. website. For technical support, service, or inquiries about replacement parts, please contact Hitachi customer service through their official channels.
Lineako laguntza: www.hitachi.com/support (Adibampesteka, mesedez, kontsultatu produktuaren dokumentazio zuzena URL)


