Sarrera
This manual provides detailed instructions for the installation, operation, and maintenance of your Venstar T1900 Residential Slimline Platinum Thermostat. Please read this manual thoroughly before attempting to install or operate the thermostat to ensure proper function and to avoid potential damage.
Segurtasun informazio garrantzitsua
- Always turn off power to the heating/cooling system at the main circuit breaker or fuse box before installing or servicing the thermostat.
- This thermostat operates on 24 Volts AC. Do not connect to line voltage (120V edo 240V).
- Kableatu elektrikoekin ohituta ez bazaude, instalazioa teknikari kualifikatu batek egin beharko luke.
- Do not short circuit the terminals on the gas valve or at the system control to test the thermostat. This will damage the thermostat and void the warranty.
- Ziurtatu kableatu-konexio guztiak ondo isolatuta eta ondo finkatuta daudela zirkuitulaburrak saihesteko.
Paketearen edukia
Egiaztatu zure paketeak elementu hauek dituela:
- Venstar T1900 Thermostat Unit
- Muntatzeko hardwarea (torlojuak eta hormako aingurak)
- Erabiltzailearen eskuliburua (dokumentu hau)
Produktua amaituview
The Venstar T1900 is a 7-day programmable digital thermostat designed for residential use. It offers precise temperature control and energy-saving scheduling capabilities. This thermostat is compatible with heat/cool, heat pump, and dual-fuel systems, controlling up to three heat stages eta bi cool stages.
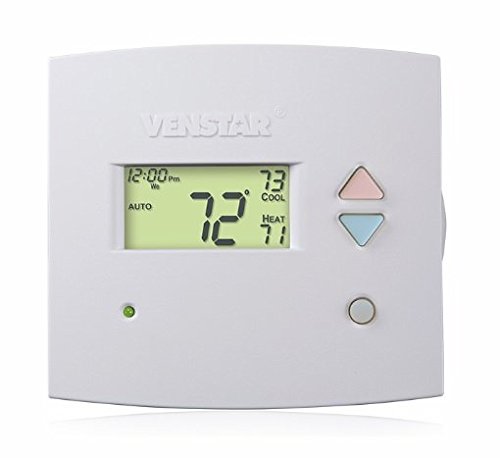
1. irudia: Aurrealdea view of the Venstar T1900 Thermostat. This image displays the thermostat's LCD screen and control buttons, indicating its slimline design.
Ezaugarri nagusiak:
- 7 eguneko programazioa: Allows for customized heating and cooling schedules for each day of the week.
- Sistemaren bateragarritasuna: Works with heat/cool, dual-fuel, and heat pump systems.
- Multi-Stage Kontrola: Manages up to three heat stages eta bi cool stages.
- Urruneko kontrolaren gaitasuna: Controllable by phone using an optional add-on (sold separately).
- Automatic or Manual Operation: Provides flexibility for scheduled or on-demand temperature adjustments.
Instalazio Gida
Beharrezko tresnak:
- Bihurkin (Phillips eta/edo punta laua)
- Drill with appropriate drill bit (if installing new wall anchors)
- Wire strippers
- Arkatza
- Maila (aukerakoa)
1. Itzali itzaltzea
Locate the circuit breaker or fuse box that controls your heating and cooling system. Turn off the power completely before proceeding with any wiring.
2. Remove Old Thermostat (if applicable)
- Kontu handiz kendu termostato zaharraren estalkia.
- Atera dauden kableatu-konexioen argazki bat erreferentzia gisa.
- Label each wire with the terminal designation it was connected to (e.g., R, G, Y, W).
- Disconnect the wires and remove the old thermostat's mounting plate from the wall.
3. Termostatoaren oinarri berria muntatu
- Separate the front cover of the T1900 thermostat from its base plate.
- Position the base plate on the wall where you want to install the thermostat. Ensure it is level.
- Markatu muntatzeko zuloak arkatz batekin.
- Beharrezkoa bada, egin pilotu-zuloak eta sartu hormako aingurak.
- Termostatoaren oinarri-plaka horman finkatu emandako torlojuak erabiliz.
4. Kableatua
Connect the wires from your HVAC system to the corresponding terminals on the T1900 thermostat base. Refer to the wiring diagram provided with your specific HVAC system for precise connections. Ensure wires are stripped approximately 3/8 inch and securely fastened under the terminal screws.
Terminalen izendapen arruntak:
- R/Rc/Rh: 24V Power (Heating/Cooling)
- C: Common (24V return)
- G: Fan
- Y/Y1: S konpresoreatage 1 (hoztea)
- Y2: S konpresoreatage 2 (hoztea)
- W/W1: Beroa Stage 1 (Berokuntza)
- W2: Beroa Stage 2 (Berokuntza)
- O / B: Reversing Valve (Heat Pumps)
Note: The T1900 supports various system types. Consult the detailed wiring diagrams in the full installation manual for specific configurations (e.g., heat pump with auxiliary heat, conventional multi-stage sistemak).
5. Termostatoa oinarrira lotu
Once wiring is complete and verified, carefully align the thermostat front cover with the mounted base plate and snap it into place.
6. Berrezarri energia
Return to your circuit breaker or fuse box and restore power to your heating and cooling system.
Hasierako konfigurazioa
Upon initial power-up, the thermostat may prompt you to configure basic settings. Follow the on-screen instructions to set the current date, time, and system type (e.g., Conventional, Heat Pump).
System Type Configuration:
It is crucial to correctly configure the thermostat for your specific HVAC system. Incorrect settings can lead to improper operation or damage. Access the installer settings menu (refer to the full installation guide for specific button sequences) to select:
- Sistema mota: Heat/Cool, Heat Pump, Dual Fuel
- Bero kopurua Stages
- Cool S kopuruatages
- Reversing Valve Operation: O (Cooling) or B (Heating)
Funtzionamendu-argibideak
Pantaila ulertzea:
The LCD screen displays the current temperature, set temperature, system mode, fan mode, time, and programming status. Refer to the icons and indicators on the screen for current operational status.
Setting System Mode:
Sakatu MODUA botoia eskuragarri dauden sistemaren moduen artean txandakatzeko:
- BEROA: The system will operate to maintain the heating setpoint.
- Hozten: The system will operate to maintain the cooling setpoint.
- AUTOA: The thermostat automatically switches between heating and cooling as needed to maintain the set temperature range.
- DESaktibatuta: Berokuntza eta hozte sistema itzalita dago.
Setting Fan Mode:
Sakatu FAN botoia haizagailu moduen artean aldatzeko:
- AUTOA: Berokuntza edo hozte sistema aktiboki martxan dagoenean bakarrik funtzionatzen du haizagailuak.
- ON: Haizagailua etengabe dabil, berogailu edo hozte eskaeren bat izan arren.
Tenperatura doitzea:
Erabili UP eta BEHERA arrow buttons to adjust the desired temperature setpoint. In programmable modes, this will temporarily override the schedule until the next scheduled change.
Programming Schedules (7-Day):
The T1900 allows for 7-day programming, enabling different schedules for each day of the week. This feature helps save energy by adjusting temperatures when you are away or asleep.
- Sakatu PROGRAMA botoia programazio moduan sartzeko.
- Erabili EGUNA button to select the day or group of days you wish to program (e.g., Mon-Fri, Sat-Sun, or individual days).
- Erabili DENBORA button to cycle through the four available periods: Wake, Leave, Return, Sleep.
- Erabili UP eta BEHERA arrow buttons to set the desired temperature for each period.
- Erabili EUTSI button to exit programming mode or save changes.
Refer to the detailed programming section in the full user guide for advanced options and specific button sequences.
Remote Control (Optional Add-on):
The Venstar T1900 thermostat can be controlled remotely via a phone using an optional add-on module (sold separately). This module connects to the thermostat and allows for remote access and control through a dedicated application. Installation and setup instructions for the remote control module are provided with the module itself.
Mantentzea
Cleaning the Thermostat:
To maintain the appearance and functionality of your thermostat, periodically wipe the exterior with a soft, damp oihalik. Ez erabili garbitzaile urratzailerik, disolbatzailerik edo spray kimikorik, hauek plastikozko eta osagai elektronikoak kaltetu baitezakete.
Bateria ordezkatzea:
The Venstar T1900 thermostat does not require batteries for operation as it is powered by the 24V AC system.
Arazoak konpontzea
If you experience issues with your Venstar T1900 thermostat, consult the following common problems and solutions:
| Arazoa | Kausa posiblea | Irtenbidea |
|---|---|---|
| Termostatoaren pantaila hutsik dago | Termostatoak ez du korronterik jasotzen. | Egiaztatu zure HVAC sistemaren zirkuitu-hauslea. Ziurtatu kableatu guztiak ondo lotuta daudela. |
| Heating/Cooling system does not respond | Hautatutako sistema modu okerra; kableatu arazoa; sistema blokeatuta. | Verify the system mode (HEAT/COOL/AUTO). Check wiring connections. Wait 5 minutes for system lockout to reset. |
| Tenperaturaren irakurketa okerra dirudi | Thermostat location; sensor obstruction. | Ensure the thermostat is not exposed to direct sunlight, drafts, or heat sources. Clean any dust from the thermostat vents. |
| Programming schedule is not working | Program not saved; temporary override active; incorrect time/day setting. | Ensure programs are saved. Check if a temporary override is active and cancel it. Verify current time and day settings. |
| Haizagailua etengabe dabil AUTO moduan | Fan mode set to ON; wiring issue. | Press the FAN button to ensure it is set to AUTO. Check fan wiring. |
If these solutions do not resolve the issue, please contact customer support or a qualified HVAC technician.
Zehaztapenak
| Ezaugarri | Zehaztapena |
|---|---|
| Marka | Venstar |
| Ereduaren izena | Ventar T1900 |
| Kontrolagailu mota | Sakatu botoia |
| Ezaugarri Berezia | Programagarria |
| Kolorea | Zuria |
| Produkturako erabilera espezifikoak | Heat Pump, Heater |
| Tenperatura Kontrol Mota | Programmable, Smart/Remote (with add-on) |
| liburukiatage | 24 Volt AC |
| Bistaratzeko mota | LCD edo LED |
| Kontrol-metodoa | Remote (with add-on) |
| Atzeko argia | Bai |
| Produktuaren neurriak | 5.3 x 2 x 2 hazbete |
| Elementuaren pisua | 0.01 ontza |
| Pilak behar dira? | Ez |
Bermearen informazioa
Venstar products are manufactured to high-quality standards. This product is covered by a limited warranty against defects in materials and workmanship. The specific terms and duration of the warranty may vary. Please refer to the warranty card included with your product or visit the official Venstar webwebgunea bermearen informazio zehatza eta erregistro-prozedurak lortzeko.
Bezeroarentzako Arreta
For technical assistance, troubleshooting, or warranty inquiries, please contact Venstar customer support. You can typically find contact information, including phone numbers and email addresses, on the official Venstar webgunea (www.venstar.com) or on the product packaging.
When contacting support, please have your thermostat model number (T1900) and any relevant purchase information ready.


