1. Sarrera
Thank you for choosing the Sygonix PYO-813 Wired Video Intercom System. This manual provides detailed instructions for the safe and efficient installation, operation, and maintenance of your new intercom system. Please read this manual thoroughly before use and retain it for future reference.
2. Segurtasun-argibideak
- Ensure all electrical connections are made by a qualified electrician to prevent electric shock or fire hazards.
- Do not expose the outdoor unit to extreme temperatures, direct sunlight for prolonged periods, or heavy rain/snow beyond its water-resistant rating.
- Ez ireki gailua casings. Refer all servicing to qualified personnel.
- Keep the indoor monitor away from water and high humidity.
- Sistemarekin batera datorren korronte-egokitzailea bakarrik erabili.
- Before cleaning, disconnect the power supply. Use a soft, dry cloth for cleaning.
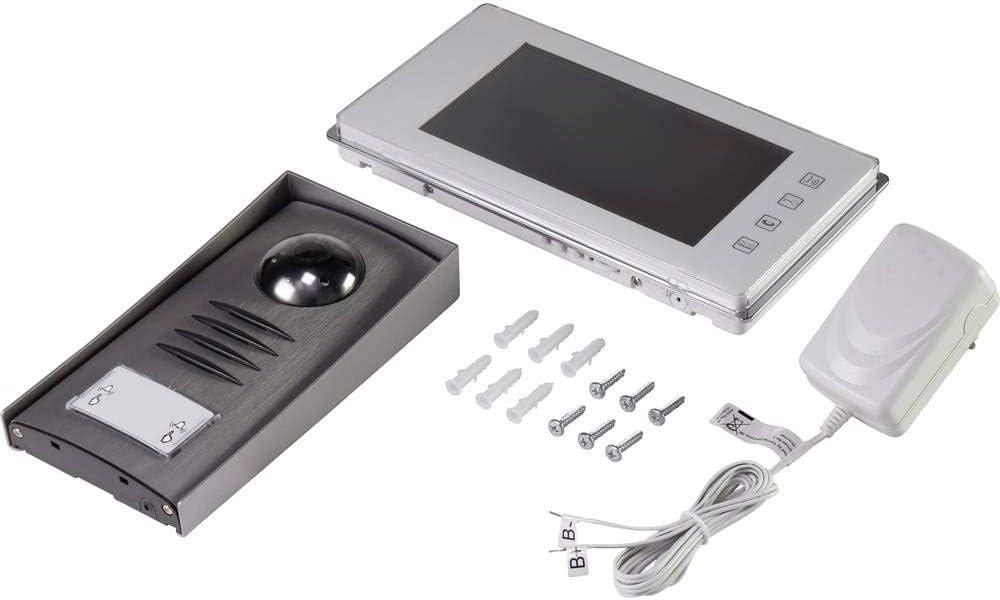
3. Paketearen edukia
Mesedez, egiaztatu paketearen edukia elementu guztiak daudela eta kalterik ez dutela ziurtatzeko:
- 1x Outdoor Camera Unit
- 1x Indoor Monitor Unit (7" TFT LCD)
- 1x korronte egokitzailea
- Muntatzeko torlojuak eta hormako takoak
- Erabiltzailearen eskuliburua (dokumentu hau)
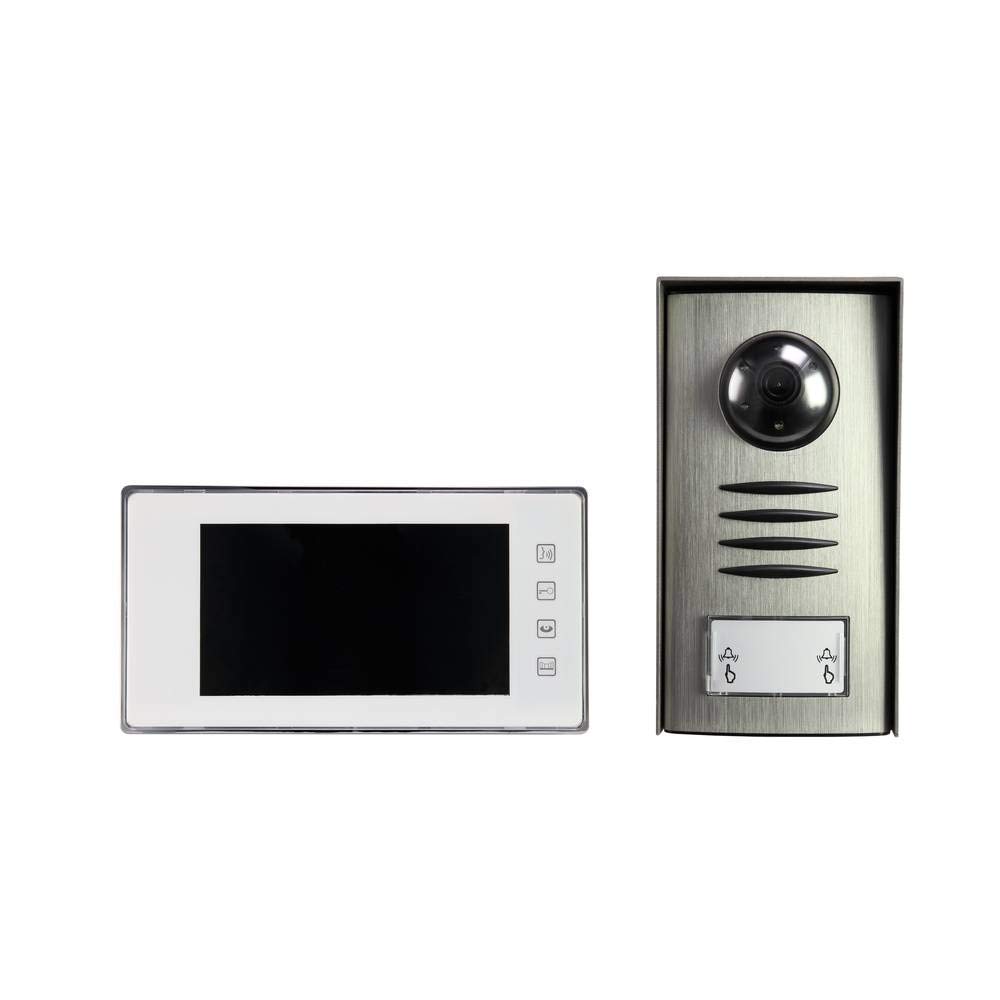
Image: Complete package contents of the Sygonix PYO-813 intercom system.
4. Produktua amaitu daview
The Sygonix PYO-813 is a wired video intercom system designed for secure and convenient communication with visitors at your door. It features a hands-free system for clear two-way communication.
4.1 Outdoor Camera Unit
- Adjustable Angle Camera: Allows for optimal viewbisitarien etorrera.
- Integrated Speaker and Microphone: Bi norabideko audio komunikazioa ahalbidetzen du.
- Water-Resistant Casing: Protects components from splashes.
- LED integratuak: Automatically illuminate in low light conditions for night vision.
- Deitzeko botoia: For visitors to initiate a call to the indoor monitor.
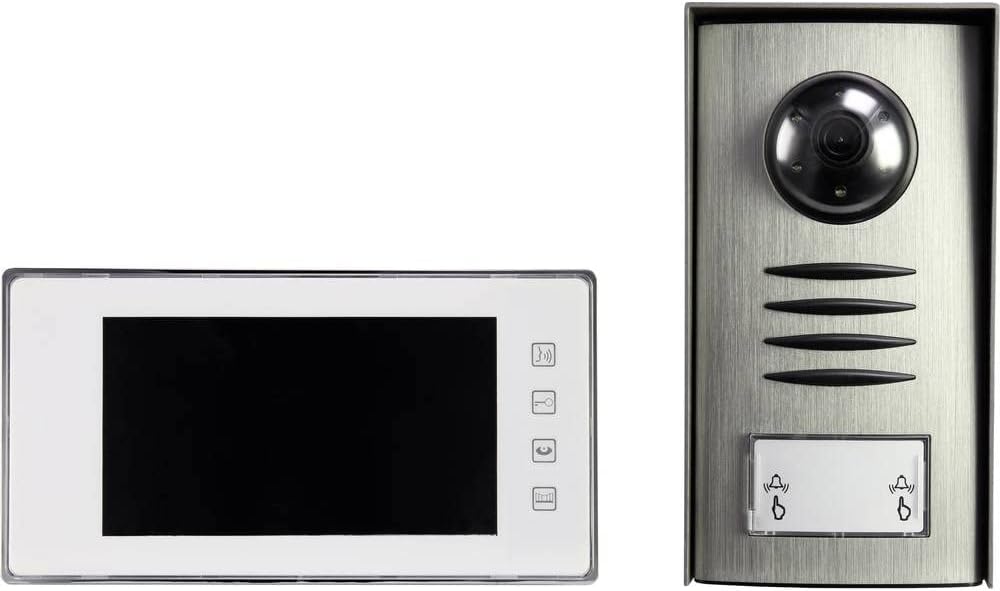
Image: The outdoor camera unit (right) and indoor monitor (left) of the Sygonix PYO-813.
4.2 Barruko Monitore Unitatea
- 7 hazbeteko TFT LCD pantaila: Provides a clear display of the visitor.
- Ukitu botoiak: For intuitive control of the system functions.
- Integrated Speaker and Microphone: For hands-free two-way communication.
Irudia: Gertuko planoa view of the Sygonix PYO-813 indoor monitor and outdoor camera unit.
5. Konfigurazioa eta instalazioa
Proper installation is crucial for optimal performance. It is recommended that installation be performed by a qualified technician.
5.1 Mounting the Outdoor Camera Unit
- Choose a suitable location near your entrance, ensuring it is protected from direct heavy weather and at an appropriate height for visitors.
- Mark the drilling points using the unit as a template.
- Zulatu zuloak eta sartu tapoiak.
- Secure the outdoor unit to the wall using the provided screws.
- Adjust the camera angle as needed for the best view of your entrance area.
5.2 Mounting the Indoor Monitor Unit
- Select a convenient indoor location, typically near the main entrance or in a central living area.
- Mark and drill holes, then insert wall plugs.
- Secure the mounting bracket (if separate) or the monitor directly to the wall.
5.3 Kableatutako konexioak
Connect the outdoor camera unit to the indoor monitor unit using appropriate wiring (not explicitly listed as included, but implied by "wired intercom"). Ensure all connections are secure and correctly polarized according to the wiring diagram in the full product manual (if available, otherwise general advice).
Connect the power adapter to the indoor monitor unit and then plug it into a suitable power outlet.
Garrantzitsua: Ensure power is disconnected during all wiring procedures.6. Funtzionamendu-argibideak
6.1 Dei bat jasotzea
- Bisitari batek kanpoko unitateko dei-botoia sakatzen duenean, barneko monitoreak jo egingo du eta bisitariaren irudia bistaratuko du.
- Sakatu Erantzun button (typically a phone icon) on the indoor monitor to establish two-way communication.
6.2 Bi norabideko komunikazioa
Once the call is answered, you can speak with the visitor hands-free through the integrated speakers and microphones on both units.
- Elkarrizketa amaitzeko, sakatu Amaitu deia button (typically a hang-up icon) or wait for the call to automatically disconnect after a set period.
6.3 Monitoring the Entrance
Eskuz egin dezakezu view the outdoor camera feed at any time without a visitor pressing the call button.
- Sakatu Monitorea button (typically an eye or camera icon) on the indoor monitor to activate the outdoor camera view.
- The integrated LEDs on the outdoor unit will automatically activate in dark conditions to provide clear night vision.
6.4 Ezarpenak doitzea
The indoor monitor may have touch buttons for adjusting settings such as ringtone volume, display brightness, and contrast. Refer to the icons on your monitor for specific functions.
7. Mantentzea
- Garbiketa: Use a soft, dry, lint-free cloth to clean the indoor monitor screen and the outdoor unit lens. Do not use abrasive cleaners or solvents.
- Ikuskapena: Periodically check all wiring connections for wear or damage.
- Ingurumena babestea: Ensure the outdoor unit's water-resistant seals are intact.
8. Arazoak
| Arazoa | Kausa posiblea | Irtenbidea |
|---|---|---|
| Ez dago irudirik barneko monitoreetan. |
|
|
| No sound during communication. |
|
|
| Irudiaren kalitate eskasa gauez. |
|
|
9. Zehaztapenak
| Marka: | Sygonix |
| Modelo zenbakia: | SY-3313340 (1656670) |
| Barruko monitorearen pantaila: | 7 hazbeteko TFT LCD pantaila |
| Kolorea: | Zilarrezkoa |
| Materiala: | Aluminioa |
| Potentzia mota: | Mains Powered (via included adapter) |
| Paketearen neurriak: | 32.5 x 32.5 x 7 cm |
| Pisua: | 9.07 gramo |
10. Bermea eta Laguntza
For warranty information, please refer to the documentation provided with your purchase or contact your retailer. For technical support or service inquiries, please contact Sygonix customer service or your local distributor.
Fabrikatzailea: Sygonix


