1. Sarrera
Thank you for choosing the Vacmaster 10 Gallon 4 Peak HP Wet/Dry Vacuum with Detachable Blower, model VBVA1010PF. This manual provides essential information for the safe assembly, operation, maintenance, and troubleshooting of your new appliance. Please read all instructions carefully before use and retain this manual for future reference.
2. Segurtasun-argibide garrantzitsuak
OHARRA: Sute, deskarga elektriko edo lesio arriskua murrizteko, irakurri eta ulertu argibide guztiak tresna hau erabili aurretik.
- Ez utzi aparatua arretarik gabe entxufatuta dagoenean. Desentxufatu entxufetik erabiltzen ez duzunean eta zerbitzua eman aurretik.
- Ez erabili kanpoan edo gainazal hezeetan.
- Ez utzi jostailu gisa erabiltzea. Arreta handia behar da umeek edo umeek gertu erabiltzen dutenean.
- Erabili eskuliburu honetan deskribatzen den moduan soilik. Erabili fabrikatzaileak gomendatutako eranskinak soilik.
- Ez erabili hondatutako kablearekin edo entxufearekin. Aparatuak behar bezala funtzionatzen ez badu, erori egin bada, hondatu, kanpoan utzi edo uretara erori bada, itzuli zerbitzu zentro batera.
- Ez tiratu edo eraman kabletik, ez erabili kablea helduleku gisa, ez itxi ate bat kabletik, edo ez tiratu kablea ertz edo ertz zorrotzetatik. Ez jarri aparatua kablearen gainean. Mantendu kablea gainazal beroetatik urrun.
- Ez deskonektatu kableari tiraka. Deskonektatzeko, heldu entxufeari, ez kableari.
- Ez maneiatu entxufea edo aparatua esku bustiekin.
- Ez sartu objekturik irekiduran. Ez erabili irekiera blokeatuta dagoela; mantendu hauts, litxar, ile eta aire-fluxua murrizten duen ezer.
- Mantendu ilea, arropa solteak, atzamarrak eta gorputz-atal guztiak irekiguneetatik eta atal mugikorretatik urrun.
- Ez hartu erretzen edo erretzen ari den ezer, hala nola zigarroak, pospoloak edo errauts beroak.
- Ez erabili likido sukoiak edo erregarriak jasotzeko, hala nola gasolina, edo erabili egon daitezkeen tokietan.
- Ez erabili iragazkiak jarri gabe.
- Deskonektatu aurretik, itzali kontrol guztiak.
- Kontuz ibili eskaileretan garbitzean.
- Do not use to pick up toxic, carcinogenic, combustible or other hazardous materials like asbestos, arsenic, barium, beryllium, lead, pesticides or other health endangering materials.
- Do not use to pick up soot, cement, plaster or drywall dust without a cartridge filter and filter bag in place. These are very fine particles that may affect the performance of the motor or be exhausted back into the air.
- Deskarga elektrikoa jasateko arriskua murrizteko, aparatu honek entxufe polarizatu bat dauka (xafla bat bestea baino zabalagoa da). Entxufe hau entxufe polarizatu batean sartuko da modu bakarrean. Entxufea entxufean guztiz sartzen ez bada, itzuli entxufea. Oraindik egokitzen ez bada, jarri harremanetan elektrizista kualifikatu batekin entxufe egokia instalatzeko. Ez aldatu entxufea inola ere.
3. Paketearen edukia
Egiaztatu behean zerrendatutako osagai guztiak paketean sartuta daudela. Piezaren bat falta bada edo hondatuta badago, jarri harremanetan bezeroarentzako arreta-zerbitzuarekin.
- Vacmaster Wet/Dry Vacuum Unit (10 Gallon Tank, Motor Head)
- Detachable Blower Unit
- Mahuka malgua (7 oin)
- Luzapen-makilak (2 pieza)
- Zoruko pita
- Zirrikitu tresna
- Erabilgarritasun-tobera
- Cartridge Filter (for dry pickup)
- Foam Filter (for wet pickup)
- Erabiltzailearen eskuliburua (dokumentu hau)
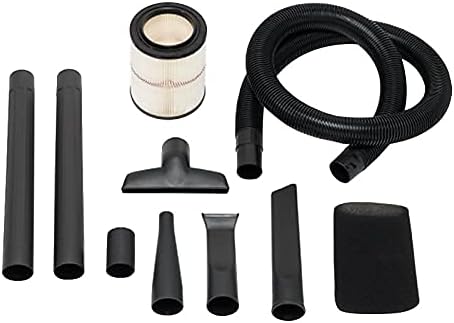
Image: Various accessories for the Vacmaster Wet/Dry Vacuum, including the flexible hose, two extension wands, a floor nozzle, a crevice tool, a utility nozzle, and both cartridge and foam filters.
4. Konfiguratzeko argibideak
4.1 Paketatzea
- Kendu eduki guztia ontzitik.
- Ziurtatu pieza guztiak daudela eta kaltetu gabe daudela.
4.2 Gurpilak jartzea
- Invert the tank.
- Insert the four caster feet into the slots on the bottom of the tank.
- Press firmly until each caster foot clicks securely into place.
4.3 Iragazkien instalazioa
The correct filter must be installed for the type of cleaning you are performing.
For Dry Vacuuming: Cartridge Filter
- Ensure the foam filter is removed.
- Slide the cartridge filter over the filter cage on the motor head.
- Secure the filter with the filter cap by twisting it clockwise until tight.
For Wet Vacuuming: Foam Filter
- Remove the cartridge filter and filter cap.
- Slide the foam filter over the filter cage on the motor head.
- Ensure the foam filter completely covers the filter cage.
4.4 Attaching the Hose and Accessories
- Insert the large end of the flexible hose into the vacuum port on the tank and twist to lock.
- Attach desired accessories (extension wands, floor nozzle, crevice tool, utility nozzle) to the other end of the hose.

Image: The Vacmaster Wet/Dry Vacuum fully assembled, showing the main unit, flexible hose, and floor nozzle ready for use.
5. Funtzionamendu-argibideak
5.1 Funtzionamendu Orokorra
- Ensure the vacuum is properly assembled with the correct filter for your task.
- Plug the power cord into a suitable 120V grounded outlet.
- Turn the power switch located on the motor head to the 'ON' position to start the vacuum.
- To stop operation, turn the power switch to the 'OFF' position.
5.2 Lehorra xurgatzea
Use the cartridge filter for dry debris pickup.
- Ensure the cartridge filter is securely installed.
- Use appropriate accessories for the type of dry debris (e.g., floor nozzle for large areas, crevice tool for tight spaces).
- Regularly check and clean the cartridge filter to maintain optimal suction.
5.3 Hezea xurgatzea
Use the foam filter for liquid pickup.
- Ensure the foam filter is securely installed and the cartridge filter is removed.
- Do not overfill the tank. The vacuum is equipped with an automatic shut-off float mechanism that will stop suction when the tank is full. If suction stops, turn off the vacuum, unplug it, and empty the tank.
- After wet pickup, always empty and clean the tank thoroughly to prevent mold and odors.
5.4 Detachable Blower Function
Your Vacmaster unit features a detachable blower for versatile use.
- Detaching the Blower: Locate the release latches on the motor head. Unlatch them and lift the motor head from the tank. The motor head itself functions as the blower unit.
- Attaching Blower Nozzle: Attach the desired blower nozzle to the air outlet port on the motor head.
- Eragiketa: Plug the blower unit into a 120V grounded outlet. Turn the power switch to 'ON' to operate the blower.
- Reattaching to Vacuum: To convert back to a vacuum, place the blower unit (motor head) back onto the tank, aligning the latches, and secure them.

Image: A person demonstrating the detachment of the blue blower unit from the main vacuum tank, highlighting the versatility of the product.
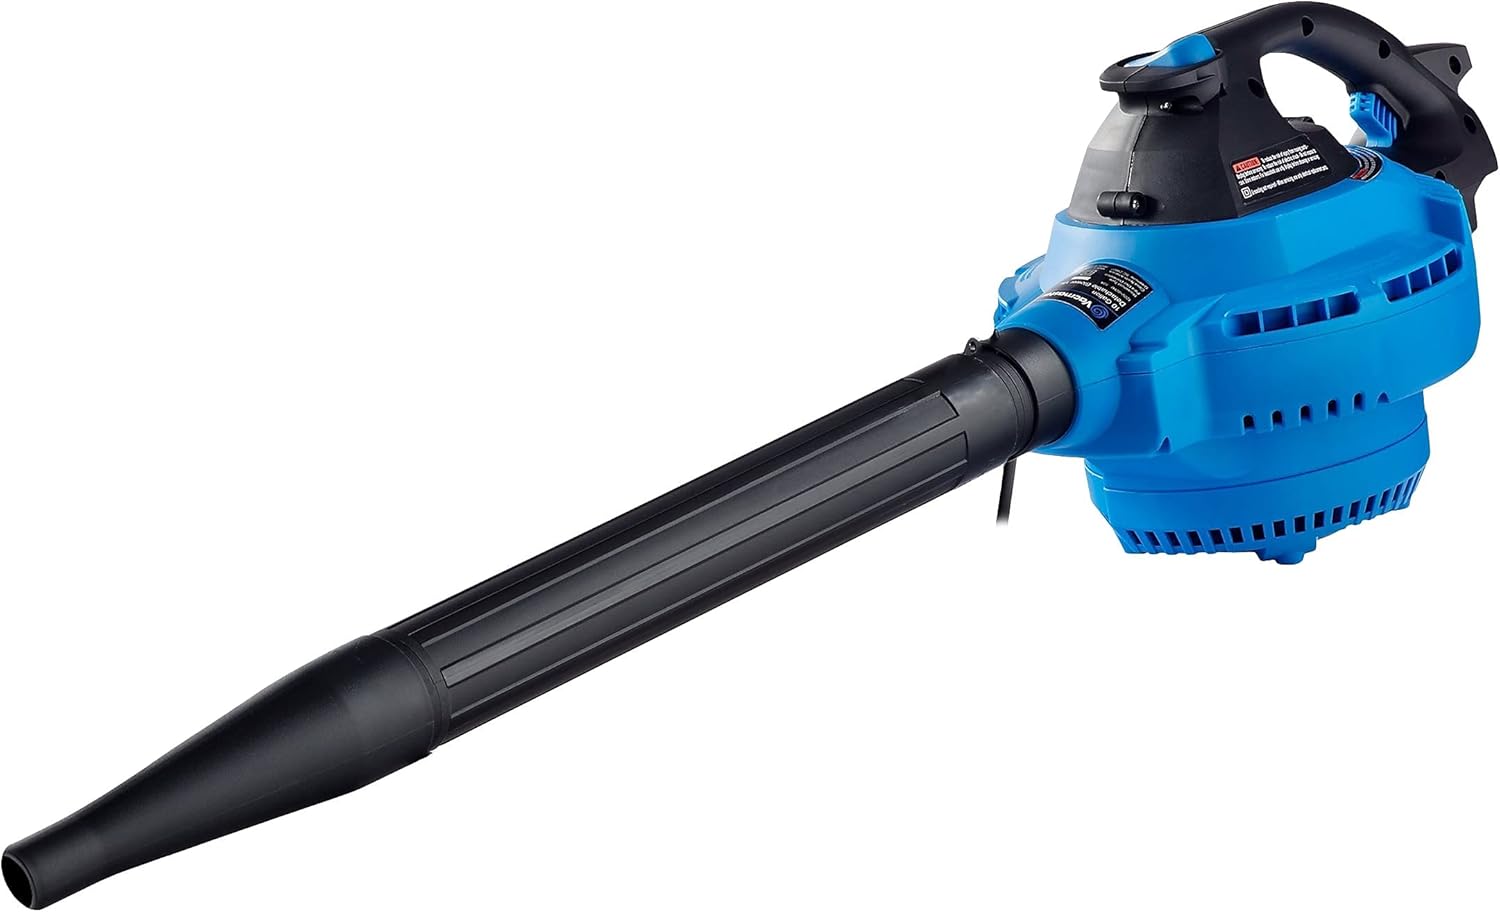
Image: The detached blower unit, a compact blue device with a black handle and a long black nozzle, ready for use as a standalone blower.
6. Mantentzea
Regular maintenance ensures optimal performance and extends the life of your Vacmaster wet/dry vacuum.
6.1 Iragazkiaren garbiketa eta ordezkapena
Always unplug the vacuum before performing any maintenance.
Cartridge Filter (Dry Pickup)
- Remove the filter cap and cartridge filter from the filter cage.
- Gently tap the filter against the inside of a trash can to remove loose dirt.
- For thorough cleaning, rinse the filter under running water. Allow it to air dry completely before reinstallation. Do not use the filter if it is still wet.
- Replace the cartridge filter if it is damaged or if suction performance significantly decreases after cleaning.
Foam Filter (Wet Pickup)
- Remove the foam filter from the filter cage.
- Rinse the foam filter under running water to remove debris.
- Squeeze out excess water and allow it to air dry completely before storage or reinstallation.
6.2 Deposituaren garbiketa
- After each use, especially wet pickup, empty the tank of all debris and liquids.
- Rinse the inside of the tank with water and mild detergent if necessary.
- Wipe the tank dry or allow it to air dry completely before storing to prevent odors and mildew.
6.3 Hose and Accessory Care
- Inspect the hose and accessories for blockages or damage before and after each use.
- Clean accessories with water and mild detergent as needed.
- Store the hose and accessories neatly to prevent kinking or damage. The vacuum unit has integrated storage for the hose and some accessories.

Image: The Vacmaster Wet/Dry Vacuum with its hose wrapped around the top and accessories stored in designated slots, demonstrating compact storage.
7. Arazoak
If you encounter issues with your Vacmaster wet/dry vacuum, refer to the following common problems and solutions:
| Arazoa | Kausa posiblea | Irtenbidea |
|---|---|---|
| Xurgagailua ez da martxan jartzen. | Ez dago korronterik entxufean. Argindar kablea ez dago konektatuta. Etengailu akastuna. | Egiaztatu etengailua/fusiblea. Ensure cord is firmly plugged into a working outlet. Jarri harremanetan bezeroarentzako laguntzarekin. |
| Xurgapen galera. | Hose or accessory clogged. Iragazkia zikin edo buxatuta dago. Tank is full (wet pickup). Tapa ez dago behar bezala zigilatuta. | Clear any blockages from hose or accessories. Garbitu edo ordeztu iragazkia. Hustu depositua. Ensure motor head latches are securely fastened. |
| Motorrak funtzionatzen du, baina xurgapenik gabe. | Hose not connected to inlet. Hose or accessory clogged. Tank is full (wet pickup). | Ensure hose is securely attached to the vacuum port. Clear any blockages. Hustu depositua. |
| Dust escapes from exhaust. | Filter is missing or damaged. Iragazkia ez da behar bezala instalatuta. | Install or replace the correct filter. Ensure filter is properly seated and secured. |
8. Zehaztapenak
| Ezaugarri | Xehetasuna |
|---|---|
| Marka | Vacmaster |
| Eredua | VBVA1010PF |
| Edukiera | 10 litro |
| Motorra | 4 Peak HP, 120V |
| Wattage | 270 watt |
| Amparoa | 10 Amps |
| Hodiaren luzera | 7 Oin |
| Kablearen luzera | 10 Oin |
| Produktuaren neurriak (L x W x H) | 18 x 18 x 24 hazbete |
| Elementuaren pisua | 26.2 kilo |
| Iragazki mota | Cartridge (Dry), Foam (Wet) |
| Ezaugarri bereziak | Wet/Dry Functionality, Detachable Blower |
| Merkataritza-identifikazio-zenbaki globala (GTIN) | 00814953015406 |
| Produktu Kode Unibertsala (UPC) | 814953015406 |
9. Bermearen informazioa
This Vacmaster product is covered by a 1 urteko fabrikatzailearen bermea from the date of purchase. This warranty covers defects in materials and workmanship under normal use. It does not cover damage resulting from misuse, abuse, accident, commercial use, or unauthorized repairs. Please retain your proof of purchase for warranty claims.
10. Bezeroarentzako arreta
For technical assistance, replacement parts, or warranty inquiries, please contact Vacmaster customer support. Refer to the official Vacmaster webwebgunean edo produktuaren ontzian kontaktu-informazio eguneratuena lortzeko.
When contacting support, please have your model number (VBVA1010PF) and proof of purchase readily available.