1. Segurtasun-argibide garrantzitsuak
Please read all instructions carefully before using the CREATE Thera Classic Espresso Machine. Retain this manual for future reference. Incorrect operation may result in damage to the appliance or personal injury.
- Ziurtatu gailua bolumen egokiko lurrera konektatutako entxufe batera konektatuta dagoela.tage (240V).
- Ez murgildu gailua, kablea edo entxufea uretan edo beste likido batzuetan.
- Keep hands and cords away from hot surfaces and steam. The steam wand and portafilter can become very hot during operation.
- Always turn off the machine and unplug it before cleaning or when not in use.
- Do not operate the machine with a damaged cord or plug, or if the appliance malfunctions or has been damaged in any manner.
- Etxetresna hau etxeko erabilerarako soilik da. Ez erabili kanpoan.
- Haurrak gainbegiratu behar dira aparatuarekin jolasten ez dutela ziurtatzeko.
2. Produktua amaitu daview eta Osagaiak
Familiarize yourself with the parts of your CREATE Thera Classic Espresso Machine.

2.1. irudia: Aurrealdea view of the CREATE Thera Classic Espresso Machine, showing the control panel, portafilter, and drip tray with two espresso cups.

2.2. irudia: All removable components of the espresso machine laid out, including the portafilter, single and double shot filter baskets, measuring spoon with tamper, and the water tank.
Osagai nagusiak:
- Kontrol-panela: Power button, single shot button, double shot button, pressure gauge, steam knob.
- Ur depositua: Removable tank for fresh water. Capacity: 1.25 Liters.
- Porta-iragazkia: Handle with filter basket holder.
- Saskiak iragazi: For single and double espresso shots, or ESE pods.
- Lurrun-makila: Esnea aparra egiteko eta ur beroa emateko.
- Tantaketarako erretilua: Removable tray to collect excess liquids.
- Neurketa Koilara/Tamper: For measuring ground coffee and tamping it into the filter basket.
3. Konfigurazioa eta lehen erabilera
3.1 Paketatzea
- Kontu handiz kendu ontziratzeko material guztiak eta ziurtatu osagai guztiak daudela.
- Clean the water tank, portafilter, filter baskets, and drip tray with warm water and mild detergent. Rinse thoroughly.
- Garbitu makinaren kanpoaldea iragarkiarekinamp oihal.
3.2 Ur depositua betetzea
- Kendu ur depositua makinaren atzeko aldetik.
- Fill the tank with fresh, cold water up to the MAX level indicator. Do not exceed the MAX line.
- Jarri ur-depositua berriro bere lekuan, ondo kokatuta dagoela ziurtatuz.
3.3 Priming the Machine (First Use or After Extended Storage)
Priming ensures the water system is filled and ready for operation.
- Ziurtatu ur depositua beteta dagoela.
- Place a large container under the portafilter head and another under the steam wand.
- Plug in the machine and press the power button (usually indicated by a power symbol or a light). The indicator light will illuminate.
- Once the machine has heated up (indicator light stops flashing or turns solid), press the double shot button to run water through the portafilter head until water flows steadily.
- Turn the steam knob to release steam/hot water through the steam wand until water flows steadily. Close the steam knob.
- Makina orain prestatuta eta erabiltzeko prest dago.
4. Funtzionamendu-argibideak
4.1 Kafe xehatuarekin espressoa egitea
- Prestatu makina: Ensure the water tank is filled and the machine is powered on and preheated.
- Prestatu Portafiltroa: Sartu nahi duzun iragazki-saskira (bakarra edo bikoitza) iragazki-portagailuan.
- Gehitu kafea: Use the measuring spoon to add freshly ground espresso coffee to the filter basket. For a single shot, use one level spoon; for a double, use two.
- Tamp Kafea: Erabili tamper end of the measuring spoon to press the coffee grounds firmly and evenly. Ensure the surface is level.
- Erantsi iragazki-portagailua: Align the portafilter with the group head (INSERT position) and twist it firmly to the right until it is securely locked (LOCK position).
- Jarri edalontziak: Jarri espresso kikara bat edo bi tanta-iragazkiaren erretiluan, zuzenean iragazki-eraztunaren tutuen azpian.
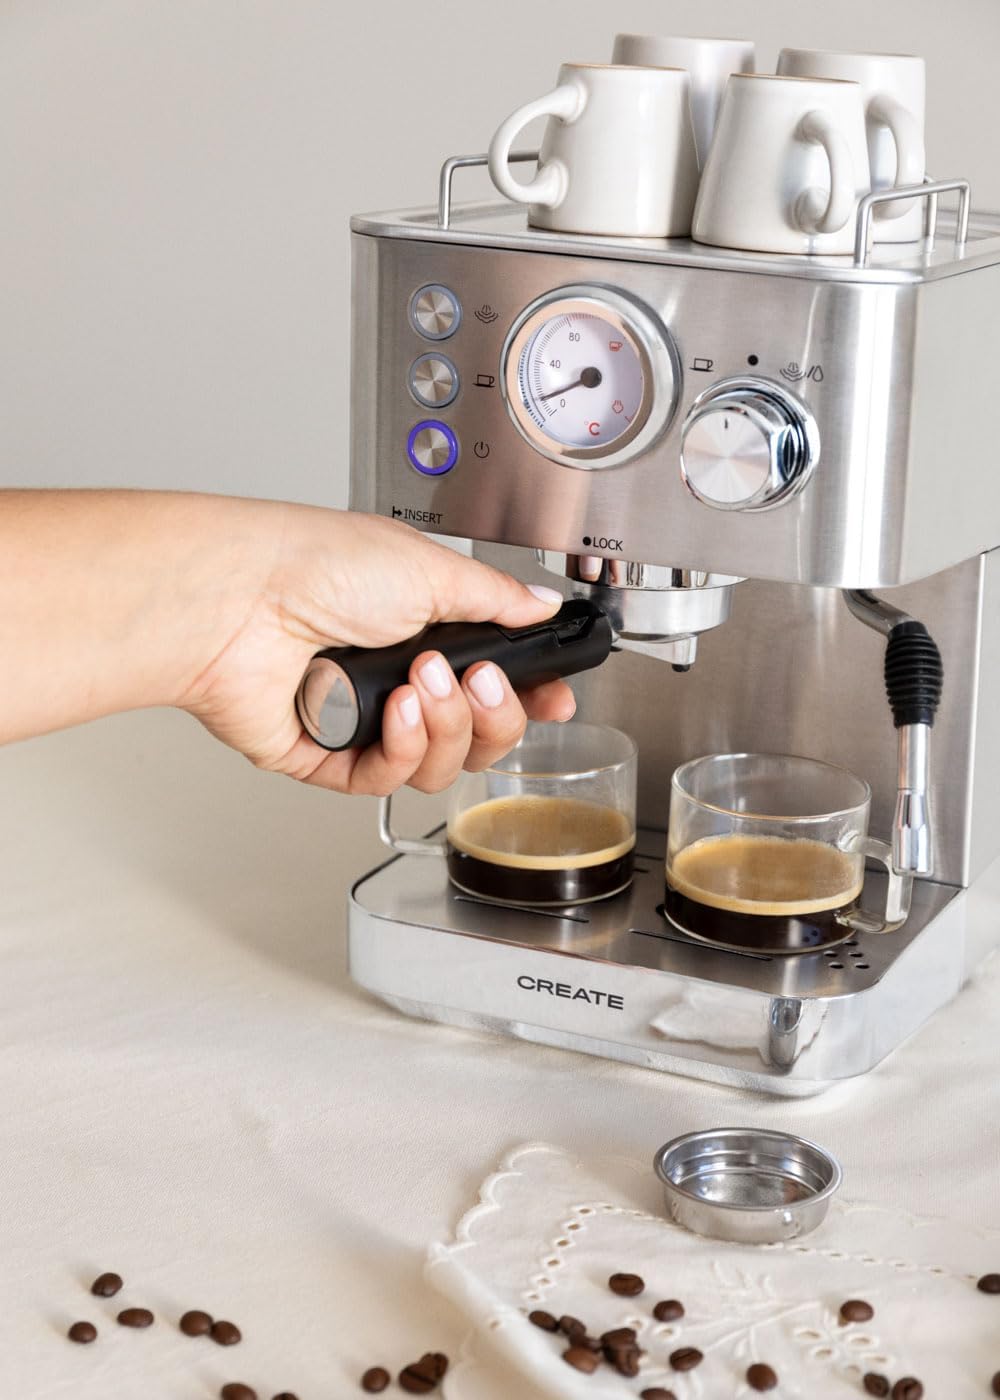
- Espressoa prestatu: Press the single shot or double shot button. The machine will begin brewing. The pressure gauge will indicate the brewing pressure.
- Gelditu garagardoa egitea: The machine may stop automatically, or you can press the button again to stop brewing manually when the desired volume is reached.
- Kendu iragazki-portagailua: Carefully twist the portafilter to the left to remove it. Dispose of the used coffee grounds.
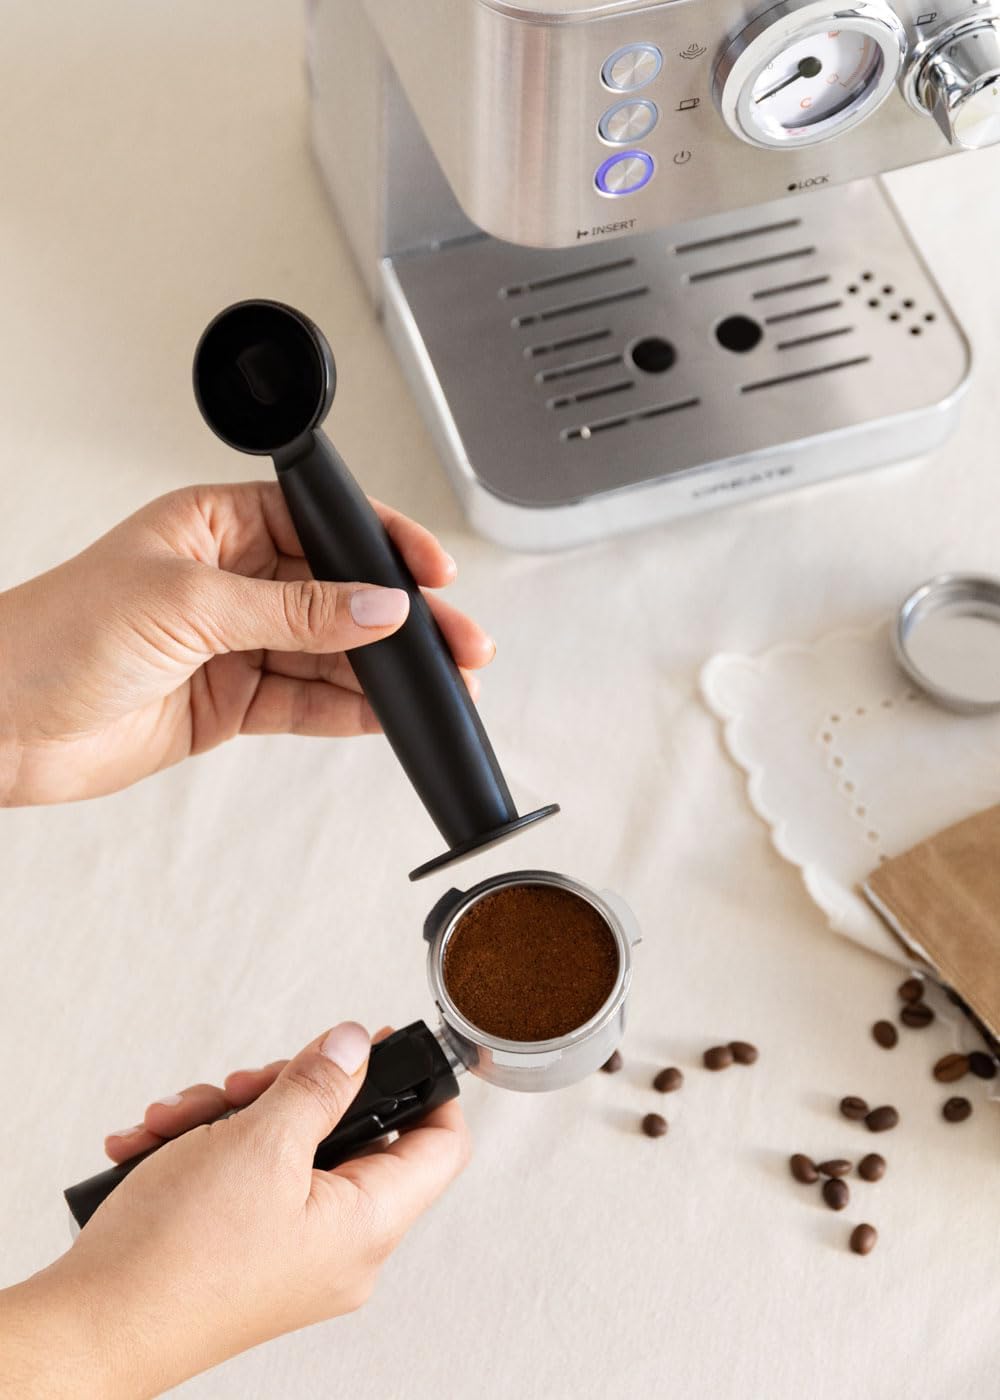
4.1. irudia: Eskua tamping ground coffee into the portafilter for espresso preparation.
4.2. irudia: A hand inserting the portafilter into the group head of the espresso machine.

4.3. irudia: Espresso being brewed into two clear glass cups, showing the rich crema.
4.2 Making Espresso with ESE Single-Dose Pods
- Follow steps 1-2 from 'Making Espresso with Ground Coffee'. Use the specific filter basket designed for ESE pods if provided.
- Place one ESE pod into the filter basket. Do not tamp.
- Follow steps 5-9 from 'Making Espresso with Ground Coffee'.
4.3 Esne lurrundua
- Esnea prestatu: Bete altzairu herdoilgaitzezko apar-pitxer bat esne hotzarekin (esnekikoa edo esnekirik gabekoa) tutuaren azpiraino.
- Aktibatu Steam: Ensure the machine is preheated. Turn the steam knob to the steam position. Wait for the steam indicator light to illuminate steadily, indicating the machine has reached steaming temperature.
- Lurrun-haga garbitzeko: Briefly open the steam knob to release any condensed water from the wand into the drip tray, then close it.
- Esne apartsua: Insert the steam wand tip just below the surface of the milk. Open the steam knob fully. Move the pitcher up and down slightly to create foam.
- Berotu esnea: Once desired foam is achieved, lower the wand deeper into the milk to heat it without adding more air. Continue until the pitcher is hot to the touch.
- Utzi lurruntzeari: Close the steam knob, then remove the pitcher.
- Lurrun-haga garbia: Berehala garbitu lurrun-hagatxoa sprayarekinamp cloth to remove any milk residue. Briefly open the steam knob again to clear any milk from inside the wand, then close it.

4.4. irudia: A hand holding a frothing pitcher while the steam wand froths milk.
5. Mantentzea eta Garbiketa
Garbiketa erregularrak errendimendu optimoa bermatzen du eta espresso makinaren bizitza luzatzen du.
5.1 Eguneko garbiketa
- Portafiltroa eta iragazki-saskiak: Erabilera bakoitzaren ondoren, kendu iragazki-eramailea, bota kafe-hondarra eta garbitu iragazki-eramailea eta iragazki-saskia ur beroaren azpian.
- Lurrun-makila: As described in section 4.3, clean immediately after each use.
- Tantaketarako erretilua: Hustu eta garbitu tanta-erretilua egunero edo adierazlea gora agertzen denean.
- Kanpoaldea: Garbitu makinaren kanpoaldea leun batekin, damp oihal. Ez erabili garbitzaile urratzaileak edo zurgatzaileak.
5.2 Kalifikatzailea
Denborarekin, mineral-gordailuak (kare-hondakinak) pilatu daitezke makinan, eta horrek eragin dezake errendimenduan. Deskaltzifikatu makina 2-3 hilabetero, edo maizago ur gogorra baduzu.
- Use a commercially available descaling solution specifically designed for espresso machines. Follow the manufacturer's instructions for mixing the solution with water.
- Bete ur-biltegia deskalifikatzeko soluzioarekin.
- Jarri ontzi handi bat iragazki-portatilaren eta lurrun-hagaren azpian.
- Run half of the solution through the portafilter by pressing the double shot button.
- Open the steam knob to run the remaining solution through the steam wand.
- Itzali makina eta utzi 15-20 minutuz.
- Empty and rinse the water tank thoroughly. Fill it with fresh water.
- Repeat steps 3-5 with fresh water to rinse the machine completely.
6. Arazoak
Makinarekin arazoak badituzu, jo ezazu honako arazo eta irtenbide ohikoenei.
| Arazoa | Kausa posiblea | Irtenbidea |
|---|---|---|
| Ez dago kafe-banaketarik | No water in tank; Clogged filter; Machine not primed. | Fill water tank; Clean filter basket; Prime the machine. |
| Kafea polikiegi prestatzen da edo batere ez da prestatzen | Kafearen hondarrak oso finak edo txarrak diraampGogorregi garbitu da; Iragazkia buxatuta dago. | Erabili ehotze lodiagoa; Tamp less firmly; Clean filter. |
| Coffee brews too quickly, weak coffee | Kafearen hondarrak lodiegiak edo kafe nahikorik ez; Ez daampnahikoa ed. | Erabili ehotze finagoa; Erabili kafe gehiago; Tamp sendoago. |
| Ez dago lurrunik makiletik | Lurrun-haga buxatuta dago; Makina ez dago lurruntzeko tenperaturan. | Clean steam wand; Wait for steam indicator light to be solid. |
| Makinatik ura isurtzen | Water tank not seated correctly; Drip tray full; Portafilter not secured. | Reseat water tank; Empty drip tray; Secure portafilter firmly. |
Konponbide hauek saiatu ondoren arazoa konpontzen ez bada, jarri harremanetan bezeroarentzako arreta-zerbitzuarekin.
7. Zehaztapenak
Technical details for the CREATE Thera Classic Espresso Machine.

7.1. irudia: Dimensional drawing of the espresso machine, indicating height, width, and depth measurements.
- Marka: SORTU
- Modelo zenbakia: AXleftj (also 59225_115714)
- Estiloa: KLASIKOA
- Potentzia: 1100 W
- liburukiatage: 240 V
- Presioa: 20 bar
- Ur deposituaren edukiera: 1.25 litro
- Produktuaren neurriak: 30.1 x 20.2 x 31.3 cm (L x W x H)
- Pisua: 4.5 kg
- Materiala: Altzairu herdoilgaitza
- Bateragarritasuna: Ground coffee and ESE single-dose pods
8. Bermea eta Laguntza
For warranty information, please refer to the documentation provided at the time of purchase. This typically includes details on coverage period and terms.
For technical support, spare parts, or service inquiries, please visit the official CREATE website or contact their customer service department. Contact details can usually be found on the product packaging or the manufacturer's webgunea.