1. Sarrera
This manual provides essential information for the safe and efficient operation, setup, maintenance, and troubleshooting of your Scheppach HC26 Compressor Air Compressor. Please read this manual thoroughly before operating the device to ensure proper use and to prevent injury or damage.

Figure 1: Scheppach HC26 Compressor Air Compressor. This image shows the main unit with its 24-liter tank, motor housing, pressure gauges, and wheels, alongside a small container, likely for compressor oil.
2. Segurtasun-argibideak
Beti jarraitu oinarrizko segurtasun neurriak tresna elektrikoak erabiltzean, sute, deskarga elektriko eta lesio pertsonalen arriskua murrizteko.
- Irakurri argibide guztiak: Ohitu zaitez konpresorearen kontrolak eta erabilera egokia ezagutzen.
- Segurtasun elektrikoa: Ensure the power supply matches the specifications (230V). Do not operate in wet conditions.
- Norberaren Babeserako Ekipamendua (PPE): Always wear safety glasses or goggles. Hearing protection is recommended during extended use.
- Presioaren Segurtasuna: Never exceed the maximum working pressure of 8 bar. Do not direct compressed air at people or animals.
- Mantentzea: Disconnect from power before performing any maintenance or adjustments.
- Aireztapena: Erabili konpresorea ondo aireztatutako gune batean gehiegi berotzea saihesteko.
- Egonkortasuna: Ensure the compressor is on a stable, level surface during operation.
3. Produktua amaitu daview
3.1 Ezaugarri nagusiak
- Max. Working pressure: 8 bar
- Kettle size: 24 L
- Oil-lubricated piston compressor for durability and long-lasting performance.
- Quick connection coupling for fast and easy tool changes.
- Driving device (wheels) and ergonomic handle for easy transport.
- Motor Power: 1500 W (2.0 HP)
- Suction Power: 220 L/min
3.2 Osagaiak
The Scheppach HC26 compressor includes the main compressor unit with a 24L tank, motor, pressure gauges, pressure regulator, quick coupling, wheels, and a transport handle.

Figure 2: Pressure Gauge and Quick Coupling. This close-up shows the pressure gauge indicating tank pressure and the quick connection coupling for attaching pneumatic tools.
4. Konfigurazioa
- Despaketatzea: Kontu handiz atera konpresorea eta osagarri guztiak paketetik. Begiratu bidalketa-kalterik dagoen.
- Gurpilen muntaia: Attach the wheels to the designated axles on the compressor base. Secure them firmly according to the included hardware.
- Olio betetzea: As an oil-lubricated compressor, ensure the crankcase is filled with the appropriate compressor oil to the correct level before first use. Refer to the oil level indicator.
- Lekua: Position the compressor on a firm, level surface in a well-ventilated area, away from walls or obstructions to allow for proper airflow.
- Konexio elektrikoa: Connect the compressor to a grounded 230V, 50Hz power outlet.
5. Funtzionamendu-argibideak
- Hasierako hasiera: After setup, turn on the compressor. It will begin to build pressure in the tank. The motor will automatically shut off once the maximum pressure (8 bar) is reached.
- Irteerako presioa doitzea: Use the pressure regulator knob to set the desired output pressure for your pneumatic tool. Monitor the regulated pressure gauge.
- Konektatzeko tresnak: Attach your pneumatic tool to the quick connection coupling. Ensure a secure connection.
- Eragiketa: Begin using your tool. The compressor motor will cycle on and off automatically to maintain tank pressure as air is consumed.
- Itzaltzea: When finished, turn off the compressor. Disconnect the tool and then unplug the compressor from the power outlet.
- Kondentsatua hustea: After each use, or at least daily, drain any accumulated moisture from the tank using the drain valve located at the bottom of the tank. This prevents rust and extends tank life.
5.1 Aplikazio arruntak
- Pneumatikoen inflazioa: Ideal for inflating vehicle tires, bicycle tires, and sports equipment.
- Nailing/Stapling: Powers pneumatic nailers and staplers for various woodworking and construction tasks.
- Spray pintura: Suitable for use with spray guns for painting projects.
- Blowing/Cleaning: Effective for blowing dust and debris from workspaces, tools, and machinery.
- Pneumatic Ratchets: Can power small pneumatic ratchets for mechanical work.

3. irudia: Aplikazioaren adibideaamples. This diagram visually represents common uses for the air compressor, including powering nail guns, pneumatic ratchets, spray guns, and for tire inflation and general blowing tasks.
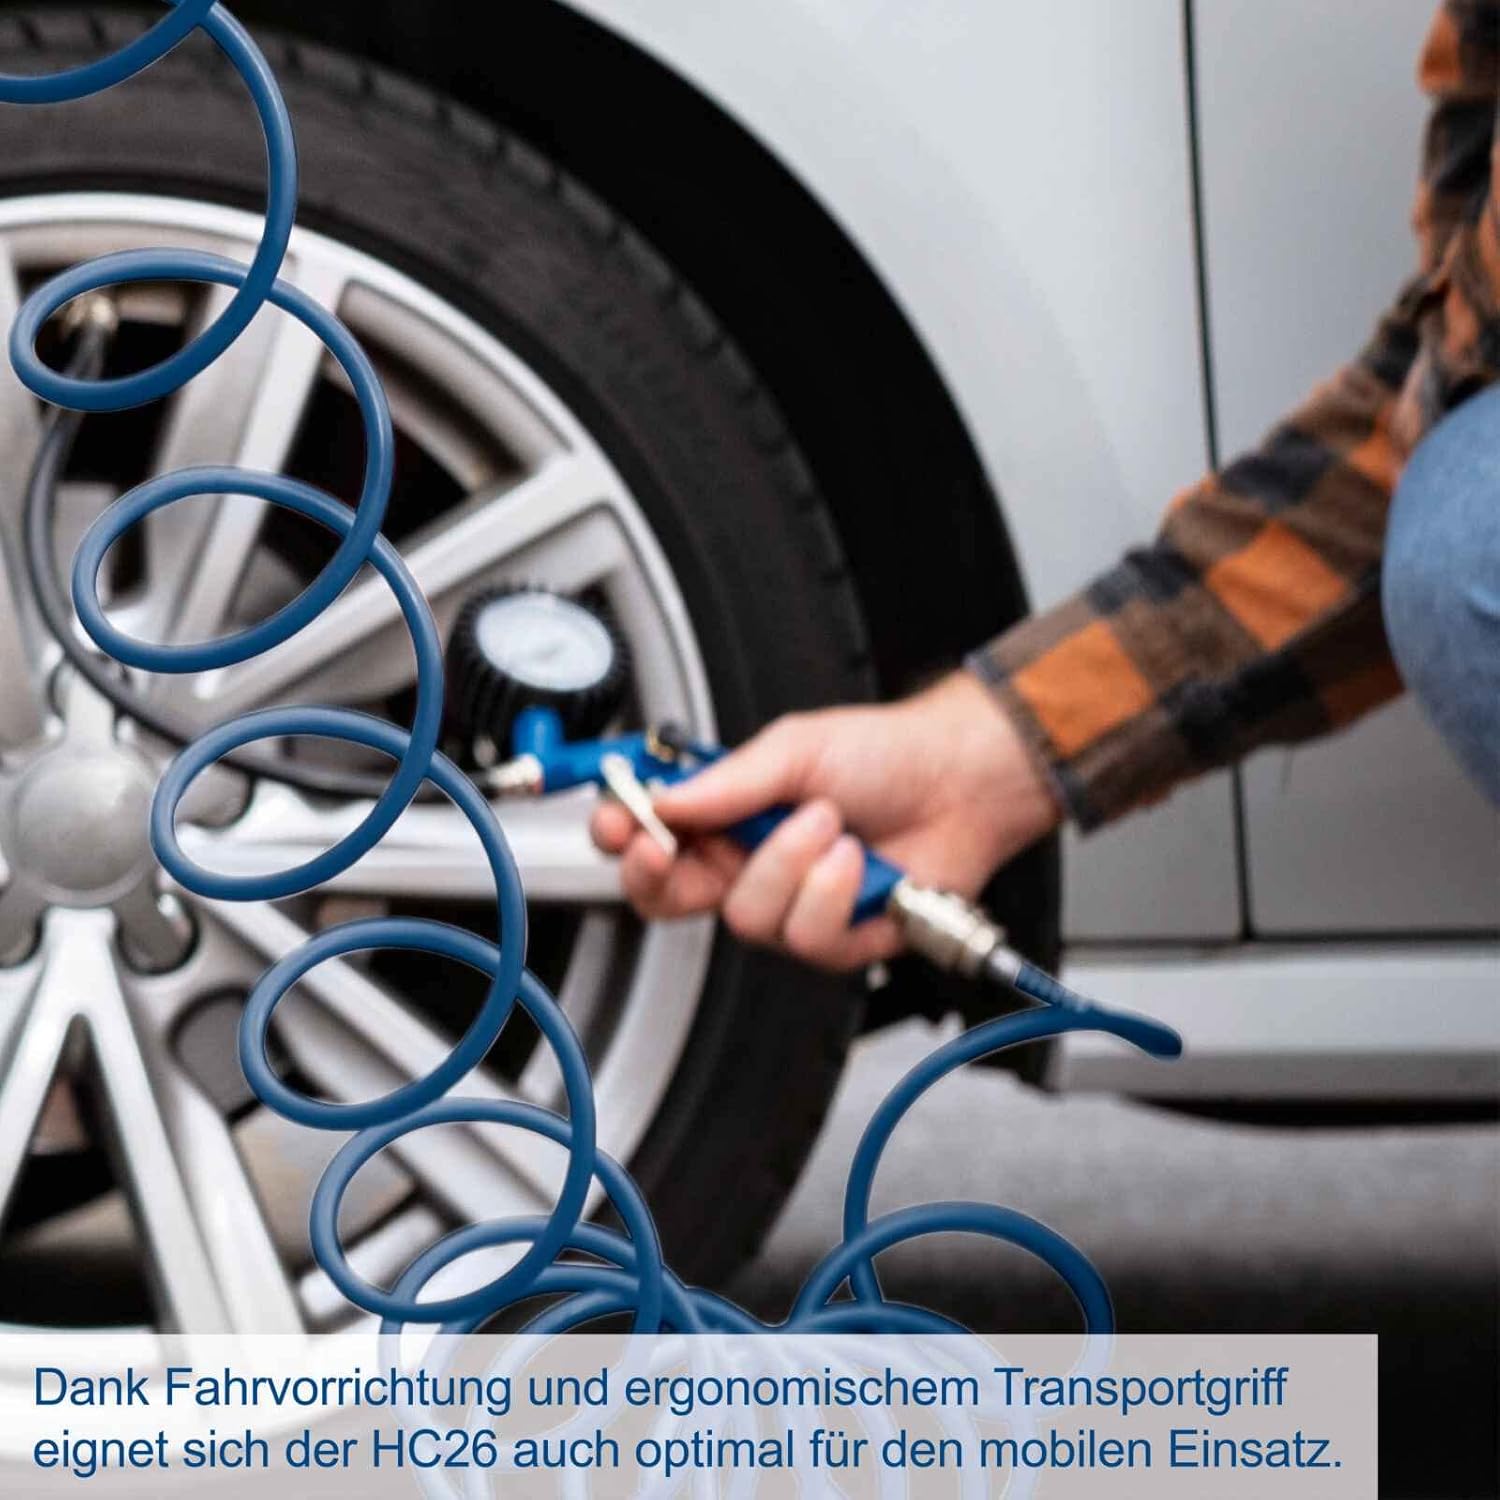
Figure 4: Mobile Use. A user is shown inflating a car tire, demonstrating the compressor's suitability for mobile applications thanks to its wheels and handle.
6. Mantentzea
Mantentze-lan erregularrak zure aire-konpresorearen iraupena eta errendimendu optimoa bermatzen ditu. Deskonektatu beti korrontea edozein mantentze-lan egin aurretik.
- Kondentsatua hustu: Daily or after each use, open the drain valve at the bottom of the tank to release accumulated moisture.
- Egiaztatu olio maila: Regularly check the oil level in the crankcase. Refill or change oil as needed, using only recommended compressor oil.
- Garbitu aire-iragazkia: Inspect and clean the air filter regularly. A clogged filter reduces efficiency and can damage the motor. Replace if necessary.
- Garbiketa orokorra: Keep the compressor clean and free of dust and debris. Wipe down exterior surfaces.
- Mahuka eta konexioak ikuskatu: Periodically check all hoses and fittings for leaks, cracks, or damage. Replace any worn parts.

Figure 5: Portability and Maintenance. This graphic highlights the compressor's ease of transport and its design for straightforward maintenance.
7. Arazoak
Bezeroarentzako arreta-zerbitzura jo aurretik, kontsultatu hurrengo taula arazo ohikoenak eta haien irtenbideak ikusteko.
| Arazoa | Kausa posiblea | Irtenbidea |
|---|---|---|
| Konpresorea ez da martxan jartzen. | Argirik ez, etengailu elektrikoa jauzi egin du, etengailu akastuna. | Egiaztatu konexioa, berrezarri etengailua, jarri harremanetan zerbitzuarekin etengailua akastuna bada. |
| Konpresorea etengabe edo maiz funtzionatzen du. | Air leak in system, check valve issue, excessive air demand. | Check hoses and fittings for leaks, inspect check valve, reduce air consumption. |
| Aire-presio baxua. | Aire-iragazkia buxatuta, aire-ihesa, presio-erreguladorea baxuegi jarrita. | Aire-iragazkia garbitu/ordezkatu, ihesak egiaztatu, presio-erreguladorea doitu. |
| Gehiegizko zarata edo bibrazioa. | Loose components, worn parts, insufficient oil. | Tighten fasteners, inspect for worn parts, check and add oil if needed. |
8. Zehaztapen Teknikoak
| Zehaztapena | Balioa |
|---|---|
| Ereduaren izena | HC26 (5906135901) |
| Marka | Scheppach |
| liburukiatage | 230 Volt |
| Motor Zaldia | 1500 W (2.0 HP) |
| Max. Lan-presioa | 8 bar |
| Tankaren Edukiera | 24 litro |
| Air Flow Capacity (Suction) | 220 PM |
| Elementuaren pisua | 1 kilogramo (gutxi gorabehera 2.2 libera) |
| Produktuaren neurriak | 0.04"L x 0.04"W x 0.04"H (Note: These dimensions appear to be placeholder values and may not reflect the actual size of the compressor.) |
| Ezaugarri Berezia | Durable, Oil-lubricated piston compressor |

Figure 6: Key Specifications. This infographic highlights the maximum 8 bar working pressure, 220 L/min suction power, and 24 L tank volume. Please note the discrepancy regarding 'Oil-free' in the image versus 'Oil Lubricated' in the product description; the product is confirmed to be oil-lubricated.
9. Bermea eta Laguntza
For warranty information, technical support, or to order replacement parts, please contact Scheppach customer service. Retain your proof of purchase for warranty claims.
For the most up-to-date contact information, please visit the official Scheppach webgunea edo erosketarekin batera datorren dokumentazioa kontsultatu.


