1. Sarrera eta Overview
The Outsunny 20' x 10' x 7' Walk-in Tunnel Greenhouse (Model 845-233WT) is designed to provide a protected and controlled environment for cultivating plants. This manual offers comprehensive instructions for the assembly, operation, maintenance, and troubleshooting of your greenhouse to ensure its proper use and extended lifespan. This greenhouse features a spacious walk-in design, a durable galvanized steel frame, a tough PE plastic cover, a zippered roll-up door, and eight roll-up mesh windows for optimal ventilation.
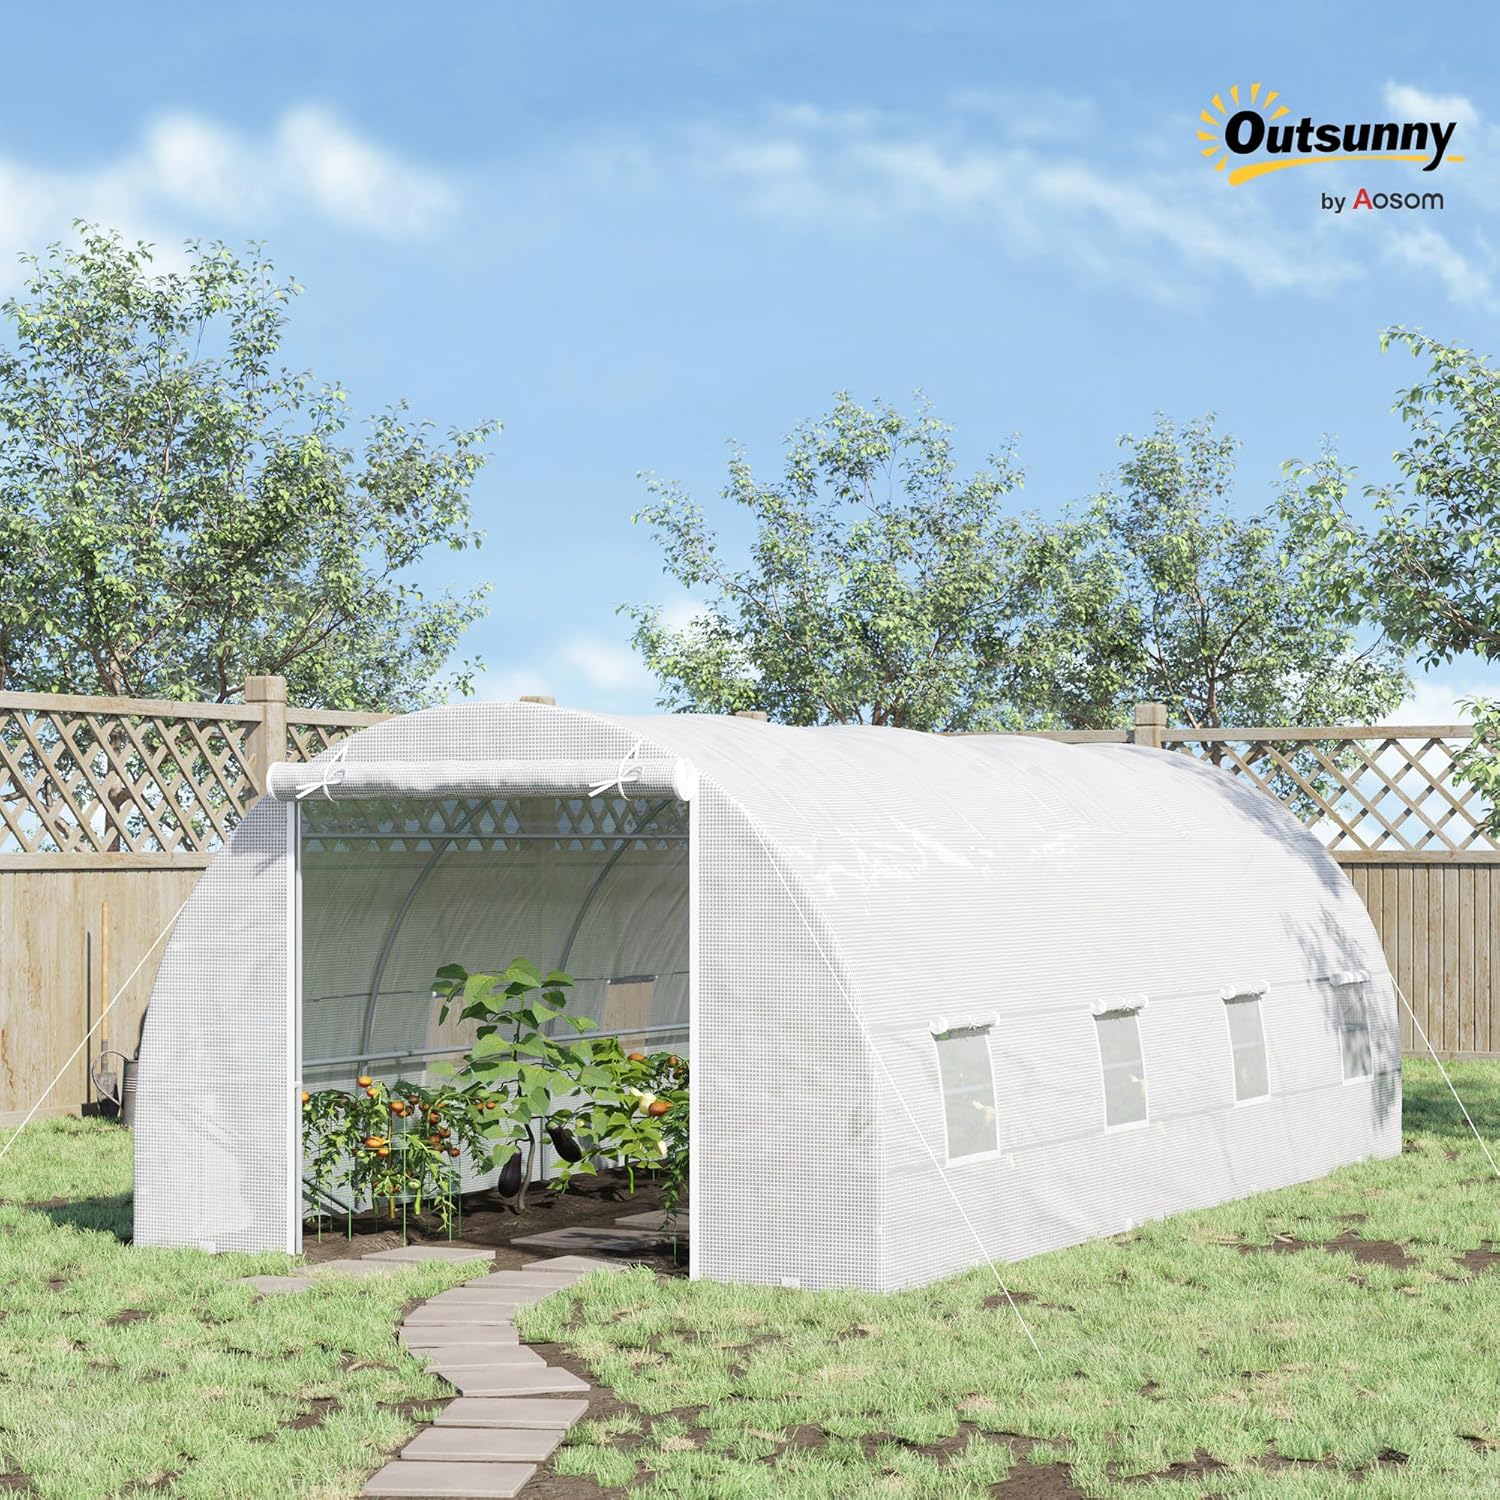
Image 1.1: The Outsunny Walk-in Tunnel Greenhouse installed in a garden.
2. Segurtasun informazioa
Please read and understand all safety warnings and instructions before assembling or operating this greenhouse. Failure to follow these instructions may result in injury or damage to the product.
- Always assemble the greenhouse with at least two people.
- Do not attempt to assemble or disassemble the greenhouse during strong winds, heavy rain, or snow.
- Ensure the greenhouse is securely anchored to the ground using the provided screw stakes, rods, and by burying the overlong cover edges.
- Take down the structure before snow storms, strong wind, and heavy rain to prevent damage.
- Mantendu haurrak eta maskotak muntaketa gunetik urrun.
- 65. Proposamenaren abisua: Produktu honek beruna barne hartzen duten produktu kimikoekin kontaktuan jar zaitzake, eta Kaliforniako Estatuak minbizia eta jaiotzetiko akatsak edo bestelako ugalketa-kalteak eragiten dituela ezagutzen du. Informazio gehiago lortzeko, joan honera www.P65Warnings.ca.gov.
3. Paketearen edukia
Muntaketa hasi aurretik, egiaztatu osagai guztiak daudela eta kalterik gabe daudela. Piezarik falta edo kaltetuta badago, jarri harremanetan bezeroarentzako arreta-zerbitzuarekin.
- Altzairu galbanizatuzko markoaren osagaiak (hodi eta konektore desberdinak)
- PE Plastic Cover (White)
- Tether Balls
- Double-Side Tape
- Screw Stakes (4)
- Hagaxkak (4)
- Guy Ropes
- Spiral Ground Stakes
- Muntaketa-hardwarea (torlojuak, azkoinak, etab.)

Image 3.1: Key components for assembly and anchoring.
4. Muntaketa eta konfigurazio argibideak
Follow these steps carefully for proper assembly. It is recommended to have at least two people for this process.
- Gunea prestatu: Aukeratu eremu laua eta ondo drainatua zure negutegirako. Garbitu hondakinak edo objektu zorrotzak.
- Markoa muntatu: Connect the galvanized steel pipes according to the diagram provided in your separate assembly guide. Ensure all connections are secure. The frame includes 4 slant bracing tubes, a front cross bar, and middle reinforced tubes for enhanced stability.
- PE estalkia instalatu: Carefully drape the PE plastic cover over the assembled frame. Ensure it is centered and evenly distributed. The cover is designed to protect plants while allowing nourishing sunlight to pass through.
- Ziurtatu estalkia: Attach the cover to the frame using the included tether balls and double-side tape. Ensure the cover is taut to prevent water pooling.
- Ainguratu Berotegia: The overlong edges of the cover should be deeply buried in the soil (approximately 30cm/11.75 inches) to provide a secure base. Additionally, use the 4 screw stakes and 4 rods to firmly anchor the greenhouse to the ground. Utilize the guy ropes and spiral ground stakes for extra stability, especially in areas prone to wind.

Image 4.1: Proper anchoring of the greenhouse cover by burying the extended edge and using ground stakes.

Image 4.2: The spacious interior of the greenhouse allows for comfortable plant care.
4.1. bideoa: Over batview of the Outsunny Walk-in Tunnel Greenhouse, showcasing its features and design. This video is provided by the seller, Aosom Direct.
5. Funtzionamendu-argibideak
Proper operation ensures the best growing conditions for your plants.
- Using the Roll-Up Zippered Door: The large zippered roll-up door provides easy access to the interior. Unzip the door and roll it up, securing it at the top to keep it open. This allows for easy entry, exit, and movement of equipment.
- Utilizing Roll-Up Mesh Windows: The greenhouse features eight roll-up windows with netting. These windows are crucial for cross-ventilation and climate control. Roll them up to allow air circulation and prevent overheating, while the netting keeps birds and larger insects out.
- Klima kontrola: Monitor the internal temperature and humidity. Adjust the number of open windows and the door position to maintain optimal conditions for your specific plants.

Image 5.1: Details of the roll-up mesh window and zippered door mechanisms.

Image 5.2: The large roll-up door provides convenient access.

Image 5.3: Mesh windows for ventilation and pest control.
6. Mantentzea
Regular maintenance will prolong the life of your greenhouse.
- Estalkia garbitzea: Periodically clean the PE plastic cover with mild soap and water to ensure maximum light transmission. Avoid abrasive cleaners or brushes that could damage the material.
- Markoaren ikuskapena: Regularly check the galvanized steel frame for any signs of rust, corrosion, or loose connections. Tighten bolts as needed.
- Ainguratze-egiaztapena: Inspect the ground anchors and buried cover edges periodically, especially after strong winds, to ensure the greenhouse remains securely fastened.
- Kremaileraren zainketa: Handle the zippers gently. If they become stiff, apply a silicone-based lubricant to ensure smooth operation. Avoid forcing stuck zippers.
- Eguraldirako prestaketa: As noted in safety, remove the cover during heavy snow, strong winds, or heavy rain to prevent structural damage.

Image 6.1: The PE cover offers tear-proof, heat preservation, UV protection, and bird-proof qualities.

Image 6.2: The galvanized steel frame provides stability and strength.
7. Arazoak
Atal honetan ohiko arazoei eta haien irtenbideei buruzko informazioa aurkituko duzu.
- Problem: Greenhouse instability or movement in wind.
Irtenbidea: Ensure all frame connections are tight. Verify that the overlong cover edges are deeply buried and that all screw stakes, rods, guy ropes, and spiral ground stakes are properly installed and secured. Consider adding additional weight to the base if in a very windy area. - Problem: Excessive heat buildup inside the greenhouse.
Irtenbidea: Open the roll-up mesh windows and the zippered door to increase air circulation. Consider adding a shade cloth over the top during peak summer months if temperatures remain too high. - Problem: Zippers are difficult to operate or have broken.
Irtenbidea: Apply a silicone-based lubricant to the zipper teeth to improve movement. Avoid forcing zippers. If a zipper is broken, it may require repair or replacement of the cover. - Problem: Water pooling on the roof of the greenhouse.
Irtenbidea: Ensure the PE cover is installed tautly and evenly over the frame. Check for any sagging areas and adjust the cover tension if possible. Clear any debris (leaves, branches) that may accumulate on the roof.
8. Zehaztapenak
| Ezaugarri | Xehetasuna |
|---|---|
| Modelo zenbakia | 845-233WT |
| Marka | Outtsunny |
| Neurriak (L x W x H) | 234.3" x 118.1" x 82.7" (20' x 10' x 7') |
| Elementuaren pisua | 67 kilo |
| Markoaren materiala | Aleaziozko altzairua (galbanizatua) |
| Estalkiaren materiala | Polietilenoa (PE) |
| Ate kopurua | 1 (Zippered Roll-Up) |
| Haize kopurua | 8 (Roll-Up Mesh Windows) |
| Barruko/Kanpoko erabilera | Kanpoan |
| Ezaugarri Berezia | Walk-in Design |

Image 8.1: Detailed dimensions of the greenhouse structure.
9. Bermea eta Laguntza
This product is backed by a 30-day easy returns policy. For any questions, missing parts, or support needs, please contact Outsunny customer service or the seller, Aosom Direct. Keep your purchase receipt for warranty claims.
Harremanetarako informazioa:
- Saltzailea: Aosom Direct
- Customer Support: Refer to your purchase documentation for specific contact details.