1. Segurtasun informazioa
Read all instructions carefully before beginning installation. Failure to follow these instructions may result in electrical shock, fire, or personal injury.
- Deskonektatu beti korrontea etengailutik edo fusible-kutxatik instalazioa edo mantentze-lanak egin aurretik.
- Kableatu guztiak estatuko eta tokiko araudi elektrikoen arabera egin behar dira. Kableatuarekin ohituta ez bazaude, kontsultatu elektrizista kualifikatu bati.
- Ensure the installation site can support the weight of the fan (approximately 3.53 kg).
- Ez erabili haizagailua palak edo karkasa hondatuta baditu.
- Maintain a minimum clearance of 7 feet (2.1 meters) from the floor to the bottom edge of the fan blades.
- Ez sartu objekturik haizagailuaren palen ibilbidean.
2. Paketearen edukia
Verify that all components listed below are present before beginning installation. If any parts are missing or damaged, do not proceed with installation and contact customer support.
- Motor-Etxebizitza Muntaia
- Fan Blades (4) - Reversible white/bleached oak
- Pala euskarriak (4)
- Downrod
- Kanoia
- Euskarria muntatzea
- Argi Kit Muntaketa
- Mushroom Globe Glass
- Tiratzeko kateak (2)
- Hardware paketea (torlojuak, arandelak, kable-azkoinak)
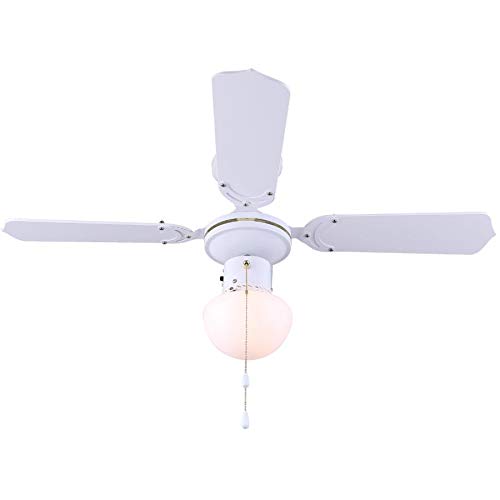
2.1 Irudia: Gainetikview of the Canarm Unity Ceiling Fan with Light, displaying the motor housing, four blades, and the central mushroom globe light.
3. Konfigurazioa eta instalazioa
Instalazio profesional bat egitea gomendatzen da. Jarraitu aurretik, ziurtatu etengailu elektrikoan korrontea deskonektatuta dagoela.
3.1 Haizagailua muntatzea
- Secure the mounting bracket to the ceiling junction box. Ensure the junction box is securely fastened to the building structure and can support the fan's weight.
- Pasa kable elektrikoak konexio-kutxatik muntatzeko euskarriaren erdiko zulotik.
- Attach the downrod to the motor housing, ensuring all screws are tightened.
- Carefully lift the fan assembly and hang it from the mounting bracket using the hook provided on the downrod.
3.2 Konexio elektrikoak
Connect the fan's electrical wires to the household wiring according to the following:
- Connect the green/bare copper wire (ground) from the fan to the ground wire from the junction box.
- Connect the white wire (neutral) from the fan to the white wire from the junction box.
- Connect the black wire (hot for fan) from the fan to the black wire from the junction box.
- Connect the blue wire (hot for light) from the fan to the black or blue wire from the junction box (if separate light switch).
- Secure all connections with wire nuts and ensure no loose strands of wire are exposed.
3.3 Haizagailuaren palak lotzea
- Attach each blade to a blade bracket using the provided screws. Ensure the desired blade finish (white or bleached oak) is facing downwards.
- Secure each blade assembly to the motor housing using the screws provided. Ensure all screws are tight.
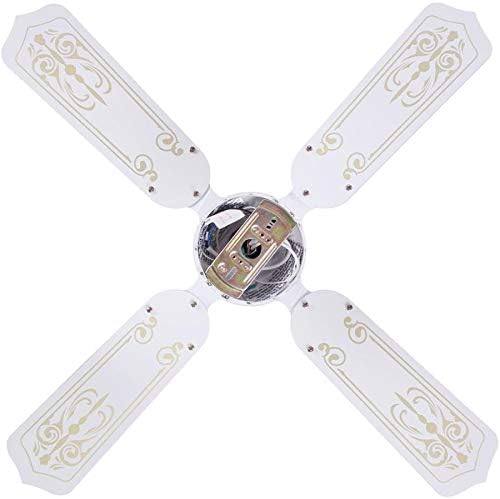

Figure 3.3: Images showing the blade attachment points on the motor housing (left) and the assembled blades from a top-down perspective (right).
3.4 Argi-kit-a instalatzea
- Connect the light kit wires to the corresponding wires from the fan motor housing (usually white to white, blue to black).
- Secure the light kit assembly to the bottom of the motor housing with the provided screws.
- Install the appropriate light bulb(s) (not included) into the sockets.
- Carefully attach the mushroom globe glass to the light kit by twisting or securing with screws, depending on the design.

3.4. irudia: hurbileko planoa view of the fan's light kit with the mushroom globe glass.
3.5 Azken urratsak
- Carefully slide the canopy up against the ceiling and secure it with the provided screws.
- Berrezarri energia etengailuan.
4. Funtzionamendu-argibideak
The Canarm Unity ceiling fan is operated by two pull chains.
- Fan abiadura kontrola: One pull chain controls the fan speed. Pull the chain repeatedly to cycle through the three available speeds (High, Medium, Low) and Off.
- Argiaren kontrola: The second pull chain controls the light. Pull the chain to turn the light On or Off.
- Blade Reversal: To change the direction of the fan blades (e.g., for summer cooling or winter heat circulation), locate the slide switch on the motor housing. With the fan off, slide the switch to the opposite position. This fan features reversible white/bleached oak blades.

Figure 4.1: The Canarm Unity fan installed, demonstrating its function within a living space.
5. Mantentzea
Mantentze-lan erregularrak errendimendu optimoa bermatzen du eta zure sabaiko haizagailuaren bizitza luzatzen du.
- Garbiketa: Aldian-aldian garbitu haizagailuaren palak eta motorraren karkasa oihal leun eta lehor batekinamp oihal. Ez erabili garbitzaile edo disolbatzaile urratzailerik.
- estutze torlojuak: Check all screws on the blade attachments and mounting hardware annually. Tighten any loose screws to prevent wobbling or noise.
- Bonbillaren ordezkoa: Disconnect power before replacing light bulbs. Allow bulbs to cool before handling. Use bulbs of the correct wattage and type as specified in the fan's electrical ratings.
6. Arazoak
Konponketarik egin aurretik, ziurtatu zirkuitu-hauslean korrontea deskonektatuta dagoela.
| Arazoa | Kausa posiblea | Irtenbidea |
|---|---|---|
| Fan ez da martxan jartzen | No power to the fan; Loose wire connections; Motor malfunction | Check circuit breaker/fuse; Verify all wire connections are secure; Contact a qualified electrician or customer support. |
| Argiak ez du funtzionatzen | Bulb faulty or loose; Loose wire connections; Light kit malfunction | Replace bulb; Tighten bulb; Check light kit wiring; Contact customer support. |
| Fan dabil | Pala-torloju solteak; Palak desorekatuak; Muntatzeko euskarri soltea | Tighten all blade screws; Ensure blades are balanced (balancing kit may be needed); Verify mounting bracket is secure. |
| Funtzionamendu zaratatsua | Loose screws; Motor bearings; Canopy rubbing ceiling | Check and tighten all screws; Ensure canopy is not touching the ceiling; If motor noise persists, contact customer support. |
7. Zehaztapenak
| Marka | Canarm |
| Modelo zenbakia | CF2336411L |
| Produktuaren neurriak | 91.44 x 91.44 x 20.32 cm (36 x 36 x 8 hazbete) |
| Elementuaren pisua | 3.53 kg |
| Kolorea | Zuria |
| Pala kopurua | 4 |
| Blade akabera | Reversible White/Bleached Oak |
| Abiadura kopurua | 3 |
| Potentzia/Wattage | 60 watt |
| Muntatze Mota | Downrod mendia |
| Kontrolagailu mota | Pull Chain Kontrola |
8. Bermea eta Laguntza
This product is covered by the manufacturer's standard warranty. Please refer to the warranty card included in your original packaging for specific terms and conditions.
For technical assistance, missing parts, or warranty claims, please contact Canarm customer support. Contact information can typically be found on the manufacturer's webgunean edo produktuaren ontzian.
Mesedez, gorde eskuliburu hau etorkizuneko erreferentzia izateko.


