1. Sarrera
Thank you for choosing the Offgridtec MPPT Pro Duo charge controller. This device is designed to efficiently manage solar power input to charge two independent battery banks, typically a main service battery and a starter battery, in 12V or 24V systems. It utilizes Maximum Power Point Tracking (MPPT) technology to optimize energy harvest from your solar panels. Please read this manual thoroughly before installation and operation to ensure safe and optimal performance.

1. irudia: Aurrealdea view of the Offgridtec MPPT Pro Duo Charge Controller.
2. Segurtasun-argibideak
Always observe the following safety precautions to prevent personal injury or damage to the controller and connected equipment:
- Instalazioa langile kualifikatuek bakarrik egin behar dute.
- Ensure all power sources (solar panels, batteries) are disconnected before installation or maintenance.
- Erabili tresna egokiak eta jantzi babes-ekipoak.
- Do not disassemble or attempt to repair the controller. Contact Offgridtec support for assistance.
- Ziurtatu kontrolatzailearen inguruan behar bezala aireztatuta dagoela gehiegi berotzea saihesteko.
- Connect batteries with correct polarity. Reverse polarity can cause severe damage.
- Use fuses or circuit breakers on all battery and solar panel connections as recommended by local regulations and system design.
- Avoid short-circuiting battery terminals or solar panel wires.
- Keep the controller away from flammable materials, moisture, and direct sunlight.
3. Produktua amaitu daview
3.1 Ezaugarri nagusiak
- Dual battery charging: Charges both main (service) and starter batteries.
- MPPT Technology: Maximizes power harvest from solar panels.
- Supports 12V and 24V systems.
- Maximum charge current up to 30A.
- Adaptive three-level charging for extended battery life.
- Supports various battery types: Gel, Flooded, LiFePO4, Li-NiCoMn (for main battery).
- Secondary charge output for starter battery (supports lead-acid).
- Optional remote display and Bluetooth compatibility (accessories required).
- AES control signal for car refrigerators to prevent energy waste.
- Standard bus protocol and RS485 communication connection.
- Robust aluminum heatsink design for efficient cooling.
- Overload, reverse polarity, and deep discharge protection.
3.2 Osagaiak
The Offgridtec MPPT Pro Duo charge controller includes:
- MPPT Pro Duo Charge Controller unit.
- Konexio terminalak.
- Integrated LED status indicators.
- SET button for battery type selection.
- Temperature sensor ports (one with integrated sensor, one for external).
- RS485 komunikazio ataka.
- AES signal output port.
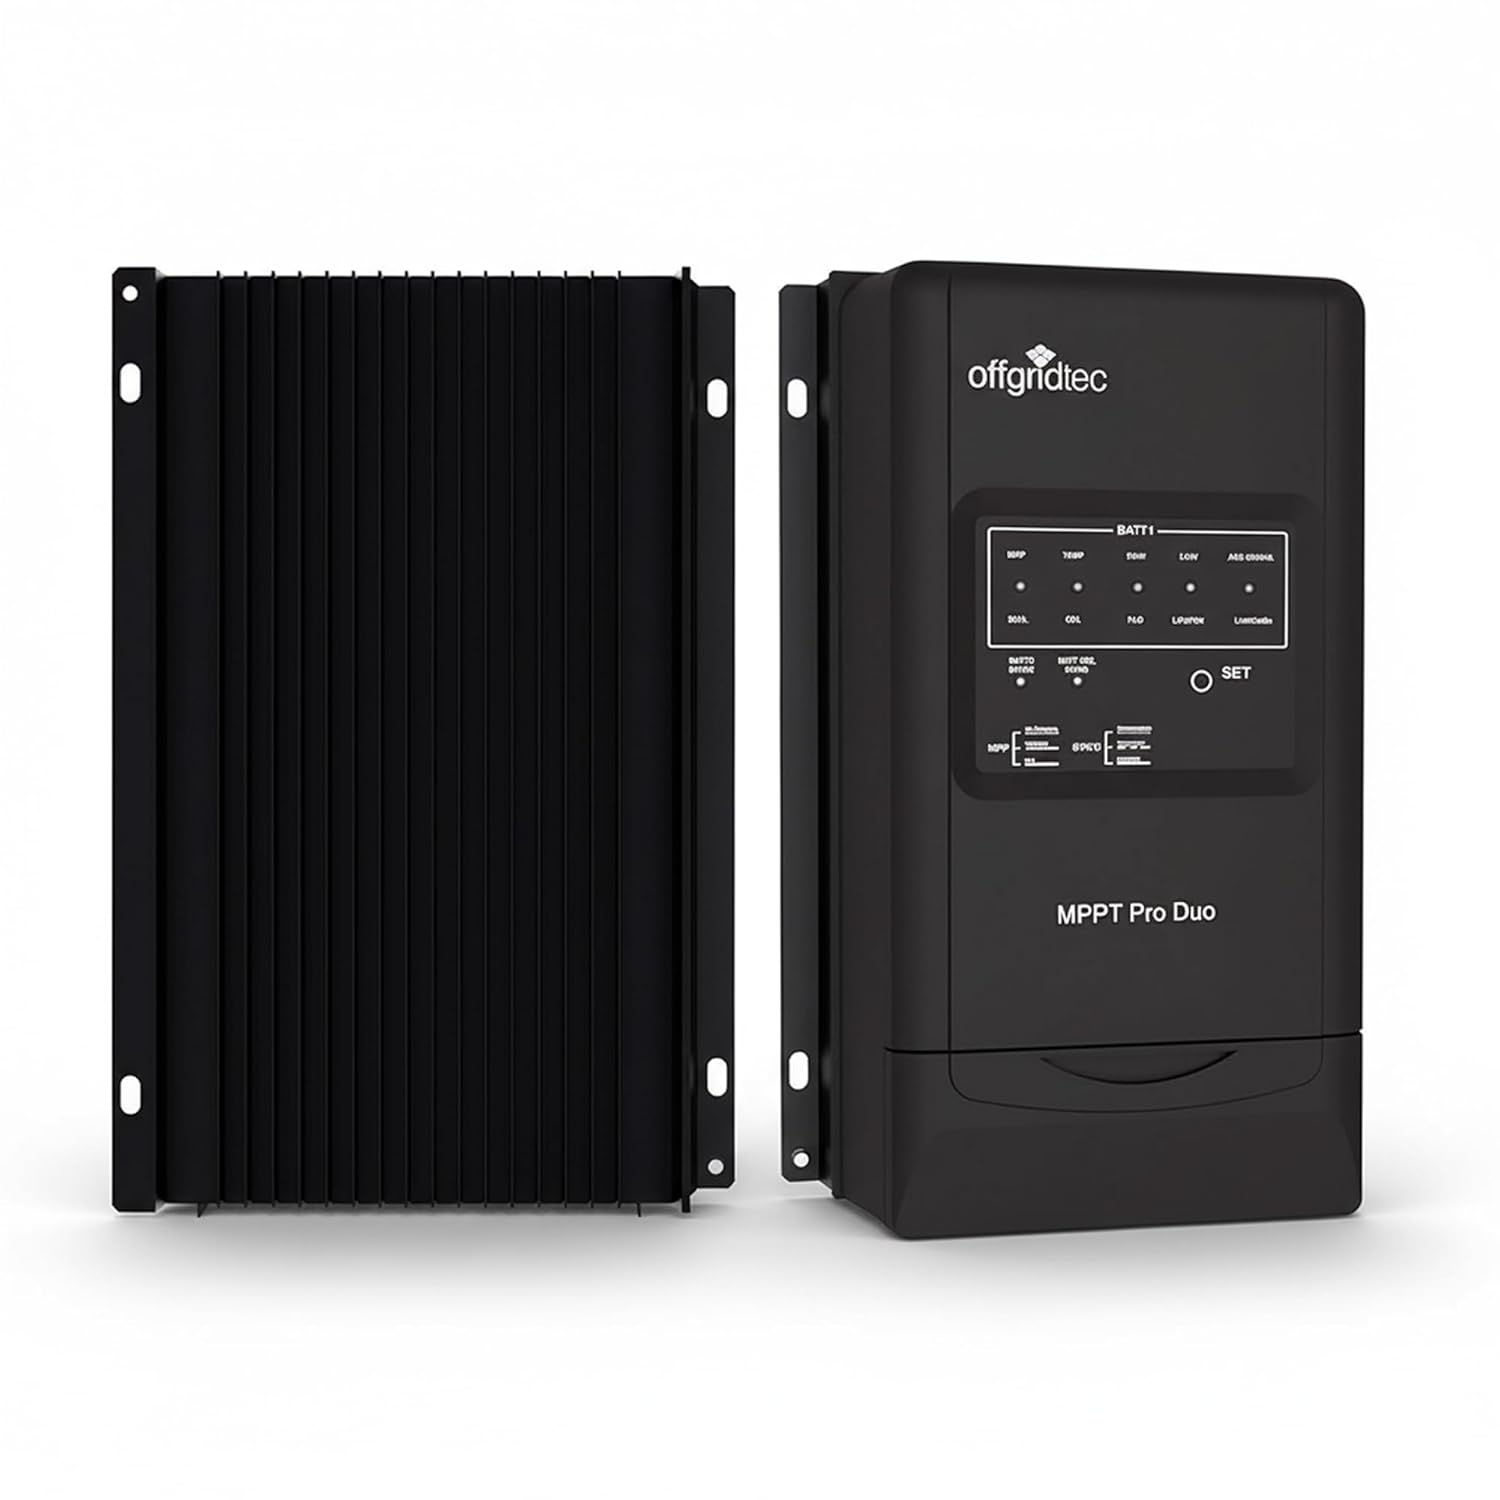
2. irudia: Aurrealdea eta atzealdea view of the charge controller, highlighting the heatsink design.
4. Konfigurazioa eta instalazioa
Proper installation is crucial for the safe and efficient operation of your charge controller. Ensure all safety instructions are followed.
4.1 Muntatzeko kokapena
- Mount the controller vertically on a non-flammable surface.
- Ensure adequate air circulation around the heatsink for optimal cooling.
- Avoid locations exposed to direct sunlight, high temperatures, or moisture.
- Dimensions: 24.7 cm (L) x 16.5 cm (W) x 6.9 cm (H).
- Mounting holes diameter: 5 mm.

Figure 3: Physical dimensions of the MPPT Pro Duo charge controller, showing the aluminum heatsink.
4.2 Kableatu diagrama eta konexioak
Follow the wiring sequence below. Incorrect wiring can damage the controller or batteries.
- Connect Battery 1 (Main/Service Battery): Connect the positive and negative terminals of your main battery to the BATT1 terminals on the controller. Use appropriate cable gauge (e.g., 16 mm² / AWG6). Ensure correct polarity.
- Connect Battery 2 (Starter Battery): Connect the positive and negative terminals of your starter battery to the BATT2 terminals on the controller. Use appropriate cable gauge (e.g., 4 mm² / AWG12). Ensure correct polarity.
- Connect Solar Panels (PV): Connect the positive and negative terminals of your solar panel array to the PV terminals on the controller. Ensure the open-circuit voltagZure eguzki-panelen tentsioak ez du 100V-tik gorako tentsioa gainditzen.
- Connect Temperature Sensors: The controller includes ports for temperature sensors. Connect the provided sensor to monitor battery temperature for optimized charging.
- Aukerako konexioak:
- RS485 komunikazioa: For connecting an optional remote display or USB adapter for PC communication.
- AES Signal Output: For controlling car refrigerators to prevent excessive discharge of the main battery.
- Lurreratzea: Ensure the controller is properly grounded (negative grounding).

Figure 4: Simplified wiring diagram showing connections from solar panel to controller and dual batteries.

5. irudia: Adibample installation of the charge controller in a recreational vehicle.
5. Funtzionamendu-argibideak
5.1 Hasierako piztea
After all connections are securely made, connect the battery power first, then the solar panel power. The controller will perform a self-test, and the LED indicators will illuminate.
5.2 Setting Battery Type (BATT1)
The controller supports various battery types for the main battery (BATT1). To select the correct battery type:
- Eduki sakatuta EZARTU button for approximately 5 seconds until the battery type indicator starts flashing.
- Sakatu EZARTU button repeatedly to cycle through the available battery types (Gel, Flooded, LiFePO4, Li-NiCoMn).
- Once the desired battery type is selected, wait for 5 seconds without pressing any button. The indicator will stop flashing, and the setting will be saved.
The secondary battery (BATT2) is typically charged as a lead-acid battery and does not require specific type selection.
5.3 LED adierazleak
The front panel features LED indicators to show the operational status:
- PV Status LED: Eguzki-panelen sarreraren egoera adierazten du.
- BATT1 Status LEDs: Show the charging stage and state of charge for the main battery.
- BATT2 Status LED: Indicates charging status for the starter battery.
- Errorearen LEDa: Illuminates to indicate a fault or warning. Refer to the troubleshooting section.

Figure 6: Installed charge controller showing illuminated LED indicators.
5.4 Kargatze-prozesua
The MPPT Pro Duo uses an adaptive three-level charging algorithm to optimize battery health and lifespan. It prioritizes charging the main battery (BATT1) and then provides a maintenance charge to the starter battery (BATT2).
- Bulk karga: Bateria azkar kargatzeko korronte maximoa ematen du.
- Xurgapen karga: Bolumen konstantea mantentzen dutage to fully charge the battery without overcharging.
- Karroza kargatzea: Bolumena murrizten dutage to a lower level to maintain the battery at full charge and compensate for self-discharge.
6. Mantentzea
Regular maintenance ensures the longevity and optimal performance of your charge controller:
- Ikus-ikuskapena: Periodically check for loose connections, damaged wiring, or signs of corrosion.
- Garbiketa: Keep the controller clean and free of dust. Use a dry cloth to wipe the exterior. Do not use liquids or solvents.
- Aireztapena: Ensure the heatsink fins are not obstructed to allow for proper heat dissipation.
- Konexioaren egiaztapena: Verify that all terminal connections are tight and secure.
- Bateria osasuna: Monitor the health of your batteries. A failing battery can affect the performance of the entire system.
7. Arazoak
If you encounter issues with your MPPT Pro Duo, refer to the following common problems and solutions:
| Arazoa | Kausa posiblea | Irtenbidea |
|---|---|---|
| No LED indicators lit. | Ez dago bateriarik edo eguzki-paneletatik energiarik; polaritatea alderantzizkoa da. | Check battery and solar panel connections and polarity. Ensure fuses are intact. |
| Bateriak ez dira kargatzen. | Low solar input; incorrect battery type setting; loose connections; faulty solar panel or battery. | Verify solar panel output. Check battery type setting. Inspect all wiring. Test solar panels and batteries independently. |
| Error LED is lit. | Gainkarga, zirkuitu laburra, gain-boltage, over-temperature, or other system fault. | Disconnect all power, inspect wiring for shorts or damage. Allow controller to cool if overheating. Reconnect power in correct sequence. If error persists, contact support. |
| Bluetooth connection issues (with optional adapter). | Incorrect password; app not installed correctly; location services disabled for app. | Try alternative passwords (refer to adapter manual). Reinstall the app. Enable location services for the app on your mobile device. |
| Secondary battery (BATT2) not charging or charging slowly. | Main battery (BATT1) not fully charged; low solar input; faulty BATT2 connection. | Ensure BATT1 is adequately charged. Verify solar input. Check BATT2 wiring and health. Note that BATT2 receives a compensatory charge after BATT1. |
If the problem persists after attempting these solutions, please contact Offgridtec customer support.
8. Zehaztapenak
| Parametroa | Balioa |
|---|---|
| Eredua | MPPT Pro Duo 12V/24V 30A |
| Sistema Boltage | 12V / 24V (Auto-sensing) |
| Max. Karga Korrontea | 30A |
| Max. PV Input Power (12V System) | 390W |
| Max. PV Input Power (24V System) | 780W |
| Max. PV Zirkuitu Irekia Voltage | 100V |
| Lurreratzea | Negatiboa |
| Supported Battery Types (BATT1) | Gel, Flooded, LiFePO4, Li-NiCoMn |
| Supported Battery Types (BATT2) | Berun-azidoa |
| Eraginkortasuna | Gehienez %98 |
| Neurriak (L x W x H) | 24.7 cm x 16.5 cm x 6.9 cm |
| Pisua | 1.4 kg |
| Funtzionamendu-tenperatura | Gehienez 60 gradu Celsius |
| Energia-kontsumoa | 26 mA (12V), 15 mA (24V) |
| Fabrikatzailea | Offgridtec GmbH |
| Product Reference / Model Number | 011200 |
9. Bermea eta Laguntza
For warranty information, please refer to the terms and conditions provided at the time of purchase or contact Offgridtec GmbH directly. Keep your proof of purchase for any warranty claims.
For technical support, troubleshooting assistance beyond this manual, or inquiries about accessories, please contact Offgridtec customer service. Contact details can typically be found on the manufacturer's official webgunea edo zure erosketa-dokumentazioa.
10. Aplikazio tipikoak
The Offgridtec MPPT Pro Duo charge controller is suitable for a variety of off-grid and mobile solar power systems, including:
- Recreational Vehicles (RVs) and Campervans
- Marine Systems (Boats & Yachts)
- Remote Telecommunication Stations
- Off-grid Cabins and Small Homes
- Camping and Outdoor Solar Setups

7. irudia: Adibamples of typical applications for the MPPT Pro Duo charge controller.