1. Sarrera
This manual provides comprehensive instructions for the SHARKOON Elite Shark CA300T Extended ATX PC Case. It covers the product's features, setup procedures, operational guidelines, maintenance tips, troubleshooting solutions, and detailed technical specifications. Please read this manual thoroughly before installation and use to ensure optimal performance and longevity of your PC case.
2. Ezaugarri nagusiak
- Diseinu futurista: The CA300T features an expressive front panel with a geometric pattern, framed by brushed aluminum, giving it a distinctive and modern aesthetic.
- Advanced Airflow: Equipped with three pre-installed 120mm RGB LED fans at the front and one at the rear, ensuring consistent airflow. The front panel includes a mesh grille for optimal ventilation, and the top panel offers a perforated cover for additional fan/radiator mounting.
- Illuminated I/O Panel: The side-mounted I/O panel includes standard audio ports, USB 3.0 ports, and a USB-C port, all featuring their own RGB illumination.
- Beira tenplatuko panelak: Two tempered glass side panels provide a clear view of internal components. The right-side panel is partially tinted to conceal the power supply tunnel while highlighting SSDs or HDDs.
- Barrualde zabala: Designed to accommodate large components, including graphics cards up to 42.5 cm, power supplies up to 24 cm, and CPU coolers up to 16.5 cm.
- Kableen kudeaketa eraginkorra: Features a spacious, foldable cable compartment and a sliding cable cover to keep wiring organized and out of sight.
- Biltegiratzeko aukerak: Supports up to seven 2.5-inch drives or four 3.5-inch drives.
3. Paketearen edukia
The SHARKOON Elite Shark CA300T PC Case package typically includes:
- SHARKOON Elite Shark CA300T PC Case (White)
- Pre-installed 120mm RGB LED Fans (3x Front, 1x Rear)
- Osagarrien kutxa (torlojuak, kable-bridak, euskarriak, etab.)
- Erabiltzailearen eskuliburua (dokumentu hau)
Note: Specific contents may vary slightly. Please check the packaging for a complete list.
4. Konfiguratzeko argibideak
Follow these steps to set up your SHARKOON Elite Shark CA300T PC case and install your components.
4.1. Kasua prestatzea
- Deskonprimitu zorroa: Kontu handiz atera ordenagailuaren kaxa bere paketetik.
- Kendu alboko panelak: Unscrew the thumbscrews on the rear of the case for both tempered glass side panels. Gently slide and lift the panels to remove them. Place them on a soft, flat surface to prevent scratches.
- Osagarrien kaxa: Bilatu osagarrien kaxa barruan, beharrezko torloju eta muntatzeko hardware guztiak dituena.
4.2. Plaka amaren instalazioa
- Instalatu Standoffs: Ensure the correct standoffs are installed for your motherboard form factor (ATX, SSI EEB). The case typically has pre-installed standoffs for standard ATX.
- Instalatu I/O babesa: If your motherboard requires an external I/O shield, install it into the rear opening of the case before mounting the motherboard.
- Muntatu plaka basea: Carefully place your motherboard onto the standoffs, aligning the screw holes. Secure the motherboard with the provided screws.
4.3. Elikatze-iturriaren (PSU) instalazioa
- Position PSU: The PSU mounts at the rear bottom of the case. Slide your PSU into the designated compartment from the rear.
- Secure PSU: Align the PSU with the screw holes and secure it with the provided screws from the rear of the case.
- Kableen kudeaketa: Route PSU cables through the cutouts to the back of the motherboard tray for organized cable management.
4.4. Biltegiratze unitatearen instalazioa
The CA300T supports various drive configurations:
- 2.5-inch Drives (SSDs): Mount SSDs to the dedicated brackets behind the motherboard tray or within the PSU shroud.
- 3.5-inch Drives (HDDs): Install HDDs into the drive cages located under the PSU shroud.
4.5. Grafiko Txartelaren eta Hedapen Txartelaren Instalazioa
- Kendu zirrikituen estalkiak: Kendu beharrezko hedapen-zirrikituen estalkiak kaxaren atzealdetik.
- Install Card: Sartu zure grafiko-txartela edo beste hedapen-txartelak plaka baseko PCIe zirrikitu egokietan.
- Txartel segurua: Secure the card with the provided screws.
4.6. Aurreko paneleko kableak konektatzea
Connect the front panel cables (USB 3.0, USB-C, HD Audio, Power Switch, Reset Switch, Power LED, HDD LED) to their corresponding headers on your motherboard. Refer to your motherboard manual for exact pin layouts.
4.7. Azken Batzarra
- Kableen kudeaketa: Use the cable ties and routing channels to organize all internal cables behind the motherboard tray.
- Lotu berriro alboko panelak: Carefully reattach both tempered glass side panels and secure them with the thumbscrews.
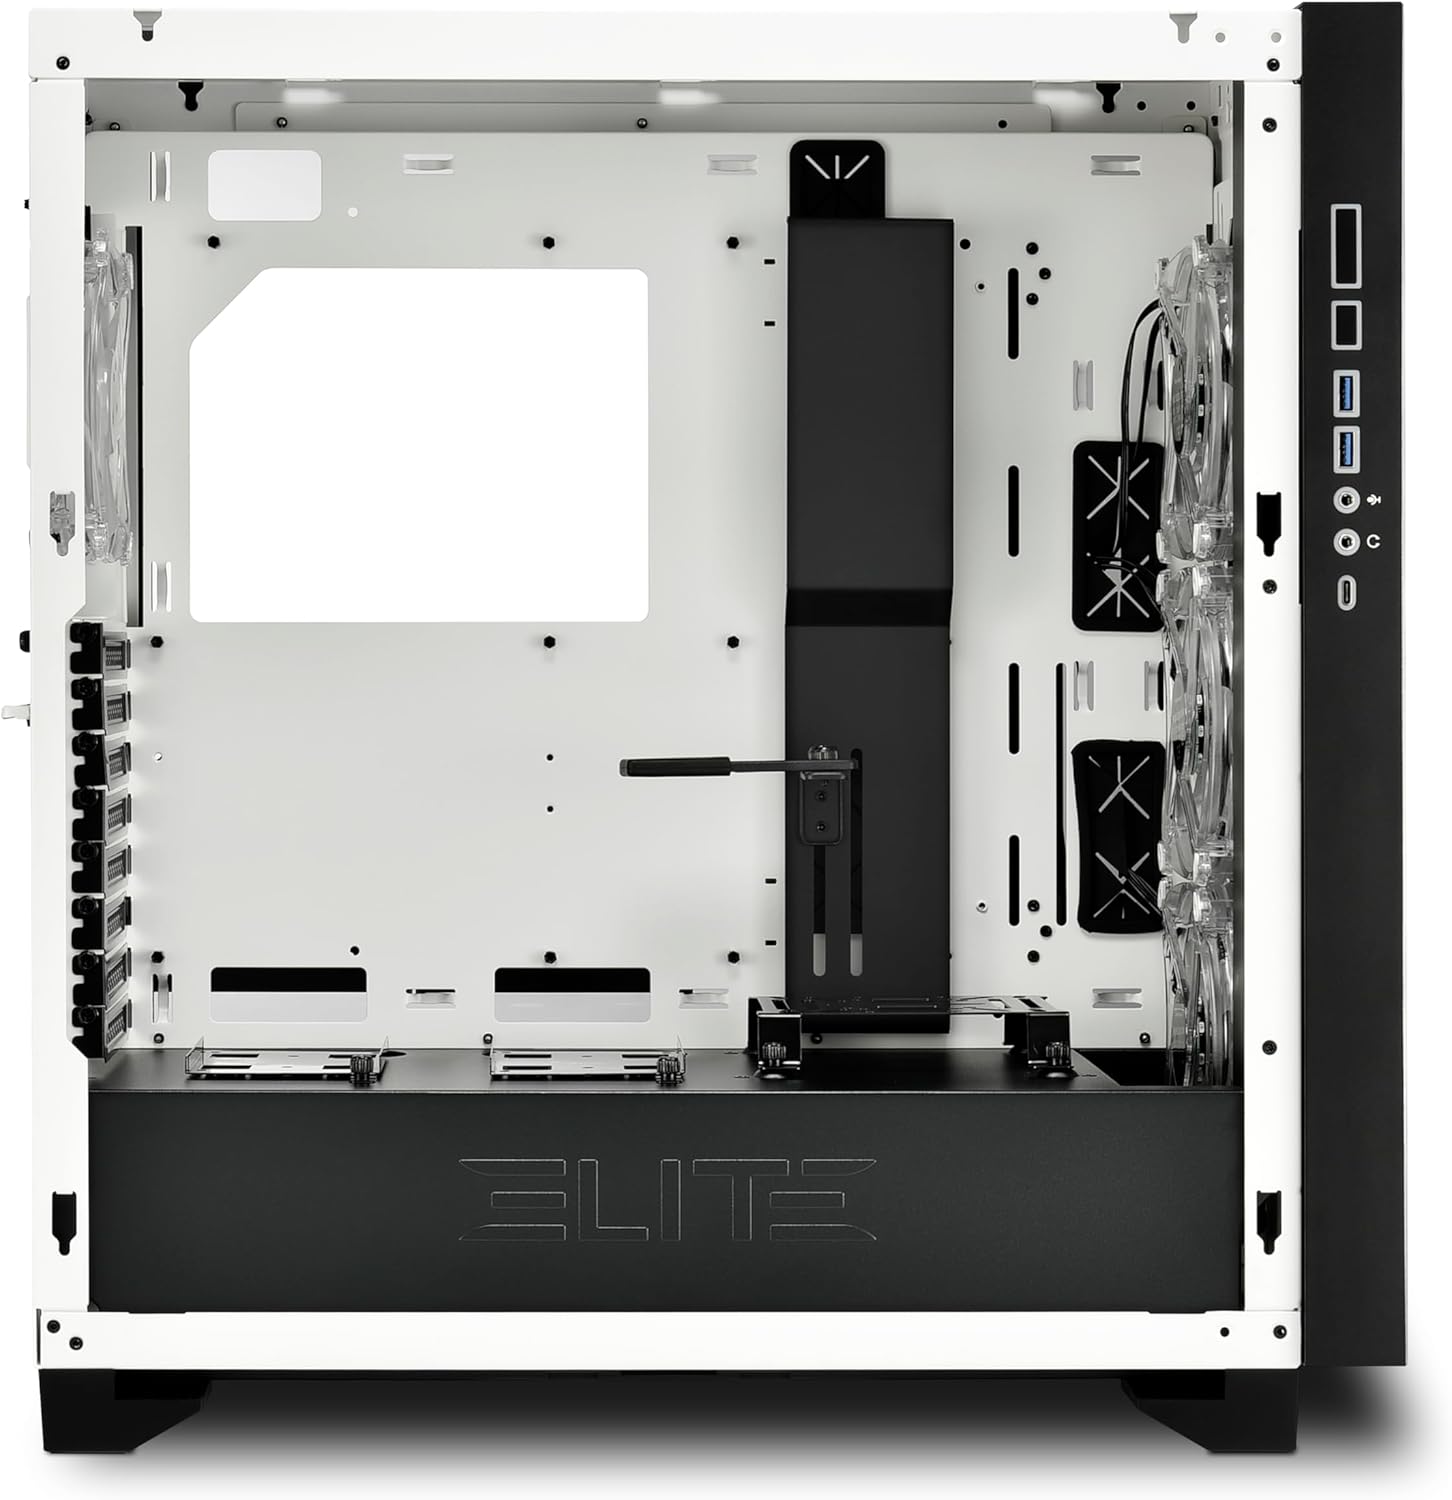
1. Irudia: Barrualdea view of the CA300T, highlighting component space.
5. Funtzionamendu-argibideak
5.1. Powering On Your System
After all components are installed and cables are connected, plug your power supply into a wall outlet and flip the PSU's power switch to the 'ON' position. Press the power button on the case's front I/O panel to start your computer.
5.2. RGB argiztapenaren kontrola
The pre-installed RGB fans and illuminated I/O panel can be controlled via your motherboard's RGB software (if compatible) or a dedicated RGB controller if included with your motherboard or purchased separately. Refer to your motherboard manual for specific RGB header locations and software instructions.
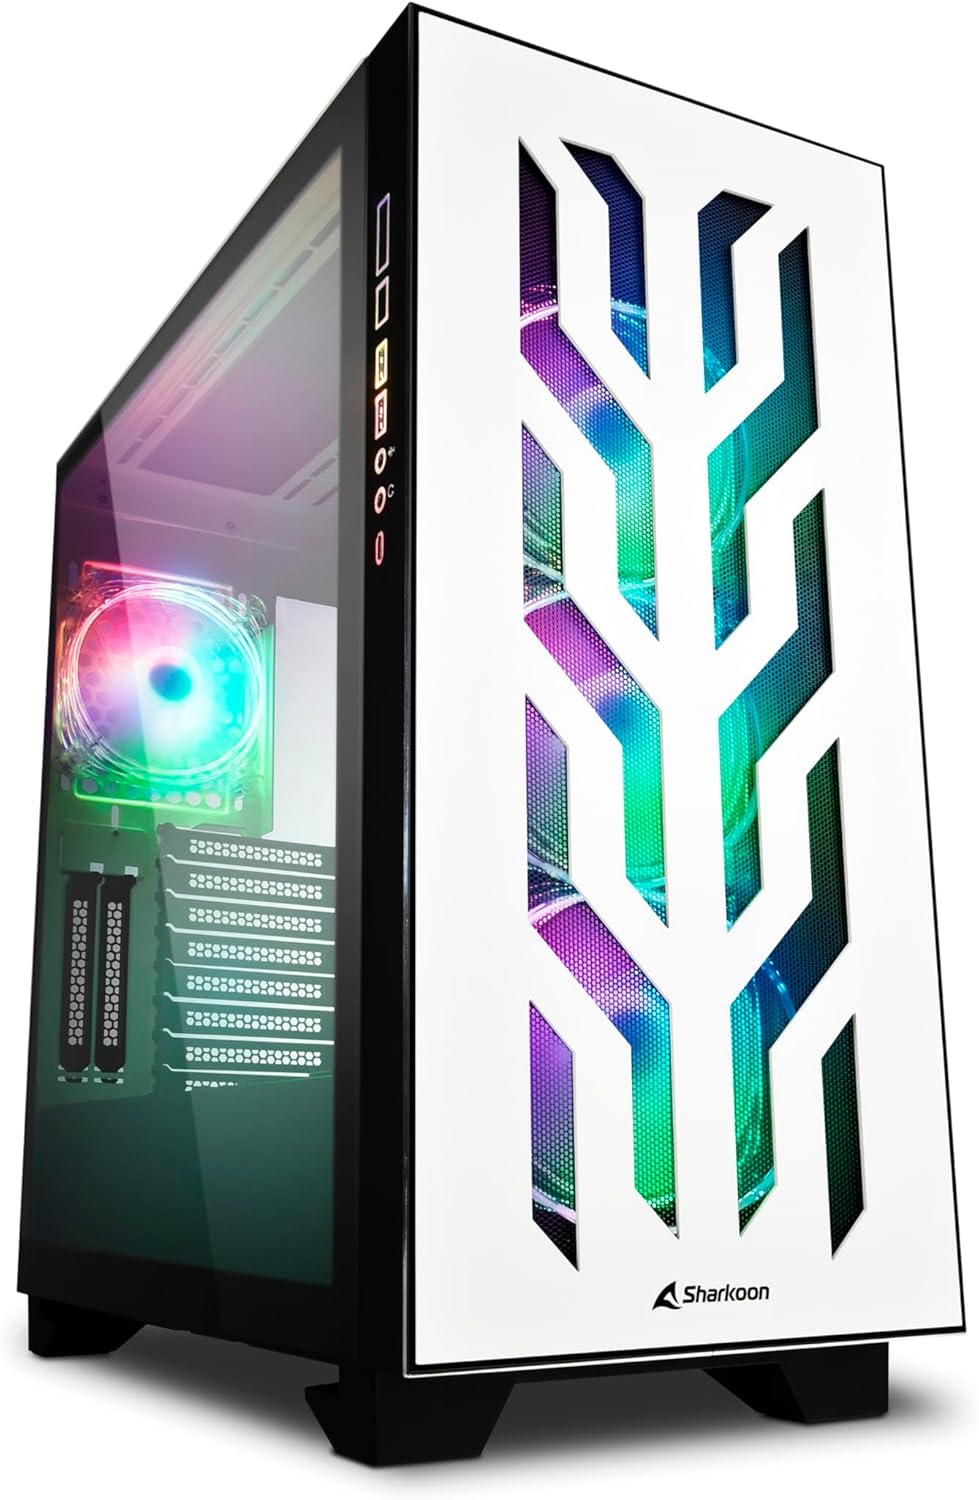
Figure 2: The CA300T with its illuminated RGB fans and distinctive front panel.
6. Mantentzea
Regular maintenance helps ensure optimal performance and extends the lifespan of your PC components.
6.1. Hauts-iragazkiaren garbiketa
The CA300T includes magnetic dust filters. It is recommended to clean these filters every 1-3 months, depending on your environment, to maintain optimal airflow and prevent dust buildup inside the case.
- Locate Filters: Identify the dust filters on the top, front, and bottom of the case.
- Kendu iragazkiak: Gently pull or slide out the magnetic dust filters.
- Garbitu iragazkiak: Use a soft brush, vacuum cleaner, or rinse with water (ensure completely dry before reinstallation) to remove accumulated dust.
- Berriro instalatu iragazkiak: Place the clean filters back into their respective positions.
6.2. Garbiketa orokorra
For external surfaces, use a soft, damp cloth to wipe down the case. Avoid abrasive cleaners or solvents that could damage the finish or tempered glass.

3. irudia: Goikoa view of the CA300T, showing the perforated top panel.
7. Arazoak
Atal honek konfigurazioan edo funtzionamenduan zehar aurki ditzakezun arazo ohikoenei buruzkoa da.
7.1. Sistemak ez du pizten
- Egiaztatu PSUa: Ensure the power supply unit is properly connected to the wall outlet and the PSU's power switch is in the 'ON' position.
- Aurrealdeko panelaren konexioak: Verify that the power switch cable from the case's front panel is correctly connected to the motherboard's power header.
- Internal Power Cables: Confirm that all necessary power cables (24-pin ATX, CPU 8-pin, GPU PCIe) are securely connected to the motherboard and components.
7.2. Haizagailuak ez dira biratzen / RGB ez da pizten
- Haizagailuaren konexioak: Ensure all fan power cables are securely connected to the motherboard's fan headers or a fan controller.
- RGB Connections: Verify that RGB cables are correctly connected to the motherboard's RGB headers or a dedicated RGB controller.
- Software/Controller: Check your motherboard's BIOS/UEFI settings or RGB software to ensure fans and RGB lighting are enabled and configured correctly.
7.3. USB atakak ez dute funtzionatzen
- Internal USB Headers: Confirm that the internal USB 3.0 and USB-C cables from the case's front panel are securely connected to the corresponding headers on your motherboard.
- Motherboard Drivers: Ensure all necessary motherboard chipset and USB drivers are installed.
8. Zehaztapen Teknikoak
| Marka | Sharkoon |
| Ereduaren izena | CA300T |
| Kolorea | Zuria |
| Kasu mota | Extended ATX Tower |
| Materiala | Metala, beira tenplatua |
| Plaka amaren bateragarritasuna | ATX, SSI EEB |
| PSU Mounting | Atzeko Muntea |
| Hozteko metodoa | Airea |
| Aurrez instalatutako zaleak | 4x 120mm RGB LED Fans (3x Front, 1x Rear) |
| Aurreko I / O Portuak | USB 3.0 (x2), USB-C (x1), Audio In/Out |
| Max. GPU Length | 42.5 cm |
| Max. CPU hozgailuaren altuera | 16.5 cm |
| Max. PSU Luzera | 24 cm |
| Drive Bays | Up to 7x 2.5" or 4x 3.5" |
| Erabilera gomendatua | Jolasa |
9. Bermea eta Laguntza
9.1. Produktuen bermea
The SHARKOON Elite Shark CA300T PC Case comes with a 2 urteko bermea on spare parts. This warranty covers defects in materials and workmanship under normal use. Please retain your proof of purchase for warranty claims.
9.2. Software eguneraketak
Software updates, if applicable for any integrated components or controllers, are guaranteed until 13ko apirilaren 2030a.
9.3. Bezeroarentzako arreta
For technical assistance, warranty claims, or further inquiries, please contact Sharkoon customer support through their official website or the retailer where the product was purchased. Have your product model and proof of purchase ready when contacting support.


