1. Sarrera
This manual provides detailed instructions for the installation, operation, and maintenance of the VIVOTEK ND9323P H.265 8-Channel Embedded PoE Network Video Recorder (NVR). Please read this manual thoroughly before using the product to ensure proper and safe operation. Keep this manual for future reference.
2. Segurtasun informazioa
Observe the following safety precautions to prevent damage to the NVR and to ensure user safety:
- Elikatze-iturria: Use only the power adapter supplied with the NVR. Ensure the power source matches the NVR's voltage eskakizunak.
- Aireztapena: Do not block any ventilation openings. Install the NVR in a well-ventilated area to prevent overheating.
- Ingurumena: Avoid exposing the NVR to water, moisture, extreme temperatures, or direct sunlight. Do not place heavy objects on the NVR.
- Zerbitzua: Ez saiatu produktu hau zuk zeuk ematen. Bidali zerbitzu guztiak zerbitzu kualifikatuko langileengana.
- Manipulazioa: Handle the NVR with care. Avoid dropping or subjecting it to strong impacts.
3. Paketearen edukia
Carefully unpack the box and ensure all items are present and in good condition. If any items are missing or damaged, contact your vendor immediately.
- VIVOTEK ND9323P NVR unitatea
- Elikatze-moldagailua
- USB sagua
- Instalazio azkarraren gida
- Accessory Pack (Screws for HDD installation, Ethernet cable)
- Case (referring to the NVR enclosure itself)
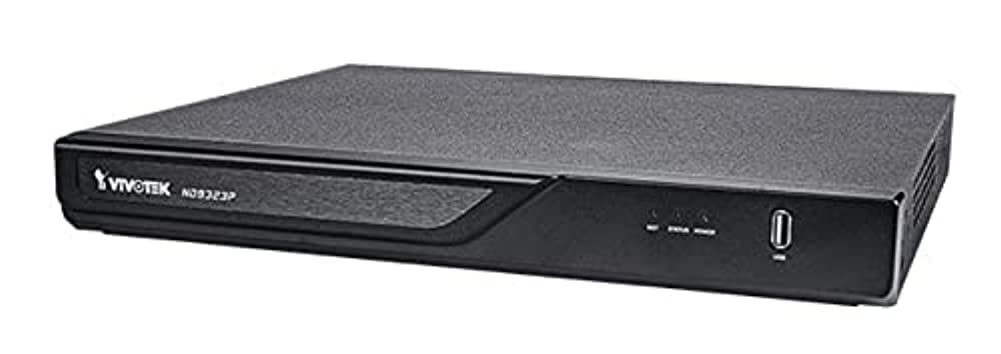
Figure 3.1: VIVOTEK ND9323P NVR unit. This image shows the front panel of the NVR, typically featuring status indicators and USB ports.
4. Produktua amaitu daview
The VIVOTEK ND9323P is an 8-channel embedded Network Video Recorder designed for IP surveillance systems. It supports H.265 video compression for efficient storage and bandwidth usage. With its integrated Power over Ethernet (PoE) ports, it simplifies camera installation by providing both power and data connectivity through a single Ethernet cable.
4.1 Ezaugarri nagusiak
- 8-Channel Video Input
- H.265/H.264 Video Compression
- 8 x 802.3at/af PoE Ports
- Local Display Output (HDMI/VGA)
- Remote Access via VIVOTEK VIVOCloud App or VMS
- Supports up to 16TB HDD storage (HDD not included)
4.2 Aurrealdeko eta atzeko panelak
Refer to the Quick Installation Guide for detailed diagrams of the front and rear panels, indicating ports and indicators.
- Aurrealdeko panela: Power LED, HDD LED, Network LED, USB ports.
- Atzeko Panel: Power input, LAN port, PoE ports (1-8), HDMI output, VGA output, Audio I/O, USB ports.
5. Konfigurazioa
5.1 Disko gogorraren instalazioa (aukerakoa)
The NVR does not typically include a pre-installed hard drive. Follow these steps to install a 3.5-inch SATA hard drive:
- Kendu eta kendu NVRaren goiko estalkia.
- Konektatu SATA datu eta elikatze kableak NVRtik disko gogorrera.
- Lotu disko gogorra NVR xasisari emandako torlojuak erabiliz.
- Jarri goiko estalkia berriro eta finkatu torlojuekin.
Oharra: Ensure the NVR is powered off and unplugged before installing or removing a hard drive.
5.2 Konexio fisikoak
- Konektatu kamerak: Connect your IP cameras to the NVR's PoE ports (1-8) using Ethernet cables. The NVR will provide power and network connectivity to the cameras.
- Konektatu sarera: Connect the NVR's LAN port to your local network router or switch using an Ethernet cable.
- Konektatu pantaila: Konektatu monitore bat NVR-aren HDMI edo VGA irteera atakara.
- Sagua konektatu: Konektatu USB sagua NVR-aren USB ataka batera.
- Piztu: Konektatu korronte-egokitzailea NVRaren elikatze-sarrerara eta gero entxufe batera. NVRa automatikoki piztuko da.
5.3 Hasierako konfigurazioa
Upon first boot, the NVR will guide you through a setup wizard on the connected monitor:
- Hizkuntza hautaketa: Aukeratu zure hizkuntza hobetsia.
- Pasahitza konfiguratzea: Create a strong password for the administrator account. This is crucial for security.
- Sarearen ezarpenak: Configure network settings (DHCP or Static IP). DHCP is recommended for most home users.
- Ordua eta data: Ezarri ordu-zona, data eta ordu zuzenak.
- Disko gogorraren hasieratzea: If you installed a new hard drive, the NVR will prompt you to format it. Confirm to proceed. Abisua: Formatting will erase all data on the drive.
- Kamera bilatu eta gehitu: The NVR will automatically search for connected VIVOTEK cameras. Select and add them to the NVR.
- Amaiera: Complete the wizard to access the NVR's live view.
6. NVRaren funtzionamendua
6.1 Accessing the NVR
You can access and manage the NVR through various methods:
- Tokiko pantaila: Directly via the connected monitor and USB mouse.
- Web Arakatzailea: Enter the NVR's IP address into a web arakatzailea sare berera konektatuta dagoen ordenagailu batean.
- VIVOTEK VIVOCloud App: Download the mobile app for remote viewtzea eta kudeaketa.
- VIVOTEK VAST 2 VMS: For advanced management and multi-NVR systems.
6.2 Bizi View
Zuzenekoak view displays real-time video feeds from all connected cameras. You can switch between single-camera view, kamera anitzeko sareta view, eta pertsonalizatu pantailaren diseinua.
6.3 Grabaketa ezarpenak
Configure recording schedules and modes for each camera:
- Grabaketa jarraitua: Erregistroak 24/7.
- Mugimendua detektatzeko grabazioa: Mugimendua detektatzen denean bakarrik grabatzen du.
- Programatutako grabazioa: Denbora-tarte zehatzetan egindako erregistroak.
- Gertaeraren grabaketa: Records based on external triggers or alarms.
Access these settings through the NVR's main menu: Configuration > Recording > Schedule.
6.4 Erreprodukzioa
Berrizview foo grabatuatage:
- Menu nagusitik, hautatu Erreprodukzioa.
- Choose the camera(s) and the date/time range you wish to review.
- Use the timeline and playback controls (play, pause, fast forward, rewind) to navigate through the footage.
6.5 Event Management and Notifications
Configure the NVR to respond to events such as motion detection, camera tampering, or network disconnection. The NVR can send email notifications, trigger alarms, or start recording.
Access these settings via: Configuration > Event.
7. Mantentzea
7.1 Firmware eguneraketak
Regularly check for and install firmware updates to ensure optimal performance, security, and access to new features. Firmware can be updated via the NVR's web interface or local display menu: Configuration > System > Firmware Upgrade.
Kontuz: Do not power off the NVR during a firmware upgrade. This can cause permanent damage.
7.2 Disko gogorraren kudeaketa
Monitor the health of your hard drive(s) and ensure sufficient storage space. The NVR will automatically overwrite the oldest recordings when the disk is full, based on your settings.
Access HDD status and settings via: Configuration > Storage > HDD Management.
7.3 Garbiketa
Mantendu NVR unitatea garbi eta hautsik gabe. Erabili zapi leun eta lehor bat garbitzeko. Ez erabili garbitzaile likidorik edo aerosolik.
8. Arazoak
This section addresses common issues you might encounter with your VIVOTEK ND9323P NVR.
8.1 Ez da bideorik bistaratzen monitorearen gainean
- Egiaztatu kableak: Ziurtatu HDMI/VGA kablea ondo konektatuta dagoela NVRra eta monitorera.
- Monitorearen sarrera: Egiaztatu monitorearen sarrera-iturri zuzena (HDMI/VGA) dela konfiguratuta.
- NVR Power: Confirm the NVR is powered on and its power LED is illuminated.
8.2 Cameras Not Showing Up / No Image
- PoE konexioa: Ensure cameras are properly connected to the NVR's PoE ports. Check if the PoE port LEDs on the NVR are active.
- Kameraren potentzia: If not using PoE, ensure cameras are receiving power from their own power adapters.
- Sareko konexioa: Verify the NVR and cameras are on the same network segment if not directly connected via PoE.
- Kameraren egoera: Check the camera's own status indicators.
- NVR Camera Management: Joan zaitez Configuration > Camera > Camera Management to ensure cameras are added and enabled. Try rescanning for cameras.
8.3 Cannot Access NVR via Web Arakatzailea
- IP helbidea: Confirm the NVR's IP address is correct and that your computer is on the same network.
- Sare-kablea: Ensure the NVR's LAN port is connected to your network.
- Firewall: Temporarily disable your computer's firewall to check if it's blocking access.
- Arakatzailearen bateragarritasuna: Use a recommended web nabigatzailea (adibidez, Chrome, Firefox).
8.4 Pasahitza ahaztuta
If you forget the administrator password, you may need to perform a factory reset. Refer to the VIVOTEK support website or contact technical support for the specific procedure for your model, as this often involves a physical reset button or a specific utility.
9. Zehaztapenak
The following table lists the key specifications for the VIVOTEK ND9323P NVR:
| Ezaugarri | Zehaztapena |
|---|---|
| Modelo zenbakia | ND9323P |
| Marka | VIVOTEK |
| Kanal kopurua | 8 |
| Konektibitate Teknologia | Ethernet |
| Gailu bateragarriak | Camera, Mobile Device |
| Bideo-konpresioa | H.265, H.264 |
| PoE Portuak | 8 x 802.3at/af |
| Produktuaren neurriak | 19.69 x 19.69 x 11.02 hazbete |
| Elementuaren pisua | 0.01 ontza |
| Fabrikatzailea | Vivotek |
10. Bermea eta Laguntza
VIVOTEK produktuak berme mugatu batek estaltzen ditu. Bermearen baldintza zehatzak ikusteko, kontsultatu zure produktuarekin batera datorren berme-txartela edo bisitatu VIVOTEKen webgune ofiziala. webgunea.
For technical support, product registration, or to download the latest firmware and software, please visit the VIVOTEK support portal:
VIVOTEK Official Support Webgunea
When contacting support, please have your NVR's model number (ND9323P) and serial number ready.


