1. Sarrera
This manual provides detailed instructions for the installation, operation, and maintenance of your Edge Audio Xtreme Series EDX5000.1FD-E0 Monoblock Amplifier. The EDX5000.1FD-E0 is a high-performance Class D full-bridge amplifier designed for powerful audio output. Please read this manual thoroughly before attempting installation or operation to ensure proper use and to prevent damage.
1.1 Segurtasun-neurriak
- Deskonektatu beti ibilgailuaren bateriaren terminal negatiboa konexio elektrikoak egin aurretik.
- Ziurtatu kableatu guztia behar bezala bideratuta eta finkatuta dagoela kalteak edo zirkuitulaburrak saihesteko.
- Erabili kableatu egokia elikatze eta lurrerako konexioetarako, eskuliburu honetan zehaztutako moduan.
- Saihestu muntatzea amplifier in locations exposed to moisture or excessive heat.
- Instalazio prozesuaren edozein atalen inguruan ziur ez bazaude, kontsultatu instalatzaile profesional bati.
2. Paketearen edukia
Instalazioarekin jarraitu aurretik, egiaztatu elementu guztiak paketean daudela.
- Edge Audio EDX5000.1FD-E0 Monoblock Ampbiziagoa
- Baxu-kontroleko urrutiko unitatea
- Wiring for Remote Bass Control
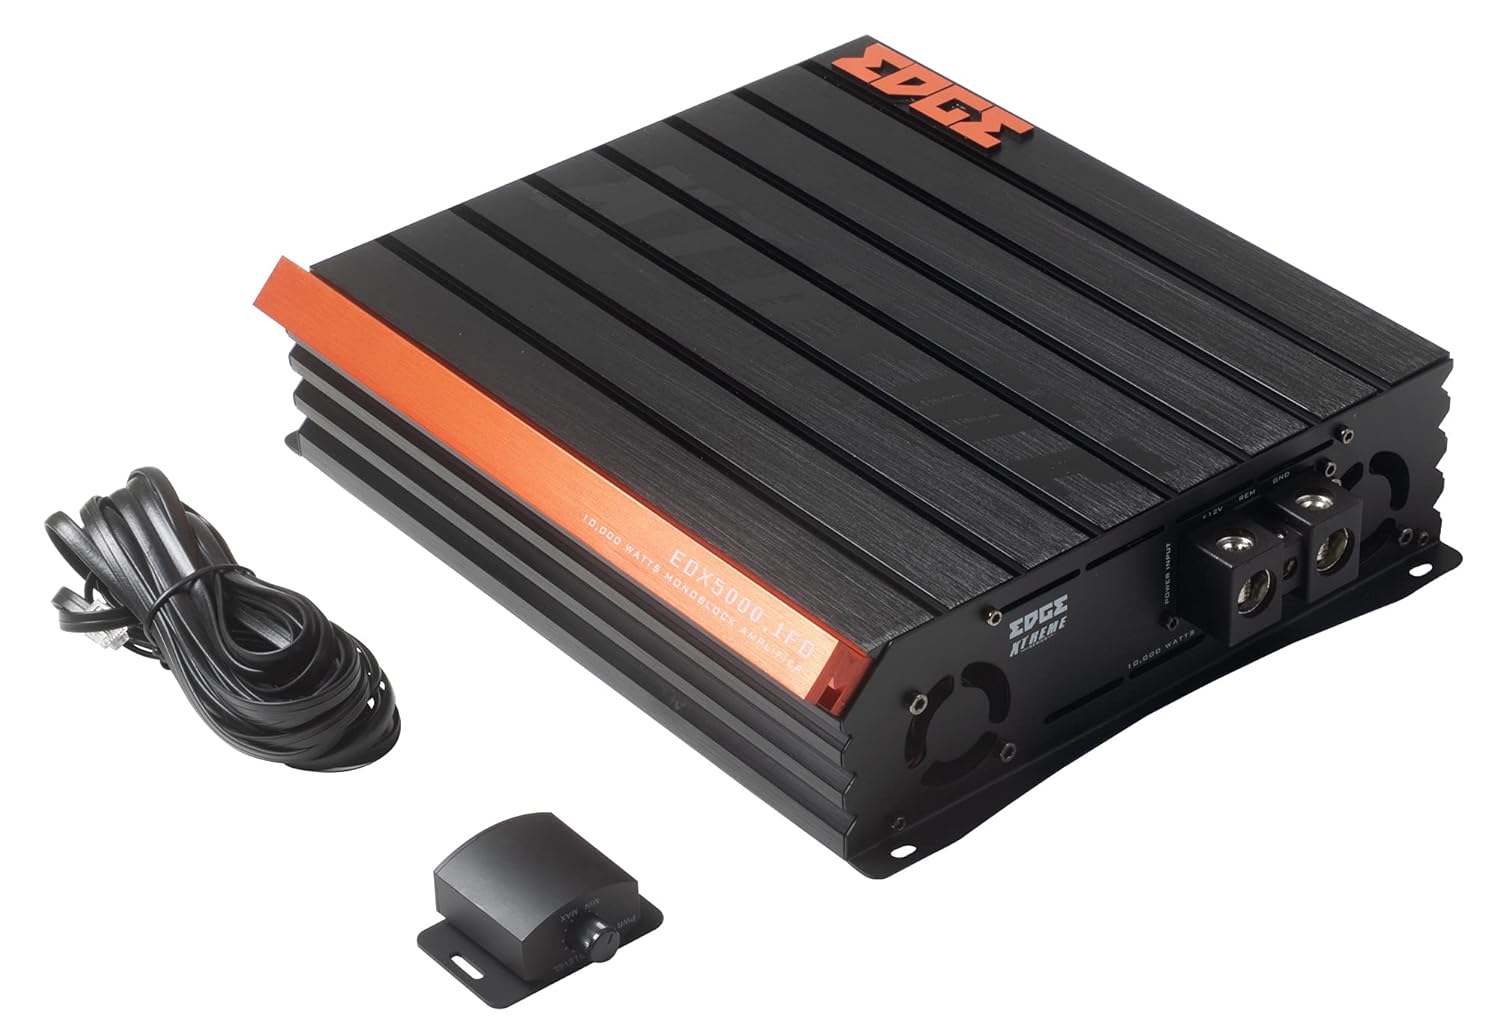
Image 2.1: Contents of the EDX5000.1FD-E0 package, including the amplifier, remote bass control, and connecting cable.

Image 2.2: The retail packaging for the Edge Audio EDX5000.1FD-E0 Monoblock Ampbiziagoa.
3. Ezaugarriak
The Edge Audio Xtreme Series EDX5000.1FD-E0 amplifier incorporates advanced features for optimal audio performance:
- Monoblock power amplifier design for dedicated subwoofer applications.
- Max Power: 10,000 watts.
- Built-in active crossovers (High-Pass Filter and Low-Pass Filter) for precise sound shaping.
- Adjustable Bass Boost circuit for enhanced low-frequency response.
- Ultra-efficient Class D topology for high power output with minimal heat generation.
- Wideband frequency response up to 20kHz.
- Full bridge technology for efficient power delivery.
- Compact footprint for versatile installation options.
- Dimensions (H x W x D): 2.5 x 10.4 x 9.1 inches (64 x 264 x 230mm).

3.1. irudia: Goian view of the EDX5000.1FD-E0 ampbizitzailea, erakustaldiaasing its compact design and heatsink fins.
4. Konfigurazioa eta instalazioa
Instalazio egokia ezinbestekoa da zure errendimendurako eta iraupen luzerako ampbizigarria. Jarraitu arretaz jarraibide hauek.
4.1 Muntatzeko kokapena
Muntatu amplifier in a dry, well-ventilated area, away from direct sunlight or heat sources. Ensure sufficient airflow around the amplifier's heatsink. The amplifier is designed for surface mounting.
4.2 Kableatutako konexioak
All wiring should be securely connected and insulated to prevent short circuits. Use high-quality, appropriate gauge wiring.
4.2.1 Potentzia-konexioak
Konektatu amplifier to the vehicle's electrical system as follows:
- +12V (Energia): Connect a heavy-gauge power cable (e.g., 4 AWG or larger for 10,000W max power) directly from the positive terminal of the vehicle's battery to the +12V terminal on the amplifier. Install an appropriate fuse (not supplied) within 18 inches of the battery.
- GND (lurra): Connect a heavy-gauge ground cable of the same size as the power cable from the GND terminal on the amplifier to a clean, unpainted metal surface of the vehicle chassis. Ensure a solid electrical connection.
- REM (Urrutiko Piztapena): Connect a smaller gauge wire (e.g., 18 AWG) from the REM terminal on the ampunitate nagusiaren urrutiko pizte-irteerara konektatzen den lifterra. Hari honek pizten du ampLifizer-a zure audio-sistemarekin piztu eta itzali.

Image 4.1: Power input terminals (+12V, REM, GND) on the EDX5000.1FD-E0 ampbiziagoa.
4.2.2 Audio Sarrerako Konexioak
Connect your head unit's RCA outputs to the 'LOW INPUT' RCA jacks on the ampbiziagoa.
4.2.3 Bozgorailuen irteerako konexioak
Konektatu subwooferra(k) bozgorailuen irteera-terminaletara. amplifier. Ensure correct polarity (+ to + and - to -) for optimal performance. Refer to your subwoofer's specifications for impedance matching.

Image 4.2: Rear panel of the EDX5000.1FD-E0 amplifier, showing low-level inputs, crossover controls, gain, bass boost, and speaker output terminals.
5. Funtzionamendu-argibideak
Behin instalatuta, egokitu ampSoinu-kalitate optimoa lortzeko lifizer ezarpenak.
5.1 Kontrol-panela amaituview
Refer to Image 4.2 for the location of the following controls:
- HPF (Pasa handiko iragazkia): Adjusts the high-pass crossover frequency. For subwoofer applications, this should typically be set to its minimum or off, as a low-pass filter is usually preferred.
- LPF (Pase Baxuko Iragazkia): Adjusts the low-pass crossover frequency (15Hz - 200Hz). This filters out frequencies above the set point, sending only low frequencies to the subwoofer. Set this according to your subwoofer and system requirements, typically between 60Hz and 100Hz.
- IRABAZIA: Bat dator amplifier's input sensitivity to the output level of your head unit. Start with the gain at minimum, then slowly increase it until you hear distortion, then back off slightly. Do not use the gain control as a volume knob.
- BASS BOST: Adjusts the level of bass enhancement (0dB - 12dB). Use sparingly to avoid distortion.
- MAIZTASUNA (Baxuaren indartze maiztasuna): Selects the center frequency for the bass boost (35Hz - 70Hz).
- URRUTIKOA: Port for connecting the wired remote bass control unit.
5.2 Urrutiko baxuen kontrola
The included remote bass control allows for convenient adjustment of the subwoofer output level from the driver's seat. Connect it to the 'REMOTE' port on the ampbiziagoa.
6. Mantentzea
Mantentze-lan erregularrak zure iraupena eta errendimendua bermatzen laguntzen du ampbiziagoa.
- Garbiketa: Aldian-aldian garbitu amplifier's exterior with a soft, dry cloth. Do not use harsh chemicals or abrasive cleaners. Ensure ventilation fins are free of dust and debris.
- Konexioaren egiaztapena: Annually inspect all power, ground, remote, and speaker connections for tightness and corrosion. Loose connections can cause performance issues or damage.
- Ingurumena: Ziurtatu amplifier remains in a dry, stable environment, protected from extreme temperatures.
7. Arazoak
Zurearekin arazoak badituzu amplaguntza-zerbitzura jo aurretik, kontsultatu arazo eta irtenbide ohikoenak.
- Potentziarik gabe:
- Check the in-line fuse near the battery.
- Verify +12V, GND, and REM connections are secure and receiving power.
- Ensure the remote turn-on wire is connected to a switched 12V source.
- Soinurik ez:
- Check all RCA input and speaker output connections.
- Verify head unit is powered on and outputting audio.
- Adjust the GAIN control.
- Soinu distortsionatua:
- Reduce the GAIN setting.
- Check speaker wiring for shorts or incorrect polarity.
- Ziurtatu bozgorailuen inpedantzia bat datorrela amplifikatzaileen zehaztapenak.
- Reduce BASS BOOST if active.
- AmpLifter gehiegi berotzea:
- Ziurtatu aireztapen egokia inguruan ampbiziagoa.
- Check speaker impedance; running too low an impedance can cause overheating.
- Verify power and ground wire gauge is sufficient.
8. Zehaztapenak
Technical specifications for the Edge Audio Xtreme Series EDX5000.1FD-E0 Monoblock Ampbiziagoa:
| Ezaugarri | Zehaztapena |
|---|---|
| Modelo zenbakia | EDX5000.1FD-E0 |
| Marka | ERTZA |
| Ampbiziagoa Mota | Monoblock, Class D, Full Bridge |
| Gehienezko potentzia | 10,000 Watt |
| Maiztasun Erantzuna | 20kHz arte |
| Built-in Crossovers | Active (HPF, LPF) |
| Bass Boost | Adjustable (0-12dB) |
| Baxua areagotzeko maiztasuna | Adjustable (35Hz-70Hz) |
| liburukiatage | 230 Voltio (Funtzionamenduko Bolumena)tage Range typically 12-14.4V DC for car audio) |
| Muntatze Mota | Gainazaleko muntaia |
| Produktuaren neurriak (H x W x D) | 2.5 x 10.4 x 9.1 hazbete (64 x 264 x 230 mm) |
| Produktuaren pisua | 6.61 kilo |
9. Bermea eta Laguntza
For warranty information or technical support, please refer to the documentation provided at the time of purchase or contact your authorized Edge Audio dealer. Keep your proof of purchase for warranty claims.


