1. Sarrera
The OSRAM BATTERYcharge 5PIN portable charging cable is designed for convenient charging of electric vehicles (EVs) and plug-in hybrid vehicles (PHEVs) equipped with a Type 1 connection. This cable allows charging from a standard 2-pin 230V Schuko socket, making it suitable for use at home or on the go. This manual provides essential information for safe and effective use of your charging cable.
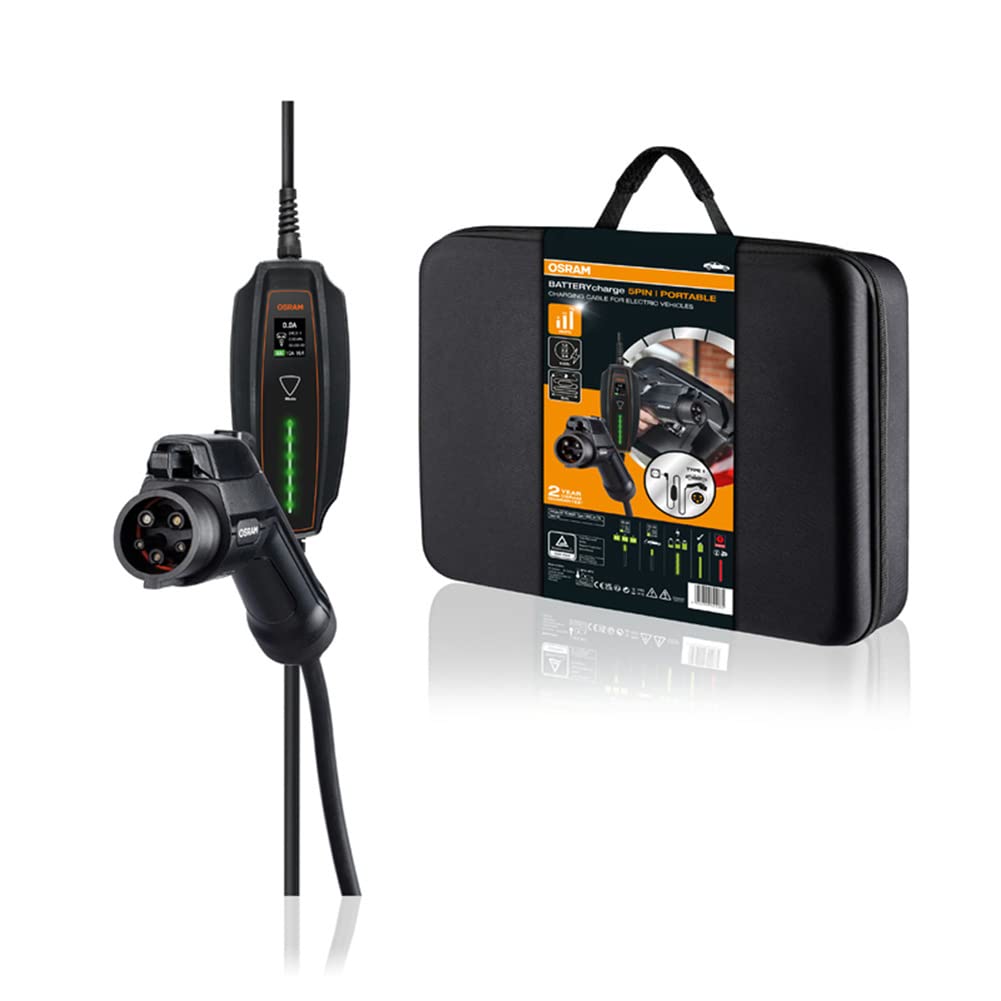
Image: The OSRAM BATTERYcharge 5PIN portable EV charging cable, displaying its main components: the Type 1 vehicle connector, the central control box, and the Schuko plug for wall outlets.
2. Segurtasun-argibideak
Read all safety instructions carefully before using the charging cable. Failure to follow these instructions may result in electric shock, fire, or serious injury.
- Ez erabili the cable if it is damaged, frayed, or shows any signs of wear.
- Ez erabili the cable in wet conditions or immerse it in water. The cable and connectors are rated IP65 for dust and splash protection, but are not designed for submersion.
- Ensure the power outlet is properly grounded and rated for the required voltage eta egungoa.
- Ez behartu the connectors into the vehicle or wall socket.
- Utzi haurrak eta maskotak urrun from the charging area during operation.
- Beti deskonektatu the cable from the vehicle first, then from the wall socket.
- Avoid using extension cords or adapters with the charging cable.
- Ez saiatu konpontzen or modify the charging cable. Contact qualified personnel for service.
3. Produktua amaitu daview
The OSRAM BATTERYcharge 5PIN cable consists of three main components:
- Type 1 Vehicle Connector (SAE J1772): Connects to your electric vehicle's charging port.
- Kontrol-kutxa: Contains the charging electronics and indicators.
- Schuko Plug (IEC TR 60083): Connects to a standard 230V wall socket.
Irudia: Xehetasun zehatza view of the Type 1 vehicle connector and the Schuko plug, highlighting their design and connection points.

Image: A close-up of the charging cable's control box, showing its display and indicator lights for charging status.
4. Konfigurazioa
Before charging, ensure your vehicle is parked in a safe, well-ventilated area and turned off.
- Unpack the cable: Remove the charging cable from its storage bag.
- Inspect the cable: Visually check the entire cable, connectors, and control box for any damage. Do not use if damaged.
- Connect to power outlet: Insert the Schuko plug firmly into a standard 230V, properly grounded wall socket. The control box will power on.
- Prepare vehicle: Ireki zure ibilgailuaren kargatzeko atakaren estalkia.

Image: An electric car is parked, with the charging cable extending from its charging port to a wall socket, illustrating a typical setup.
5. Funtzionamendu-argibideak
Jarraitu urrats hauek zure ibilgailu elektrikoa kargatzeko:
- Connect to vehicle: Insert the Type 1 vehicle connector firmly into your vehicle's charging port. Ensure it clicks into place.
- Initiate charging: The control box will automatically detect the vehicle and begin the charging process. The indicators on the control box will show the charging status.
- Monitor charging: Observe the control box indicators and your vehicle's dashboard for charging status.
- Kargatzea amaitu: Once charging is complete, or if you need to stop charging, first disconnect the Type 1 connector from the vehicle. Most vehicles require unlocking the charging port via the car's key fob or interior button before removal.
- Disconnect from power: After disconnecting from the vehicle, unplug the Schuko plug from the wall socket.

Image: A hand holds the Type 1 connector, preparing to insert it into the electric vehicle's charging port.

Image: The Type 1 connector is securely plugged into the vehicle's charging port, indicating a successful connection.
6. Mantentzea
Proper maintenance ensures the longevity and safe operation of your charging cable.
- Garbiketa: Wipe the cable and connectors with a dry or slightly damp cloth. Do not use harsh chemicals or abrasive cleaners. Ensure connectors are dry before use.
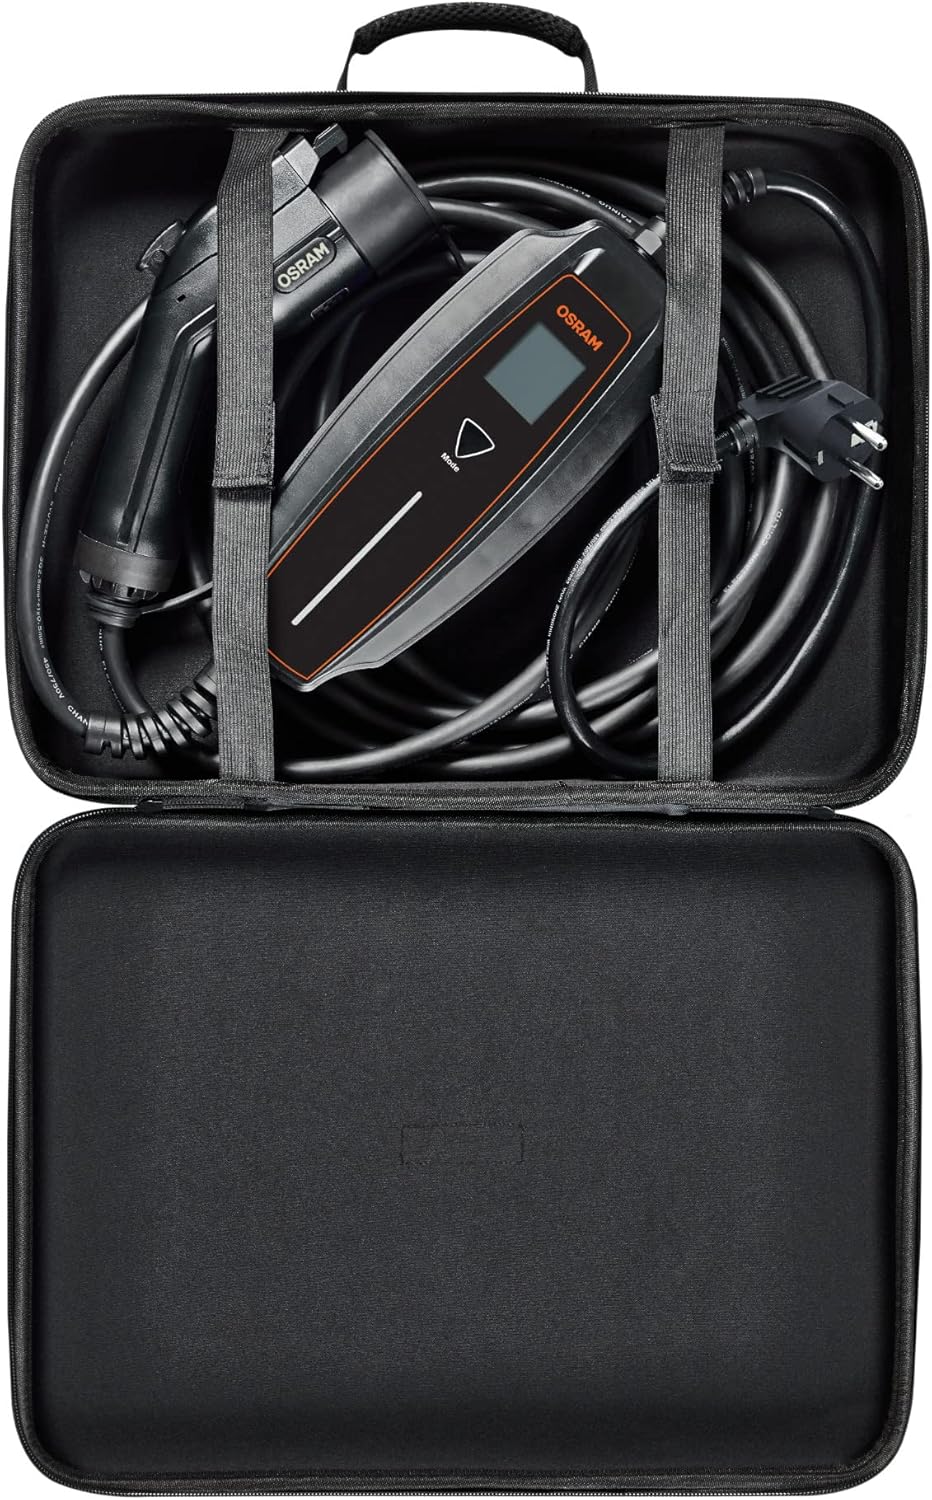
- Biltegiratzea: After use, coil the cable neatly and store it in the provided durable, compact storage bag. Store in a dry, cool place, away from direct sunlight and extreme temperatures.
- Ikuskapena: Regularly inspect the cable for any signs of damage, cuts, or fraying. Check the connectors for corrosion or bent pins.
- Hautsaren babesa: Utilize the dust protection caps for the connectors when the cable is not in use.

Image: The OSRAM BATTERYcharge 5PIN charging cable neatly stored inside its compact, durable carrying bag.
7. Arazoak
Arazoak badituzu, jo ezazu honako arazo eta irtenbide ohikoenei:
| Arazoa | Kausa posiblea | Irtenbidea |
|---|---|---|
| Kargatzen ez da hasten. | Cable not fully connected; vehicle not ready for charging; power outlet issue; cable damage. | Ensure both ends are securely connected. Check vehicle's charging settings. Test the wall socket with another appliance. Inspect cable for damage. |
| Control box indicators are off. | No power from the wall socket; cable not plugged in. | Verify the Schuko plug is fully inserted. Check the wall socket's power supply (e.g., circuit breaker). |
| Charging stops unexpectedly. | Vehicle fault; power interruption; overheating. | Check vehicle's dashboard for error messages. Ensure stable power supply. Allow cable to cool down if it feels hot. |
| Connector is stuck in vehicle. | Vehicle's locking mechanism engaged. | Refer to your vehicle's manual for unlocking the charging port. Typically, this involves using the key fob or an interior button. |
If the problem persists after attempting these solutions, contact OSRAM customer support.
8. Zehaztapenak
| Ezaugarri | Xehetasuna |
|---|---|
| Modelo zenbakia | OPC10A05 |
| Connector Type (Vehicle) | 1 mota (SAE J1772) |
| Connector Type (Wall) | Schuko (IEC TR 60083) |
| Sarrera boltage | 230V |
| Kablearen luzera | 5 metro |
| Sarrera babesteko (IP) balorazioa | IP65 (hauts eta zipriztinen aurkakoa) |
| Impact Resistance (IK) Rating | IK10 |
| Ziurtagiriak | TÜV, CE |
| Elementuaren pisua | 5.76 libra (gutxi gorabehera 2.61 kg) |
| Produktuaren neurriak | 216.54 x 4.72 x 5.12 hazbete (gutxi gorabehera 550 x 12 x 13 cm) |
9. Bermea eta Laguntza
The OSRAM BATTERYcharge 5PIN portable charging cable comes with a 2 urteko bermea. For exact conditions and to register your product, please visit osram.com/am-guarantee.
For technical support, troubleshooting assistance, or warranty claims, please contact OSRAM customer service through their official webgunea edo zure produktuaren ontziarekin emandako harremanetarako informazioa.


