1. Sarrera
Thank you for choosing the Vacmaster VK1638SWC Industrial Wet and Dry Vacuum Cleaner. This manual provides essential information for the safe assembly, operation, maintenance, and troubleshooting of your new appliance. Please read these instructions thoroughly before use and retain them for future reference.

Image: The Vacmaster VK1638SWC vacuum cleaner actively cleaning a workshop floor, demonstrating its industrial application.
2. Segurtasun informazioa
Jarraitu beti oinarrizko segurtasun neurriak tresna hau erabiltzean, sute, deskarga elektriko edo lesio arriskua murrizteko.
- Irakurri argibide guztiak xurgagailua erabili aurretik.
- Ez utzi aparatua arretarik gabe entxufatuta dagoenean. Desentxufatu entxufetik erabiltzen ez duzunean eta zerbitzua eman aurretik.
- Do not pick up hot ashes, coals, or flammable/combustible liquids.
- Ez erabili likido edo lurrun lehergarrien inguruan.
- Ensure all filters are correctly installed for the intended operation (wet or dry).
- Mantendu ilea, arropa solteak, behatzak eta gorputzeko atal guztiak irekiguneetatik eta atal mugikorretatik urrun.
- Erabili eskuliburu honetan deskribatzen den bezala soilik. Erabili fabrikatzaileak gomendatutako osagarriak soilik.
- Ez erabili hondatutako kable edo entxufe batekin. Aparatua behar bezala funtzionatzen ez badu, erori egin bada, hondatu, kanpoan utzi edo uretara erori bada, itzuli zerbitzu zentro batera.
- Ez tiratu edo eraman kabletik, ez erabili kablea helduleku gisa, ez itxi ate bat kabletik, edo ez tiratu kablea ertz edo ertz zorrotzetatik. Ez jarri aparatua kablearen gainean. Mantendu kablea gainazal beroetatik urrun.
- Ez deskonektatu kableari tiraka. Deskonektatzeko, heldu entxufeari, ez kableari.
- Ez maneiatu entxufea edo aparatua esku bustiekin.
- Deskonektatu aurretik, itzali kontrol guztiak.
- Kontuz ibili eskaileretan garbitzean.
- Ez erabili likido sukoiak edo erregarriak jasotzeko, hala nola gasolina, edo erabili egon daitezkeen tokietan.
- Ez hartu erretzen edo erretzen ari den ezer, hala nola zigarroak, pospoloak edo errauts beroak.
- Ez erabili iragazkiak jarri gabe.
- Tresna hau ez da gaitasun fisiko, sentsorial edo mental murriztua duten edo esperientzia eta ezagutza falta duten pertsonek (haurrak barne) erabiltzeko, baldin eta haien segurtasunaz arduratzen den pertsona batek gailuaren erabilerari buruz gainbegiratu edo jarraibiderik eman ez badu.
- Haurrak gainbegiratu behar dira aparatuarekin jolasten ez dutela ziurtatzeko.
3. Paketearen edukia
Carefully unpack the box and ensure all items are present and undamaged. If any parts are missing or damaged, contact Vacmaster customer support.
- 1 x Dust Extractor Unit
- 1 x HEPA 13 Cartridge Filter
- 1 x HEPA Exhaust Filter
- 1 x Pre-filter (washable)
- 1 x apar-iragazkia
- 2 x Luzapen-hodiak
- 1 x Handle with Air Flow Control
- 1 x Universal Floor Head
- 1 x Dual Mode Floor Head
- 1 x Anti-crush Hose
- 1 x Round Dusting Tool
- 1 x Extra-large Crevice Tool
- 1 x Universal Power Tool Adaptor
- 1 x Accessory Pouch
- 1 x 38L Hygiene Seal Dust Bag

Image: The Vacmaster VK1638SWC unit displayed with its full range of included accessories.
4. Konfigurazioa
4.1 Xurgagailua muntatzea
- Gurpilak erantsi: Insert the casters into the designated slots on the base of the vacuum until they click securely into place.
- Erantsi heldulekua: Secure the handle to the top of the unit using the provided hardware.
- Konektatu mahuka: Insert the anti-crush hose into the suction inlet on the front of the tank. Ensure it is firmly seated.
- Instalatu iragazkiak: Refer to section 4.2 for specific filter installation based on your intended use (wet or dry).

Irudia: Gertutik view of the yellow latch, indicating how to secure or release the motor head from the tank.
4.2 Iragazkien instalazioa
The VK1638SWC uses different filters for wet and dry applications. Always ensure the correct filter is installed before operation.
- Lehorra xurgatzeko: Install the HEPA 13 Cartridge Filter and the washable Pre-filter. Ensure the HEPA Exhaust Filter is also in place. The 38L hygiene seal dust bag can be used for improved dust collection and disposal.
- Hezea xurgatzeko: Remove the HEPA 13 Cartridge Filter and Pre-filter. Install the Foam Filter over the filter cage. Do NOT use the dust bag for wet vacuuming.

Image: A person demonstrating the process of accessing and handling the filter inside the vacuum cleaner's tank.
5. Funtzionamendu-argibideak
5.1 Lehorra xurgatzea
- Ensure the HEPA 13 Cartridge Filter and Pre-filter are correctly installed.
- Connect the desired extension tubes and floor head (universal or dual mode) or other accessory to the hose.
- Entxufatu kablea entxufe egoki batera (240 Volt).
- Turn the vacuum cleaner ON using the power switch.
- Begin vacuuming the dry debris.
- When finished, turn the vacuum OFF and unplug it.
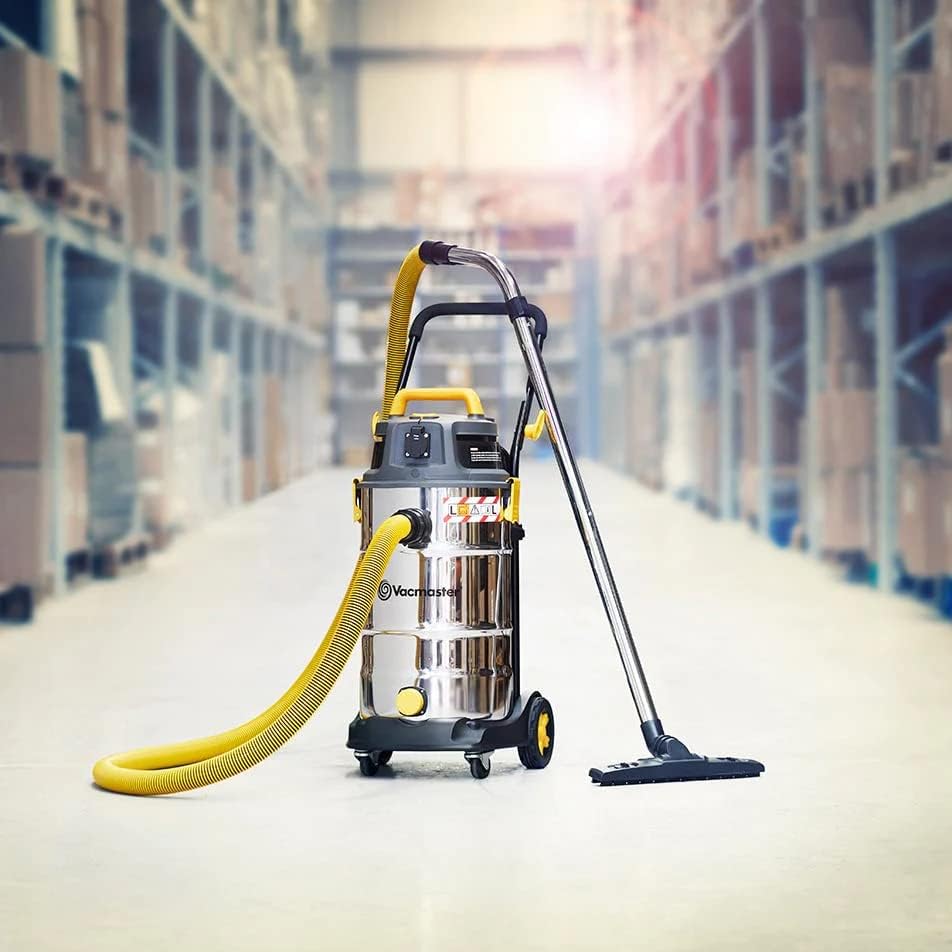
Image: The Vacmaster VK1638SWC vacuum cleaner fully assembled with its hose, extension tubes, and floor head.
5.2 Hezea xurgatzea
- Ensure the Foam Filter is correctly installed and the HEPA 13 Cartridge Filter and Pre-filter are removed.
- Connect the desired floor head or accessory suitable for wet pickup to the hose.
- Entxufatu korronte-kablea entxufe elektriko egoki batean.
- Turn the vacuum cleaner ON.
- Begin vacuuming liquids. The vacuum has an automatic shut-off feature that will stop suction when the tank is full.
- When finished or when the tank is full, turn the vacuum OFF and unplug it. Empty the tank as described in the Maintenance section.

Image: The Vacmaster VK1638SWC vacuum cleaner demonstrating its liquid draining capability from the tank's outlet.
5.3 Puzgailu-funtzioa
The VK1638SWC can also function as a powerful blower.
- Ensure the tank is empty and clean, and the appropriate filter is installed (HEPA for dry blowing, no filter or foam filter for wet blowing).
- Remove the hose from the suction inlet.
- Insert the hose into the blower port located on the motor head.
- Plug in and turn ON the vacuum to use the blower function.
5.4 Power Tool Connection
The included universal power tool adaptor allows for direct dust extraction when working with power tools.
- Ensure the vacuum is set up for dry vacuuming with the HEPA 13 filter.
- Connect the universal power tool adaptor to the end of the vacuum hose.
- Attach the other end of the adaptor to the dust extraction port on your power tool.
- Plug the power tool into the integrated power socket on the vacuum cleaner (if available and compatible). This allows the vacuum to start automatically when the power tool is activated.
- Turn on the vacuum cleaner and then your power tool to begin dust extraction.

Image: The Vacmaster VK1638SWC vacuum cleaner connected to a sanding machine, demonstrating its dust extraction capability.
5.5 Using the Wheel Brake
To secure the vacuum cleaner in place, engage the wheel brake by pressing down on the lever located on one of the casters. To release, lift the lever.

Image: A person's foot pressing down on the yellow lever to engage the wheel brake on the vacuum cleaner.
6. Mantentzea
Regular maintenance ensures optimal performance and extends the life of your vacuum cleaner. Always unplug the unit before performing any maintenance.
6.1 Iragazkiaren garbiketa eta ordezkapena
- HEPA 13 Cartridge Filter & Pre-filter: For dry use, these filters should be cleaned regularly by tapping them gently to dislodge dust or by using a soft brush. The pre-filter is washable; rinse with water and allow to air dry completely before reinstallation. Replace the HEPA cartridge filter when suction power significantly decreases or if it becomes damaged.
- Apar-iragazkia: For wet use, the foam filter should be rinsed with water after each use and allowed to air dry completely before storage or next use.
- HEPA ihes-iragazkia: Check periodically and replace if visibly dirty or if air quality issues are noted.
6.2 Tank Cleaning and Emptying
- Hondakin lehorrak: Unlatch the motor head and carefully lift it off. Remove the dust bag (if used) and dispose of contents. Empty any remaining debris from the stainless steel tank.
- Likidoak: For liquid disposal, the tank can be emptied by tilting the unit or by using the drain plug located at the bottom of the tank. After emptying, rinse the tank with water and wipe dry to prevent odors and corrosion.
6.3 Osagarrien Biltegiratzea
The VK1638SWC features integrated storage for its accessories, keeping them organized and readily accessible.

Image: The Vacmaster VK1638SWC vacuum cleaner showcasing its onboard storage for hose, power cord, and various attachments.
7. Arazoak
Bezeroarentzako arreta-zerbitzura jo aurretik, kontsultatu hurrengo taula arazo ohikoenak eta haien irtenbideak ikusteko.
| Arazoa | Kausa posiblea | Irtenbidea |
|---|---|---|
| Xurgagailua ez da pizten. | No power supply; Damaged cord/plug; Faulty switch. | Check power outlet and plug. Inspect cord for damage. Contact service if switch is faulty. |
| Xurgapen galera. | Clogged hose/attachments; Full tank; Dirty/incorrect filter; Air leak. | Clear obstructions. Empty tank. Clean/replace filters. Check all connections for leaks. |
| Motorra gehiegi berotzen da/itzali egiten da. | Blocked airflow; Full tank (wet use); Prolonged heavy use. | Check for blockages. Empty tank. Allow motor to cool down before restarting. |
| Unitatetik ura isurtzen da. | Foam filter not installed correctly for wet use; Tank overfilled; Damaged tank seal. | Ensure foam filter is properly seated. Do not overfill tank. Inspect tank seal for damage. |
8. Zehaztapenak
| Ezaugarri | Xehetasuna |
|---|---|
| Modelo zenbakia | VK1638SWC |
| Boterea | 1600W-ko motorra |
| Air Watts | 260 Air Watts |
| Aire-fluxua | 52 L/s (max) |
| Huts-presioa | 27 kpa |
| Tankaren Edukiera | 38 litro |
| Iragazkia | Dual HEPA 13 (Cartridge & Exhaust), Washable Pre-filter, Foam Filter |
| Materiala | Altzairu herdoilgaitzezko depositua |
| Neurriak (L x W x H) | 49 x 41 x 79 cm |
| Pisua | 17 kilogramo |
| liburukiatage | 240 Volt |
| Ezaugarri Berezia | Funtzionalitate hezea/lehorra |
9. Bermea eta Laguntza
9.1 Bermearen informazioa
The Vacmaster VK1638SWC Industrial Wet and Dry Vacuum Cleaner comes with a 2 urteko bermea from the date of purchase. This warranty covers defects in materials and workmanship under normal use. It does not cover damage resulting from misuse, abuse, accident, unauthorized repairs, or lack of maintenance.
9.2 Bezeroarentzako laguntza
For technical assistance, warranty claims, or to order replacement parts, please contact Vacmaster customer support. Refer to the contact information provided with your purchase documentation or visit the official Vacmaster webgunea.


