1. Sarrera
This user manual provides comprehensive instructions for the EasySMX 9110 Wireless Gaming Controller and its accompanying backup wireless receiver dongle. This kit is designed to enhance your gaming experience across multiple platforms.
The EasySMX 9110 Wireless Gaming Controller is compatible with a wide range of devices, including PC (Xinput & Dinput), Steam, PlayStation 3 (PS3), Android mobile devices, Android TV boxes, Tesla vehicles, Nintendo Switch, and Steam Deck.
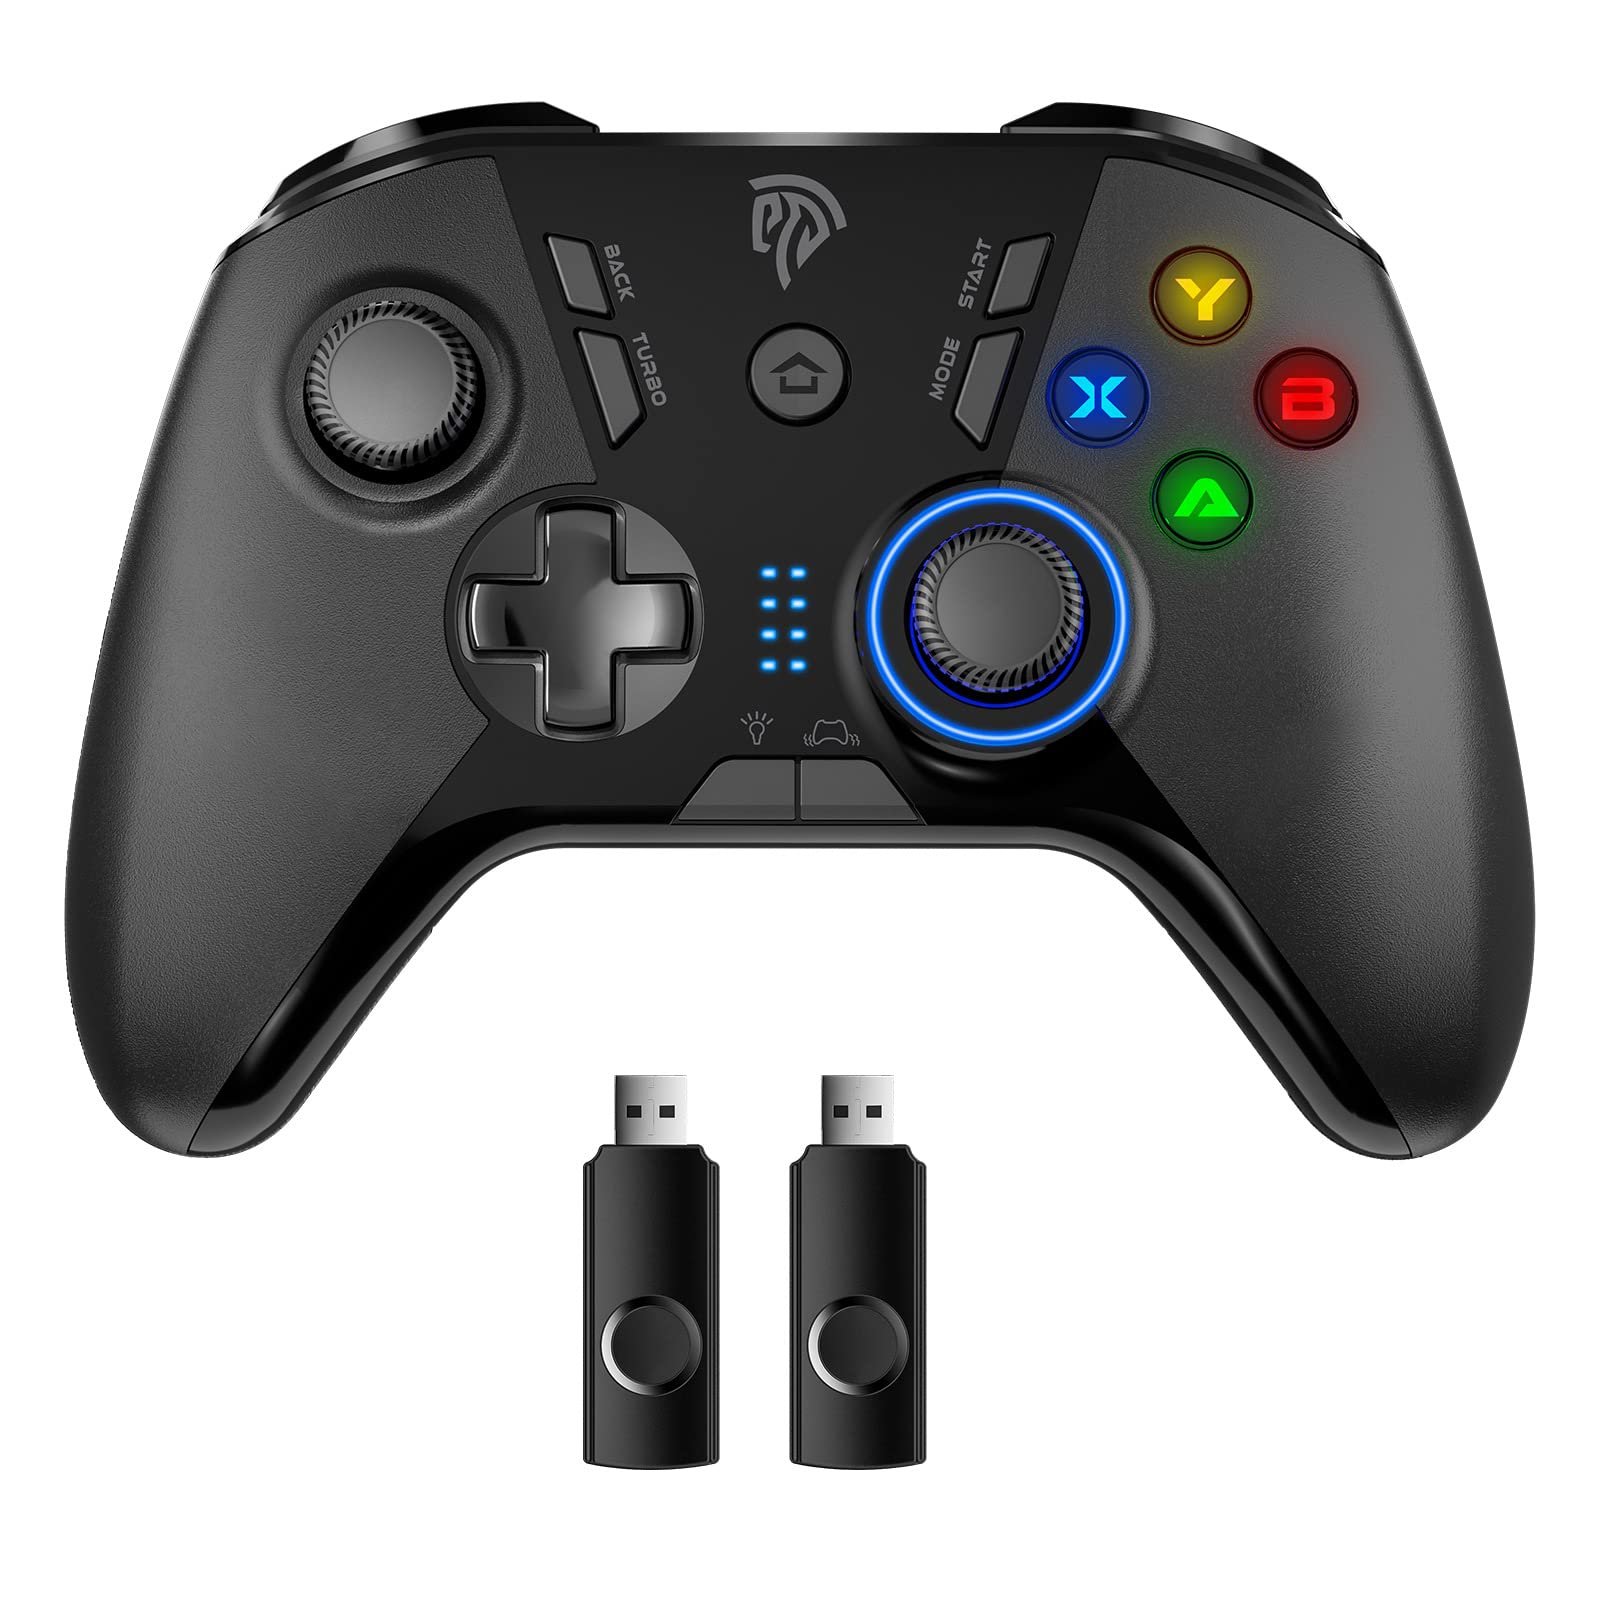
Image 1.1: EasySMX 9110 Wireless Gaming Controller and USB Dongle. The image displays the black wireless controller with its various buttons and joysticks, alongside the compact black USB wireless receiver dongle.
2. Paketearen edukia
Mesedez, egiaztatu elementu guztiak zure paketean daudela:
- 1 x EasySMX 9110 Wireless Gaming Controller
- 1 x Backup Wireless Receiver Dongle
- 1 x USB Charging Cable (typically included, though not explicitly listed in product features)
- 1 x Erabiltzailearen eskuliburua (dokumentu hau)
3. Konfigurazioa
3.1. Kontrolatzailea kargatzea
Before initial use, ensure the controller is fully charged. The controller has a built-in 600mAh battery, providing approximately 12-14 hours of working time on a full charge. A full charge typically takes about 2 hours.
- Connect the small end of the USB charging cable to the charging port on the controller.
- Konektatu USB kargatzeko kablearen mutur handiena USB elikatze-iturri batera (adibidez, ordenagailuko USB ataka, USB hormako egokitzailea).
- The indicator lights on the controller will show charging status. They will typically stop blinking or change color once fully charged.
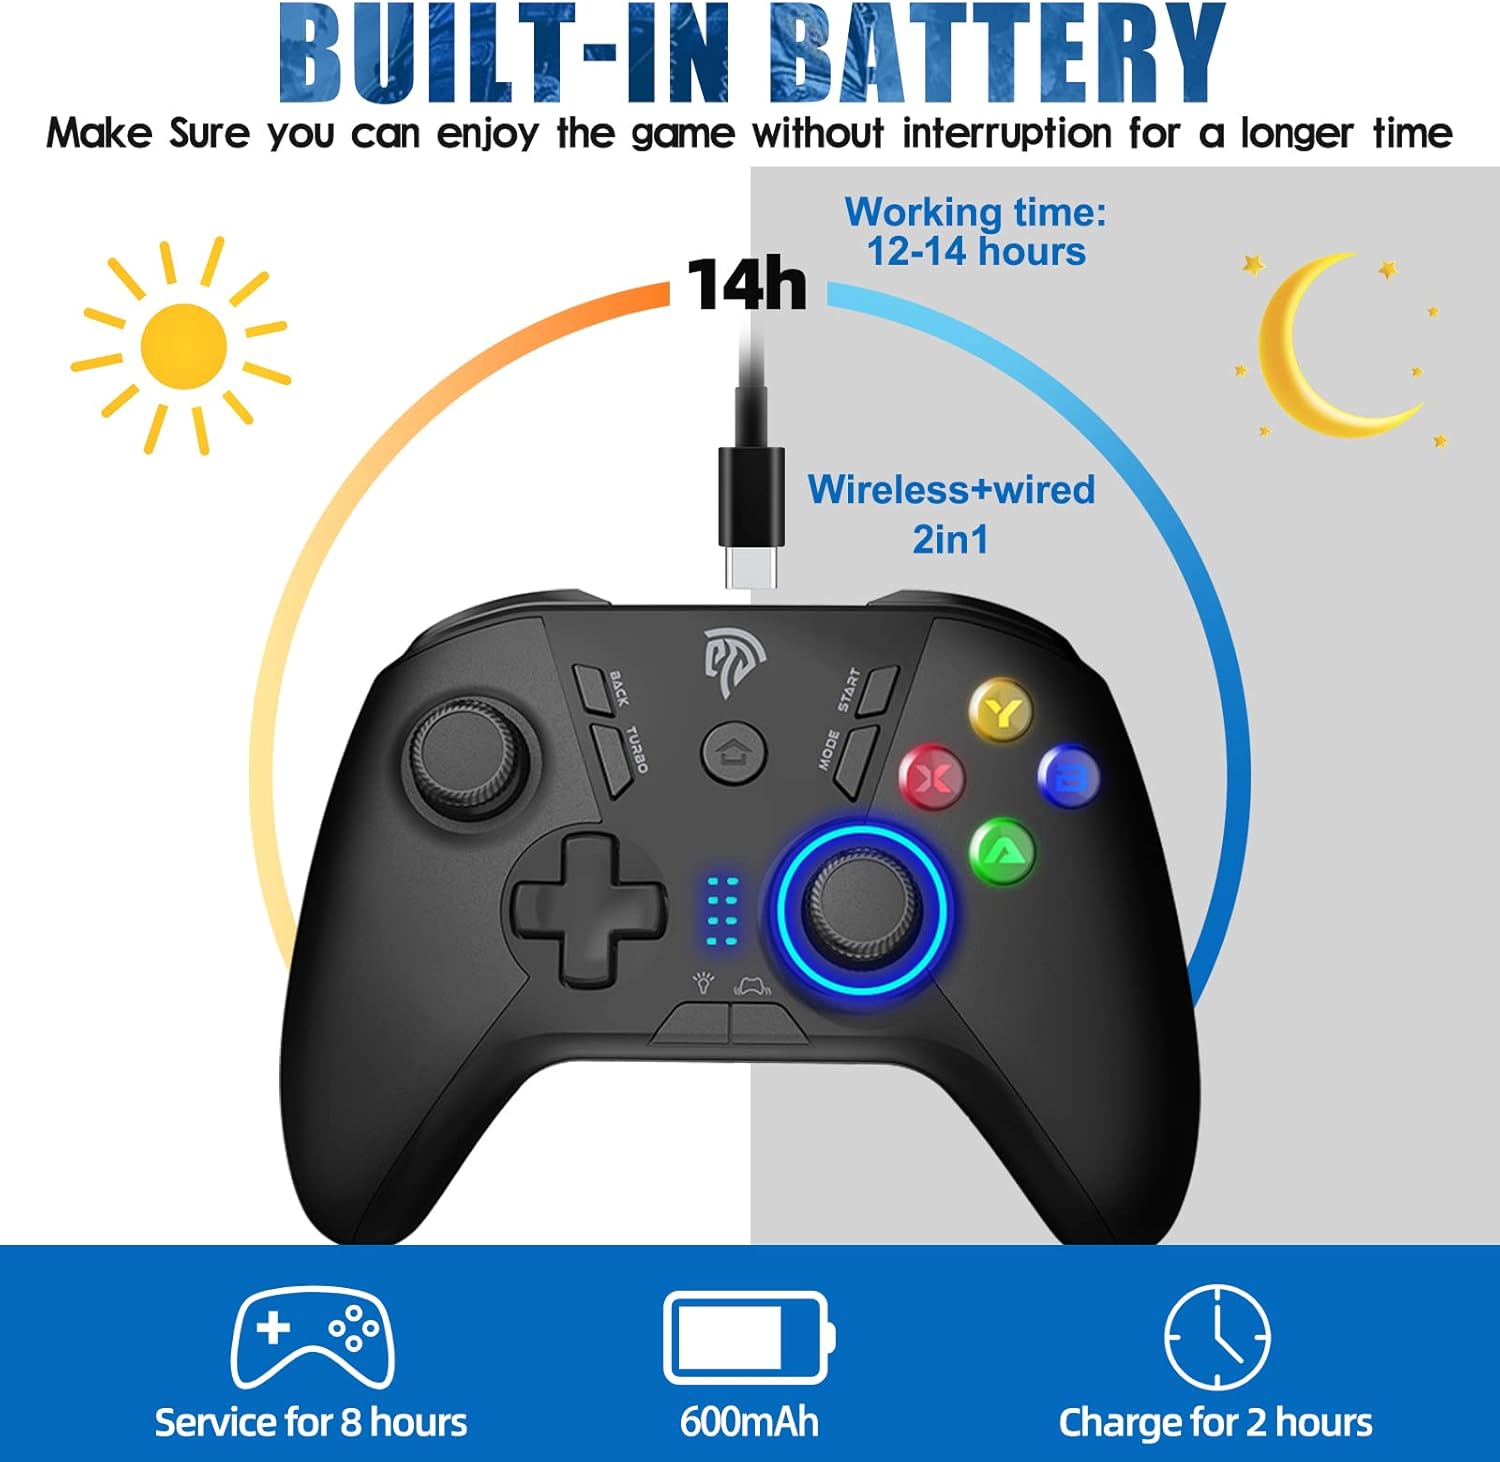
Image 3.1: EasySMX 9110 Controller Built-in Battery and Charging Information. This graphic illustrates the controller's 600mAh built-in battery, showing a working time of 12-14 hours and a charging time of 2 hours.
3.2. Connecting the Wireless Receiver Dongle
The controller uses a 2.4GHz wireless connection via the provided USB dongle. The dongle allows for a stable connection up to 10 meters (approximately 33 feet).
- Locate an available USB port on your desired gaming platform (PC, PS3, Android TV Box, Nintendo Switch Dock, Steam Deck via adapter, Tesla).
- Insert the wireless receiver dongle firmly into the USB port.
- The system should automatically recognize the dongle.

Image 3.2: EasySMX Wireless Receiver Dongle Close-up. A detailed view of the black USB wireless receiver dongle, featuring a central circular button.

Image 3.3: EasySMX Controller 2.4G Wireless Range and Dongle. This image illustrates the 2.4G wireless connection between the controller and the USB dongle, highlighting a 10-meter operational range.
3.3. Kontrolatzailea parekatzea
Once the dongle is connected to your device, power on the controller. The controller should automatically attempt to connect to the dongle. The indicator lights on the controller will confirm a successful connection.
- Press the Home button (usually the central logo button) on the controller to power it on.
- The indicator lights will flash while searching for the dongle and become solid once connected.
- If the controller does not connect automatically, ensure the dongle is properly inserted and try pressing the Home button again.
4. Funtzionamendu-argibideak
4.1. Piztu/Itzali
- Piztu: Press the Home button (EasySMX logo) to turn on the controller.
- Itzali: Press and hold the Home button for approximately 5 seconds to turn off the controller. The controller will also automatically power off after a period of inactivity to conserve battery.
4.2. Mode Switching (Xinput/Dinput)
The EasySMX 9110 controller supports both Xinput and Dinput modes for PC compatibility. The controller typically defaults to Xinput mode when connected to a PC, which is standard for most modern games.
- To switch between modes, consult the specific instructions provided with your controller or refer to the EasySMX official support website. (Note: Specific button combination for mode switching is not provided in the product data, general guidance is given).
4.3. Turbo funtzioa
The controller features a Turbo function for rapid-fire input. This can be useful in games requiring quick, repeated button presses.
- To activate Turbo: Press and hold the desired action button (e.g., A, B, X, Y) and then press the 'TURBO' button simultaneously.
- To deactivate Turbo: Repeat the same process (hold the action button and press 'TURBO').
4.4. Supported Platforms and Connection Methods
The controller offers versatile compatibility:
- PC (Windows XP/7/8/8.1/10/11): Connect the USB dongle to an available USB port on your desktop or laptop. The system will install necessary drivers automatically.
- PlayStation 3 (PS3): Connect the USB dongle to an available USB port on the PS3 console.
- Android Mobile/Tablet/TV Box: For Android devices, an OTG adapter (not included) may be required to connect the USB dongle. Plug the dongle into the OTG adapter, then connect the adapter to your Android device.
- Nintendo Switch: Connect the USB dongle to an available USB port on the Nintendo Switch dock. For handheld mode, an OTG adapter is required.
- Lurrun-kubierta: Connect the USB dongle to an available USB port on the Steam Deck or via a USB-C hub/adapter.
- Tesla: Connect the USB dongle to an available USB port in your Tesla vehicle.
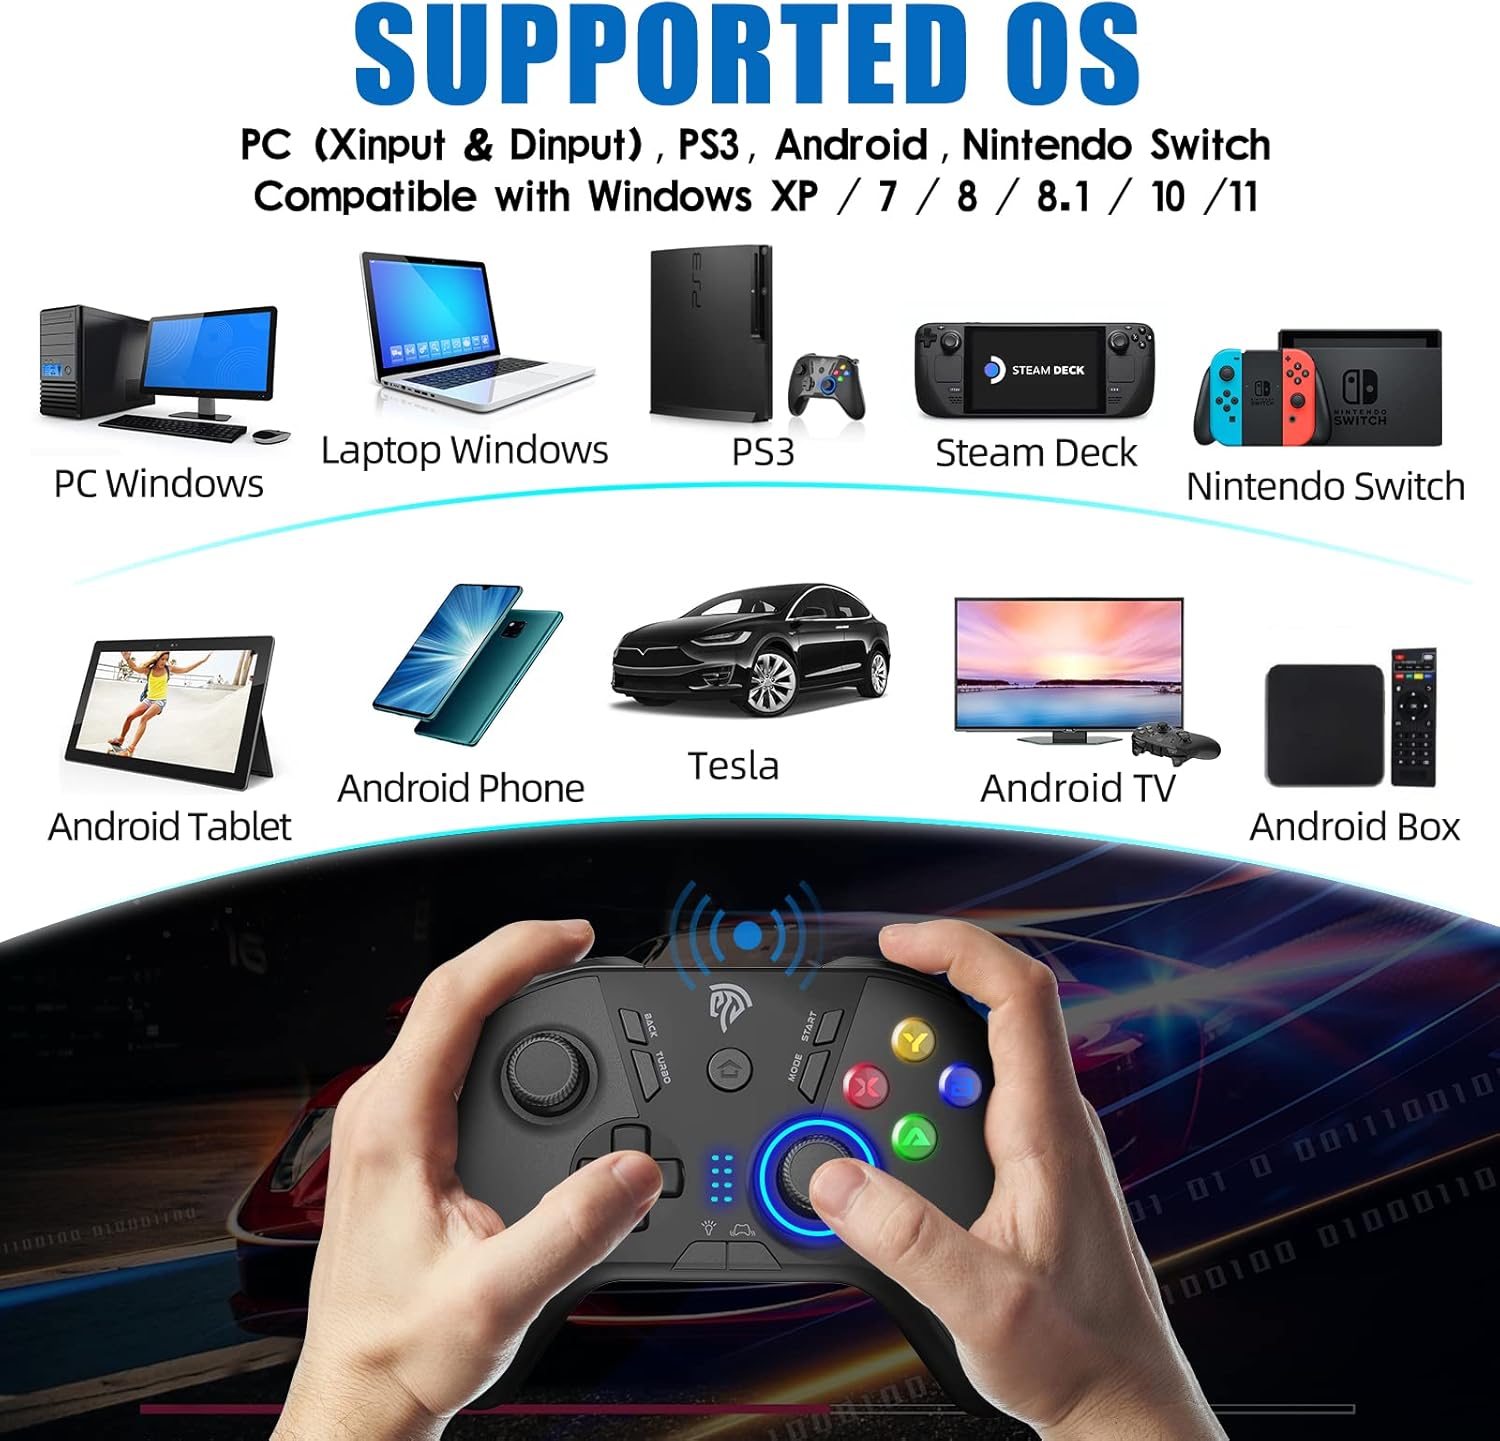
Image 4.1: EasySMX Controller Supported Operating Systems and Devices. This image displays various compatible platforms including PC (Windows), Laptop, PS3, Steam Deck, Nintendo Switch, Android Phone, Android Tablet, Tesla, Android TV, and Android Box.
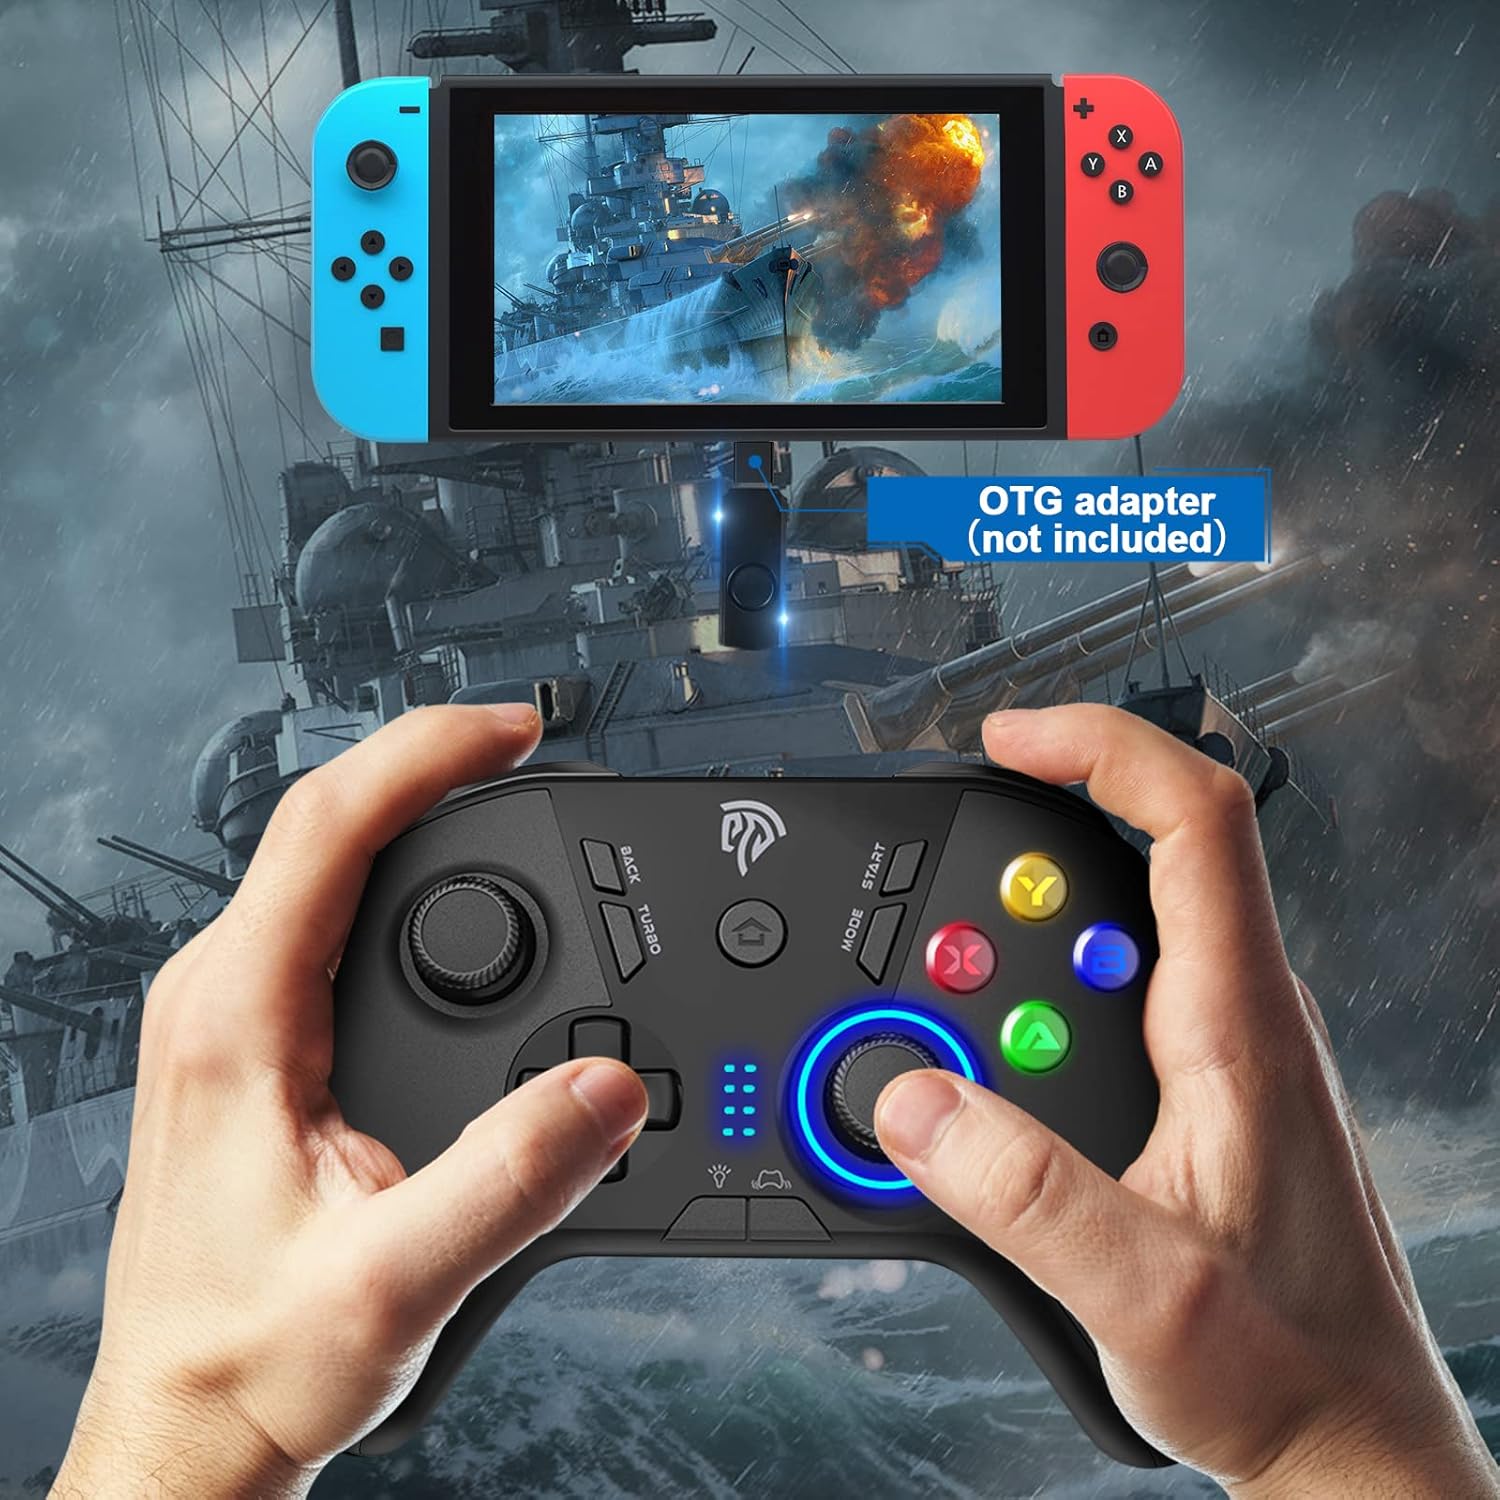
Image 4.2: EasySMX Controller Connected to Nintendo Switch via OTG Adapter. The image shows the controller being used with a Nintendo Switch in handheld mode, indicating that an OTG adapter (not included) is required for this connection.
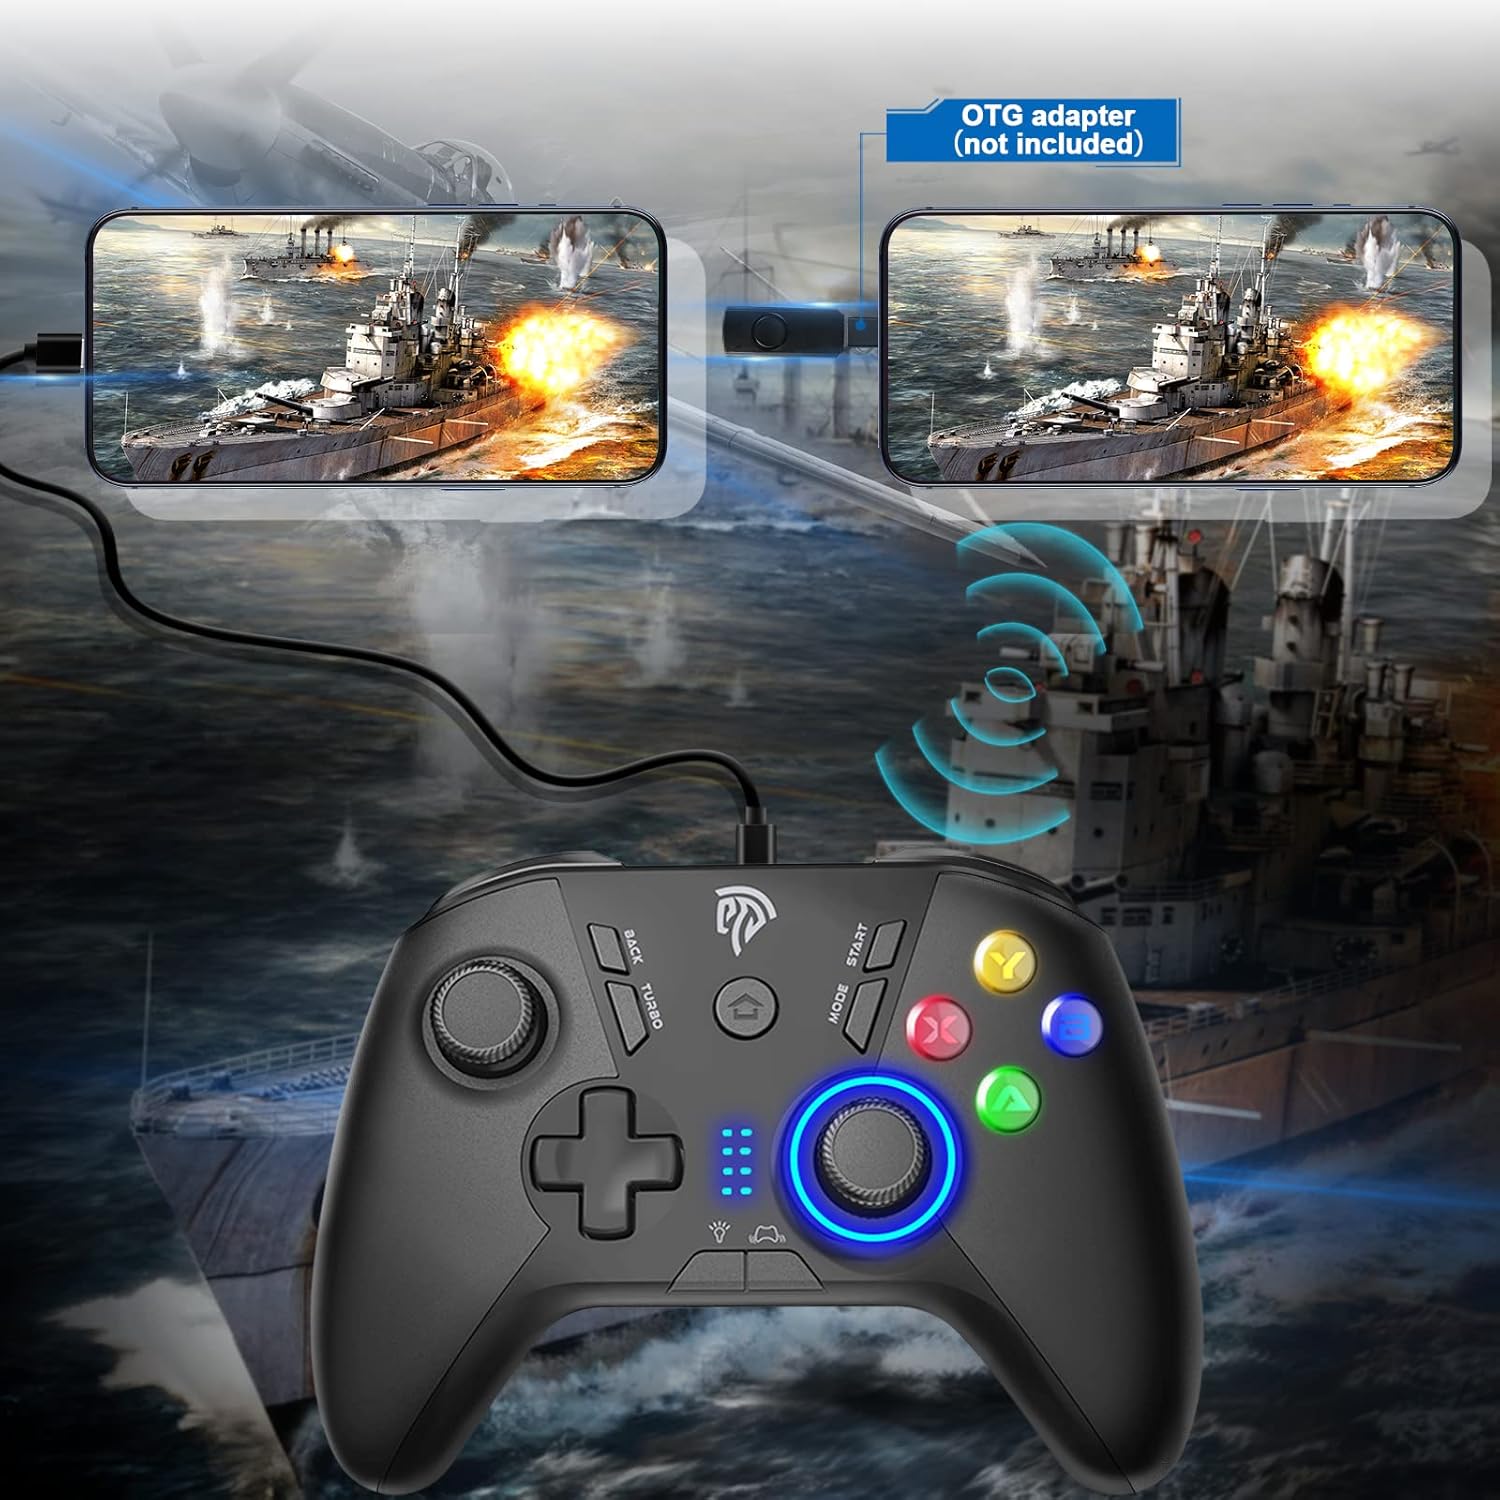
Image 4.3: EasySMX Controller Connected to Mobile Phones via OTG Adapter. This image demonstrates the controller connected to two mobile phones, illustrating the use of an OTG adapter (not included) for wired connection to mobile devices.
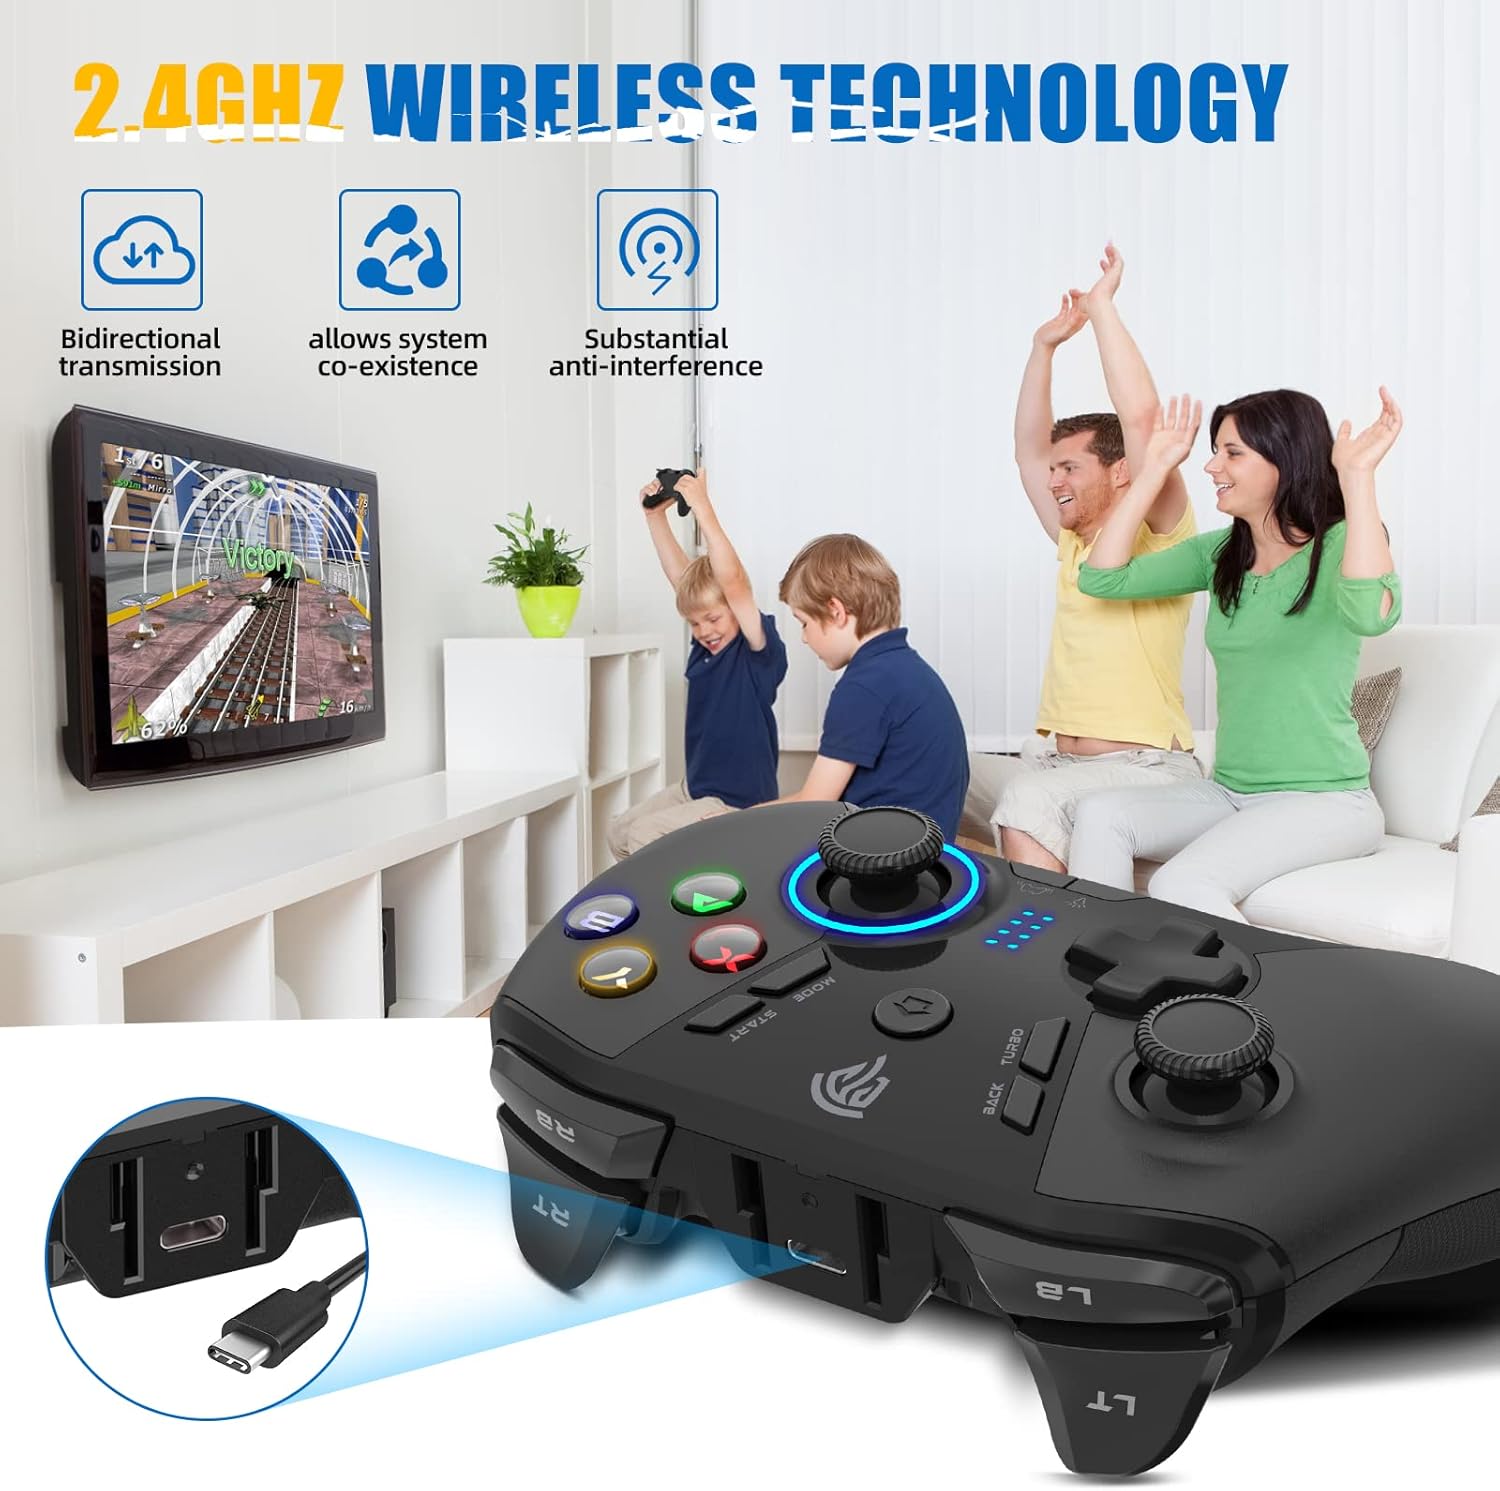
Image 4.4: EasySMX 2.4GHz Wireless Technology for Gaming. This image highlights the 2.4GHz wireless technology, emphasizing bidirectional transmission, system co-existence, and substantial anti-interference for a smooth gaming experience.
5. Mantentzea
5.1. Garbiketa
- Use a soft, dry cloth to wipe the surface of the controller and dongle.
- Zikinkeria egoskorrerako, apur bat lehortuampGarbitu oihal bat urarekin edo garbiketa-soluzio leun batekin, eta gero lehortu berehala.
- Do not use harsh chemicals, abrasive cleaners, or allow liquids to enter the device openings.
5.2. Biltegiratzea
- Store the controller and dongle in a cool, dry place away from direct sunlight and extreme temperatures.
- Kalteak saihesteko, saihestu objektu astunak kontrolatzailearen gainean jartzea.
5.3. Bateria zaintzea
- To prolong battery life, avoid fully discharging the controller frequently.
- If storing the controller for an extended period, charge it to approximately 50% every three months.
6. Arazoak
6.1. Kontrolatzailea ez da konektatzen
- Check Dongle: Ensure the wireless receiver dongle is securely plugged into a working USB port on your device.
- Piztu: Make sure the controller is powered on by pressing the Home button.
- Bateria maila: Charge the controller fully to ensure it has sufficient power.
- Interferentzia: Move closer to the dongle or away from potential sources of wireless interference (e.g., Wi-Fi routers, microwaves).
- Parekatu berriro: Try re-pairing the controller by powering it off and on, ensuring the dongle is connected.
6.2. Buttons or Joysticks Not Responding
- Konexioa: Verify the controller is properly connected to your device (indicator lights solid).
- Berrabiarazi: Power off and then power on the controller.
- Proba beste gailu batean: If possible, test the controller on a different compatible device to determine if the issue is with the controller or the original device/game.
- Garbitu: Ensure no debris is obstructing the buttons or joysticks.
6.3. Lag or Disconnections
- Distantzia: Ensure the controller is within the 10-meter operating range of the dongle.
- Oztopoak: Minimize physical obstructions between the controller and the dongle.
- Interferentzia: Reduce other 2.4GHz wireless devices operating nearby.
- USB ataka: Try a different USB port for the dongle, especially if using a USB hub.
7. Zehaztapenak
| Ezaugarri | Xehetasuna |
|---|---|
| Marka | EasySMX |
| Eredua | 9110 |
| Konektibitate Teknologia | 2.4GHz Wireless (USB Dongle) |
| Wireless Range | Gehienez 10 metro |
| Kontrolagailu mota | Gamepad |
| Gailu bateragarriak | PC (Desktop, Laptop), Gaming Console (PS3, Nintendo Switch, Steam Deck), Smartphone (Android), Television (Android TV), Tesla |
| Energia iturria | Battery Powered (Built-in 600mAh) |
| Lanaldia | 12-14 ordu (gutxi gorabehera) |
| Kargatzeko Denbora | 2 ordu (gutxi gorabehera) |
| Ezaugarri Berezia | Wireless, Turbo Function |
8. Bermea eta Laguntza
8.1. Bermearen informazioa
EasySMX products typically come with a limited warranty. For specific warranty terms and conditions, please refer to the warranty card included with your product or visit the official EasySMX webgunea. Gorde erosketa-agiria erosketaren frogagiri gisa berme-erreklamazioetarako.
8.2. Bezeroarentzako arreta
If you encounter any issues not covered in this manual or require further assistance, please contact EasySMX customer support. You can usually find contact information (email, phone, or support portal) on the official EasySMX webgunea:
When contacting support, please have your product model (9110) and purchase details ready.


