1. Produktua amaitu daview
This document provides instructions for the installation, operation, and maintenance of the Aquacomputer Backplate for Kryographics Next RTX 3080 Extended / RTX 3090 Extended, Passive. This backplate is designed to enhance the passive cooling capabilities of your graphics card by providing additional surface area for heat dissipation from the rear of the PCB.
It is crucial to follow all instructions carefully to ensure proper installation and optimal performance of the backplate.
2. Paketearen edukia
Mesedez, egiaztatu osagai guztiak daudela instalazioa hasi aurretik:
- 1x Aquacomputer Backplate for Kryographics Next RTX 3080 Extended / RTX 3090 Extended, Passive
- Mounting hardware (screws, washers, thermal pads - specific quantities may vary, refer to included diagram if available)
Note: The main product image shows the backplate itself. Please ensure all listed components are present.
3. Konfigurazioa eta instalazioa
Before proceeding, ensure your computer is powered off and disconnected from the mains electricity. It is recommended to wear anti-static gloves to prevent damage to sensitive electronic components.
- Prestatu txartel grafikoa: Carefully remove your graphics card from the computer. If a water block is already installed, ensure it is properly seated and secured.
- Azalera garbiak: Gently clean the back of your graphics card's PCB and the contact surface of the backplate with isopropyl alcohol to remove any dust, oils, or residue. Allow to dry completely.
- Aplikatu konpresak termikoak: Apply the provided thermal pads to the designated areas on the backplate or the graphics card PCB, as indicated in the product's specific mounting diagram (if included). Ensure good contact and coverage over memory modules and VRMs on the back of the PCB.
- Atzeko plaka kokatu: Carefully align the backplate with the mounting holes on the rear of your graphics card.
- Atzeko plaka finkatu: Using the provided screws and washers, gently secure the backplate to the graphics card. Tighten screws in a diagonal pattern to ensure even pressure. Do not overtighten, as this can damage the PCB.
- Azken egiaztapena: Visually inspect the installation to ensure the backplate is flush and securely attached without any gaps or misalignments.
- Txartel grafikoa berriro instalatu: Carefully reinstall your graphics card into your computer's PCIe slot and reconnect all necessary power cables.

1. irudia: Aurrealdea view of the Aquacomputer Backplate. This image displays the top surface of the backplate, featuring the 'RTX' cutout logo and various mounting holes for attachment to the graphics card.
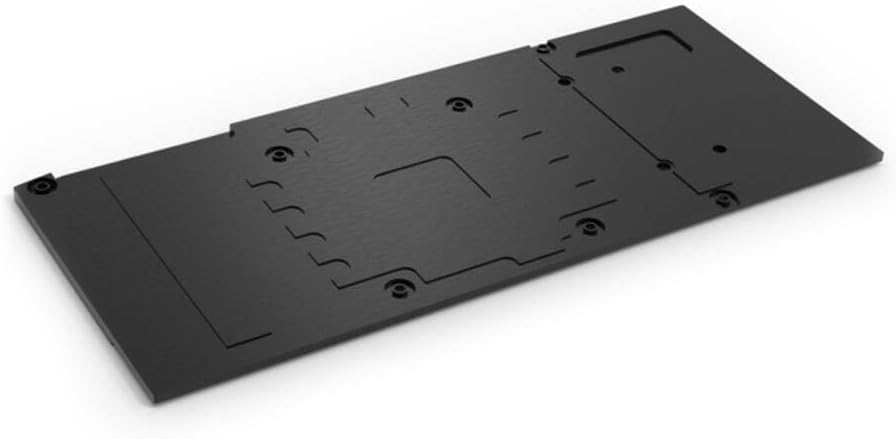
2. irudia: Atzekoa view of the Aquacomputer Backplate. This image illustrates the underside of the backplate, highlighting the recessed areas designed for thermal pads to make contact with the graphics card's components, along with the corresponding screw holes.
4. Funtzionamendu-kontuan hartu beharrekoak
As a passive cooling component, the backplate does not require active operation. Its effectiveness relies on proper installation and adequate airflow within your computer case. Ensure your system has good case ventilation to allow heat to dissipate efficiently from the backplate's surface.
5. Mantentzea
Regular maintenance helps ensure optimal performance and longevity of your backplate:
- Hautsa kentzea: Periodically clean any dust accumulation from the surface of the backplate using compressed air or a soft, dry cloth. Ensure the computer is powered off before cleaning.
- Thermal Pad Inspection: If you notice a decrease in cooling performance, consider inspecting the thermal pads. Over time, thermal pads can degrade and may need replacement.
- Torlojuen estutasuna: Occasionally check the tightness of the mounting screws. Vibrations can sometimes cause screws to loosen slightly.
6. Arazoak
If you encounter issues after installing the backplate, consider the following:
- Poor Thermal Performance:
- Verify that thermal pads are correctly placed and making good contact with both the PCB components and the backplate.
- Ensure mounting screws are tightened evenly to apply consistent pressure.
- Check for adequate airflow within your computer case.
- Backplate Not Fitting Correctly:
- Double-check that the backplate model is compatible with your specific graphics card (Kryographics Next RTX 3080 Extended / RTX 3090 Extended).
- Ensure no cables or other components are obstructing the backplate's seating.
7. Zehaztapenak
| Ezaugarri | Xehetasuna |
|---|---|
| Marka | Aquacomputer |
| Modelo zenbakia | 1021062 |
| ASIN | B0BK45P2JT |
| Fabrikatzailea | AQUACOMPUTER |
| Eskuragarri dagoen lehen data | 28ko urriaren 2022a |
| Bateragarritasuna | Kryographics Next RTX 3080 Extended / RTX 3090 Extended |
| Hozte Mota | Pasiboa |
8. Bermea eta Laguntza
Specific warranty details and direct support contact information are not provided within the available product data. For warranty claims or technical assistance, please refer to the official Aquacomputer website or contact your retailer of purchase. Keep your proof of purchase for any warranty-related inquiries.
9. Segurtasun informazio garrantzitsua
- Deskonektatu beti ordenagailuaren korrontea barneko osagaiak instalatu edo mantentze-lanak egin aurretik.
- Handle electronic components with care to avoid electrostatic discharge (ESD) damage. Use anti-static precautions.
- Do not overtighten screws, as this can damage the graphics card PCB.
- Mantendu haurren eskura.

