Sarrera
Thank you for choosing the LEHMANN Sargo Cordless Window Cleaner. This manual provides essential information for the safe and efficient use of your device. Please read these instructions carefully before first use and keep them for future reference.
Segurtasun-argibide garrantzitsuak
- Irakurri argibide guztiak aparatua erabili aurretik.
- Tresna hau etxeko erabilerarako soilik da. Ez erabili helburu komertzialetarako.
- Mantendu aparatua haurrengandik eta maskotengandik urrun.
- Ez murgildu aparatua uretan edo beste likido batzuetan.
- Erabili tresnarekin batera datorren kargagailua soilik.
- Ez erabili tresna kaltetuta edo gaizki funtzionatzen badu. Jarri harremanetan bezeroarentzako arreta-zerbitzuarekin.
- Kargagailua konektatu aurretik, ziurtatu kargatzeko ataka lehor dagoela.
- Do not use abrasive cleaning agents or solvents on the appliance.
- Always empty the dirty water tank after each use.
Produktua amaituview
Familiarize yourself with the components of your LEHMANN Sargo Cordless Window Cleaner.

1. irudia: barne dauden osagaiak
1. Window Vacuum Unit, 2. Microfiber Cleaning Pad with Holder, 3. Telescopic Pole, 4. Charger.

2. irudia: Produktuaren neurriak
The main unit measures approximately 31 cm in height, 25 cm in width (squeegee blade), and 15 cm in depth.
The LEHMANN Sargo is designed for efficient cleaning of windows, mirrors, and other smooth surfaces. It features an integrated sprayer, a 25 cm wide squeegee blade, and a dirty water collection tank.
Konfigurazioa
1. Bateria kargatzea
Before first use, fully charge the device. A full charge takes approximately 150 minutes.
- Connect the charger to the charging port on the device.
- Entxufatu kargagailua korronte-hartune batera.
- The charging indicator light will show the charging status (refer to device specific indicator details if available, otherwise assume a standard indicator).
- Guztiz kargatuta dagoenean, deskonektatu kargagailua.
2. Assembling the Telescopic Pole (Optional)
For cleaning high windows or hard-to-reach areas, attach the telescopic pole.
- Attach the window vacuum unit to the end of the telescopic pole. Ensure it clicks securely into place.
- Adjust the pole length by twisting and extending the sections. The pole is adjustable from 42.5 cm to 62 cm.
- To attach the microfiber cleaning pad holder, slide it onto the designated slot on the pole.
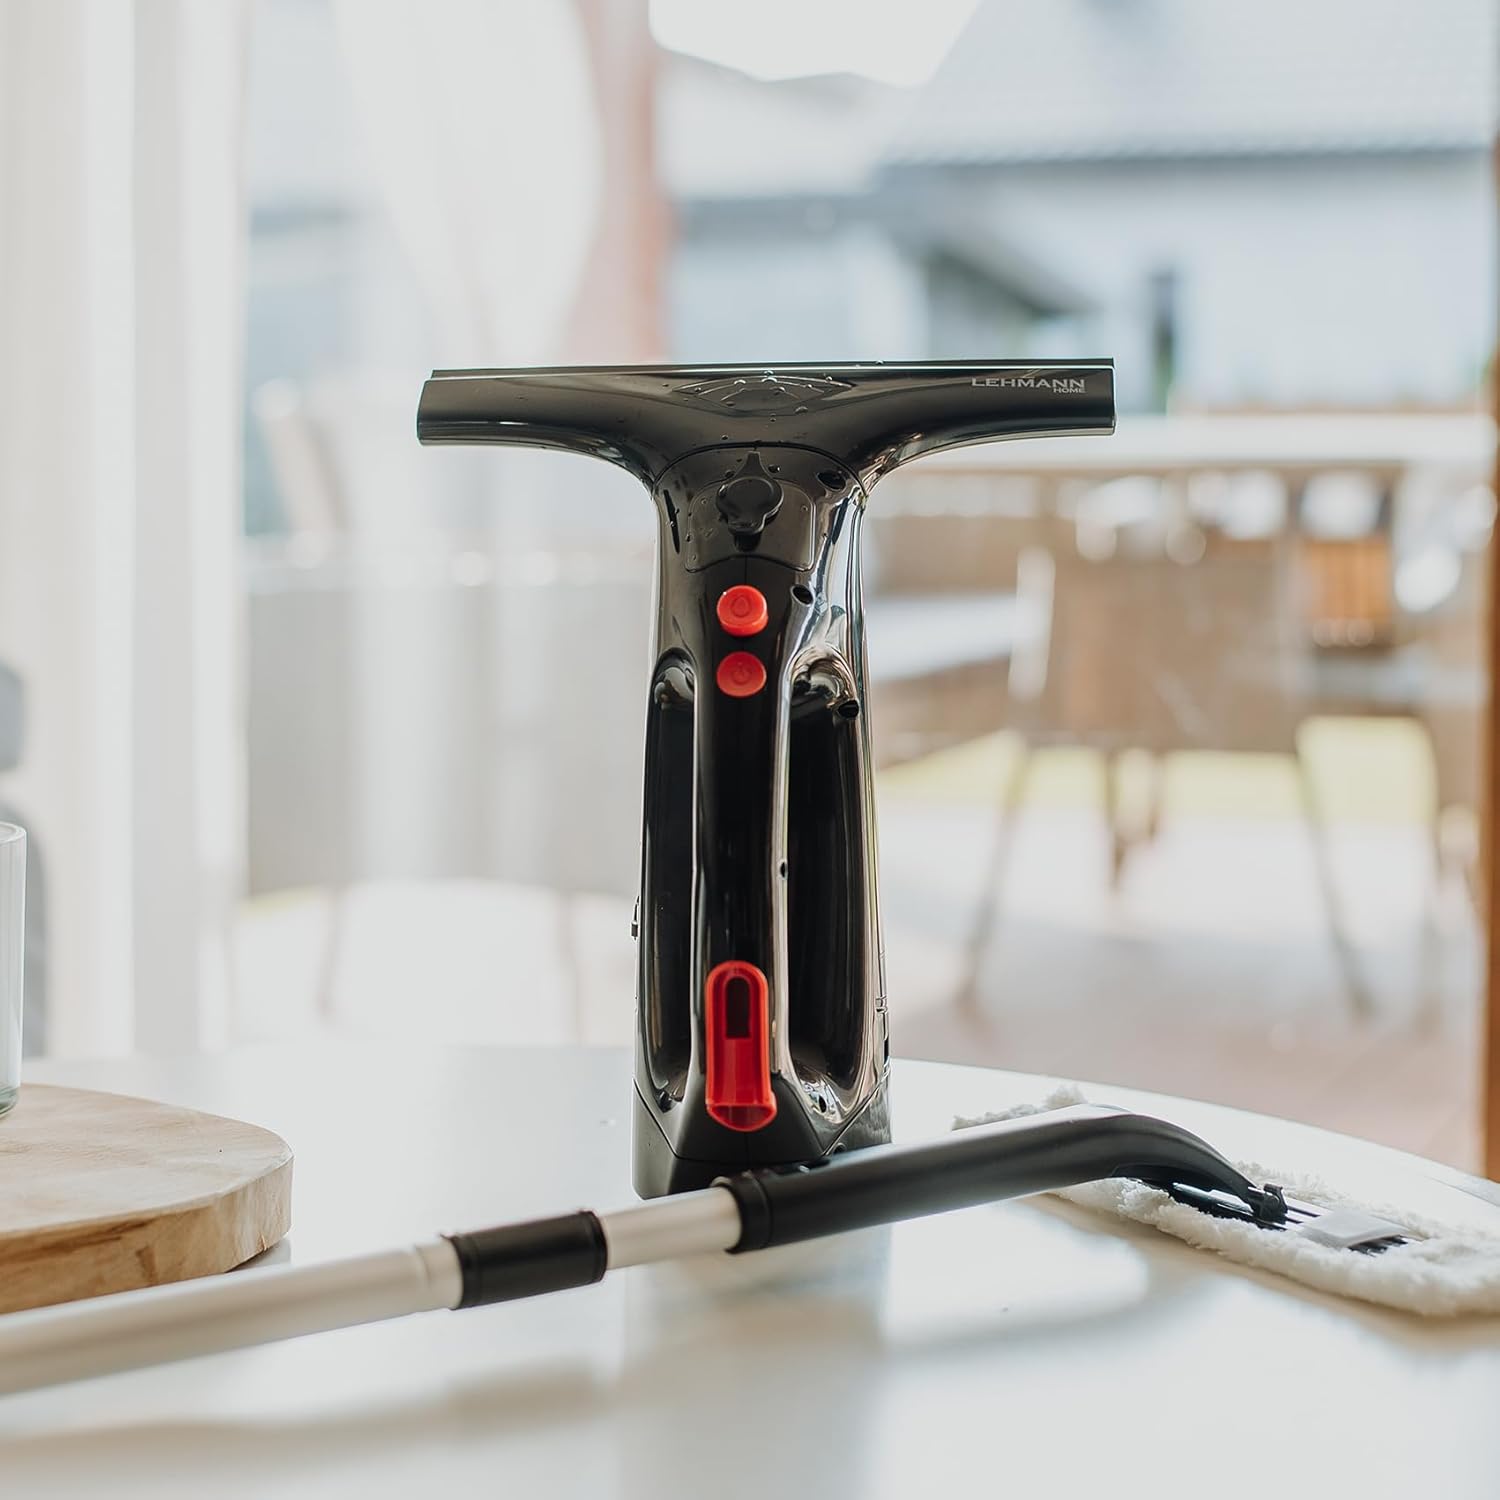
Figure 3: Window Cleaner with Telescopic Pole
The window cleaner unit attached to the telescopic pole for extended reach.
3. Attaching the Microfiber Cleaning Pad
The microfiber pad is used for applying cleaning solution and scrubbing surfaces.
- Align the microfiber cleaning pad with its holder.
- Securely attach the pad to the holder, ensuring it covers the entire surface.
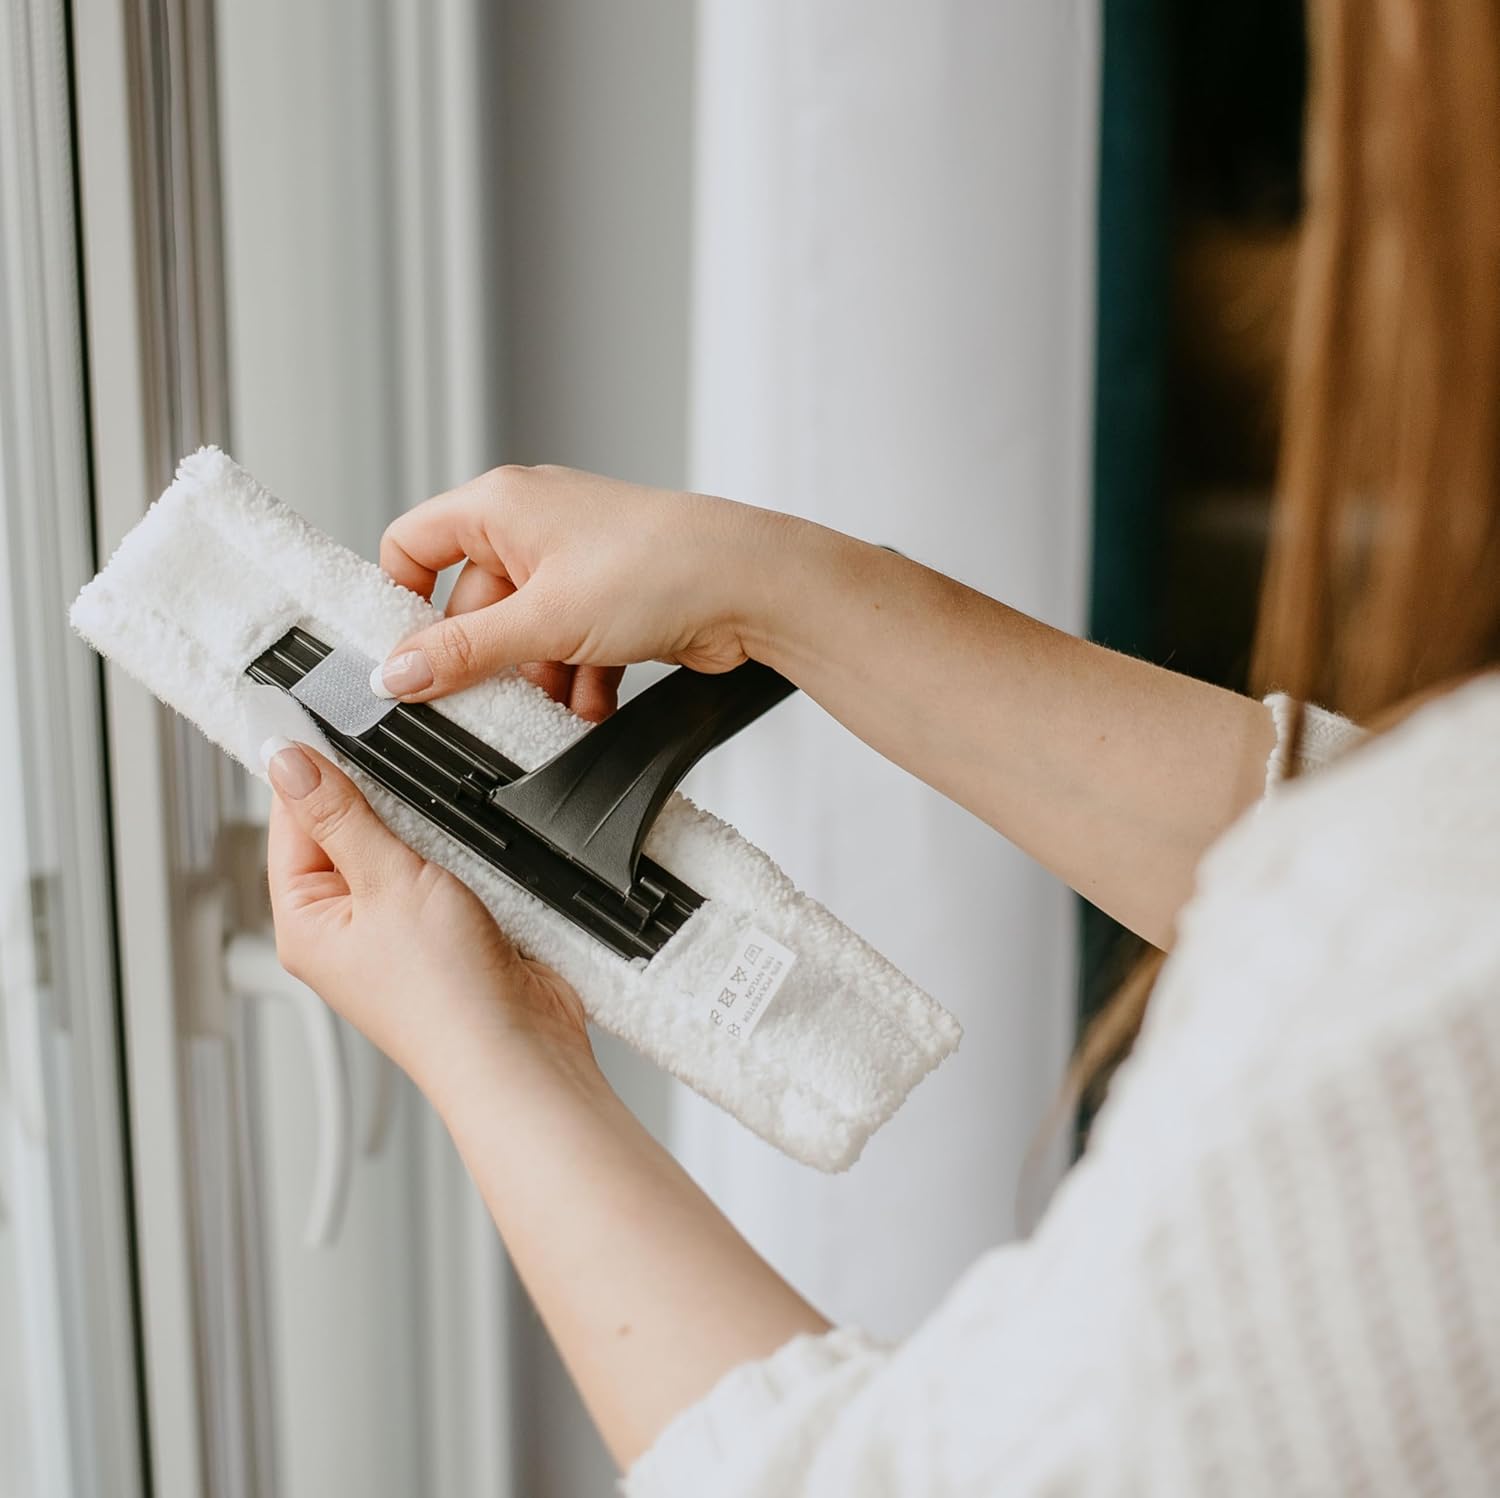
Figure 4: Attaching Microfiber Pad
Hands demonstrating how to attach the microfiber cleaning pad to its designated holder.
4. Filling the Sprayer
The integrated sprayer has a capacity of 70 ml.
- Locate the filling opening on the device.
- Carefully pour your preferred window cleaning solution into the sprayer tank. Do not overfill.
- Close the filling opening securely.
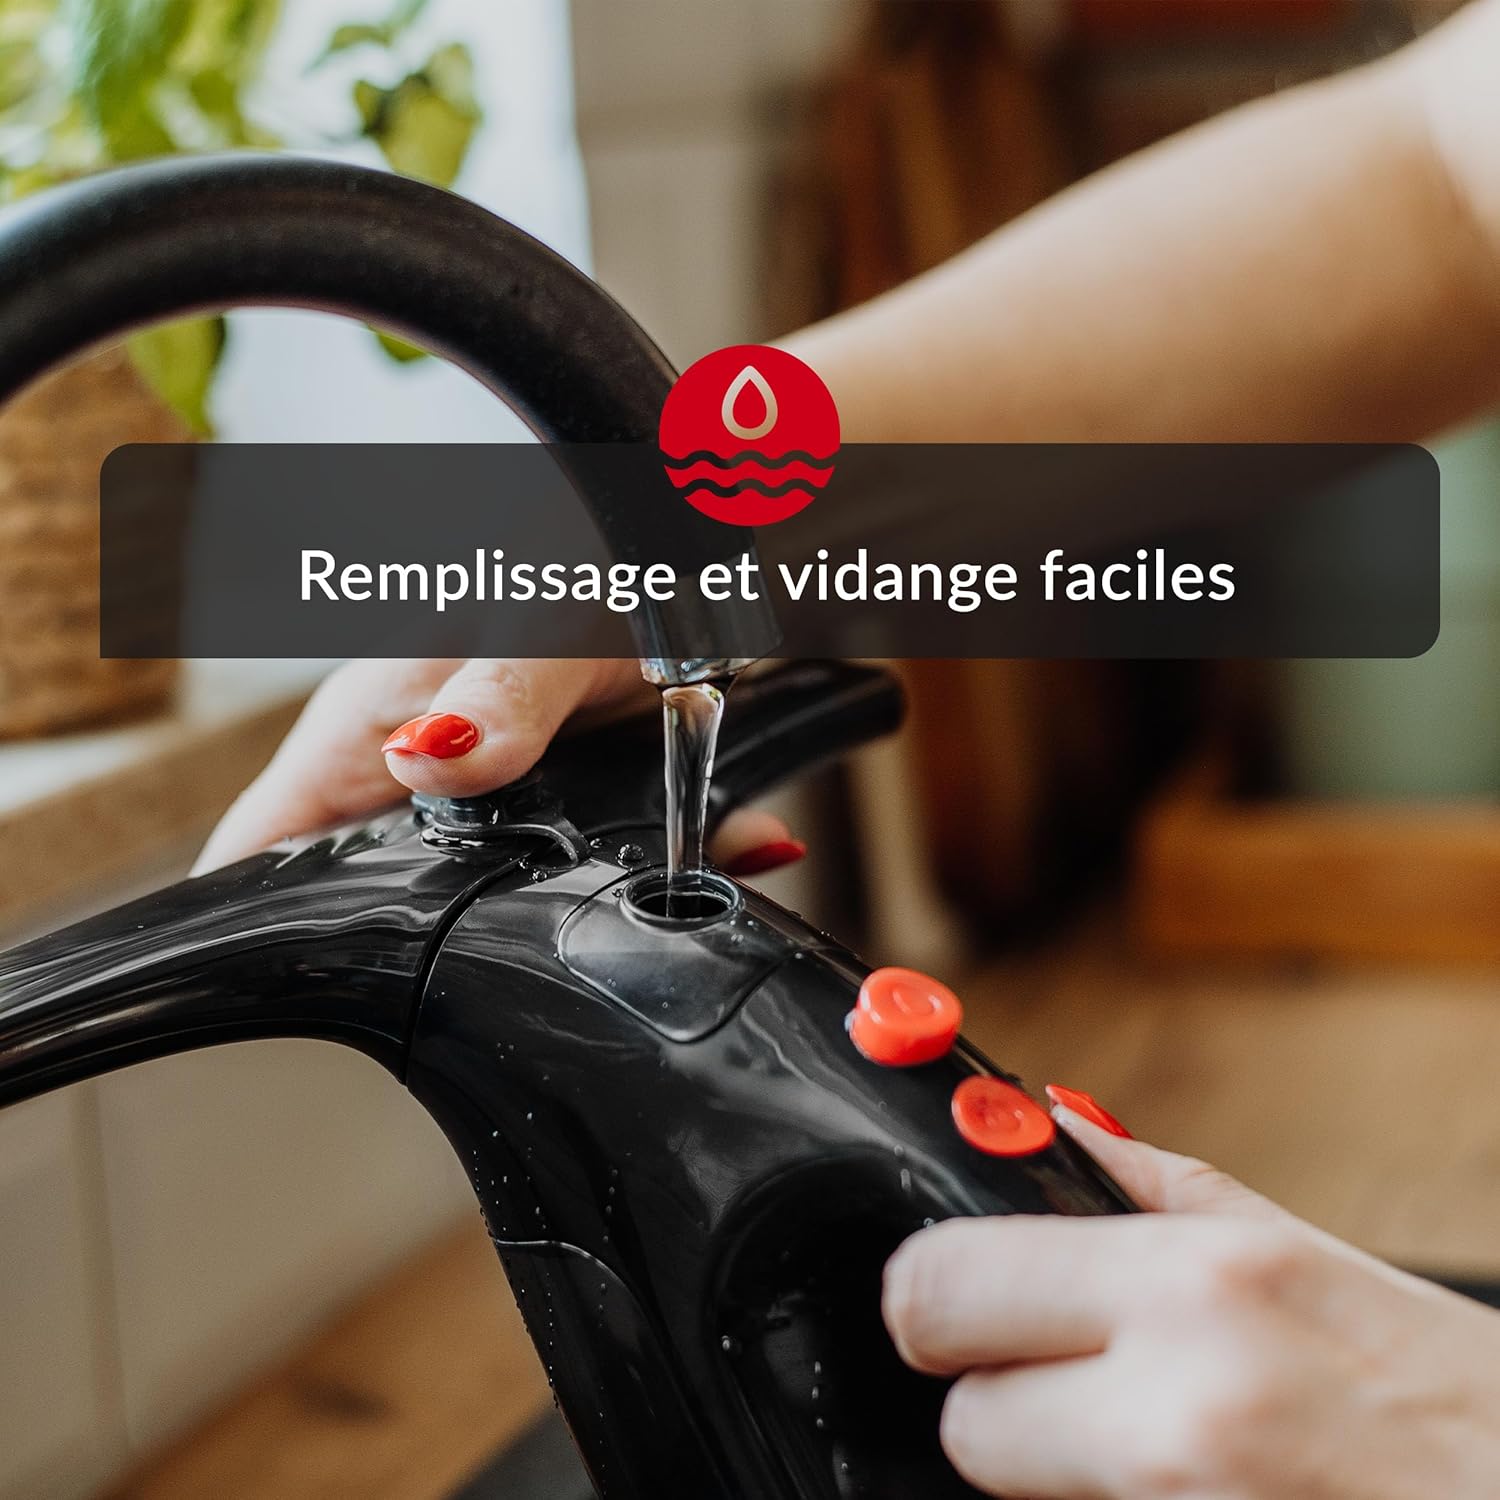
Figure 5: Easy Filling and Emptying
Water being poured into the device, illustrating the simple filling process.
Funtzionamendu-argibideak
Follow these steps for effective window cleaning.

Figure 6: Cleaning Process Overview
A visual guide showing the four steps: Pour water, Spray, Spread, Wipe.
1. Prepare the Surface
- Ensure the surface is free from large debris.
- If using the integrated sprayer, press the spray button to apply cleaning solution evenly onto the surface.
- Use the microfiber pad (either handheld or on the telescopic pole) to spread the cleaning solution and loosen dirt.
2. Vacuum Cleaning
- Turn on the window vacuum unit.
- Place the squeegee blade firmly against the top of the wet surface.
- Pull the device downwards in a straight, even motion, allowing the squeegee to collect the dirty water into the tank.
- Overlap each stroke slightly to avoid leaving streaks.
- For best results, wipe the squeegee blade with a clean cloth after each stroke.

Figure 7: Efficient Cleaning
The window cleaner in action, demonstrating its ability to clean up to 75 m² per charge.
3. Ur zikinaren depositua hustea
- After cleaning or when the dirty water tank is full (capacity 100 ml), turn off the device.
- Locate the dirty water tank release mechanism.
- Carefully remove the tank and empty its contents into a drain.
- Rinse the tank with clean water and reattach it securely to the device.
Figure 8: Easy Filling and Emptying
The device being filled with water, also illustrating the ease of emptying the dirty water tank.
Mantentzea
1. Gailua garbitzea
- Garbitu gailuaren kanpoaldea leun batekin, damp oihal.
- Ez erabili produktu kimiko gogorrik edo garbigailu urratzailea.
- Ensure the squeegee blade is clean and free from debris for optimal performance.
2. Microfiber Pad Care
- Remove the microfiber pad from its holder after each use.
- Wash the pad according to its care label (typically machine washable).
- Allow the pad to air dry completely before storing or reusing.
3. Bateriaren zaintza eta biltegiratzea
- Gorde gailua leku fresko eta lehor batean erabiltzen ez duzunean.
- Epe luzerako biltegiratze baterako, kargatu bateria % 50 inguru hilabete batzuetan behin bateriaren osasuna mantentzeko.
- Ez jarri gailua muturreko tenperaturetara.
Arazoak konpontzea
| Arazoa | Kausa posiblea | Irtenbidea |
|---|---|---|
| Gailua ez da pizten. | Bateria deskargatuta dago. | Kargatu bateria guztiz. |
| Poor suction or streaks. | Squeegee blade is dirty or worn. Dirty water tank is full. | Clean the squeegee blade. Empty the dirty water tank. Replace the squeegee blade if worn. |
| Ura isurtzen da gailutik. | Dirty water tank not properly secured. Tank is overfilled. | Ensure the dirty water tank is correctly attached. Do not overfill the tank. |
| Ihinztagailua ez dabil. | Sprayer tank is empty. Nozzle is clogged. | Refill the sprayer tank. Clean the sprayer nozzle. |
Zehaztapen Teknikoak
| Ezaugarri | Xehetasuna |
|---|---|
| Eredua | Sargo |
| Marka | LEHMANN |
| Bateria mota | Litio-ioi |
| Bateria Edukiera | 2200 mAh, 3.7 V |
| Funtzionamendu Denbora | Gehienez 25 minutu |
| Kargatzeko Denbora | Gutxi gorabehera. 150 minutu |
| Garbiketa Zabalera | 25 cm |
| Sprayer Tank Capacity | 70 ml |
| Ur zikinen deposituaren edukiera | 100 ml |
| Max. Cleaning Area per Charge | 75 m² |
| Pisua | 1 kg (approx. 0.7 kg for main unit) |
| Neurriak (L x W x H) | 10 x 14.5 x 44 cm |
| Makila teleskopikoaren luzera | 42.5 cm to 62 cm (adjustable) |
| Dakarten osagaiak | Window vacuum, charger, telescopic pole, microfiber cleaning pad. |

9. irudia: Produktuaren zehaztapen nagusiak
An image of the window cleaner highlighting its maximum width (25 cm), maximum working time (25 min), sprayer volume (70 ml), charging time (150 min), and dirty water tank volume (100 ml).
Bermea eta Laguntza
LEHMANN products are manufactured to high-quality standards. For information regarding warranty terms and conditions, please refer to the documentation provided with your purchase or visit the official LEHMANN webgunea.
If you encounter any issues or have questions about your LEHMANN Sargo Cordless Window Cleaner, please contact LEHMANN customer support. Contact details can typically be found on the product packaging or the official brand webgunea.
Informazio gehiagorako, bisitatu dezakezu LEHMANN Brand Store.