1. Segurtasun-argibide garrantzitsuak
Mesedez, irakurri arretaz argibide guztiak tresna erabili aurretik. Gorde eskuliburu hau etorkizunean erreferentzia gisa.
- Ziurtatu liburukiatagAparatuan adierazitakoa zure tokiko sare elektrikoaren bolumenari dagokiotage konektatu aurretik.
- Ez sartu gailua, korronte-kablea edo entxufea uretan edo beste likidoren batean.
- Always unplug the coffee maker from the power outlet before cleaning and when not in use. Allow it to cool down before adding or removing parts.
- Ez erabili aparaturik kablea edo entxufea hondatuta dagoenean, edo aparatuak gaizki funtzionatzen duenean edo nolabait hondatu ondoren.
- Aparatua etxeko erabilerarako soilik da. Ez erabili kanpoan.
- Ez utzi kablea mahai edo mostrador baten ertzetik zintzilik, ezta gainazal beroak ukitu ere.
- Place the coffee maker on a firm, flat surface, away from hot gas or electric burners and heated ovens.
- Ez ukitu gainazal beroak. Erabili heldulekuak edo eskutokiak.
- Gainbegiratzea beharrezkoa da aparaturen bat umeek edo umeen ondoan erabiltzen dutenean.
- Ez erabili gailua aurreikusitako erabilerarako.
2. Produktua amaitu daview
The Cecotec Coffee 66 Drop & Thermo Time is a drip coffee maker designed for ease of use and consistent coffee brewing. It features a programmable timer, intensity control, and a thermal carafe to keep your coffee warm.

2.1. irudia: Aurrealdea view of the Cecotec Coffee 66 Drop & Thermo Time Drip Coffee Maker. This image shows the main body, control panel with LCD display, and the thermal carafe in its position.
Osagaiak:
- Ur depositua: Atzealdean kokatua, ur-mailaren adierazle garbi batekin.
- Estalkia: Covers the water tank and coffee filter basket.
- Iragazi saskia: Holds the reusable mesh filter or paper filter.
- Berrerabilgarria den sare-iragazkia: For holding coffee grounds.
- Karafa termikoa: Stainless steel carafe with a capacity of up to 10 cups, designed to keep coffee hot.
- Kontrol-panela: Features an LCD display and buttons for various functions.
- Neurtzeko koilara: For accurate coffee ground measurement.
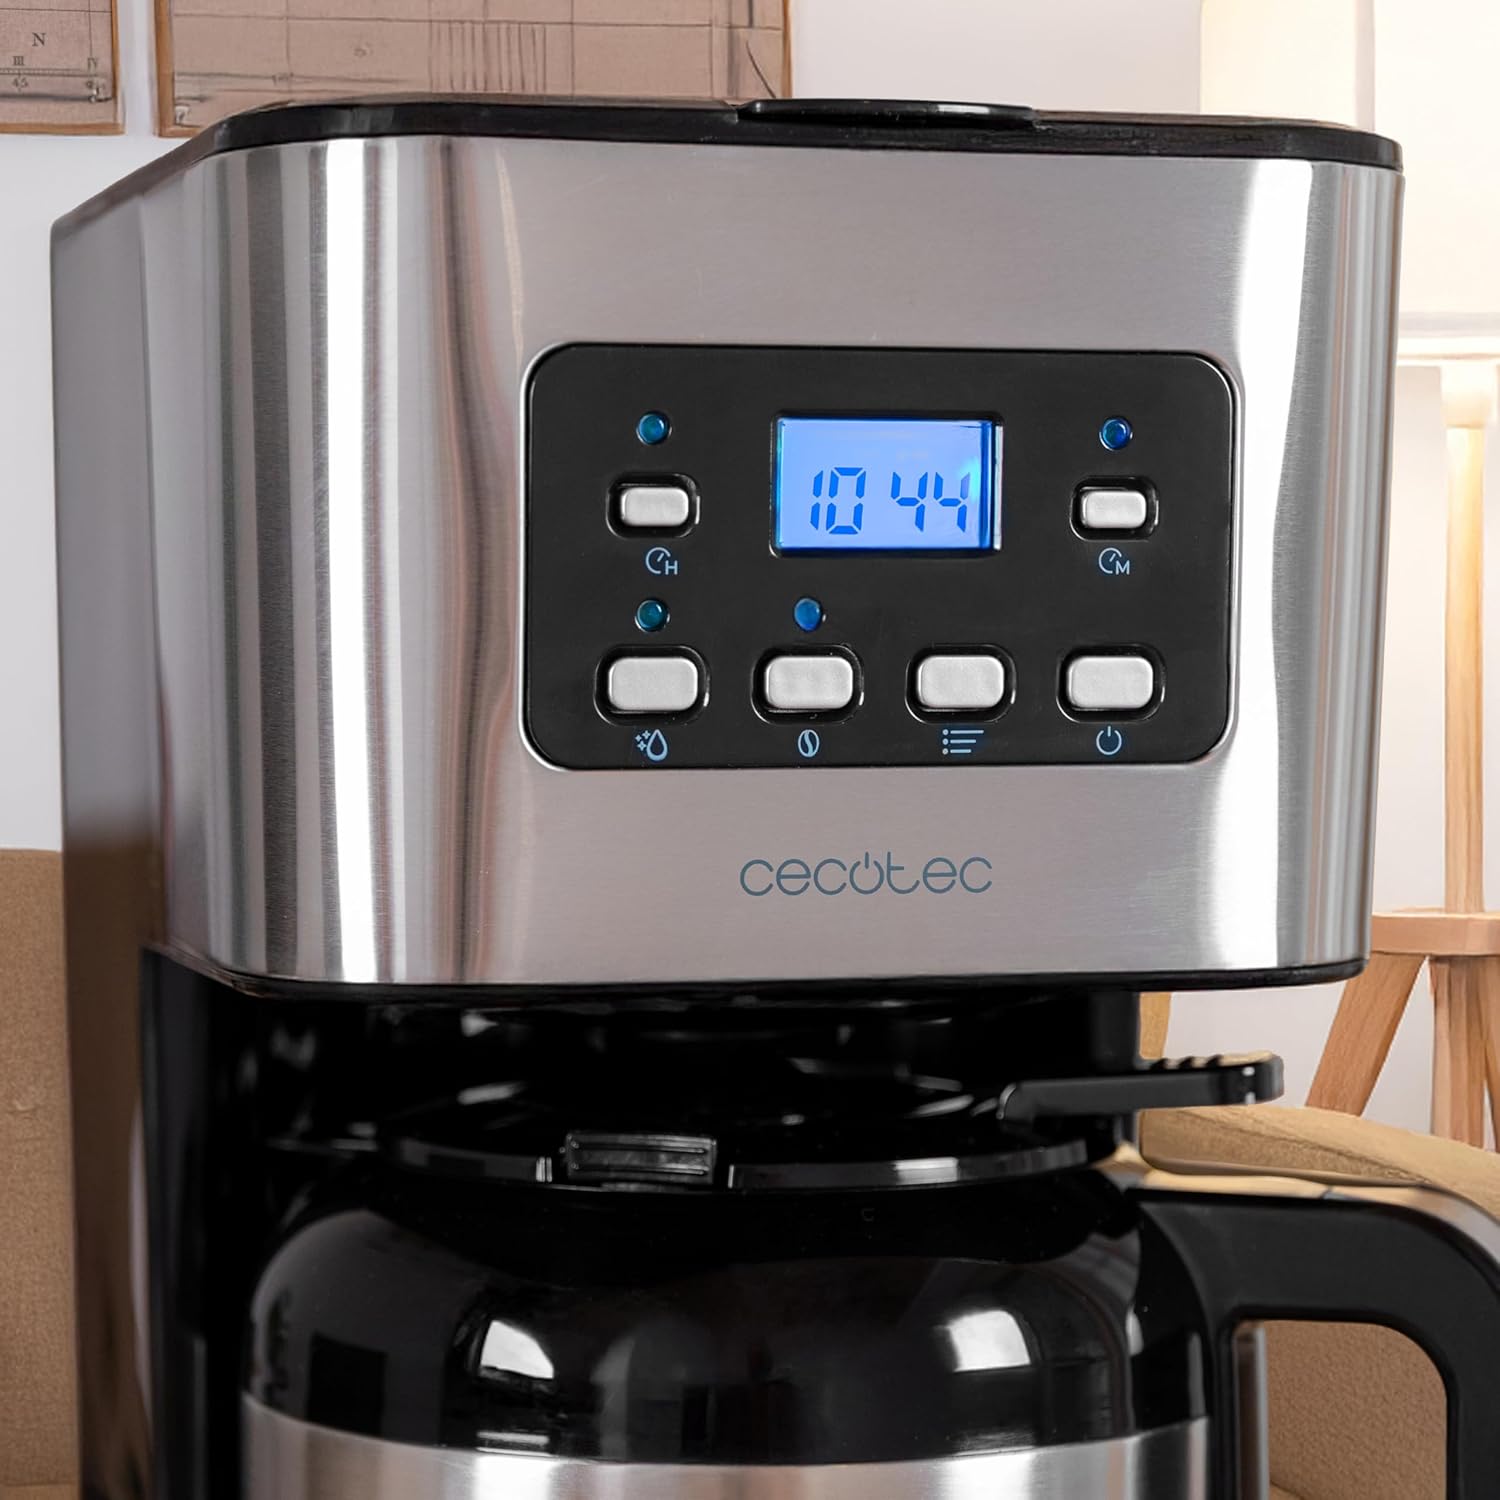
2.2. irudia: Gertutik view of the control panel. The LCD display shows the time, and various buttons for power, intensity, timer, and programming are visible.
3. Konfigurazioa eta lehen erabilera
3.1 Desontziratzea eta hasierako garbiketa
- Kontu handiz kendu ontziratzeko material guztiak eta promozio-etiketa guztiak.
- Wash the thermal carafe, lid, and reusable mesh filter in warm, soapy water. Rinse thoroughly and dry.
- Garbitu kafe-makinaren kanpoaldea iragarkiarekinamp oihal.
- Before first use, run a brewing cycle with only water (no coffee grounds) to clean the internal components. Fill the water tank to the MAX level, place the empty filter basket and carafe, and start a cycle. Discard the water.
3.2 Erlojua ezartzea
- Plug the coffee maker into a power outlet. The LCD display will show '12:00' or flash.
- Press the 'TIME' button. The hour digits will flash.
- Use the 'MIN' and 'PROG' buttons to adjust the hour.
- Press 'TIME' again. The minute digits will flash.
- Use the 'MIN' and 'PROG' buttons to adjust the minutes.
- Press 'TIME' a third time or wait a few seconds for the setting to be saved.
4. Funtzionamendu-argibideak
4.1 Kafea prestatzea
- Ireki kafe-makinaren tapa.
- Fill the water tank with fresh, cold water up to the desired level, indicated by the water level gauge. Do not exceed the 'MAX' line.
- Place the reusable mesh filter into the filter basket. If using a paper filter, place it inside the mesh filter.
- Add the desired amount of ground coffee into the filter. A general guideline is one level measuring spoon (approximately 7g) per cup. Adjust to your taste.
- Itxi estalkia ongi.
- Ensure the thermal carafe is correctly placed on the warming plate.
- Press the 'ON/OFF' button to start brewing. The indicator light will illuminate.
- The brewing process will begin. Once complete, the coffee maker will automatically turn off.
- Carefully remove the carafe and pour your coffee.

4.1. irudia: A person pouring freshly brewed coffee from the thermal carafe into a mug. The carafe's handle and spout are visible.
4.2 Using the Intensity Function (Aroma)
To adjust the coffee strength:
- After adding water and coffee grounds, but before pressing 'ON/OFF', press the 'INTENSITY' (aroma) button.
- The display will indicate the selected intensity level.
- Press 'ON/OFF' to start brewing with the chosen intensity.
4.3 Programming the Delay Brew Timer
You can set the coffee maker to start brewing at a specific time:
- Prestatu kafe-makina urarekin eta kafe-hondarrekin 4.1 atalean azaltzen den bezala.
- Press the 'PROG' button. The display will show 'PROG' and the hour digits will flash.
- Use the 'MIN' and 'PROG' buttons to set the desired hour for brewing to start.
- Press 'PROG' again. The minute digits will flash.
- Use the 'MIN' and 'PROG' buttons to set the desired minutes.
- Press 'PROG' a third time or wait a few seconds. The 'PROG' indicator will light up, confirming the timer is set.
- Kafe-makina automatikoki hasiko da prestatzen programatutako orduan.
5. Mantentzea eta Garbiketa
Garbiketa erregularrak kafe-makinaren errendimendu optimoa bermatzen du eta bizitza luzatzen du.
5.1 Eguneko garbiketa
- Deskonektatu beti aparatua eta utzi guztiz hozten garbitu aurretik.
- Remove the thermal carafe, lid, and reusable mesh filter. Wash them in warm, soapy water. Rinse thoroughly and dry.
- Discard used coffee grounds.
- Garbitu kafe-makinaren kanpoko gainazalak oihal leun eta lehor batekinamp oihal. Ez erabili garbitzaile urratzaileak edo zurgatzaileak.
- The thermal carafe is ez ontzi-garbigailuan seguru.
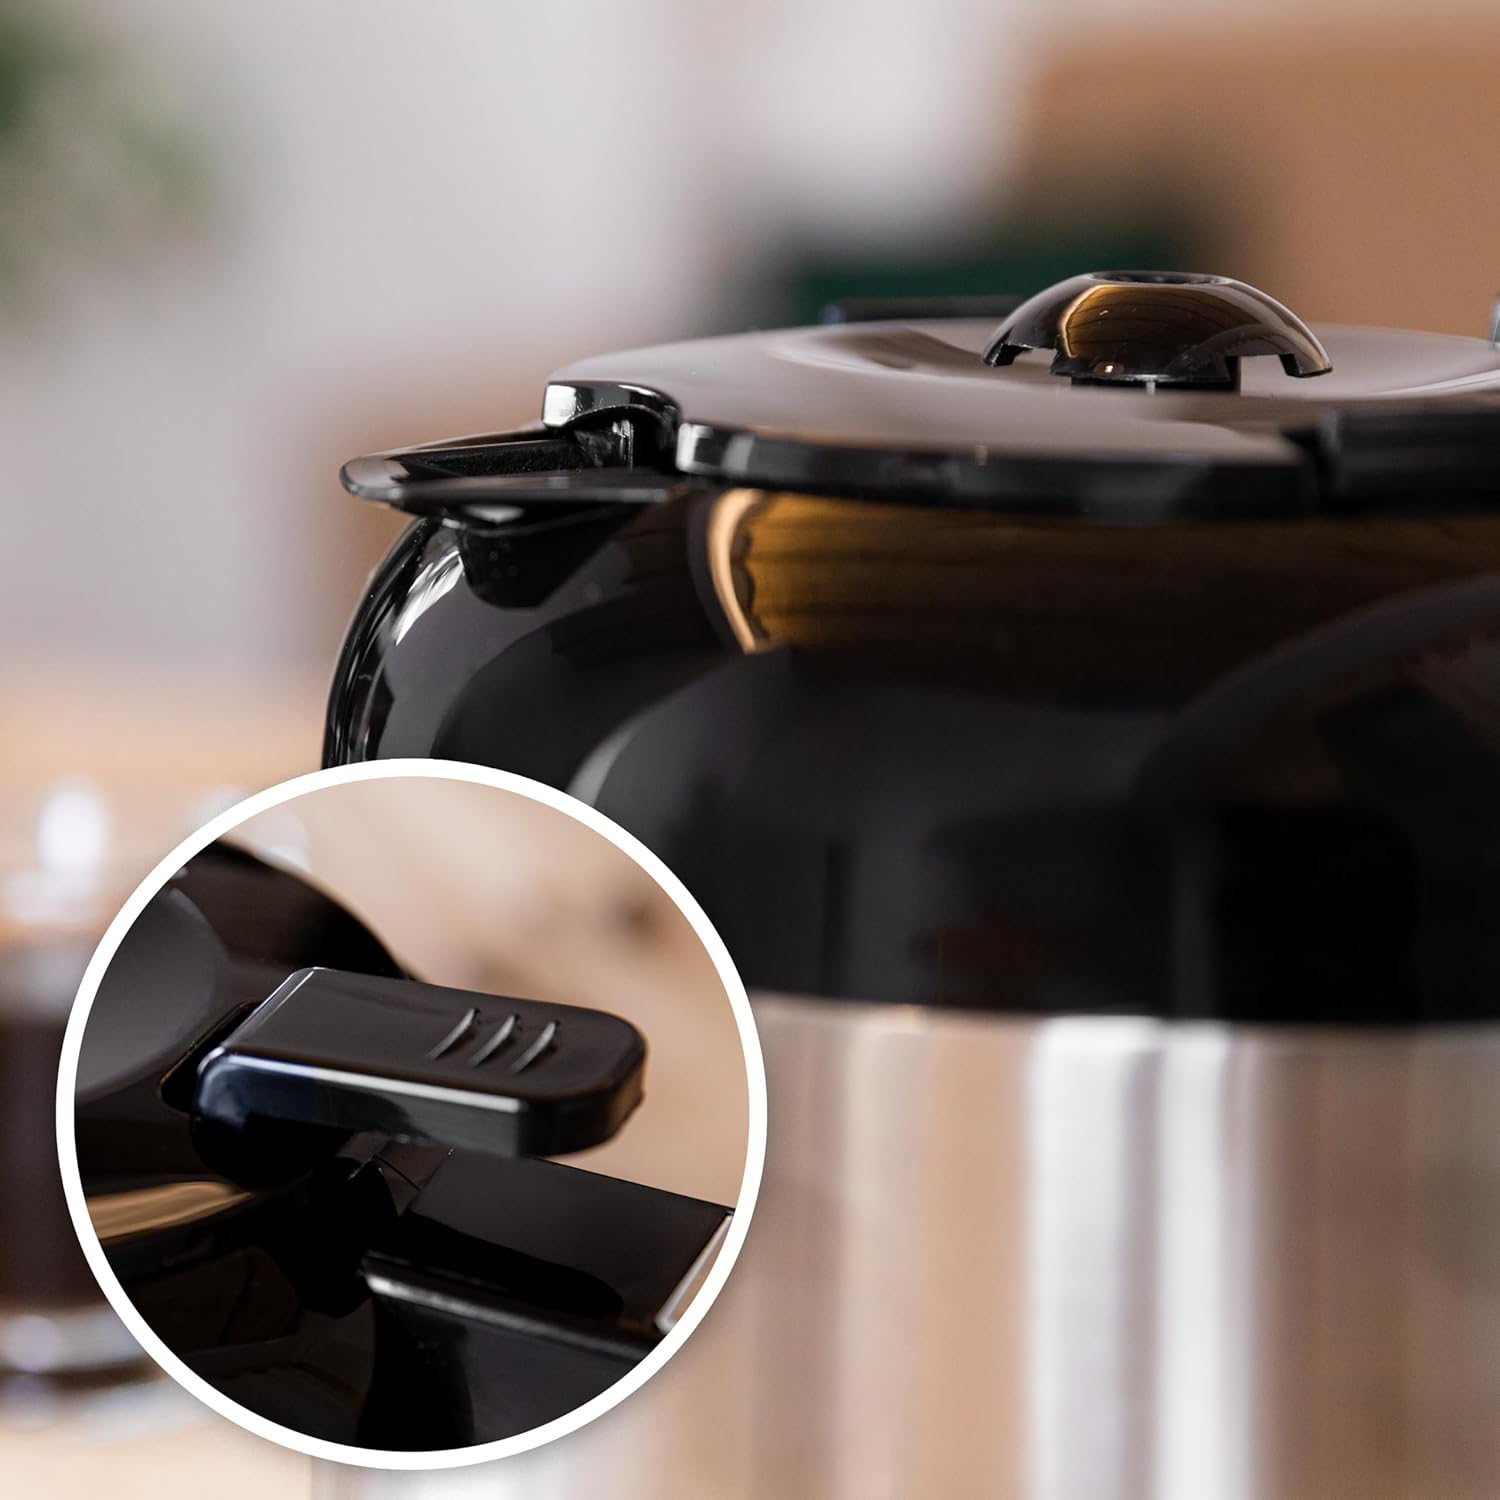
5.1. irudia: Close-up of the thermal carafe lid, highlighting the drip-stop mechanism. This part should be cleaned regularly to prevent blockages.
5.2 Kalifikatzailea
Mineral deposits (limescale) can build up in your coffee maker over time, affecting its performance. Descale your coffee maker every 2-3 months, or more frequently if you have hard water.
- Fill the water tank with a solution of white vinegar and water (1 part vinegar to 2 parts water).
- Place the empty thermal carafe on the warming plate.
- Start a brewing cycle without coffee grounds.
- After about half the solution has brewed through, turn off the coffee maker and let it sit for 15-20 minutes to allow the solution to work.
- Piztu berriro kafe-makina prestatzeko zikloa osatzeko.
- Bota ozpin-disoluzioa karafatik.
- Run 2-3 cycles with fresh, clean water to rinse out any remaining vinegar taste or odor.
6. Arazoak
If you encounter issues with your coffee maker, refer to the following table:
| Arazoa | Kausa posiblea | Irtenbidea |
|---|---|---|
| Kafea ez da prestatzen. | No power; water tank empty; carafe not in place; timer set. | Check power connection; fill water tank; ensure carafe is correctly positioned; check timer settings. |
| Kafea ahulegia da. | Not enough coffee grounds; coarse grind; intensity setting too low. | Add more coffee grounds; use a finer grind; select a higher intensity setting. |
| Kafea iragazkitik gainezka egiten du. | Too many coffee grounds; filter clogged; carafe not in place. | Reduce coffee grounds; clean filter thoroughly; ensure carafe is fully inserted. |
| Unusual noise during brewing. | Kare-metaketa. | Perform a descaling cycle (see Section 5.2). |
7. Zehaztapenak
| Ezaugarri | Xehetasuna |
|---|---|
| Marka | Cecotec |
| Ereduaren izena | Coffee 66 Drop & Thermo Time |
| Elementuaren eredu-zenbakia | 00274 |
| Mota | Tantaka Kafe Makina |
| Edukiera | 1.2 Litres (up to 10 cups) |
| Garratxoaren materiala | Stainless Steel (Thermal) |
| Boterea | 950 W |
| Ezaugarri bereziak | Removable Tank, Thermal Carafe, Water Filter, Programmable Timer (24 hours), Intensity Function, Drip-free feature, Overheating protection |
| Produktuaren neurriak | 25D x 17Z x 32.5A zentimetro |
| Elementuaren pisua | 2 kg 100 g |
| Dakarten osagaiak | Filter coffee maker, instruction manual, Measuring spoon |
8. Bermea eta Laguntza
This Cecotec appliance is covered by a manufacturer's warranty. Please refer to the warranty card included with your product for specific terms and conditions, including the warranty period and coverage details.
Laguntza teknikoa, ordezko piezak edo berme erreklamazioak jasotzeko, jarri harremanetan Cecotec bezeroarentzako arreta-zerbitzu ofizialaren bidez. website or the contact information provided in your product packaging. Ensure you have your model number (00274) and proof of purchase available when contacting support.


