1. Sarrera
This manual provides detailed instructions for the safe and effective operation of your VETEK A06-2 8K Camcorder. Please read this manual thoroughly before using the device to ensure proper functionality and to prevent damage. This camcorder is designed for amateur use and may not include advanced professional features such as autofocus or optical zoom.

Image: The VETEK A06-2 8K Camcorder, showcasing its 8K Ultra HD video resolution, 48.0 megapixels still image recording, 3.0-inch IPS touch screen, and WiFi capabilities. The camera is positioned against a backdrop of mountains.
2. Paketearen edukia
Egiaztatu behean zerrendatutako elementu guztiak zure paketean sartuta daudela:
- VETEK A06-2 8K Camcorder
- 2 x Litio polimerozko bateriak
- USB kablea
- Erabiltzailearen eskuliburua (dokumentu hau)
3. Produktua amaitu daview
3.1 Kameraren osagaiak

Image: A diagram illustrating the front and top controls of the VETEK A06-2 camcorder. Key components include the Power/OK button, Mode button, UP/WiFi button, Menu button, DOWN button, Built-in flash, Built-in microphone sound, and IR Night Vision Function.
- Pizteko/Ados botoia: Used to power on/off the camera and confirm selections. Short press to display night vision or built-in flash functions. Long press to shut down.
- MODE botoia: Switches between different camera modes.
- UP/WiFi Button: Navigates up in menus or activates WiFi function.
- MENU botoia: Accesses the camera's menu settings.
- BEHERA botoia: Menuetan behera nabigatzen du.
- Flash integratua: Provides illumination for photos and videos in low light.
- Mikrofono integratua: Audioa harrapatzen du.
- IR Night Vision Function: Enables recording in low-light or dark conditions.

Image: A diagram illustrating the side ports and controls of the VETEK A06-2 camcorder. Key components include the Zoom Key, Quick photo key, Hot boots, Fast video key, Microphone interface, HDMI interface, and USB interface.
- Zoom tekla: Adjusts the digital zoom level.
- Quick Photo Key: Argazki finko bat ateratzen du.
- Zapata beroa: Kanpoko osagarriak lotzeko, hala nola mikrofonoak edo argiak.
- Fast Video Key: Quickly starts video recording.
- Mikrofono Interfazea: Connects an external microphone for improved audio.
- HDMI Interfazea: Connects the camera to a TV or monitor for playback.
- USB interfazea: Connects to a computer for charging, data transfer (storage mode), or webcam functionality (PC camera mode).
4. Konfigurazioa
4.1 Bateriaren instalazioa eta kargatzea
The camcorder uses Lithium Polymer batteries. Ensure batteries are fully charged before first use.

Image: A visual representation of the two charging methods for the VETEK A06-2 camcorder batteries. One method shows batteries being charged in an external dual charger, and the other shows a battery installed in the camera being charged via a USB cable.
- Instalatu bateria: Open the battery compartment and insert the battery according to the polarity indicators.
- Kargatzeko metodoak:
- Use the dual charger to charge the batteries directly.
- Install a battery in the camera and connect the camera to a power source using the provided USB cable.
4.2 Memoria txartelaren instalazioa
The camcorder supports SD flash memory cards (4-128GB SD Card Class 10 or higher recommended). A memory card is required for recording.
- Locate the memory card slot on the camera.
- Sartu SD txartela metalezko kontaktuak norabide egokian dituela, klik egin arte.
- For first-time use, format the memory card through the camera's menu settings. This ensures compatibility and optimal performance.
5. Funtzionamendu-argibideak
5.1 Oinarrizko funtzionamendua
- Piztu/Itzali: Long press the Power/OK button to turn the camera on or off.
- Modu aukeraketa: Press the MODE button to switch between video recording, photo taking, and playback modes.
- Menuen nabigazioa: Use the MENU button to access settings. Use the UP/WiFi and DOWN buttons to navigate, and the Power/OK button to confirm.
5.2 Bideoa grabatzea
Ensure the camera is in video recording mode.
- Press the Fast Video Key or the Power/OK button to start recording.
- Sakatu berriro botoi bera grabaketa gelditzeko.
- The camcorder records in 8K video resolution.

Image: A visual demonstrating the ULTRA HD 8K video resolution and 48MP image resolution capabilities of the VETEK A06-2 camcorder. It also highlights the 18x digital zoom feature with comparative shots.
5.3 Argazkiak ateratzea
Ensure the camera is in photo taking mode.
- Press the Quick Photo Key to capture a still image.
- The camcorder supports 48MP image resolution.

Image: Three sequential images demonstrating time-lapse photography with the VETEK A06-2 camcorder, showing options for 2-second, 5-second, and 10-second intervals.
5.4 Gaueko ikusmena
The camera features IR Night Vision for recording in low-light conditions.
- Short press the Power/OK button to activate the night vision function.
- The camera will record in black and white in night vision mode.

Image: The VETEK A06-2 camcorder displaying an image captured using its IR Night Vision feature, showing a vivid black and white scene in the dark.

Image: A split image comparing the view from the VETEK A06-2 camcorder in Night Vision mode (left, monochrome) versus Normal mode (right, color) of a city skyline at night.
5.5 WiFi konexioa
The camcorder features built-in WiFi for remote control and sharing.
- Press the UP/WiFi button to activate the WiFi function.
- Connect your smartphone or tablet to the camera's WiFi network.
- Use the dedicated app to control the camera remotely and share photos/videos.

Image: The VETEK A06-2 camcorder on a tripod, being controlled remotely by a smartphone and a physical remote control, demonstrating its WiFi connectivity for sharing content on social media.

Image: A user interacting with the VETEK A06-2 camcorder's touch screen while a smartphone displays the camera's WiFi connection interface and live view, illustrating remote control via an app.
5.6 Webcam Funtzioa
The camcorder can be used as a webbideo-deietarako eta zuzeneko erreprodukzioetarako kamera.
- Konektatu kamera zure ordenagailura USB kablearen bidez.
- Select "PC camera mode" when prompted on the camera screen.
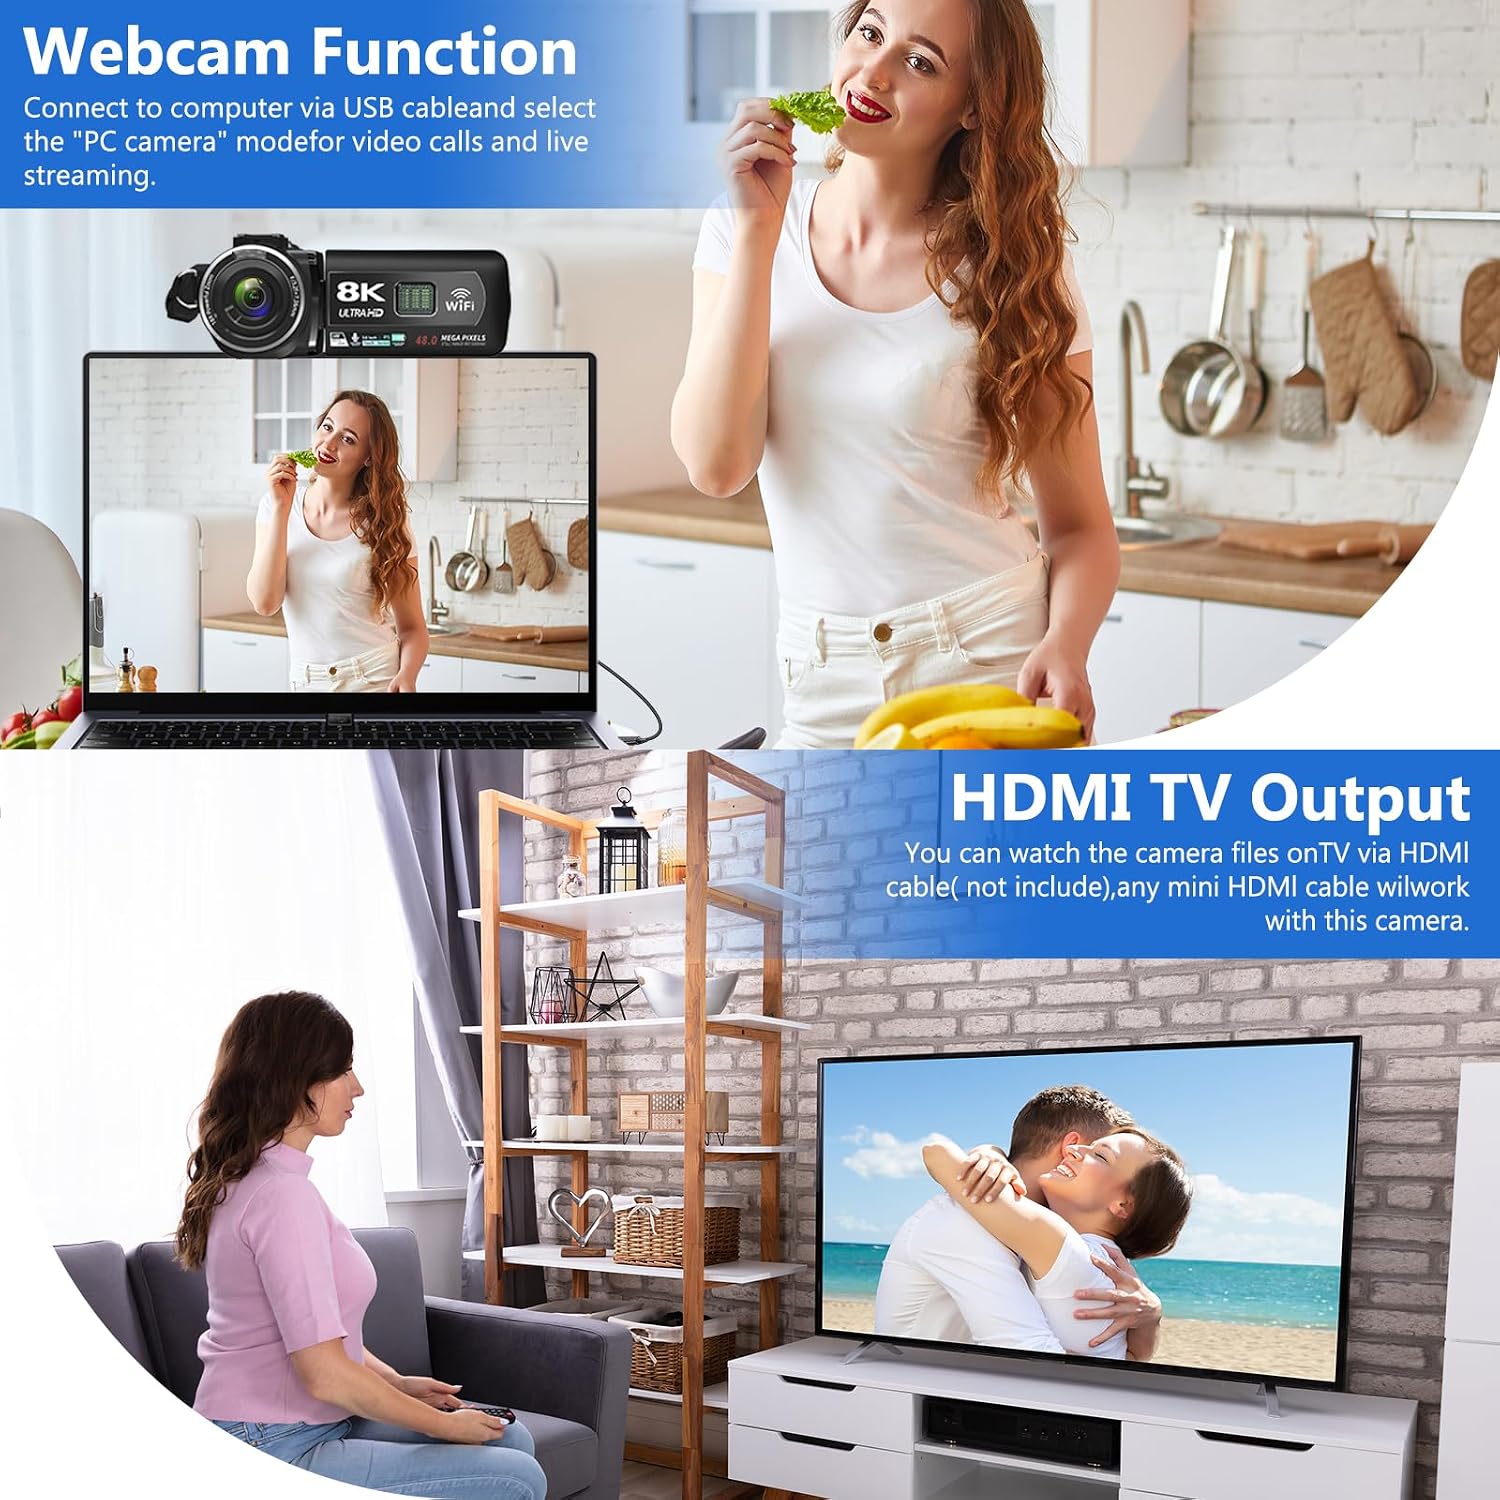
Image: The VETEK A06-2 camcorder connected to a laptop via USB, demonstrating its webcam function for video calls. Below, the camera is connected to a television via HDMI for viewing recorded content.
5.7 HDMI TV Output
View your recorded videos and photos on a larger screen.
- Connect the camera to a TV or monitor using an HDMI cable (not included).
- Hautatu zure telebistan HDMI sarrera egokia.

Image: The VETEK A06-2 camcorder connected to a large television screen via an HDMI cable, showing content from the camera being displayed on the TV for a family to watch.
5.8 Zarata murriztea
The camcorder includes a built-in noise reduction function to improve audio quality.
- Activate the noise reduction function in the camera's settings menu.
- For enhanced audio, an external microphone can be connected to the microphone interface.

Image: A woman playing a guitar, with a VETEK A06-2 camcorder recording her. Text indicates that the camera's built-in noise reduction and external microphone support help improve audio quality.
6. Mantentzea
6.1 Garbiketa
- Erabili zapi leun eta lehor bat kameraren gorputza garbitzeko.
- Lentearentzat, erabili lenteak garbitzeko oihal eta disoluzio espezializatu bat. Saihestu lentea zuzenean ukitzea.
6.2 Biltegiratzea
- Gorde kamera leku fresko eta lehor batean, eguzki-argitik eta muturreko tenperaturetatik babestuta.
- Kendu bateriak kamera denbora luzez erabiliko ez bada.
7. Arazoak
Zure kamerarekin arazoak badituzu, jo ezazu honako arazo eta irtenbide ohikoenei:
| Arazoa | Kausa posiblea | Irtenbidea |
|---|---|---|
| Kamera ez da pizten. | Bateria agortuta dago edo gaizki instalatuta dago. | Kargatu bateria edo instalatu berriro behar bezala. |
| Ezin da bideoa grabatu/argazkiak atera. | Memory card is full, not inserted, or not formatted. | Insert a memory card, format it, or delete unnecessary files. |
| Irudi/bideo kalitate eskasa. | Insufficient lighting, dirty lens, or shooting too close. | Ensure adequate lighting, clean the lens, and maintain a shooting distance of over 1.5m/4ft. |
| WiFi konexio arazoak. | Incorrect password or app issues. | Verify WiFi password, restart camera and device, or reinstall the app. |
Arazoak jarraitzen badu, jarri harremanetan bezeroarentzako arreta-zerbitzuarekin.
8. Zehaztapenak
| Ezaugarri | Xehetasuna |
|---|---|
| Marka | VETEK |
| Modelo zenbakia | A06-2 |
| Bideo Harrapaketa Ebazpena | 8K |
| Argazki sentsoreen teknologia | CMOS |
| Irudien Ebazpena | 48 megapixelekoa |
| Pantailaren tamaina | 3 hazbete |
| Konektibitate Teknologia | USB, WiFi |
| Flash memoria mota | SD (Supports 4-128GB Class 10 or higher) |
| Ezaugarri bereziak | Face Detection, Night Vision, Anti-Shake, Image Stabilization, Time Lapse, Low Light, Noise Reduction |
| Pilak | 2 litio-polimeroko bateria (barne) |
| Produktuaren neurriak | 5.12 x 2.36 x 2.17 hazbete |
| Elementuaren pisua | 2.2 kilo |
9. Ohar garrantzitsuak
- This camcorder is designed for amateurs and does not feature autofocus or optical zoom.
- The camera does not have a focus function. Maintain a shooting distance above 1.5m (4ft) for clear pictures or videos.
- After recording video, check the video effect on a computer. Checking it on the camera reduces the resolution of the video.
- To connect to a computer, use the digital cable provided, select the storage method, and then view the video on the computer.

Image: A graphic titled 'Warm Tips' reiterating key usage instructions such as reading the manual, the camera being for amateurs, lack of autofocus, checking video on a computer, maintaining shooting distance, and formatting the memory card.
10. Bezeroarentzako arreta
For any questions, technical assistance, or warranty claims, please contact VETEK customer service. All products are eligible for a free return within 30 days of purchase.

Image: A smiling customer service representative wearing a headset, indicating 24-hour customer service availability.


