1. Produktua amaitu daview
The Gemini GMU-M200 is a dual-person handheld UHF wireless microphone system designed for various audio applications. It features two handheld microphones and a compact plug-in receiver, providing wireless audio transmission up to 164 feet (50 meters). This system is suitable for performances, karaoke, weddings, conferences, meetings, and lectures.
Each microphone is equipped with a dynamic mic capsule and a cardioid pickup pattern, which helps to focus on the speaker's voice and minimize background noise and feedback. The dual-channel receiver connects to audio equipment via a standard 1/4" TS plug. Both microphones and the receiver are powered by rechargeable lithium batteries, with convenient USB charging capability.
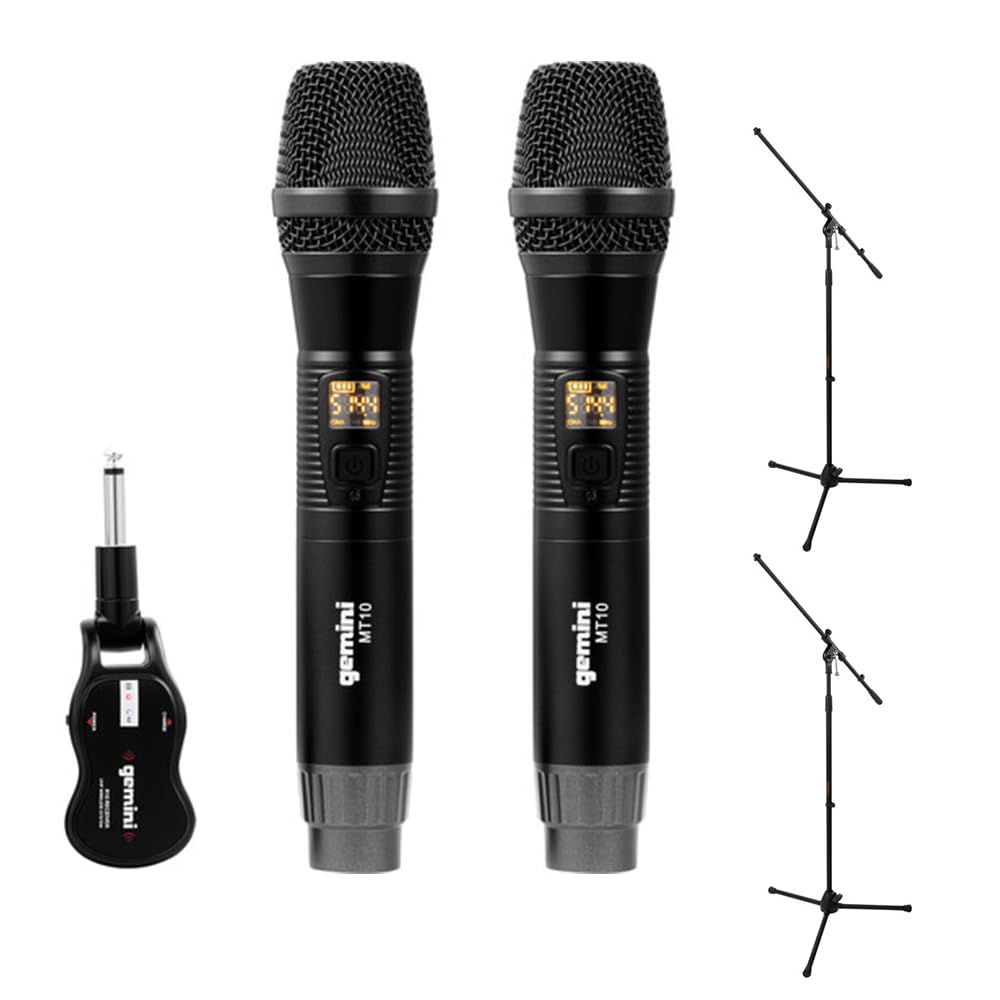
Image 1.1: Gemini GMU-M200 Wireless Microphone System components, including two handheld microphones and a plug-in receiver.
2. Zer dago kutxan
Verify that all components are present before setup.
- 2x Handheld Wireless Microphones (Gemini MT10)
- 1x Plug-in Wireless Receiver (Gemini R10)
- 2x Rechargeable 18650 1200mAh Lithium Batteries (pre-installed in microphones)
- 1x Mikro-USB kargatzeko kablea
- 2x Auray MS-5230F Tripod Microphone Stands with Fixed Boom (Note: These are included as part of the bundle.)
- Erabiltzailearen eskuliburua (dokumentu hau)

Image 2.1: Included Micro-USB charging cable.

Image 2.2: Two Auray MS-5230F Tripod Microphone Stands included in the bundle.
3. Konfiguratzeko argibideak
3.1. Microphone Battery Installation and Charging
- Unscrew the bottom cap of each handheld microphone.
- Ensure the 18650 1200mAh rechargeable lithium battery is correctly inserted according to polarity markings. The batteries are typically pre-installed.
- To charge the microphones, connect the micro-USB charging cable to the DC-5V port located at the bottom of each microphone. Connect the other end to a USB power source (e.g., computer USB port, USB wall adapter).
- The LED display on the microphone will indicate charging status. A full charge provides several hours of use.

Image 3.1: Handheld microphone with the battery compartment open, showing the rechargeable 18650 battery.

3.2 irudia: Gertuko planoa view of the micro-USB charging port (DC-5V) at the base of the microphone.
3.2. Receiver Charging and Connection
- The plug-in receiver also contains a rechargeable lithium battery. Charge it using the provided micro-USB cable and a USB power source.
- Once charged, plug the receiver's 1/4" TS connector directly into the microphone input of your audio device (e.g., PA speaker, amplifier, mixer, karaoke machine).
- Ensure the audio device's input volume is set to a low level before powering on the receiver.
4. Funtzionamendu-argibideak
4.1. Piztea eta parekatze automatikoa
- Press and hold the power button on each handheld microphone to turn them on. The LED display will illuminate.
- Press and hold the power button on the plug-in receiver to turn it on.
- The microphones and receiver will automatically pair. A successful connection is indicated by a stable signal indicator on the microphone's LED display.
4.2. Bolumena doitzea
- Volume can be controlled directly from the handheld microphones. Refer to the microphone's controls for volume adjustment buttons.
- Additionally, adjust the input volume on your connected audio device (PA speaker, amplifier, mixer) to achieve the desired sound level.
4.3. Changing Frequencies
If you experience interference or signal dropouts, you can change the operating frequency:
- On the handheld microphone, locate the "SET" button.
- Press the "SET" button to cycle through available UHF frequencies. The LED display will show the current frequency.
- The receiver will automatically sync to the new frequency selected on the microphone.
- Select a frequency that provides clear, interference-free audio. The system operates within the 512-541.7 MHz range in the United States.

Image 4.1: Two Gemini MT10 handheld microphones, showing their LED displays and control buttons.
5. Mantentzea
5.1. Garbiketa
- Garbitu mikrofonoak eta hargailua zapi leun eta lehor batekin.
- Ez erabili garbitzaile urratzailerik, disolbatzailerik edo produktu kimiko gogorrik.
- Avoid moisture contact with electronic components.
5.2. Bateria zaintzea
- Recharge batteries regularly, even if the system is not in frequent use, to maintain battery health.
- If storing the system for an extended period, charge the batteries to approximately 50% before storage.
- Replace batteries if their performance significantly degrades. Use only approved 18650 rechargeable lithium batteries for the microphones.
6. Arazoak
- Soinurik ez:
- Ensure microphones and receiver are powered on.
- Check battery levels on both microphones and receiver. Recharge if necessary.
- Verify the receiver is securely plugged into the audio device's input.
- Increase the volume on the microphones and the connected audio device.
- Confirm that the microphones and receiver are paired (stable signal indicator).
- Interferentzia/Elektrizitate estatikoa:
- Press the "SET" button on the microphone to change to a different operating frequency.
- Ensure there are no other wireless devices operating on similar frequencies nearby.
- Murriztu mikrofonoen eta hargailuaren arteko distantzia.
- Avoid physical obstructions between the transmitter and receiver.
- Short Wireless Range:
- Ensure line of sight between microphones and receiver for optimal performance.
- Avoid placing the receiver near large metal objects or other electronic devices that may cause interference.
- Check battery levels. Low batteries can affect range.
7. Zehaztapenak
| Ezaugarri | Zehaztapena |
|---|---|
| Ereduaren izena | GEGMUM200 |
| Mikrofonoaren forma-faktorea | Microphone System (Handheld) |
| Konektibitate Teknologia | UHF haririk gabea |
| Maiztasun-barrutia (AEB) | 512 - 541.7 MHz |
| Kanal kopurua | 2 (kanal bikoitza) |
| Wireless Range | 164 oin baino gehiago (50 metro) |
| Energia iturria | Battery Powered (Rechargeable Lithium) |
| Mikrofonoaren bateria mota | 18650 1200mAh (User-replaceable) |
| Kargatzeko ataka | Micro-USB (DC-5V) |
| Receiver Connector Type | 1/4" TS Plug |
| Eredu polarra | Norabide bakarra (kardioidea) |
| Materiala | Metala |
| Kolorea | Beltza |
| Elementuaren pisua | 2 pounds (system) |
| Gailu bateragarriak | Amplifier, Karaoke Makina, Bozgorailua |
8. Bermea eta Laguntza
For warranty information or technical support, please refer to the official Gemini webwebgunera edo jarri harremanetan bezeroarentzako arreta-zerbitzuarekin. Gorde erosketa-agiria erosketaren frogagiri gisa, berme-erreklamazioetarako.
Gemini Official Webgunea: www.geminisound.com (Oharra: Hau leku-markatzailea da URL, egiaztatu benetako laguntza webgunea.)


