Sarrera
Thank you for choosing the Sharp Digital Alarm Clock. This manual provides detailed instructions for setting up, operating, and maintaining your new alarm clock. Designed for clarity and convenience, this clock features an easy-to-read LCD display with an optional always-on backlight, dual alarm settings, and a USB charging port for your devices. Please read this manual thoroughly before use to ensure optimal performance and longevity of your product.

Aurrealdea view of the Sharp Digital Alarm Clock, displaying time, month, date, day, and temperature on its colorful LCD screen.
Segurtasun Informazioa
Please observe the following safety precautions to prevent damage to the unit or personal injury:
- Ez jarri unitatea tenperatura altuen, eguzki-argiaren eraginpean edo hezetasun handiaren eraginpean.
- Saihestu unitatea erortzea edo kolpe gogorren eraginpean jartzea.
- Ez nahastu bateria zaharrak eta berriak, edo bateria mota desberdinak.
- Kendu bateriak unitatea denbora luzez erabiliko ez bada, isuriak saihesteko.
- Mantendu unitatea uretatik eta beste likidoetatik urrun.
- Ez saiatu unitatea zeuk desmuntatzen edo konpontzen. Mantendu mantentze-lan guztiak langile kualifikatuen esku.
Paketearen edukia
Egiaztatu elementu guztiak paketean daudela:
- Sharp Digital Alarm Clock (Model SPC5028AMZ)
- Erabiltzailearen eskuliburua (dokumentu hau)
Note: 3 x AAA batteries are required and not included.
Produktua amaituview
Aurrealdeko pantaila

Diagram illustrating key features of the alarm clock, including atomic accuracy, 1.5-inch tall time display, on/off display nightlight, indoor temperature display, calendar display, bright color display, wall mountable or tabletop viewing, and battery operation (3x AAA batteries).
The front of the clock features a clear LCD display that shows the time, month, date, day of the week, and indoor temperature. The main time display is approximately 1.5 inches tall for easy readability.
Atzeko panela eta kontrolak

Xehetasuna view of the clock's rear panel, showing the location of the battery compartment, various control buttons (Calendar, Time, Alarm, 12/24, Up, °C/°F, Down, Wave), the ON/OFF switch for the nightlight, and the backstand for tabletop viewing. Dimensions (6.45"W x 5"H) are also indicated.
- CALENDAR Set Button: Used to set the date and year.
- TIME Set Button: Used to set the time manually.
- ALARM Set & ON/OFF Button: Used to set and activate/deactivate alarms.
- 12/24 botoia: Toggles between 12-hour and 24-hour time formats.
- GORA botoia: Adjusts settings upwards.
- °C/°F botoia: Tenperaturaren bistaratzea Celsius eta Fahrenheit artean txandakatzen du.
- BEHERA botoia: Ezarpenak beherantz doitzen ditu.
- WAVE (Atomic Search) Button: Initiates a manual search for the atomic time signal.
- ON/OFF Switch (Nightlight): Controls the always-on backlight feature.
- Bateriaren konpartimendua: Holds 3 x AAA batteries.
- Backstand: For tabletop viewing.
- Horman muntatzeko zuloa: Erlojua horman zintzilikatzeko.
Konfigurazioa
Bateriaren instalazioa
- Open the battery compartment cover on the rear of the clock.
- Insert 3 new AAA batteries, ensuring correct polarity (+ and -).
- Itxi bateriaren konpartimenduaren estalkia ondo.
Hasierako piztea
Upon battery installation, the clock will power on and attempt to synchronize with the atomic time signal.
Atomic Time Synchronization (WWVB)
The Sharp Digital Alarm Clock is designed to automatically synchronize with the WWVB atomic time signal broadcast from Fort Collins, Colorado, ensuring precise timekeeping.

Map of the United States showing the WWVB radio broadcast signal originating from Fort Collins, Colorado, which the atomic clock uses for synchronization.
- The clock will automatically attempt to receive the signal daily, typically overnight when electronic interference is minimal.
- For optimal reception, place the clock near a window and orient its front or rear panel towards Fort Collins, Colorado.
- A signal strength indicator (antenna icon) on the display will show the reception status.
- To manually initiate a signal search, press the OLATUA atzeko paneleko botoia.

Graphic depicting a full moon, with text 'LESS ELECTRONIC INTERFERENCE AT NIGHT SET BY MORNING', indicating optimal atomic clock synchronization occurs during nighttime hours.
Setting Time Zone
Even with atomic synchronization, you must manually select your local time zone for the correct hourly time display.
- Eduki sakatuta DENBORA button until the time zone indicator flashes.
- Erabili UP or BEHERA buttons to select your desired time zone (e.g., PST, MST, CST, EST).
- Sakatu DENBORA botoia berriro berresteko eta irteteko.
Eskuzko ordua eta data ezartzea
If atomic synchronization is not desired or available, you can set the time and date manually.
- Ordua ezartzeko: Eduki sakatuta DENBORA button until the hour flashes. Use UP/BEHERA doitzeko. Sakatu DENBORA to move to minutes, then adjust. Press DENBORA berriro gordetzeko.
- Data zehazteko: Eduki sakatuta EGUTEGIA button until the year flashes. Use UP/BEHERA doitzeko. Sakatu EGUTEGIA to move to month, then day, adjusting each. Press EGUTEGIA berriro gordetzeko.
- 12/24 orduko formatua: Sakatu 12/24 button to switch between 12-hour (with AM/PM indicator) and 24-hour formats.
Funtzionamendu-argibideak
Adjusting Display Brightness and Backlight
The clock features an optional always-on backlight with adjustable brightness for optimal viewargiztapen-baldintza ezberdinetan aritzea.
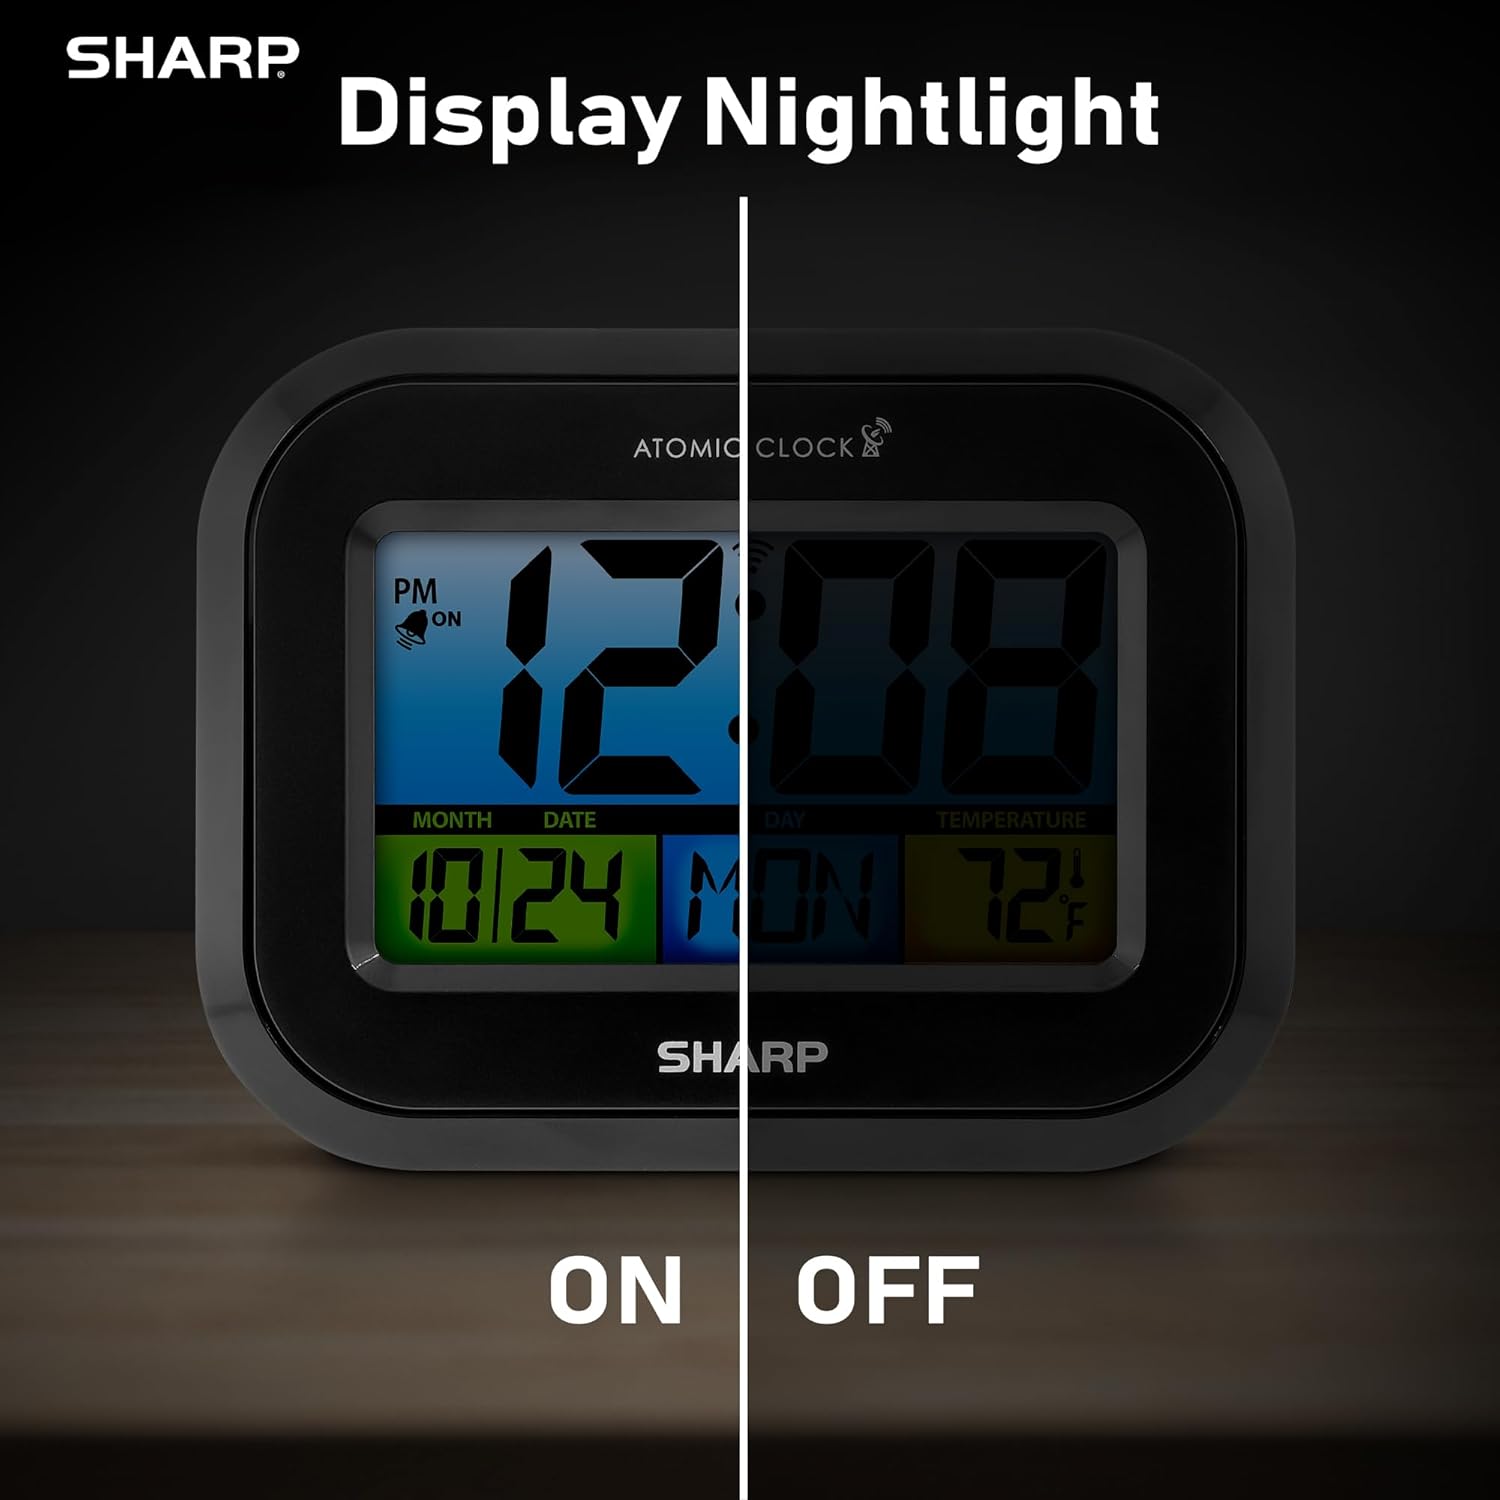
Comparison image showing the clock's display with the nightlight off (dim) and on (illuminated) in both day and night settings.
- Always-On Backlight: Erabili ON/OFF etengailua on the rear panel to activate or deactivate the continuous backlight. When ON, the display will have a soft glow.
- Eskaera atzeko argia: Even if the always-on backlight is OFF, you can momentarily illuminate the display by pressing the ATZEKO ILUMINA button (usually located on the top edge, though not explicitly labeled in the provided image, it's a common feature). This provides a brighter illumination for a few seconds.

Image highlighting the physical ON/OFF switch on the rear of the clock for controlling the display nightlight, indicating its function for soft glowing backlight in the dark.
Setting Dual Alarms
The clock supports two independent alarm settings.
- Sakatu ALARMA button once to select Alarm 1. Press again for Alarm 2.
- Alarmaren ordua bistaratzen den bitartean, sakatu eta eutsi botoiari ALARMA button until the hour flashes.
- Erabili UP or BEHERA botoiak ordua doitzeko. Sakatu ALARMA to move to minutes, then adjust.
- Sakatu ALARMA again to save the alarm time.
- Alarma aktibatzeko/desaktibatzeko, sakatu ALARMA button repeatedly until the alarm icon (bell) appears/disappears for the desired alarm.
USB kargatzeko ataka erabiliz
The clock includes a USB charging port for convenient charging of small electronic devices. Locate the USB port on the side or rear of the unit (specific location not detailed in provided images, but implied by feature bullets). Connect your device's USB cable to this port to begin charging.
Temperature Display (°C/°F)
The clock displays the indoor temperature. To switch between Celsius and Fahrenheit, press the ° C / ° F atzeko paneleko botoia.
Viewing Angle Optimization
Like most LCD screens, this display is best viewed from the front or slightly above. Visibility may appear reduced at sharp side or low angles. For the best viewing experience, use the built-in kickstand to position the clock to face you.

Illustration demonstrating the optimal viewing angle for the LCD display, showing that the clock is best viewed from above or straight on, with a built-in kickstand to position it.
Wall Mounting and Tabletop Use
The clock is designed for versatile placement. Use the integrated backstand for tabletop viewing or the wall mount hole on the rear for hanging it on a wall.

The Sharp Digital Alarm Clock displayed in a home office setting, showing its versatility for both wall mounting and tabletop placement.
Mantentzea
Garbiketa
Garbitu erlojua zapi leun eta lehor batekin. Ez erabili garbitzaile edo disolbatzaile urratzailerik, gainazala kaltetu baitezakete.
Bateria ordezkatzea
When the display becomes dim or the clock stops functioning, it's time to replace the batteries. Follow the battery installation steps in the Setup section. It is recommended to replace all three AAA batteries at the same time with new ones.
Arazoak konpontzea
| Arazoa | Irtenbide posiblea |
|---|---|
| Pantaila ilun edo hutsik dago. | Check battery polarity and ensure batteries are fresh. Replace all 3 AAA batteries. Ensure the backlight ON/OFF switch is in the 'ON' position if continuous illumination is desired. |
| Atomic time not synchronizing. | Ensure the clock is placed near a window and oriented towards Fort Collins, Colorado. Avoid placing near electronic devices that may cause interference. Try initiating a manual search by pressing the WAVE button. Synchronization is often best overnight. |
| Time or date is incorrect after battery change. | Manually set the time zone. Allow time for atomic synchronization, or manually set the time and date using the TIME and CALENDAR buttons. |
| Display is hard to read from certain angles. | This is a characteristic of LCD technology. Adjust the clock's position using the kickstand to ensure it is viewed straight-on or from slightly above eye level. |
| Alarmak ez du jotzen. | Ensure the alarm is set and activated (bell icon visible). Check battery level. |
Zehaztapenak
| Jabetza | Balioa |
|---|---|
| Marka | Zorrotza |
| Modelo zenbakia | SPC5028AMZ |
| Bistaratzeko mota | LCDa |
| Kolorea | Beltza |
| Produktuaren neurriak | 6.45"Z x 5"A |
| Elementuaren pisua | 10.8 ontza (0.31 kilogramo) |
| Energia iturria | Pilaz elikatzen da (3 x AAA, ez daude barne) |
| Eragiketa modua | Atomikoa |
| Ezaugarri bereziak | Cordless, Dual Alarm, USB Charging Port, Indoor Temperature Display, Always-On Backlight |
| Muntatze Mota | Hormako euskarria, mahai gainekoa |
| Markoaren materiala | Plastikoa |
Bermea eta Laguntza
Sharp products are manufactured to the highest quality standards. For warranty information or technical support, please refer to the documentation included with your purchase or visit the official Sharp webgunea. Gorde erosketa-agiria erosketaren frogagiri gisa berme-erreklamazioetarako.

Sharp Time Solutions


