1. Sarrera
Thank you for choosing the Takstar V4 Wireless Video Microphone System. This system is designed to provide high-quality audio recording for various applications, including video production with DSLRs, smartphones, and cameras. It features 2.4GHz wireless transmission, real-time monitoring, noise reduction, and versatile compatibility. Please read this manual thoroughly before use to ensure proper operation and to maximize the performance of your device.
2. Paketearen edukia
Please verify that all items listed below are included in your package. If any items are missing or damaged, contact your retailer.
- V4 Wireless Video Microphone (Transmitter and Receiver units)
- Kargatzeko kaxa
- Audio Cables (e.g., 3.5mm TRS for cameras, 3.5mm TRRS for smartphones, Lightning/USB-C adapters if included) - Note: Specific cable types may vary based on package version.
- USB kargatzeko kablea
- Windscreen/Dead Cat (for outdoor use)
- Erabiltzailearen eskuliburua (dokumentu hau)
3. Produktua amaitu daview
The Takstar V4 system consists of a transmitter, a receiver, and a portable charging case. Familiarize yourself with the components and their functions.
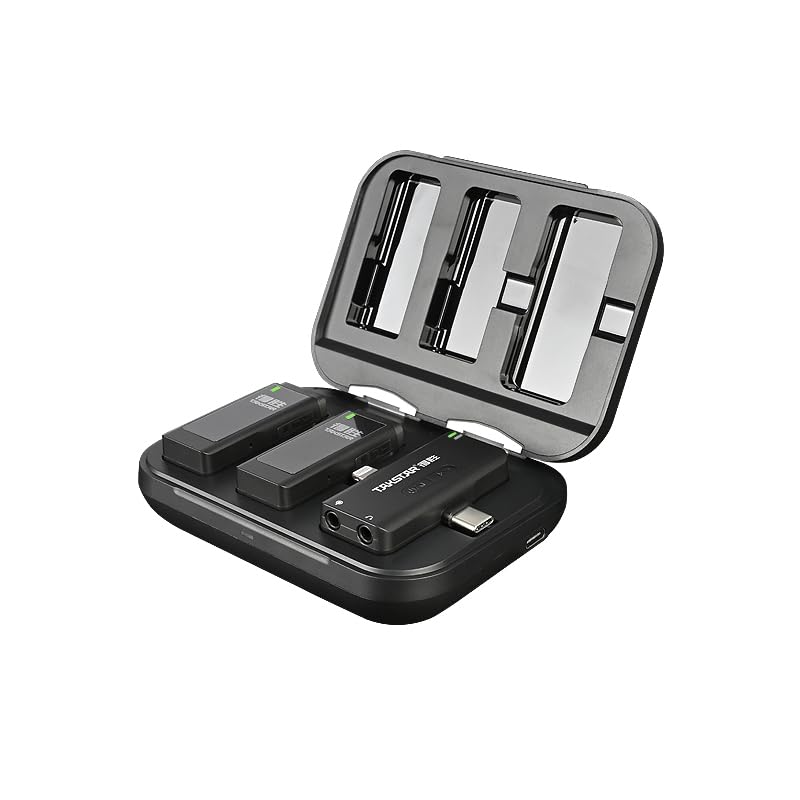
3.1. irudia: Takstar V4 Wireless Microphone System (Charging Case Open)
This image displays the Takstar V4 wireless microphone system with its charging case open. Inside the case, two transmitter units and one receiver unit are visible, indicating a dual-channel system. The units are compact and designed to fit securely within the case for charging and storage.
3.1 igorle (TX)
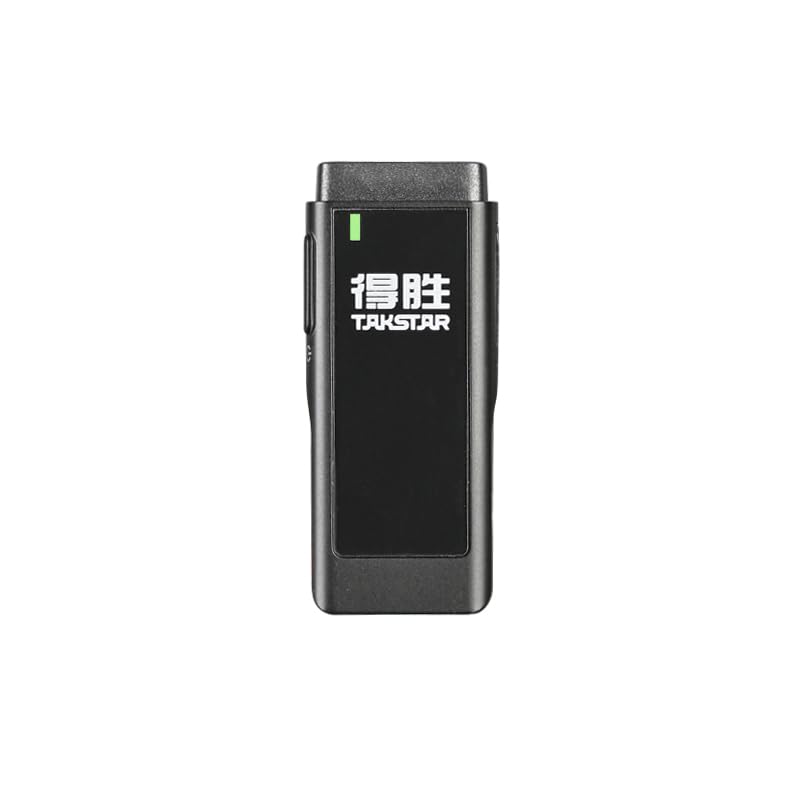
3.2. irudia: Transmisore Unitatea
The transmitter unit features an integrated microphone, a power indicator, and controls for various functions. It is designed to be clipped onto clothing for discreet audio capture.
- Mikrofono integratua: Norabide guztiko bilketa.
- Power/Status Indicator: Displays power status and connection.
- Pizteko botoia: On/Off, pairing.
- Zarata murrizteko botoia: Cycles through noise reduction modes.
- TF txartelaren zirrikitua: For local audio storage.
- USB-C ataka: For charging and data transfer (if applicable).
3.2 hargailua (RX)
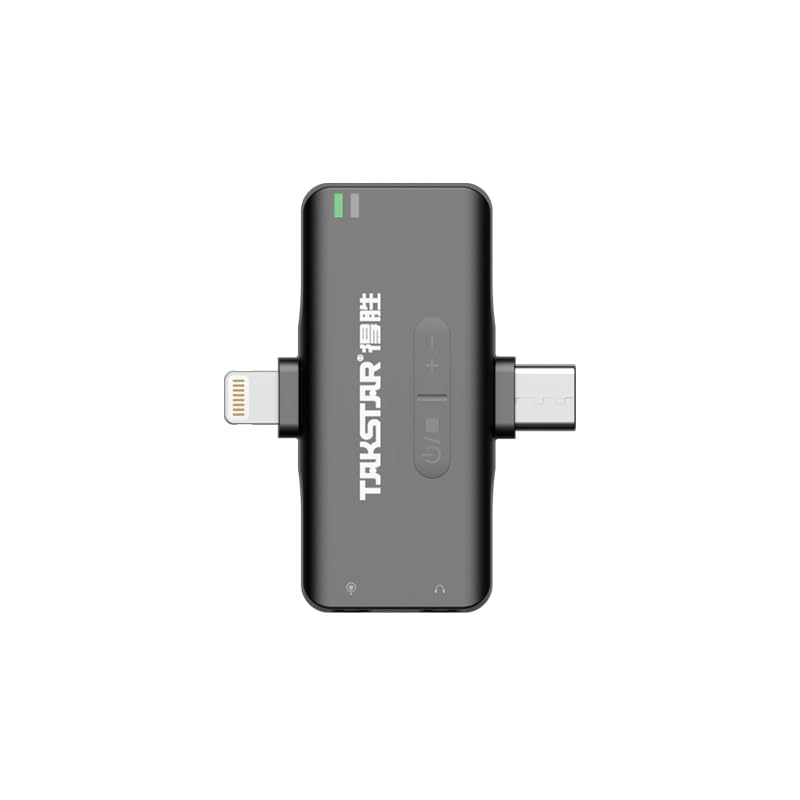
3.3. irudia: Hartzailea Unitatea
The receiver unit connects to your recording device (camera, smartphone). It features a connector for the device, volume controls, and a monitoring port.
- Gailuaren konektorea: USB-C, Lightning, or 3.5mm TRS/TRRS for connection to recording devices.
- Bolumena kontrolatzeko botoiak: Egokitu irteerako bolumena.
- 3.5 mm-ko monitorizazio portua: For real-time audio monitoring with headphones.
- Power/Status Indicator: Displays power status and connection.
3.3 Kargatzeko maleta

3.4. irudia: Kargatzeko kaxa
The portable charging case stores and recharges the transmitter and receiver units, providing extended battery life for on-the-go use.
- Kargatzeko tarteak: Securely holds and charges TX and RX units.
- USB-C kargatzeko ataka: For recharging the case itself.
- Bateria adierazlea: Kargatzeko kaxaren bateriaren maila erakusten du.
4. Konfigurazio gida
4.1 Hasierako karga
Before first use, fully charge the transmitter, receiver, and charging case.
- Place the transmitter(s) and receiver into the charging case.
- Konektatu kargatzeko kaxa USB elikatze-iturri batera emandako USB kargatzeko kablea erabiliz.
- The indicators on the units and case will show charging status. Once fully charged, the indicators will change (e.g., turn solid green or off).

4.1. irudia: Sistema kargatzea
This image illustrates the portable charging case in use, with the microphone units placed inside. It highlights the convenience of charging the system while on the move, ideal for outdoor recording sessions or interviews.
4.2 Grabazio gailuetara konektatzea
The V4 system offers universal compatibility with cameras, iOS, and Android devices.
- Kameretarako (DSLR/ispilurik gabekoak): Connect the receiver's 3.5mm output to your camera's microphone input using the appropriate 3.5mm TRS cable.
- For Smartphones (iOS/Android): Directly plug the receiver into your smartphone's Lightning port (for iOS) or USB-C port (for Android). Ensure your phone supports external microphones.

4.2. irudia: Versatile Application and Compatibility
This image demonstrates the Takstar V4's broad compatibility, showing its use in various scenarios such as live streaming, vlogging, general filming, and interviews. It highlights the system's ability to connect to cameras, DSLRs, Android, and Apple smartphones.
4.3 Pairing (Automatic)
The Takstar V4 system utilizes 2.4GHz wireless transmission, and units typically pair automatically upon powering on. If pairing does not occur:
- Ensure both the transmitter(s) and receiver are powered on.
- Refer to the specific pairing instructions in the quick start guide if manual pairing is required (usually involves pressing and holding a button on both units).
- A solid indicator light on both units typically signifies a successful connection.
5. Funtzionamendu-argibideak
5.1 Piztu/Itzali
- Piztu: Press and hold the power button on the transmitter and receiver until the indicator light illuminates.
- Itzali: Sakatu eta eutsi berriro pizteko botoia adierazle-argia itzali arte.
- Itzaltze automatikoa: The receiver and transmitter feature a smart shutdown function, automatically powering off after 10 minutes without connection to conserve battery.
5.2 Bolumenaren doikuntza
Use the volume control buttons on the receiver to adjust the audio output level. There are typically 3 steps of adjustable volume.
5.3 Denbora errealeko jarraipena
Connect headphones to the 3.5mm monitoring port on the receiver to listen to the audio being recorded in real-time. This allows you to verify audio quality and levels during recording.
5.4 Noise Reduction Modes
The transmitter features selectable noise reduction modes to adapt to various recording environments. Press the noise reduction button on the transmitter to cycle through the available modes (e.g., Off, Low, High). The indicator light may change to reflect the active mode.
5.5 TF Card Audio Storage
The transmitter supports local TF card audio storage, providing a backup in case of wireless signal interruption or for standalone recording.
- Insert a TF card (not included) into the designated slot on the transmitter.
- When recording, the audio will automatically be saved to the TF card.
- To access recordings, connect the transmitter to a computer via USB-C or remove the TF card and use a card reader.
5.1. irudia: TF txartelaren biltegiratzea
This image depicts a TF card being inserted into the side slot of the Takstar V4 transmitter unit. It visually explains the 'Auto Record To TF Storage' feature, where an inserted TF card allows for automatic local audio backup, indicated by an LED.
5.6 Standalone Voice Recorder
The microphone transmitter can function as a standalone voice recorder, allowing you to record audio directly to the inserted TF card without being connected to a receiver or recording device.
- Ensure a TF card is inserted into the transmitter.
- Power on the transmitter. Recording will typically begin automatically or can be initiated by a specific button press (refer to quick start guide for exact trigger).
- Power off the transmitter to stop and save the recording.
6. Mantentzea
- Garbiketa: Erabili zapi leun eta lehor bat unitateak eta kargatzeko kaxa garbitzeko. Saihestu produktu kimiko gogorrak edo material urratzaileak erabiltzea.
- Biltegiratzea: Store the system in a cool, dry place away from direct sunlight and extreme temperatures. Always store units in the charging case when not in use.
- Bateria zaintzea: To prolong battery life, avoid fully discharging the units frequently. Recharge regularly, even if not in constant use.
- Uraren esposizioa: The units are not waterproof. Avoid exposure to water or high humidity.
7. Arazoak
7.1 Audio Irteerarik Ez
- Ensure both transmitter and receiver are powered on and successfully paired (indicator lights solid).
- Check the connection cable between the receiver and your recording device. Ensure it is fully inserted and the correct type (TRS for camera, TRRS for smartphone, or direct digital connection).
- Verify the volume level on the receiver and your recording device.
- Test with headphones connected to the receiver's monitoring port to isolate the issue.
- Ensure the recording app on your smartphone is configured to use an external microphone.
7.2 Poor Audio Quality / Interference
- Ensure the transmitter is within the effective operating range (up to 120m line-of-sight). Obstacles can reduce range.
- Check for strong Wi-Fi or other 2.4GHz devices nearby that might cause interference.
- Activate noise reduction modes on the transmitter to mitigate environmental noise.
- Ensure the microphone is positioned correctly and not rubbing against clothing. Use the included windscreen for outdoor recording.
7.3 Units Not Charging
- Ensure the USB charging cable is securely connected to both the charging case and a working power source.
- Verify that the units are correctly seated in their charging slots within the case.
- Check the charging case's battery level.
8. Zehaztapenak
| Ezaugarri | Xehetasuna |
|---|---|
| Marka | Takstar |
| Eredua | V4 |
| Konektibitate Teknologia | Wireless (2.4GHz), Auxiliary |
| Konektore mota | 3.5 mm Jack, USB-C, Lightning (depending on receiver variant) |
| Gailu bateragarriak | Camera, iOS Devices, Android Devices |
| Mikrofonoaren forma-faktorea | Lavalier |
| Eredu polarra | Norabide orotarikoa |
| Ezaugarri bereziak | Portable, Rechargeable, Wireless, Noise Reduction, Real-time Monitoring, TF Card Storage |
| Eragiketa-eremua | 120m arte (ikusmen-lerroan) |
| Bateriaren iraupena (transmisorea) | Up to 10 hours (continuous playtime when connected to camera via 3.5mm interface) |
| Kargatzeko Kutxa Bateria | 2000mAh (kargagarria) |
| Seinaleen eta zarataren arteko erlazioa | 64 dB |
| Maiztasun Erantzuna | 20 Hz - 20 kHz (typical, inferred) |
| Elementuaren pisua | 128 g (gutxi gorabehera) |
| Produktuaren neurriak | 5.34 x 4.36 x 2.21 cm (gutxi gorabehera) |
| Jatorrizko Herrialdea | Txina |
Oharra: zehaztapenak aldatu egin daitezke, jakinarazi gabe.
9. Bermea eta Laguntza
For warranty information, technical support, or service inquiries, please contact your local Takstar distributor or visit the official Takstar webgunea. Gorde erosketaren egiaztagiria bermearen erreklamazioetarako.
Sareko baliabideak:
- Official Takstar Webgunea: www.takstar.com


