Sarrera
Thank you for choosing the NEEWER DS006 Tabletop Projector Stand. This versatile stand is designed to provide stable support for various devices, including projectors, cameras, smartphones, and action cameras. Its adjustable height and rotatable ball head offer flexibility for diverse applications. Please read this manual carefully before use to ensure proper setup and operation.
Paketearen edukia
Egiaztatu behean zerrendatutako elementu guztiak zure paketean sartuta daudela:
- 1 x Center Column
- 1 x Weighted Base
- 1 x Buru esferikoa
- 1 x Telefonoaren titularra
- 1 x Action Camera Mount
- 1 x 1/4" Screw to 5/8" Stud Adapter
- 1 x Erabiltzailearen eskuliburua
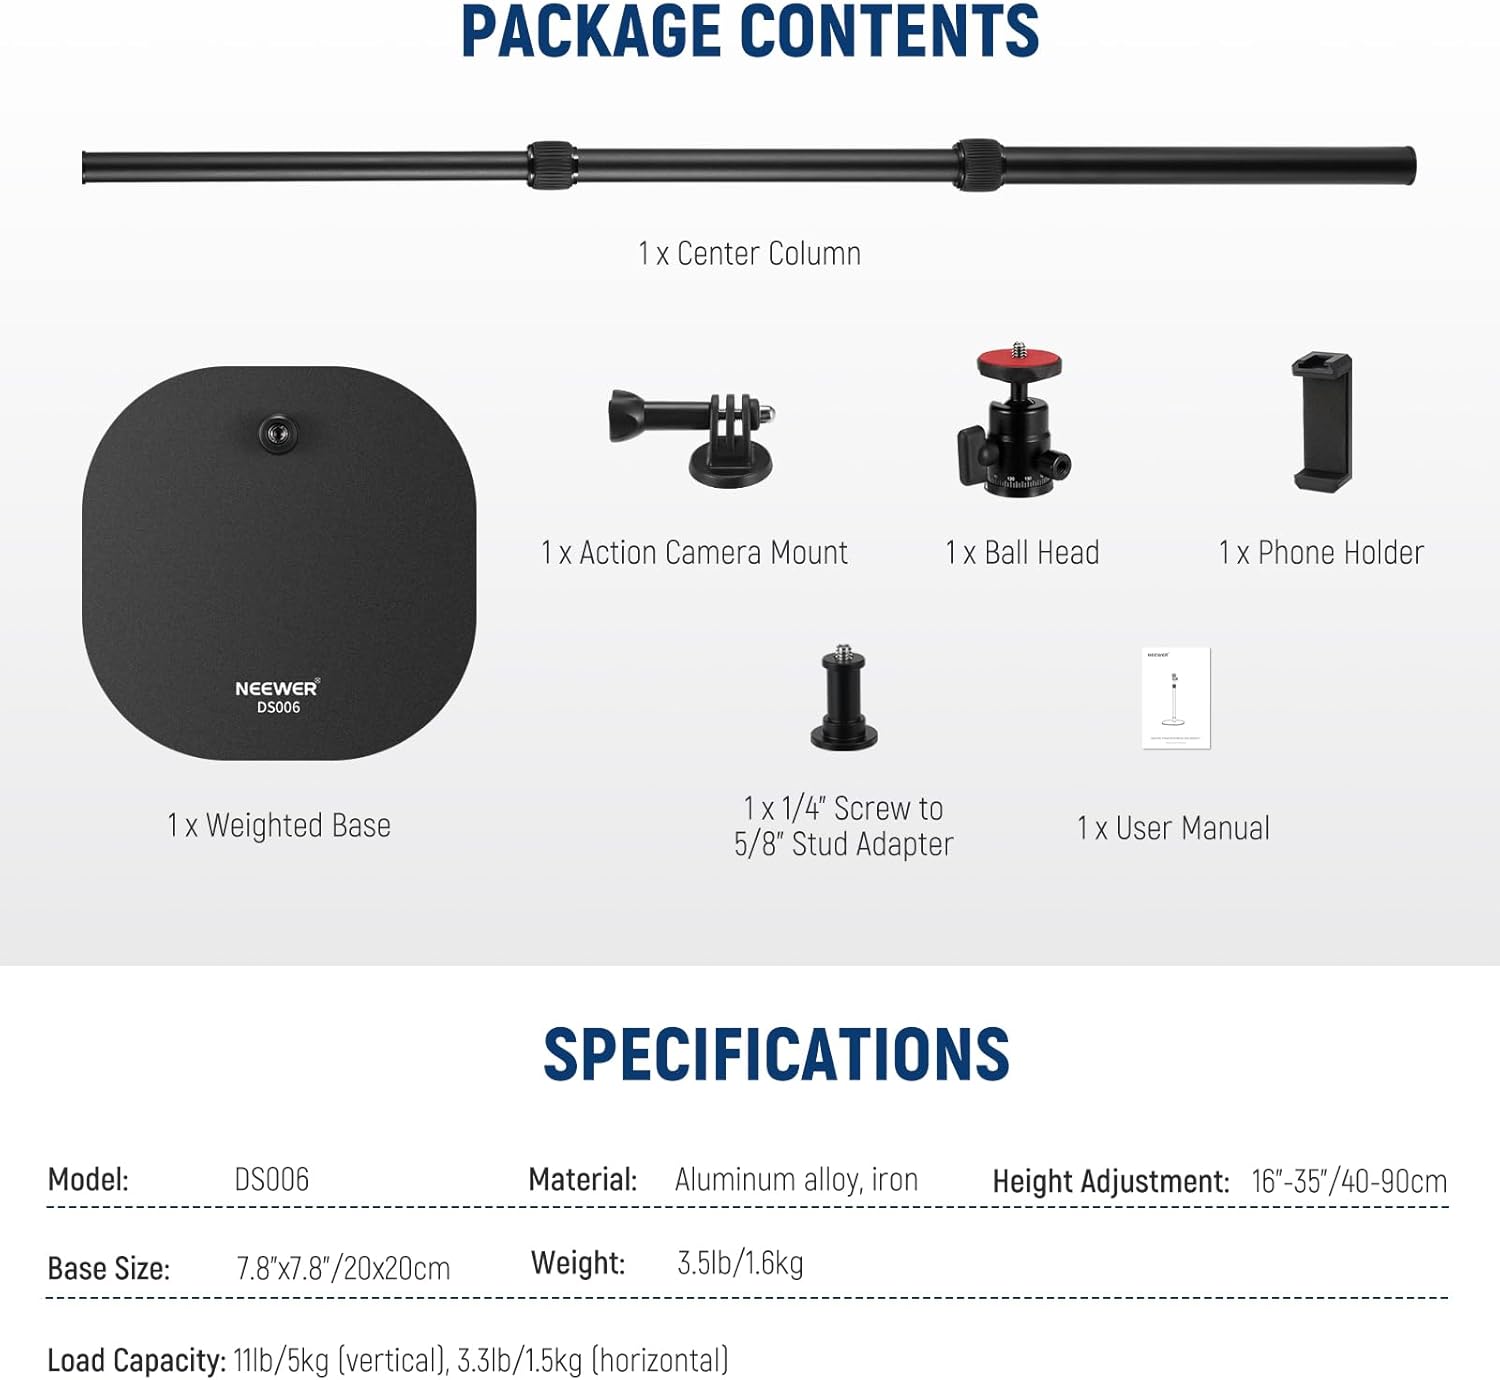
1. irudia: paketearen edukia
Konfigurazio Argibideak
- Oinarrizko muntaia: Screw the bottom end of the center column firmly into the threaded hole on the weighted base. Ensure it is securely tightened to provide a stable foundation. The base weighs 2.9lb (1.3kg) and measures 7.8"x7.8" (20x20cm), featuring a soft foam pad on the bottom for scratch protection and stability.
- Telescopic Column Adjustment: The center column consists of three telescopic sections. To adjust the height (16"-35" / 40-90cm), twist the locking rings counter-clockwise to loosen, extend or retract the sections to your desired height, and then twist clockwise to secure them firmly in place.
- Ball Head Attachment: Screw the ball head onto the 1/4" screw at the top of the center column. Tighten it securely.
- Gailuaren muntaketa:
- For Projectors/Cameras: Attach your device directly to the 1/4" screw on the ball head.
- For Ring Lights/LED Panels: Use the included 1/4" screw to 5/8" stud adapter if your lighting equipment requires a 5/8" stud mount.
- Smartphoneetarako: Attach the phone holder to the ball head's 1/4" screw. Expand the phone holder to securely grip your smartphone (compatible with devices 2.5"-4.1" / 6.4-10.5cm wide).
- Ekintza-kameretarako: Attach the action camera mount to the ball head's 1/4" screw, then secure your action camera (e.g., GoPro Hero series, Insta360) to the mount.

Figure 4: 1/4" Mounting Screw for Projectors

Figure 5: Phone Holder and Action Camera Mount

Figure 2: Stable Weighted Base

Figure 3: Telescopic Center Column
Funtzionamendu-argibideak
- Adjusting Device Angle: The ball head allows for 360° rotation and 90° tilt. Loosen the locking knob on the ball head, adjust your device to the desired angle, and then tighten the knob firmly to secure it. The ball head also features a 360° scaled base for precise panoramic adjustments.
- Standaren altuera doitzea: Follow the steps in the "Telescopic Column Adjustment" section to set the stand to your preferred height between 16" and 35" (40-90cm).
- Aplikazioak: This stand is suitable for a wide range of uses, including food photography, product photography, cosmetic photography, artwork display, close-up shots, projecting, live streaming, tabletop video recording, online teaching, video calls, and makeup tutorials.
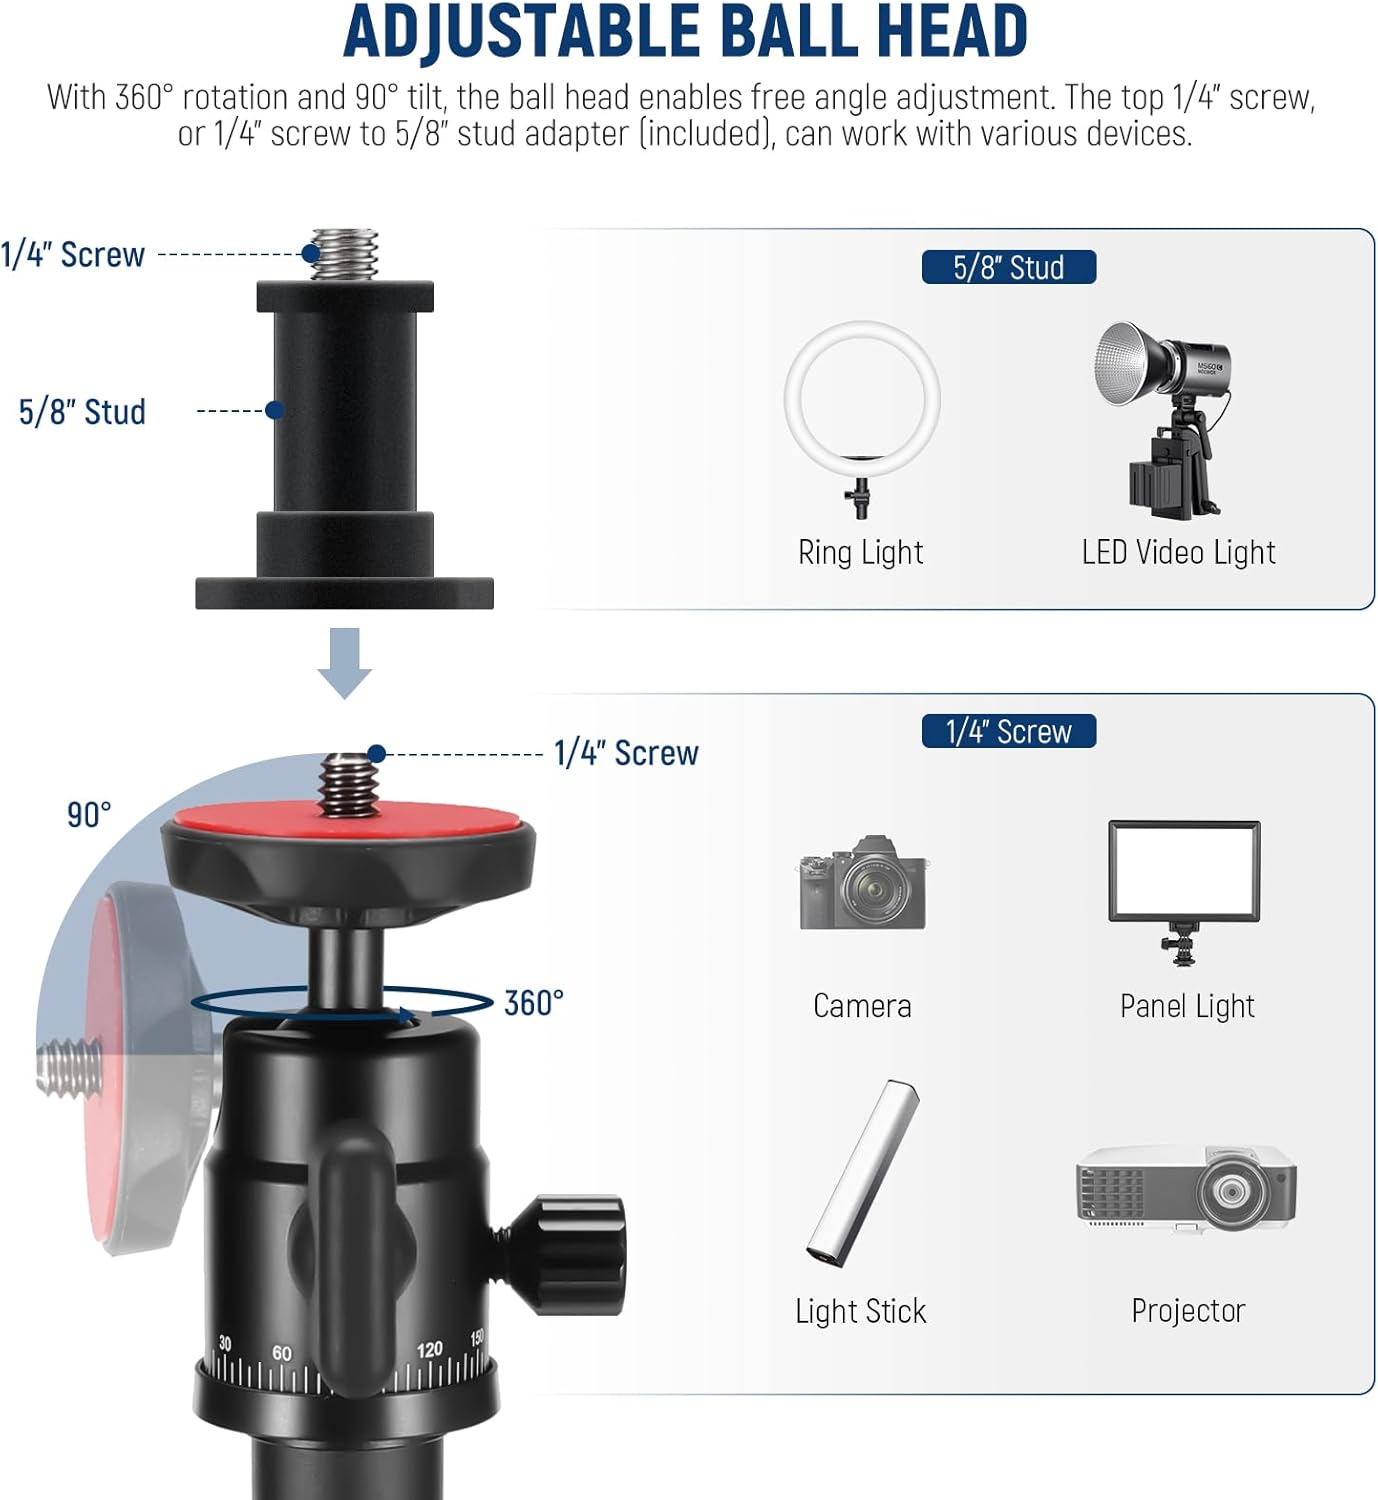
Figure 6: Adjustable Ball Head

Figure 7: Wide Applications
Mantentzea
- Garbiketa: Wipe the stand with a soft, dry cloth. Avoid using abrasive cleaners or solvents that may damage the finish.
- Biltegiratzea: Store the stand in a dry, cool place away from direct sunlight and extreme temperatures.
- Ikuskapena: Aldian-aldian egiaztatu torloju eta konexio guztiak ondo estututa eta ondo finkatuta daudela ziurtatzeko.
Arazoak konpontzea
- Zutik egotea ezegonkorra sentitzen da: Ensure the weighted base is on a flat, stable surface. Verify that all telescopic column twist locks are fully tightened and the center column is securely screwed into the base. Check that the ball head is also firmly attached.
- Device is slipping on ball head: Ensure the ball head locking knob is fully tightened after positioning your device. Do not exceed the vertical load capacity of 11lb (5kg) or horizontal load capacity of 3.3lb (1.5kg).
- Altuera doitzeko zailtasuna: Loosen the twist locks completely before attempting to extend or retract the telescopic sections. If still stiff, ensure no debris is obstructing the mechanism.
- Osagarriak ez dira egokiak: Confirm that you are using the correct mounting point (1/4" screw for most devices, 5/8" stud adapter for specific lighting, phone holder for smartphones, action camera mount for action cameras).
Zehaztapenak
| Eredua | DS006 |
| Materiala | Aluminum alloy, Iron |
| Altuera doitzea | 16"-35" (40-90cm) |
| Oinarrizko Tamaina | 7.8"x7.8" (20x20cm) |
| Oinarrizko pisua | 2.9 lb (1.3 kg) |
| Karga Bertikaleko Ahalmena | 11 lb (5 kg) |
| Karga-gaitasun horizontala | 3.3 lb (1.5 kg) |
| Telefonoaren zabalera bateragarria | 2.5"-4.1" (6.4-10.5cm) |
8. irudia: Produktuaren zehaztapenak
Bermearen informazioa
Warranty details for the NEEWER DS006 Tabletop Projector Stand are typically provided with your purchase documentation or can be found on the official NEEWER webgunea. Gorde erosketaren egiaztagiria berme-erreklamazioetarako.
Bezeroarentzako Arreta
For further assistance, technical support, or inquiries regarding your NEEWER DS006 Tabletop Projector Stand, please visit the official NEEWER website or contact their customer service department through the channels provided with your product or on their webgunea.


