1. Sarrera
Thank you for choosing the Conentool 21V Cordless Impact Drill/Driver Kit. This tool is designed for various drilling and screwdriving tasks in wood, metal, plastics, and masonry. Please read this manual carefully before operating the tool to ensure safe and efficient use. Keep this manual for future reference.

Image 1.1: The Conentool 21V Cordless Impact Drill/Driver Kit, including the drill, two 2500mAh batteries, charger, and a variety of drill bits and accessories in a carrying case.
2. Segurtasun Jarraibide Orokorrak
OHARRA: Irakurri tresna elektriko honekin emandako segurtasun-abisu, argibide, ilustrazio eta zehaztapen guztiak. Behean zerrendatzen diren argibide guztiak ez betetzeak deskarga elektrikoa, sutea eta/edo lesio larriak eragin ditzake.
2.1 Lan eremuko segurtasuna
- Mantendu lan-eremua garbi eta ondo argiztatuta. Eremu nahasiak edo ilunek istripuak gonbidatzen dituzte.
- Ez erabili tresna elektrikoak atmosfera lehergarrietan, adibidez, likido sukoiak, gasak edo hautsak daudenean. Erreminta elektrikoek hautsa edo keak piztu ditzaketen txinpartak sortzen dituzte.
- Mantendu haurrak eta ingurukoak urrun, erreminta elektrikoa erabiltzen duzun bitartean. Distrakzioek kontrola galtzea eragin dezakete.
2.2 Segurtasun elektrikoa
- Erreminten entxufeak entxufearekin bat etorri behar dira. Inoiz ez aldatu entxufea inola ere.
- Saihestu gorputzaren kontaktua lurrarekin edo lurretik loturiko gainazalekin, hala nola hodiekin, erradiadoreekin, sukaldeekin eta hozkailuekin. Deskarga elektrikoa jasateko arriskua areagotu egiten da zure gorputza lurrarekin edo lurrarekin lotuta badago.
- Ez jarri tresna elektrikoak euria edo hezetasunera. Erreminta elektriko batean sartzeak deskarga elektrikoaren arriskua areagotuko du.
2.3 Segurtasun pertsonala
- Beti eraman begi-babesak. Erabili segurtasun-betaurrekoak, betaurrekoak edo aurpegi-babesa.
- Tresna denbora luzez erabiltzean, erabili entzumen-babesak.
- Jantzi behar bezala. Ez erabili arropa solterik edo bitxirik. Mantendu zure ilea eta arropa zati mugikorretatik urrun.
- Egon adi, ikusi zer egiten ari zaren eta erabili zentzua erreminta elektrikoa ustiatzean.
3. Paketearen edukia
Egiaztatu behean zerrendatutako elementu guztiak zure paketean sartuta daudela. Elementuren bat falta bada edo hondatuta badago, jarri harremanetan bezeroarentzako arreta-zerbitzuarekin.
- 1 x Conentool 21V Cordless Impact Drill/Driver
- 2 x 2500mAh litio-ioizko bateria
- 1 x Bateria kargagailua
- 1 x Ardatz malguaren luzapena
- Various Drill Bits (for wood, metal, masonry)
- Various Screwdriver Bits
- Socket egokitzaileak
- Eramateko zorroa
- Erabiltzailearen eskuliburua

Image 3.1: A complete overview of the kit contents, including the drill, two batteries, charger, flexible shaft, various drill bits, screwdriver bits, and socket adapters, all neatly arranged.
4. Produktua amaitu daview
Familiarize yourself with the main components of your drill/driver:
- Chuck: Holds drill bits and screwdriver bits.
- Momentuaren doikuntza eraztuna: Selects the desired torque setting.
- Modu hautatzaile eraztuna: Switches between screwdriving, drilling, and impact drilling modes.
- Abiadura hautagailu etengailua: Changes between high and low-speed gears.
- Aktibatzeko etengailua: Activates the tool and controls speed (variable speed).
- Aurrera/Atzera hautatzailea: Biraketa-norabidea aldatzen du.
- Laneko LED argia: Lan-eremua argitzen du.
- Bateria paketea: Tresnari potentzia ematen dio.
- Bateria askatzeko botoia: Bateria kentzeko.
- Heldulekua: Ergonomic grip for comfortable use.

4.1 irudia: Barneko bat view highlighting the brushless motor, which provides increased power, efficiency, and a quieter operation with no sparks.
5. Konfigurazioa
5.1 Bateria kargatzea
The battery pack is not fully charged at the time of purchase. It is recommended to fully charge the battery before first use.
- Konektatu kargagailua entxufe estandar batera.
- Slide the battery pack onto the charger base. Ensure it clicks into place.
- The charger indicator light will show the charging status. A red light typically indicates charging, and a green light indicates a full charge.
- Guztiz kargatuta dagoenean, deskonektatu kargagailua korronte-hartunetik eta kendu bateria.

Image 5.1: The battery charger connected to a wall outlet, with a battery pack inserted for charging. The red light indicates charging, and the green light indicates a completed charge.
5.2 Bateria instalatzea eta kentzea
- Instalatzeko: Align the battery pack with the base of the tool handle and slide it in until it clicks securely into place.
- Kentzeko: Press the battery release button (usually located at the front of the battery) and slide the battery pack out of the tool.

5.2 irudia: Mozketa bat view of the 2500mAh battery pack, illustrating its internal lithium-ion cells and power management system, designed for up to 90 minutes of use per battery.
5.3 Installing and Removing Drill/Screwdriver Bits
- Instalatzeko: Rotate the chuck counter-clockwise to open the jaws. Insert the desired bit into the chuck as far as it will go. Rotate the chuck clockwise to tighten the jaws firmly around the bit.
- Kentzeko: Biratu mandrila erlojuaren orratzen kontrako noranzkoan masailezurrak askatzeko eta broka ateratzeko.
Ensure the bit is securely fastened to prevent it from slipping during operation.
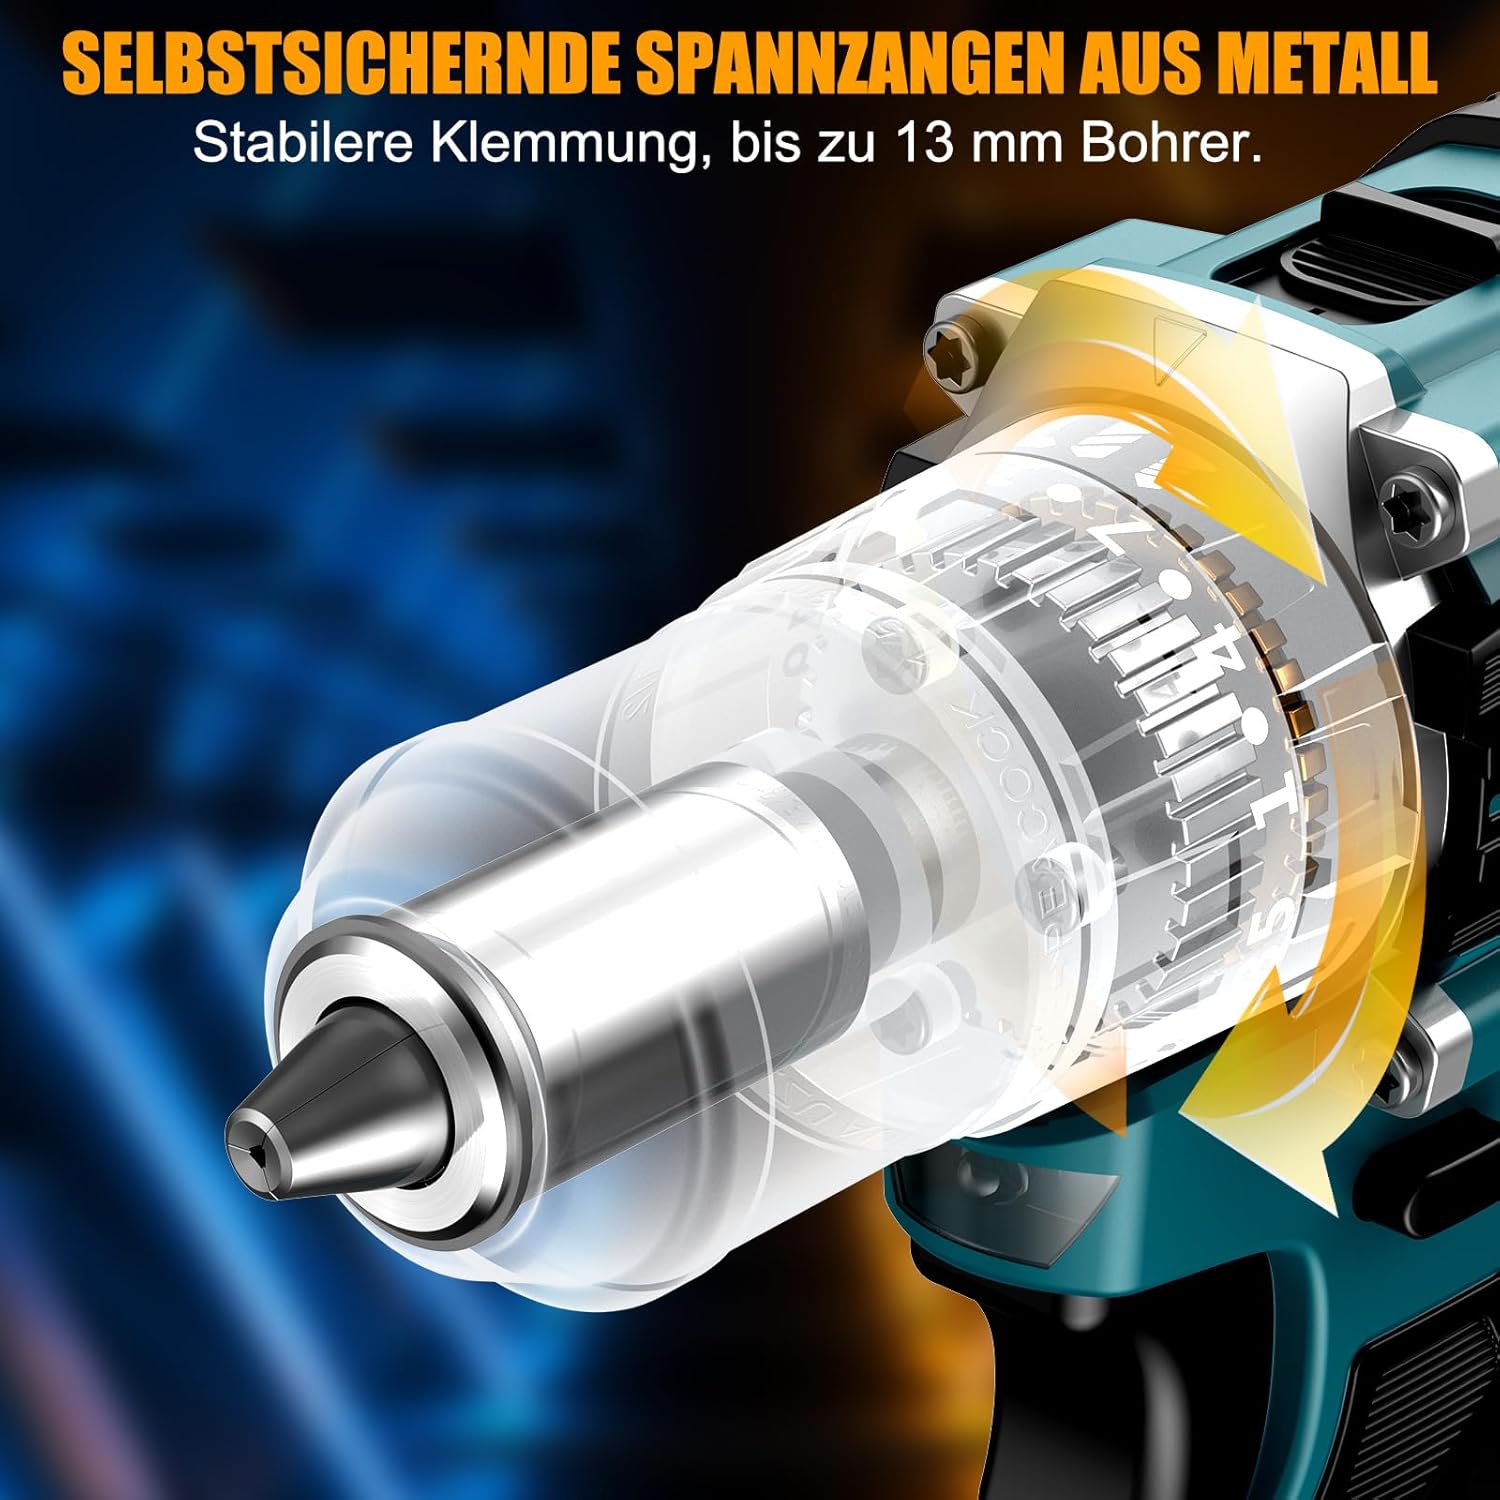
5.3. irudia: Xehetasun bat view of the self-locking metal chuck, demonstrating its stable clamping mechanism capable of holding drill bits up to 13mm securely.
6. Funtzionamendu-argibideak
6.1 Piztea/Itzaltzea eta Abiadura Kontrolatzea
- To turn the tool ON, press the trigger switch. The speed is variable; press the trigger further for higher speed.
- Tresna ITZALTZEKO, askatu abiarazle-etengailua.
- The integrated LED work light will illuminate when the trigger is pressed, providing visibility in dimly lit areas.
6.2 Aurrerantz/Atzeranzko Biraketa
The forward/reverse selector switch is located above the trigger. Push it to the left for forward rotation (for screwdriving and drilling) and to the right for reverse rotation (for removing screws or freeing jammed bits). Ensure the tool is stopped before changing direction.
6.3 Speed Gear Selection
The drill features a 2-speed gear selector switch on top of the tool:
- Gear 1 (Low Speed, 0-650 RPM): Ideal for high-torque applications like driving large screws or drilling large holes.
- Gear 2 (High Speed, 0-1850 RPM): Suitable for fast drilling in softer materials and smaller diameter holes.
Always select the appropriate gear for the task. Change gears only when the tool is completely stopped.
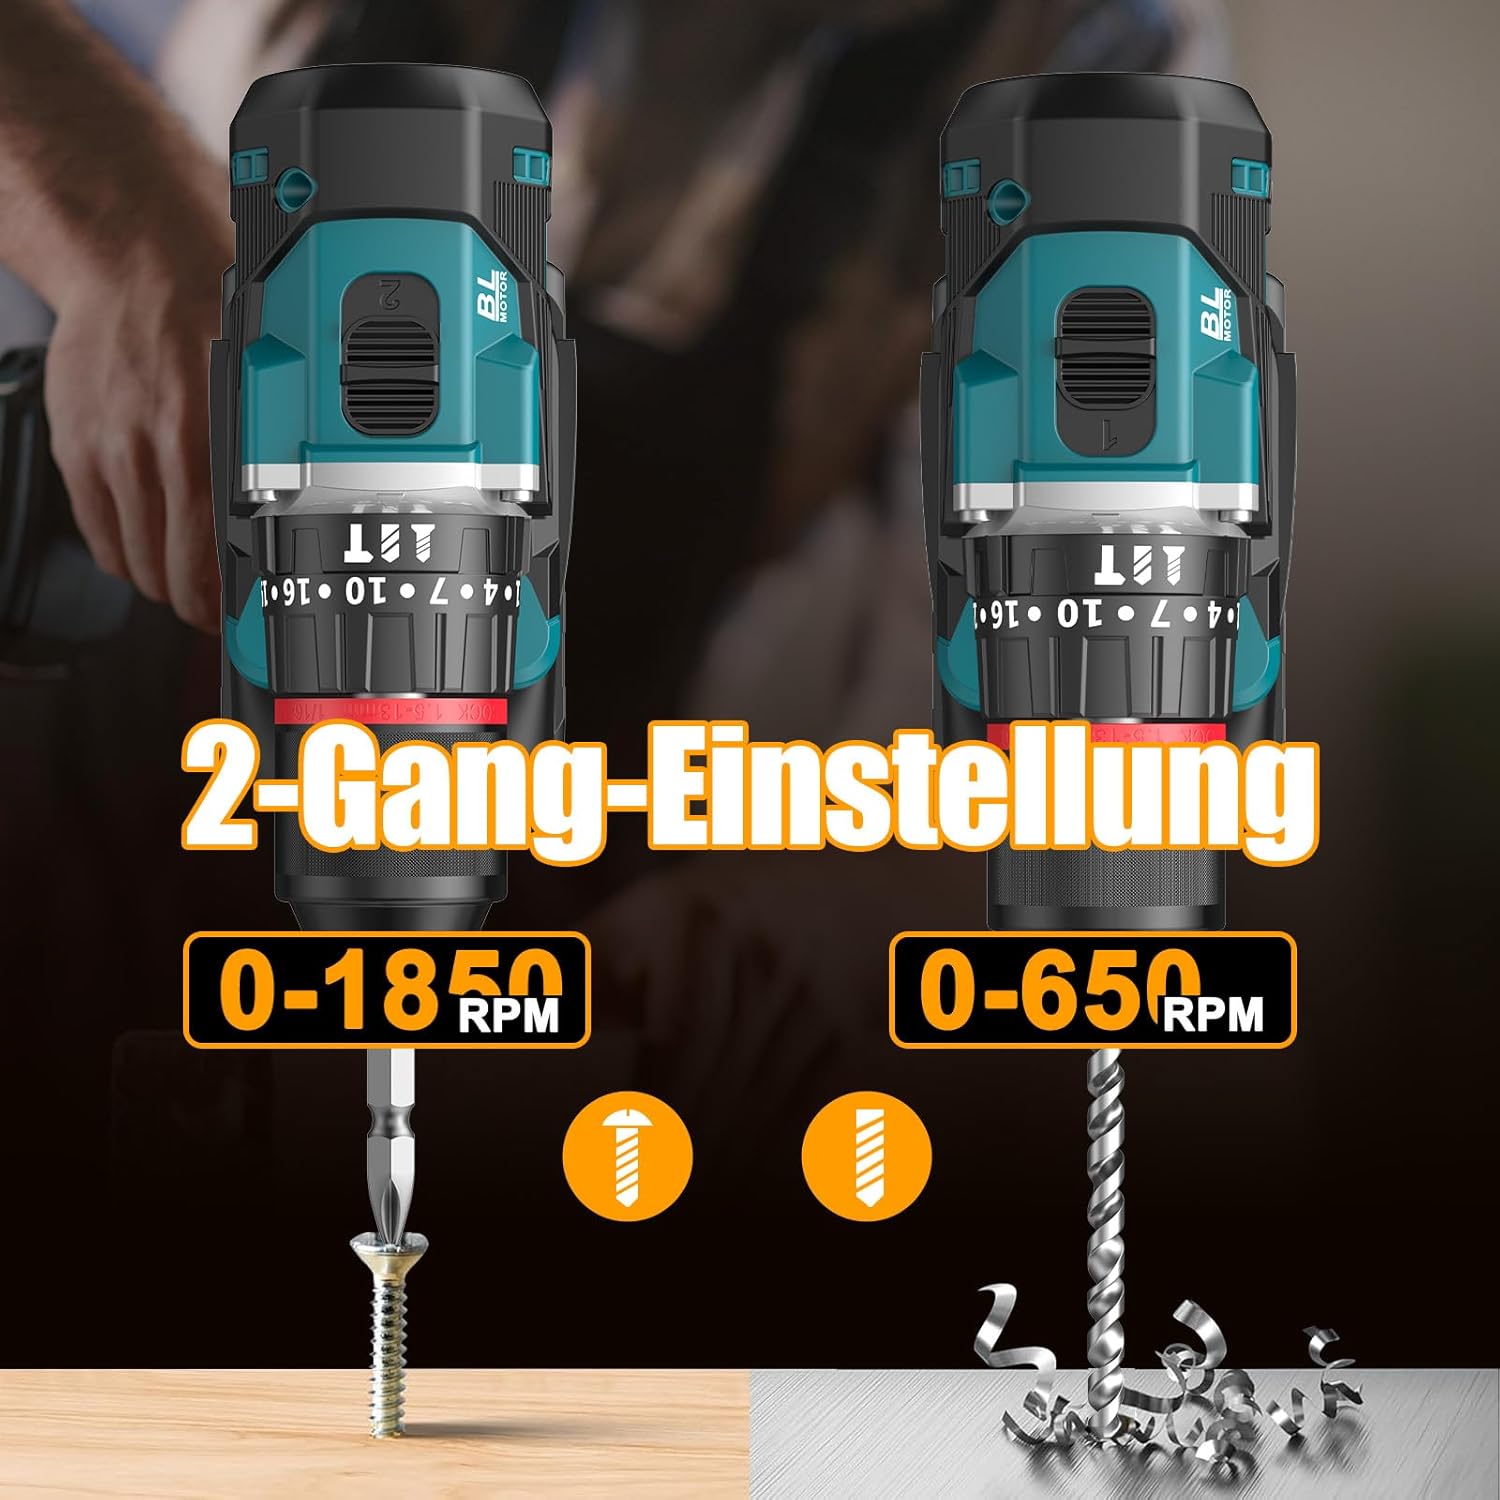
Image 6.1: An illustration demonstrating the two-speed gear settings: Gear 1 (0-650 RPM) for screwdriving and Gear 2 (0-1850 RPM) for drilling, allowing for optimal performance based on the application.
6.4 Torque Adjustment and Mode Selection
The torque adjustment ring allows you to set the desired torque for screwdriving applications, preventing overtightening or stripping screws. The mode selector ring allows you to switch between different operating modes.
- Screwdriving Mode (Torque Settings 1-35): Use these settings to match the torque to the screw size and material. Lower numbers for smaller screws/softer materials, higher numbers for larger screws/harder materials.
- Zulatzeko modua (Zulagailu-puntaren ikonoa): For general drilling without impact. The clutch is disengaged, providing maximum torque.
- Impact Drilling Mode (Mailuaren ikonoa): For drilling into masonry or concrete, providing a hammering action in addition to rotation.
The drill offers 35+3 settings, including 35 torque settings for screwdriving and 3 modes (screwdriving, drilling, impact drilling).

Image 6.2: A visual representation of the 35+3 torque and mode settings, indicating precise power control and a maximum torque of 55 N.m, suitable for various materials like wood, brick, plastic, and metal.
7. Mantentzea
7.1 Garbiketa
- Deskonektatu beti bateria-paketea garbiketa edo mantentze-lanak egin aurretik.
- Tresnaren aireztapen-irekidurak garbi mantendu gehiegi berotzea saihesteko.
- Erabili biguna, damp tresna garbitzeko oihal casing. Ez erabili produktu kimiko gogorrik edo garbitzaile urratzailerik.
7.2 Biltegiratzea
- Gorde tresna eta bateriak leku fresko eta lehor batean, eguzki-argitik eta hezetasunetik babestuta.
- Gorde tresna bere zorroan hautsetik eta kalteetatik babesteko.
- Mantendu haurren eskura.

Image 7.1: A person carrying the Conentool drill kit in its durable black carrying case, designed for convenient storage and transport of the tool and its accessories.
7.3 Bateria zaintzea
- Do not store batteries in a discharged state. Recharge them regularly, especially if not used for extended periods.
- Saihestu bateriak tenperatura altuetan jartzea.
- Ez saiatu bateria desmuntatzen edo aldatzen.
8. Arazoak
| Arazoa | Kausa posiblea | Irtenbidea |
|---|---|---|
| Tresna ez da martxan jartzen | Bateria kargatu gabe edo gaizki instalatuta. | Ziurtatu bateria guztiz kargatuta eta behar bezala sartuta dagoela. |
| Potentzia edo abiadura murriztua | Bateria karga baxua da. | Kargatu bateria. |
| Bitak irristatzen dira mandrilan | Mandrila ez dago behar bezala estutu. | Tighten the chuck firmly around the bit. Ensure the bit shank is clean. |
| Gehiegi berotzea | Aireztapen-zirrikituak blokeatuta; etengabeko erabilera intentsiboa. | Garbitu aireztapen-zirrikituak. Utzi tresna hozten denbora luzez erabiltzen bada. |
9. Zehaztapenak
| Ezaugarri | Zehaztapena |
|---|---|
| Modelo zenbakia | ebvc-sd-de |
| liburukiatage | 21 Volt |
| Bateria mota | Litio-ioi |
| Bateria Edukiera | 2500 mAh (bakoitza) |
| Max Torque | 55 Nm |
| Torque ezarpenak | 35 + 3 Modes (Screwdriving, Drilling, Impact Drilling) |
| Kargarik gabeko abiadura (1. martxa) | 0-650 RPM |
| Kargarik gabeko abiadura (2. martxa) | 0-1850 RPM |
| Chuck Tamaina | 13 mm (3/8 inch) Keyless |
| Produktuaren neurriak | 35 x 31 x 10 cm |
| Pisua (bateriarekin) | 1.5 kilogramo |
10. Bermea eta Laguntza
Conentool products are manufactured to high-quality standards. In the unlikely event of a defect due to material or manufacturing fault, please contact your retailer or Conentool customer service. Please retain your proof of purchase for warranty claims.
For further assistance, technical support, or to inquire about spare parts, please refer to the contact information provided with your purchase or visit the official Conentool webgunea.


