1. Sarrera
This manual provides comprehensive instructions for the installation, operation, and maintenance of your Vivotek ND9426P Network Video Recorder (NVR). The ND9426P is a 16-channel, 2-bay embedded NVR with Power over Ethernet (PoE) capabilities and integrated Artificial Intelligence (AI) features, designed for robust surveillance applications. Please read this manual thoroughly before using the device to ensure proper setup and functionality.
2. Segurtasun informazioa
- Ensure the NVR is installed in a well-ventilated area to prevent overheating.
- Erabili gailuarekin hornitutako korronte-egokigailua soilik.
- Ez jarri NVRa uraren, hezetasunaren edo muturreko tenperaturen eraginpean.
- Avoid placing heavy objects on top of the NVR.
- Deskonektatu energia mantentze-lan edo instalazio prozedurak egin aurretik.
- Jarri zerbitzu-zerbitzu guztiak langile kualifikatuari.
3. Paketearen edukia
Egiaztatu behean zerrendatutako elementu guztiak zure paketean sartuta daudela. Elementuren bat falta bada edo hondatuta badago, jarri harremanetan zure saltzailearekin berehala.
- Vivotek ND9426P NVR Unit
- Elikatze-moldagailua
- USB sagua
- Instalazio azkarraren gida
- HDD muntatzeko torlojuak
4. Gainbehera fisikoaview
Familiarize yourself with the front and rear panels of the Vivotek ND9426P NVR.
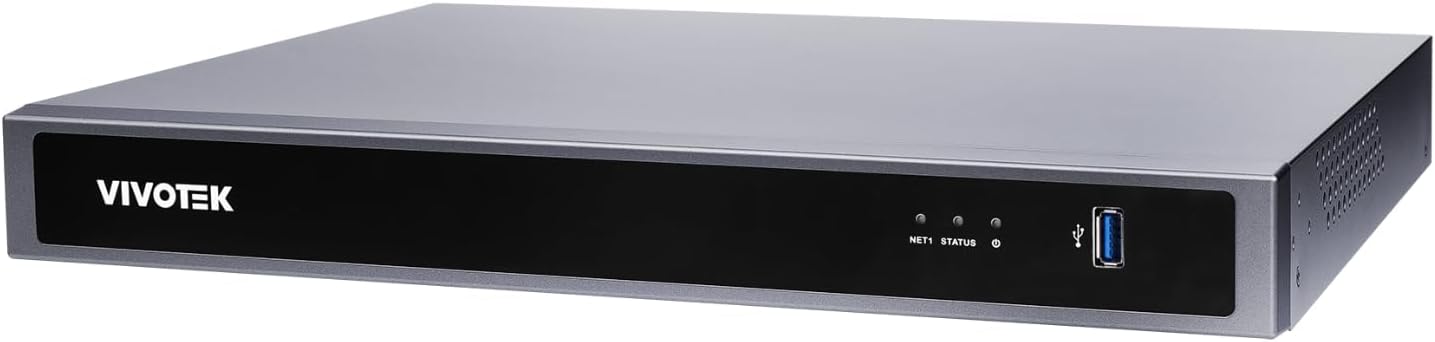
Figure 1: Front Panel of Vivotek ND9426P NVR. This image displays the front of the NVR unit, featuring the VIVOTEK brand logo on the left, two small indicator LEDs labeled "NET1" and "STATUS" in the center, and a blue USB 3.0 port on the right. The overall casing is a dark gray metallic finish.
4.1 Aurreko panela
- VIVOTEK Logo: Marka adierazten du.
- NET1 LED: Network activity indicator for LAN port 1.
- EGOERA LED: Sistemaren egoera adierazlea.
- USB 3.0 ataka: For connecting a USB mouse, keyboard, or external storage devices.
4.2 Atzeko panela (konfigurazio tipikoa)
While not pictured, the rear panel typically includes the following ports:
- PoE Ports (x16): RJ-45 ports for connecting IP cameras and providing power.
- LAN ataka: RJ-45 port for connecting the NVR to your local network.
- HDMI irteera: Monitore edo pantaila batera konektatzeko.
- VGA irteera: Monitore edo pantaila batera konektatzeko.
- Audio sarrera/irteera: Kanpoko audio gailuak konektatzeko.
- USB 2.0 portuak: Periferikoentzako USB ataka gehigarriak.
- Potentzia sarrera: Korronte-egokigailua konektatzeko.
- Lurreko terminalera: Segurtasun-lurrerako konexioa.
5. Konfigurazioa
5.1 Hardwarearen instalazioa
- Disko gogorraren instalazioa:
Unscrew the NVR casing to access the internal bays. Mount up to two 3.5-inch SATA hard drives using the provided screws. Reattach the casing segurtasunez.
- Konektatu IP kamerak:
Connect your PoE-enabled IP cameras to the NVR's PoE ports using Ethernet cables. The NVR will provide power and data connectivity.
- Connect Display and Mouse:
Connect a monitor to the NVR's HDMI or VGA output port. Connect the USB mouse to one of the NVR's USB ports.
- Sare-konexioa:
Konektatu NVRaren LAN ataka zure sareko bideratzailera edo etengailura Ethernet kable bat erabiliz.
- Piztu:
Konektatu korronte-egokitzailea NVRaren elikatze-sarrerara eta gero entxufe batera. NVRa automatikoki piztuko da.
5.2 Hasierako konfigurazioa
- Upon first boot, the NVR will guide you through a setup wizard. Follow the on-screen instructions.
- Set a strong password for the administrator account. This is crucial for security.
- Konfiguratu sarearen ezarpenak (DHCP edo IP estatikoa).
- Scan for and add connected IP cameras.
- Ezarri data, ordua eta ordu-eremua.
6. NVRaren funtzionamendua
6.1 Erabiltzaile interfazearen nabigazioa
- Zuzenean View: Access real-time video feeds from all connected cameras. Use the mouse to select camera views and layouts.
- Erreprodukzioa: Review foo grabatuatage. Navigate through timelines, search by date/time, and export video clips.
- Grabaketa ezarpenak: Configure recording schedules (continuous, motion-triggered, event-based) and video quality for each camera.
- Ekitaldien Kudeaketa: Set up alerts for motion detection, tampering, or AI-triggered events. Configure notification methods (e.g., email, push notifications).
- Sistemaren ezarpenak: Manage user accounts, network configurations, storage, and system logs.
6.2 IAren ezaugarriak
The Vivotek ND9426P integrates advanced AI capabilities to enhance surveillance efficiency. These features may include:
- Mugimendu adimenduna hautematea: Differentiates between human/vehicle movement and environmental factors to reduce false alarms.
- Intrusioaren hautematea: Defines specific areas for monitoring and triggers alerts upon unauthorized entry.
- Line Crossing Detection: Detects when an object crosses a predefined virtual line.
- Refer to the NVR's on-screen interface or the detailed software manual for specific AI feature configuration.
7. Mantentzea
- Firmware eguneraketak: Regularly check the VIVOTEK website for firmware updates to ensure optimal performance and security. Follow the provided instructions carefully for updating.
- Datuen babeskopia: Aldian-aldian egin grabatutako janari garrantzitsuen babeskopiaktage to external storage devices (e.g., USB drive, network storage) to prevent data loss.
- Sistemaren erregistroak: Review system logs regularly for any error messages or unusual activity that may indicate a problem.
- Garbiketa: Keep the NVR unit clean and free from dust. Use a soft, dry cloth. Do not use liquid cleaners or aerosols. Ensure ventilation openings are not obstructed.
8. Arazoak
| Arazoa | Kausa posiblea | Irtenbidea |
|---|---|---|
| Ez dago bideo irteerarik monitorean | Kable konexio soltea, sarrera iturri okerra monitorean, NVR piztuta ez. | Check HDMI/VGA cable connections. Ensure monitor is set to correct input. Verify NVR power. |
| Kamerak ez dira bistaratzen | Camera not powered, network issue, incorrect camera settings. | Check camera power and Ethernet cables. Verify network connectivity. Ensure cameras are added and configured correctly in NVR settings. |
| Cannot access NVR over network | Network cable disconnected, incorrect IP address, firewall blocking access. | Check LAN cable. Verify NVR's IP address and network settings. Adjust firewall rules if necessary. |
| Grabaketa ez dabil | Hard drive not installed/initialized, recording schedule not set, insufficient storage. | Ensure HDD is installed and formatted. Check recording schedules. Verify available storage space. |
9. Zehaztapenak
| Eredua | ND9426P |
| Marka | VIVOTEK |
| Kanal kopurua | 16 |
| HDD baoak | 2 (3.5" SATA) |
| PoE Portuak | 16 |
| Konektibitate Teknologia | Ethernet, USB |
| Elementuaren pisua | 1 kilogramo (2.2 libra) |
| Paketearen neurriak | 0.39 x 0.39 x 0.39 hazbete (L x W x H) |
Note: Specifications are subject to change without notice. For the most current information, please refer to the official VIVOTEK product page.
10. Bermea eta Laguntza
VIVOTEK produktuak berme mugatu batek estaltzen ditu. Bermearen baldintza zehatzak ikusteko, kontsultatu zure produktuarekin batera datorren berme-txartela edo bisitatu VIVOTEKen webgune ofiziala. webgunea.
For technical support, product inquiries, or service requests, please contact your local VIVOTEK dealer or visit the VIVOTEK support portal online. Have your product model and serial number ready when contacting support.
- VIVOTEK Ofiziala Webgunea: www.vivotek.com
- Laguntza ataria: Ikusi webeskualdeko laguntza-kontaktuen gunea.


