1. Sarrera
The Irfora FY128C Smart Digital Multimeter is a compact and intelligent electrical testing instrument designed for professionals, factories, schools, and home users. It is engineered to meet the safety requirements of the International Electrotechnical Safety Standard (IEC-61010) for electronic measuring instruments and handheld digital multimeters. This device offers accurate measurements for AC/DC voltage, resistance, frequency, continuity, live wire checking, and Non-Contact Voltage (NCV) detekzioa.
Segurtasun neurriak:
- Erabili aurretik, ziurtatu beti multimetroa funtzionamendu-egoera onean dagoela.
- Ez saiatu bolumena neurtzentagZehaztutako gehienezko mugak gainditzen dituzten korronteak edo korronteak.
- Kontu handiz ibili zirkuitu biziekin lan egitean.
- Bateria baxuaren adierazlea agertzen denean, aldatu bateriak berehala.
- Do not operate the multimeter if the casing hondatuta edo irekita dago.
2. Paketearen edukia
Mesedez, egiaztatu paketea elementu hauek dituen:
- 1 x Digital Multimeter (FY128C)
- 1 x Proba-kable pare bat (gorria eta beltza)
- 1 x Erabiltzailearen eskuliburua (ingelesez)
3. Produktua amaitu daview
The FY128C Smart Digital Multimeter features a large, backlit LCD display for clear readings, a built-in flashlight for dark environments, and a support bracket for convenient hands-free operation. Below is an illustration of the instrument's key components and functions.

Figure 3.1: Instrument Functions Overview

Figure 3.2: Large LCD Display for Easy Reading
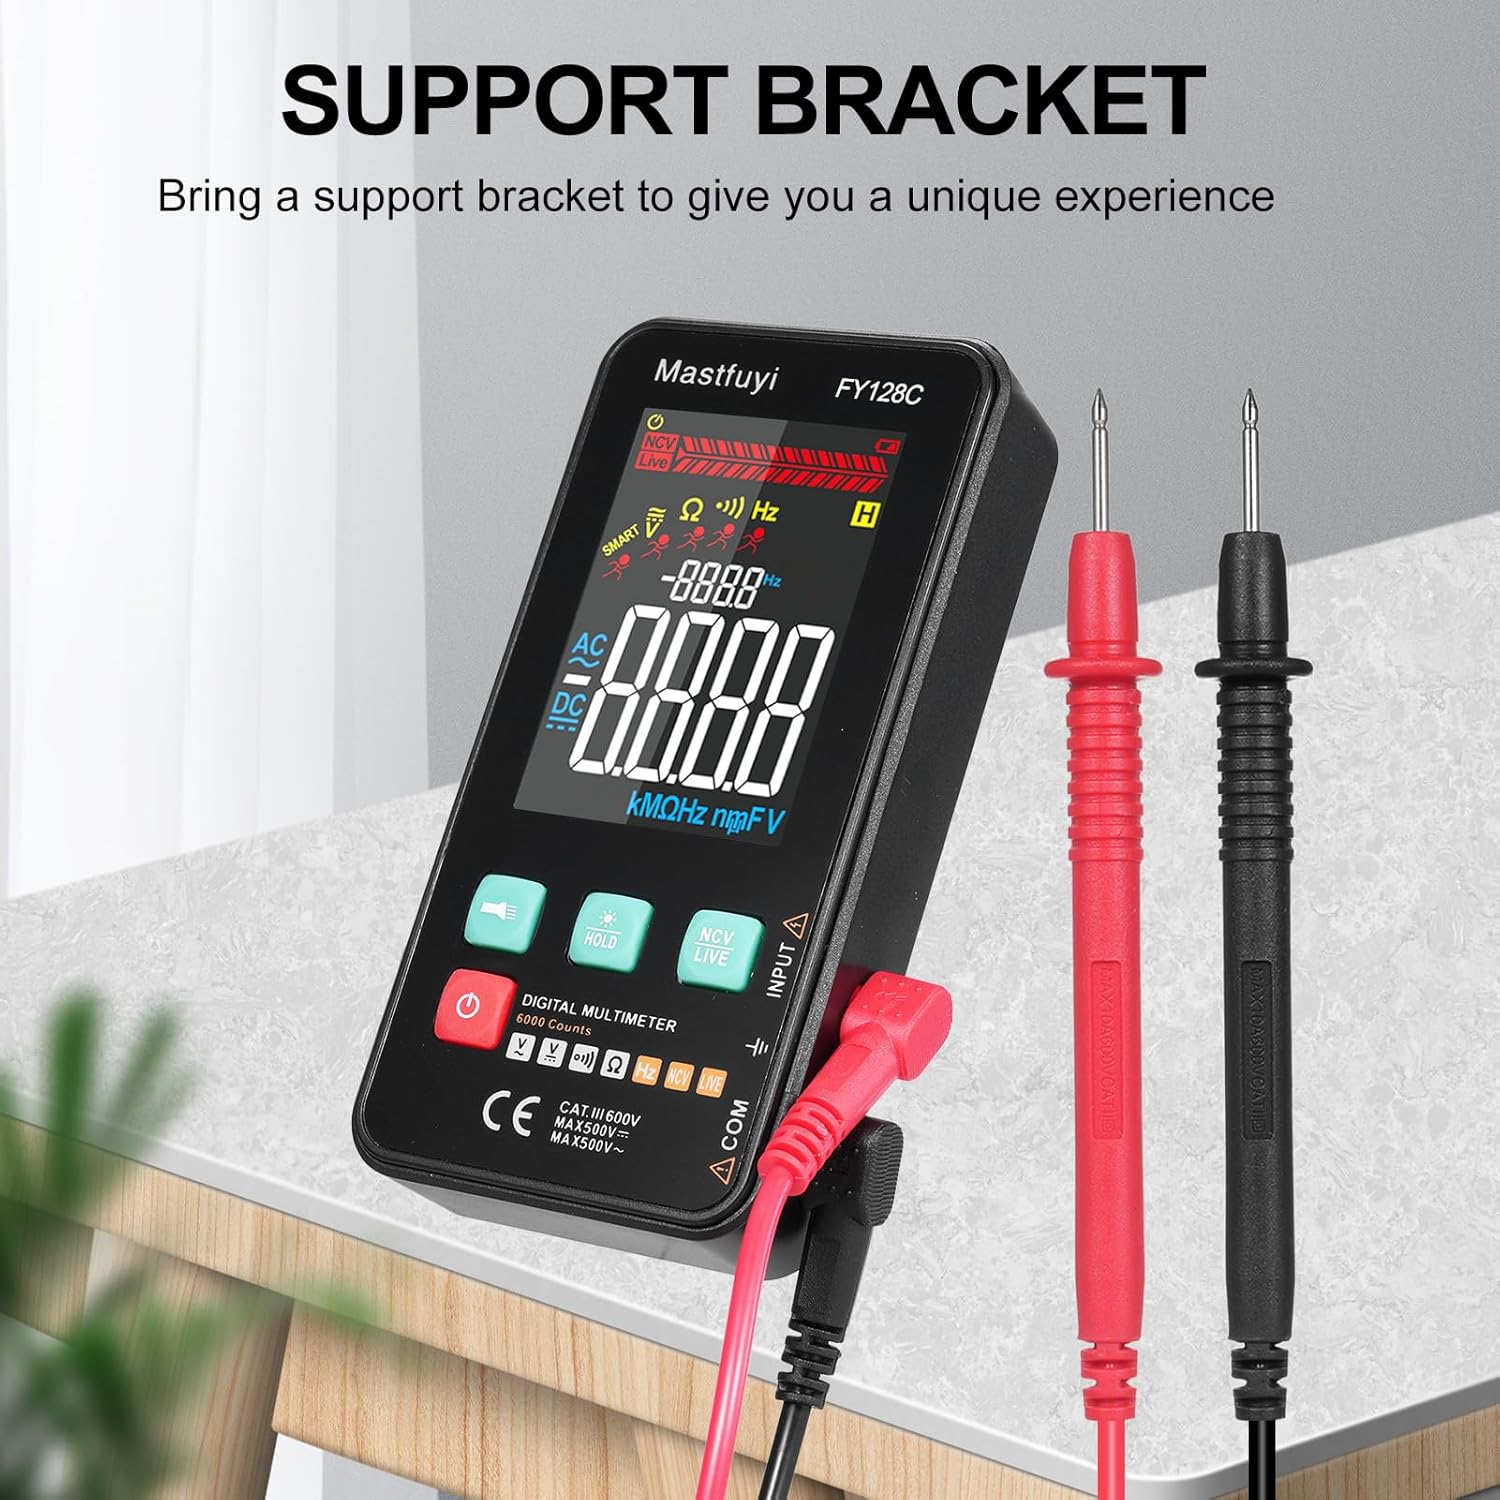
Figure 3.3: Multimeter with Support Bracket and Test Leads
4. Konfigurazioa
4.1 Bateriaren instalazioa
- Ziurtatu multimetroa itzalita dagoela.
- Bilatu bateriaren konpartimentuaren estalkia gailuaren atzealdean.
- Erabili bihurkin bat bateriaren konpartimendua irekitzeko.
- Sartu bi 1.5 V-ko AAA pila, polaritate zuzena (+/-) errespetatuz.
- Jarri bateriaren konpartimenduaren estalkia eta lotu torlojuarekin.
4.2 Proba-kableak konektatzea
- Sartu proba-kable beltza 'COM' (Komuna) sarrera-hartunean.
- Insert the red test lead into the 'INPUT' jack for most measurements (voltage, resistance, frequency, continuity).
- Ensure the test leads are securely connected before taking any measurements.
5. Funtzionamendu-argibideak
The FY128C Multimeter offers two primary measurement modes: Auto Identification and Manual Switching.
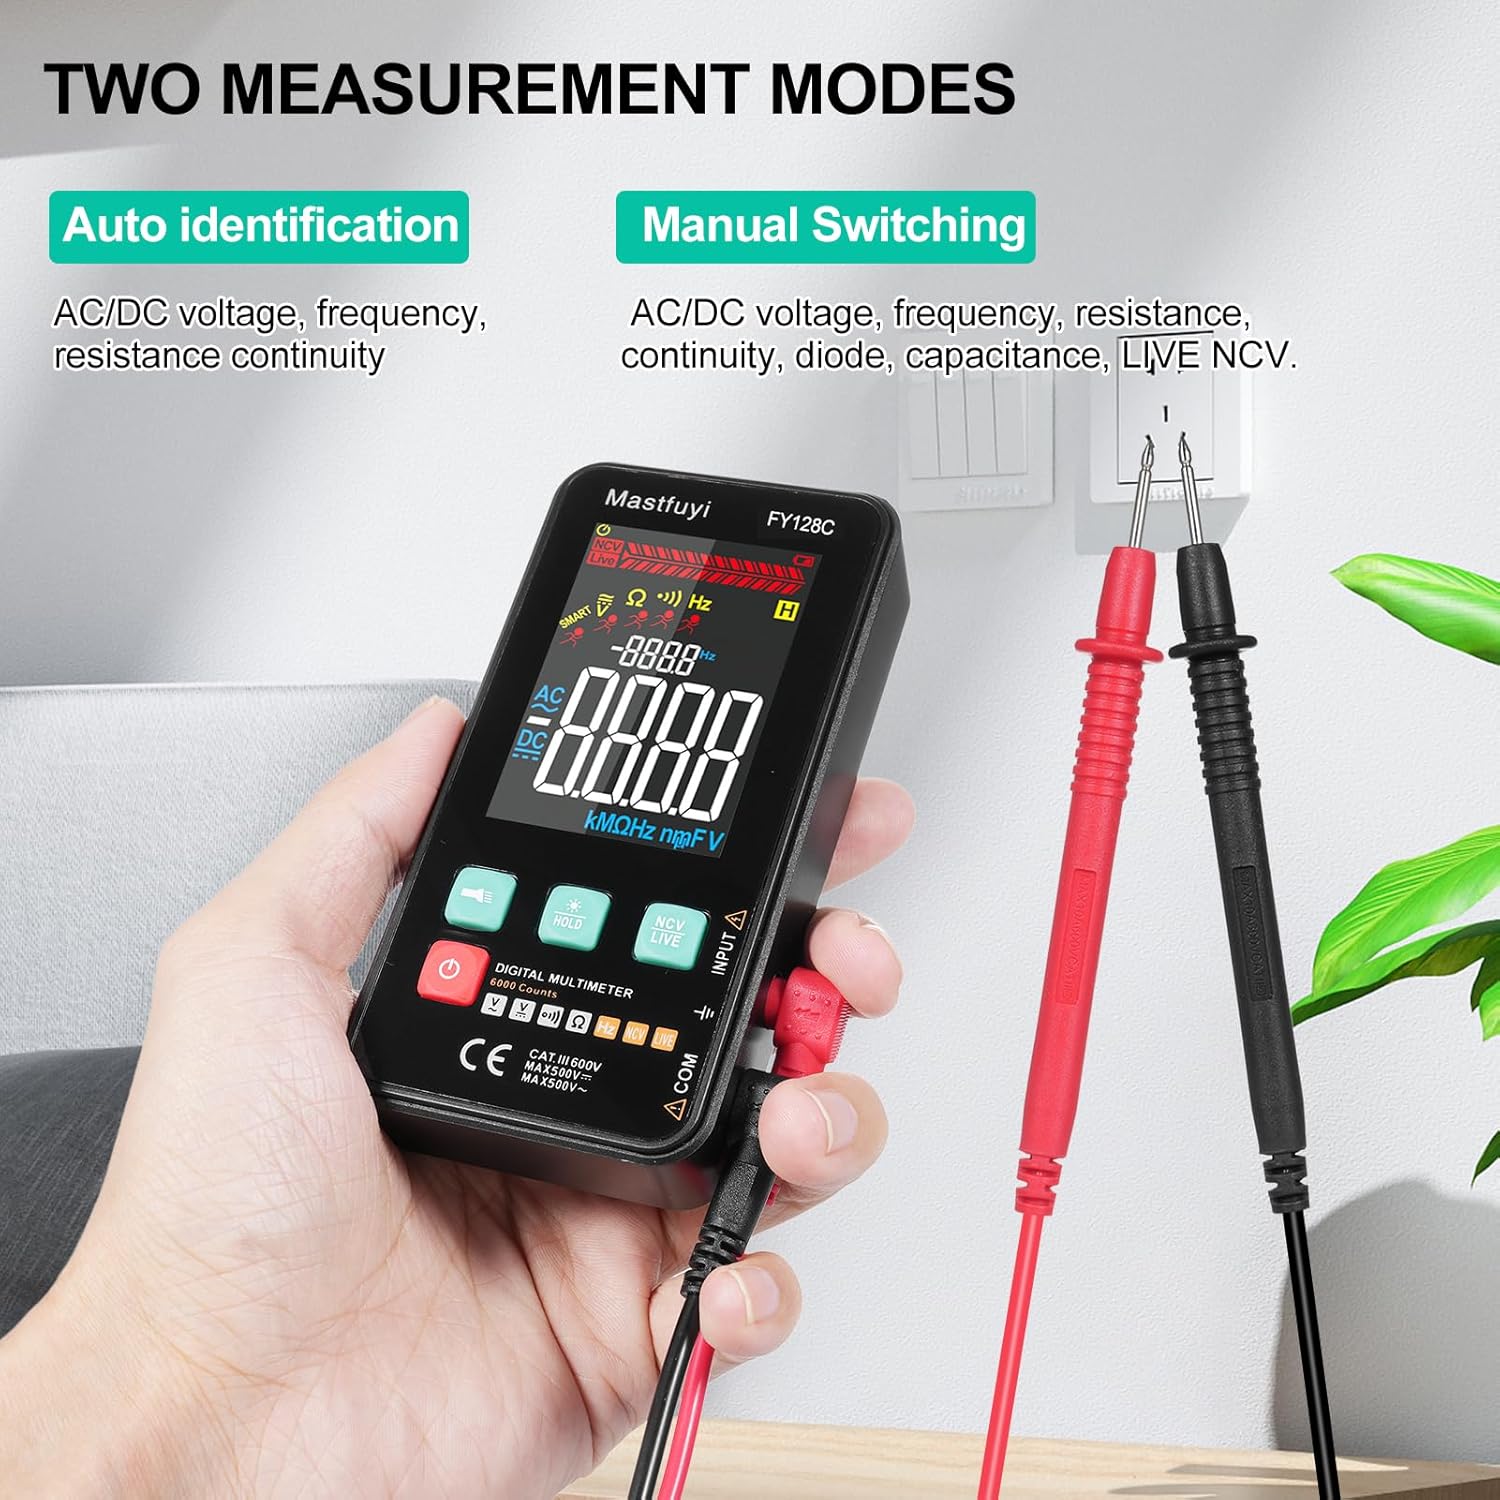
Figure 5.1: Two Measurement Modes
5.1 Piztu/Itzali
Sakatu pizteko botoia (U) to turn the multimeter on or off. The device features an auto-shutdown function to conserve battery power after a period of inactivity.
5.2 Auto Identification Mode
In this mode, the multimeter automatically identifies and measures AC/DC voltage, frequency, resistance, and continuity. Simply connect the test leads to the circuit or component, and the device will display the appropriate measurement.
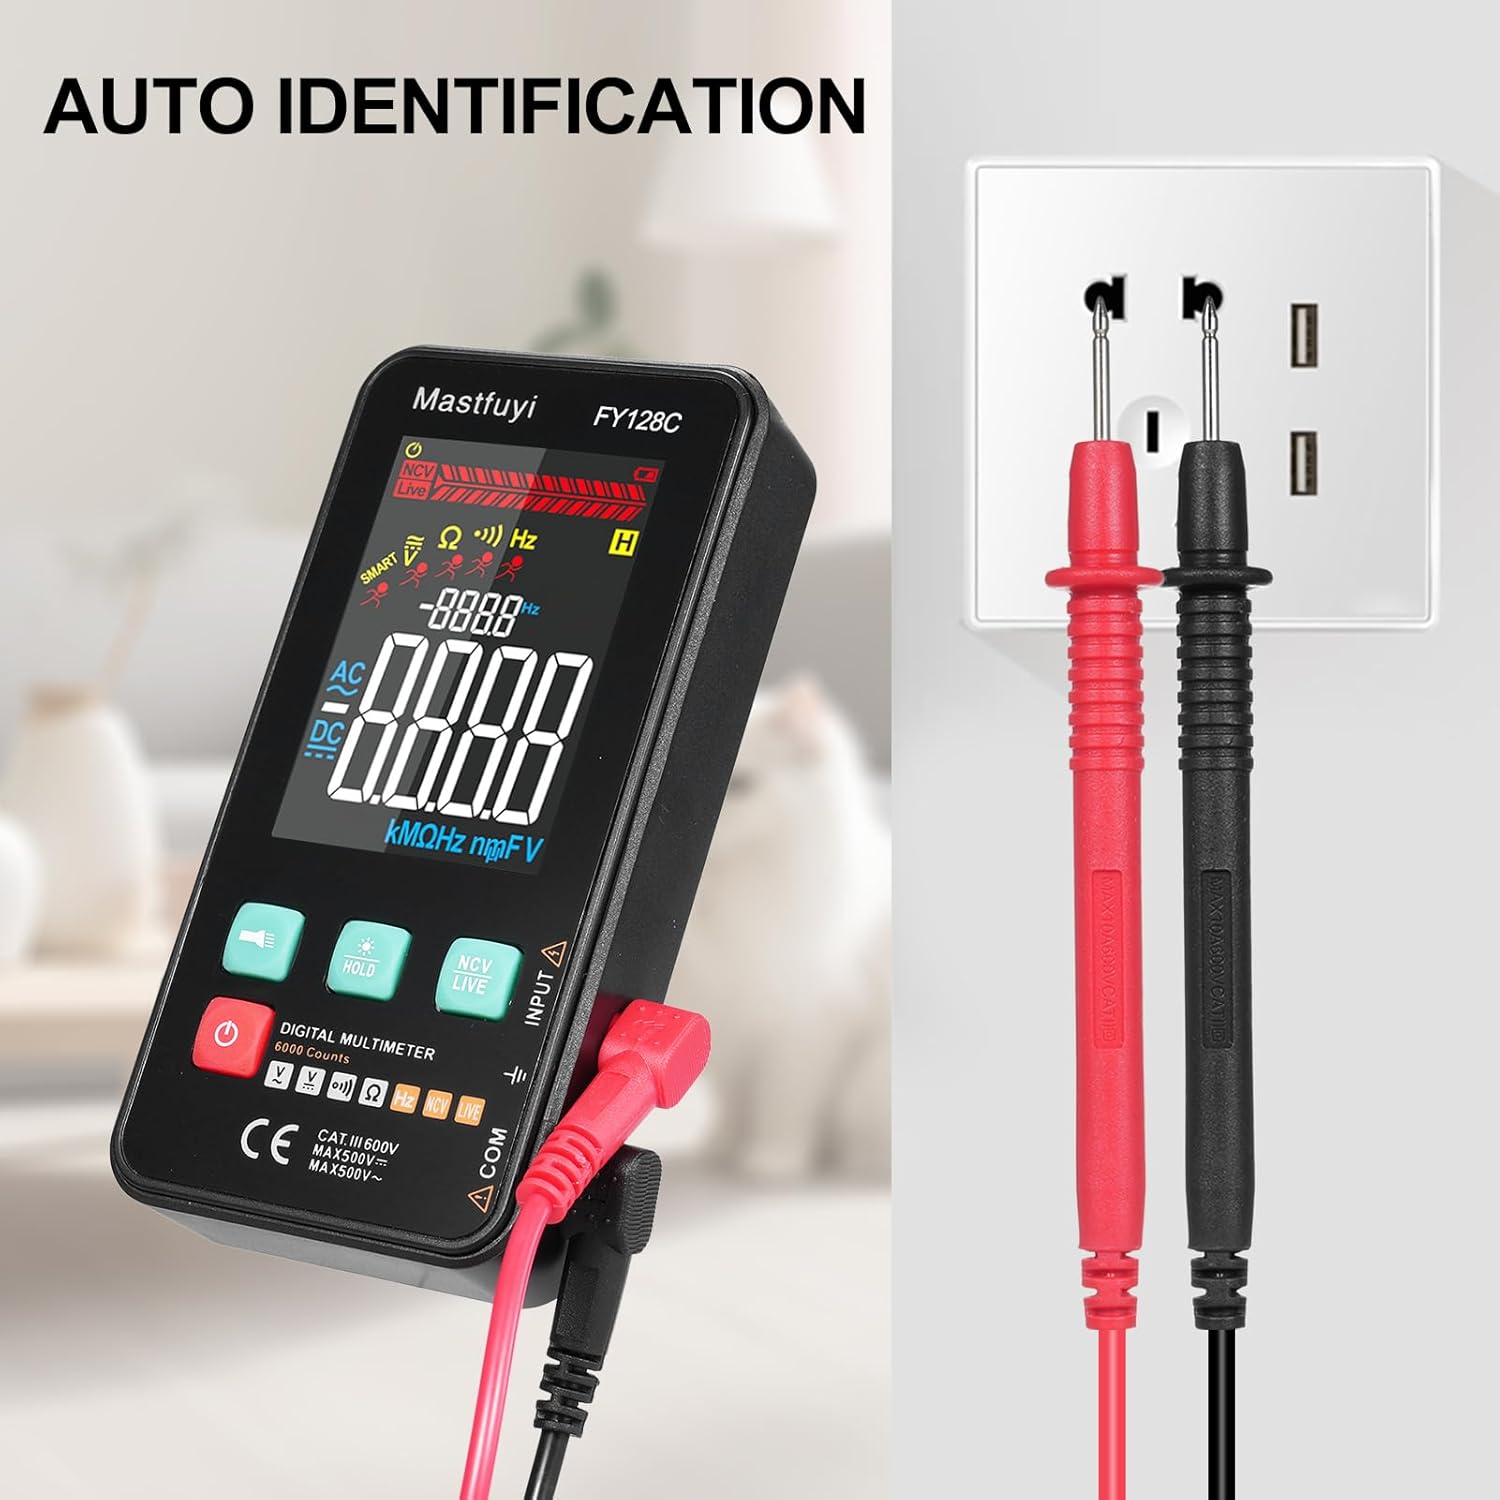
Figure 5.2: Auto Identification in Use
5.3 Manual Switching Mode
For specific measurements or when auto-identification is not desired, you can manually switch between functions. Press the 'MODE' button (often indicated by a symbol like a wave or function icon) to cycle through AC/DC voltage, frequency, resistance, continuity, and NCV/LIVE functions.
5.4 AC/DC Voltage Neurketa
- Aukeratu dagokion bolumenatage mode (AC V or DC V) if in manual mode, or rely on auto-identification.
- Konektatu proba-kableak paraleloan neurtu nahi duzun zirkuituarekin edo osagaiarekin.
- Irakurri liburukiatage balioa LCD pantailan.
5.5 Erresistentzia Neurketa
- Ziurtatu zirkuitua edo osagaia deskonektatuta dagoela erresistentzia neurtu aurretik.
- Select the resistance mode (Ω) if in manual mode.
- Konektatu proba-kableak osagaiaren kableen artean.
- Irakurri erresistentziaren balioa LCD pantailan.
5.6 Maiztasunaren Neurketa
- Select the frequency mode (Hz) if in manual mode.
- Connect the test leads to the circuit where you want to measure frequency.
- Irakurri maiztasunaren balioa LCD pantailan.
5.7 Jarraitasun proba
- Ziurtatu zirkuitua edo osagaia deskonektatuta dagoela.
- Select the continuity mode (often indicated by a buzzer icon).
- Connect the test leads across the component or wire.
- If there is continuity (a complete circuit), the multimeter will emit an audible beep.
5.8 Live Wire Checking
This function helps identify live wires without direct contact.
- Select the 'LIVE' mode (often shared with NCV).
- Bring the red test lead probe close to the wire or outlet.
- The multimeter will indicate the presence of a live wire through visual (LED) and/or audible signals.

Figure 5.3: Live Wire Checking in Progress
5.9 NCV (Kontakturik Gabeko Bolumena)tage) Proba
NCV funtzioak AC bolumenaren detekzio segurua ahalbidetzen du.tage without physical contact with the conductor.
- Select the 'NCV' mode.
- Bring the top part of the multimeter (NCV sensor area) close to the suspected voltage iturria.
- Gailuak korronte alternoaren bolumena adieraziko du.tage with an audible beep and/or visual indicator (e.g., LED lights). The intensity of the signal may vary with voltage indarra eta hurbiltasuna.

Figure 5.4: NCV Insulation Safety Test
5.10 Datuak gordetzeko funtzioa
Sakatu 'HOLD' botoia pantailan uneko irakurketa izozteko. Sakatu berriro eustea askatzeko eta neurketa zuzenak berriro hasteko.
5.11 Linterna eta atzeko argia
Press the flashlight button (often indicated by a light bulb icon) to turn on the built-in flashlight. The LCD display also has a backlight for improved visibility in low-light conditions, which typically activates automatically or can be toggled with a dedicated button.
6. Mantentzea
6.1 Garbiketa
Garbitu multimetroaren casiniragarkiarekin gamp cloth and mild detergent. Do not use abrasive cleaners or solvents. Ensure the device is completely dry before use.
6.2 Bateria ordezkatzea
When the low battery indicator appears on the display, replace the batteries as described in Section 4.1. Always use fresh 1.5V AAA batteries.
6.3 Biltegiratzea
If the multimeter will not be used for an extended period, remove the batteries to prevent leakage. Store the device in a cool, dry place, away from direct sunlight and extreme temperatures.
7. Arazoak
This section addresses common issues you might encounter with your FY128C Smart Digital Multimeter.
| Arazoa | Kausa posiblea | Irtenbidea |
|---|---|---|
| Pantailarik ez edo pantaila iluna | Low batteries; Device not powered on; Damaged display. | Replace batteries; Press power button; Contact support if display is damaged. |
| Irakurketa okerrak | Incorrect mode selected; Poor test lead connection; External interference. | Verify mode selection; Ensure leads are firmly connected; Move away from strong electromagnetic fields. |
| Jarraitutasun probak ez du bip egiten | Open circuit; Continuity mode not selected; Faulty test leads. | Check the circuit for breaks; Select continuity mode; Test leads for damage. |
| Auto-shutdown too frequent | Default auto-shutdown setting. | This is a power-saving feature. Ensure you are actively using the device or press a button to reset the timer. |
8. Zehaztapenak
Below are the technical specifications for the Irfora FY128C Smart Digital Multimeter.

8.1. irudia: Produktuaren neurriak
| Ezaugarri | Specification (FY128C) |
|---|---|
| Eredua | FY128C |
| Materiala | ABS |
| AC Boltage Barrutia | 1V~500V, ±(1.5%+3) |
| DC bolumenatage Barrutia | 0.5V~500V, ±(1.2%+5) |
| Erresistentzia sorta | 30Ω~10000KΩ, ±(2%+5) |
| Maiztasun barrutia | 40Hz~1000Hz, ±(2.5%+5) |
| Jarraitasuna | Bai |
| NCV (Kontakturik gabeko boltage) | Bai |
| Live Wire Checking | Bai |
| Itzaltze automatikoa | Bai |
| Elikatze Hornidura | 2 * 1.5V AAA batteries (Not included) |
| Elementuaren tamaina | 123 * 61 * 24 mm / 4.84 * 2.40 * 0.94 hazbete |
| Elementuaren pisua | 113g / 3.98oz |
| Segurtasun Araua | IEC-61010, CAT III 600V |
9. Bermea eta Laguntza
The Irfora FY128C Smart Digital Multimeter comes with a standard manufacturer's warranty. For specific warranty terms, duration, or to obtain technical support, please refer to the documentation provided with your purchase or contact your retailer. Keep your purchase receipt as proof of purchase for warranty claims.
