1. Sarrera
Eskerrik asko erosketagatik.asing the Pisichen 8-inch Touch Panel Mobile HD Mini Monitor. This compact and versatile display is designed to enhance your productivity and entertainment experience across various devices. Featuring a responsive 5-point capacitive touch screen and multiple connectivity options, it offers a seamless and immersive visual interface.

Figure 1.1: Pisichen 8-inch Touch Panel Mobile HD Mini Monitor
This monitor is equipped with:
- 5-Point Capacitive Touch: For intuitive and precise interaction.
- HD 800x480 Resolution: Delivering clear and vivid visuals.
- Konektibitate anitza: Two HDMI ports and one USB-C port for broad compatibility.
- Hainbat bistaratzeko moduak: Supports duplicate, extended, and second screen modes.
- HDR Mode & Built-in Speakers: Enhances visual depth and provides integrated audio.
2. Paketearen edukia
Mesedez, egiaztatu paketea elementu hauek dituen:
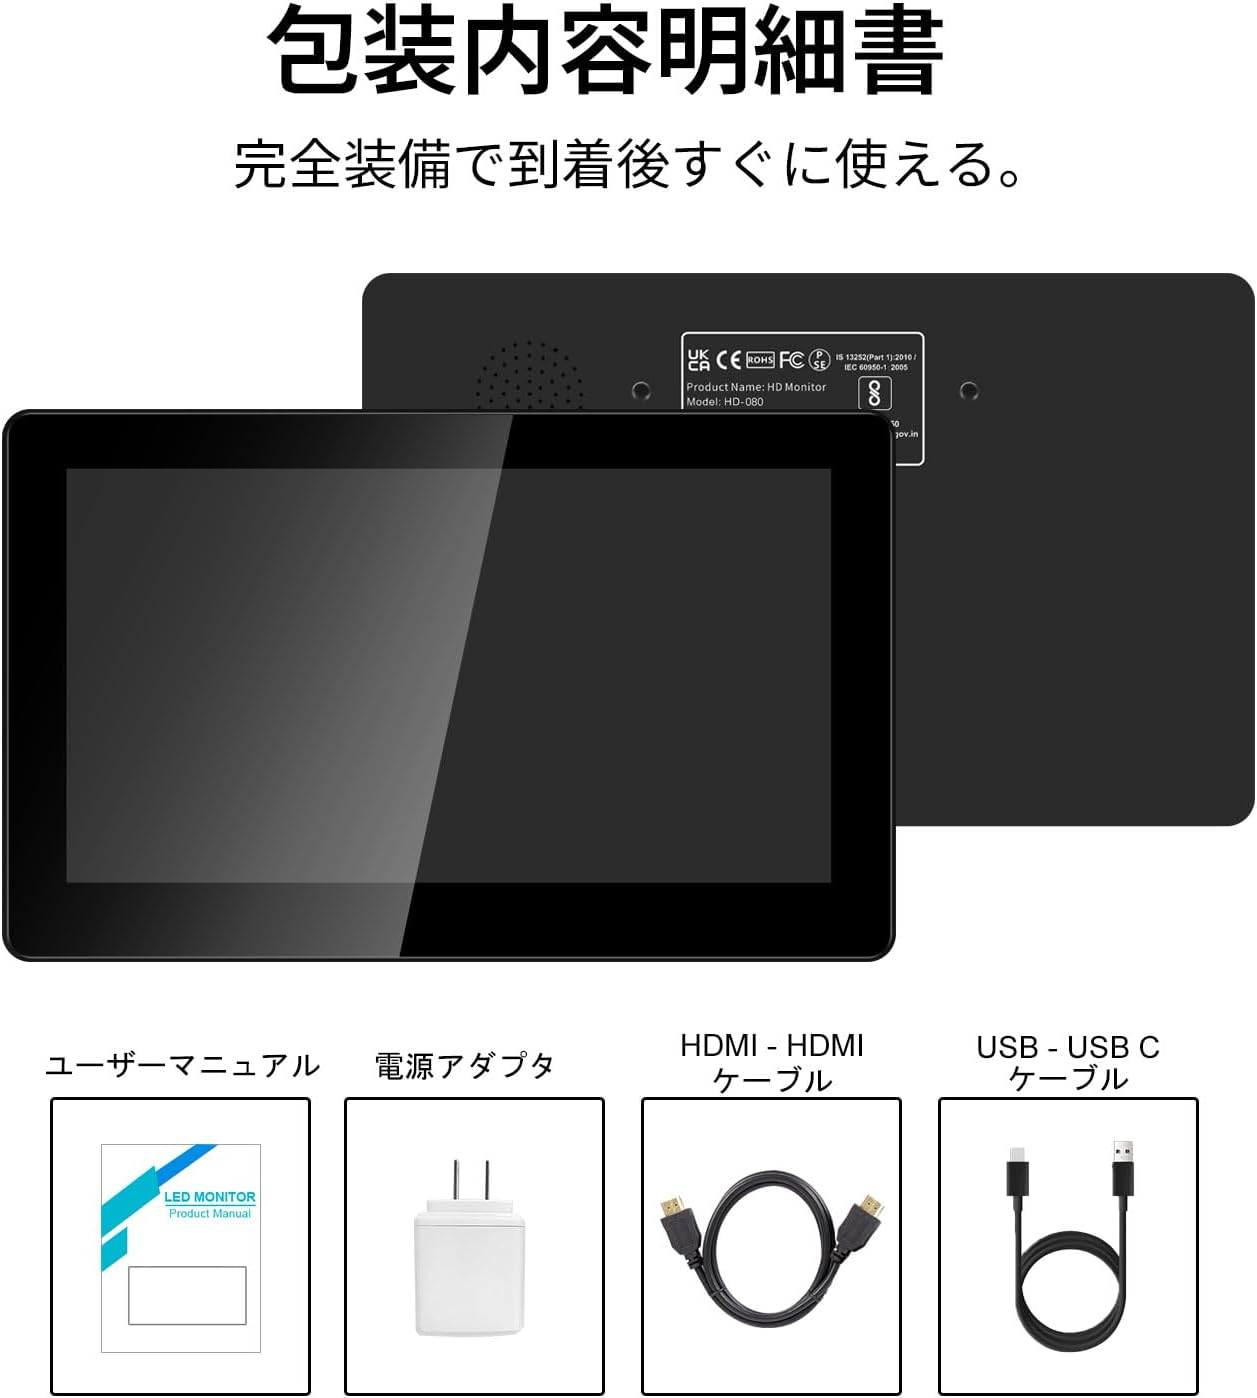
2.1. irudia: paketearen edukia
- Pisichen 8-inch Touch Panel Mobile HD Mini Monitor
- Erabiltzailearen eskuliburua
- Elikatze-moldagailua
- HDMItik HDMI kablea
- USB-A to USB-C Cable (for power and touch functionality)
3. Konfiguratzeko argibideak
Follow these steps to set up your Pisichen mini monitor:
3.1 Monitorea konektatzea
- Potentzia-konexioa: Connect the provided power adapter to the monitor's power port and plug it into a power outlet. Alternatively, use the USB-C port for power by connecting it to a compatible USB power source.
- Bideoaren sarrera:
- For HDMI devices (PC, laptop, game console): Use the HDMI to HDMI cable to connect your device's HDMI output to one of the monitor's HDMI ports (HDMI 1 or HDMI 2).
- For USB-C devices (with DisplayPort Alternate Mode support): Connect a USB-C to USB-C cable (not included) from your device to the monitor's USB-C port. This single cable can provide both video and power/touch.
- Touch Functionality (for HDMI connections): If using an HDMI connection and requiring touch functionality, connect the provided USB-A to USB-C cable from your source device's USB-A port to the monitor's USB-C port. This enables touch input.
- Audio irteera: If you prefer external audio, connect headphones or external speakers to the 3.5mm audio jack on the monitor.

Figure 3.1: Monitor Ports and Connections
3.2 Hasierako piztea
Once connected, press the ON/OFF button on the side of the monitor to power it on. The monitor should automatically detect the input signal. If not, use the menu buttons to select the correct input source.
4. Funtzionamendu-argibideak
4.1 Oinarrizko kontrolak
The monitor features several buttons on its side for control:
- ON/OFF botoia: Powers the monitor on or off.
- Volume Down / Brightness Up: Adjusts volume or increases brightness.
- Volume Up / Brightness Down: Adjusts volume or decreases brightness.
- Signal Switch / Return: Switches between input signals or acts as a 'back' button in menus.
- Menu / OK: Opens the OSD (On-Screen Display) menu or confirms a selection.
4.2 Touch Panel Operation
The 5-point capacitive touch panel allows for intuitive interaction:
- Sakatu: Hautatu elementuak edo aktibatu funtzioak.
- Pasatu hatza: Scroll through content or navigate interfaces.
- Zoom egiteko apur bat egin: Enlarge or reduce content (e.g., images, maps).
- Multi-finger Gestures: Supported for specific operating systems and applications.

Figure 4.1: 5-Point Touch Panel Gestures
Note: Touch functionality may require specific driver installation on some operating systems or devices. Ensure your device supports touch input over the chosen connection method.
4.3 Bistaratzeko moduak
The monitor supports various display modes when connected to a computer:
- Bikoiztu modua: Displays the same content on both your primary screen and the mini monitor.
- Modu hedatua: Extends your desktop across both screens, allowing for more workspace.
- Bigarren pantaila modua: Uses only the mini monitor as the display.
- Erretratu modua: The monitor can be rotated for vertical display, useful for specific applications.
These modes can typically be configured through your operating system's display settings.

Figure 4.2: Multiple Display Modes
4.4 HDR Mode
The monitor supports HDR (High Dynamic Range) mode, which can be enabled via the OSD menu or your connected device's display settings. HDR provides a wider range of colors and contrasts, resulting in a more vibrant and realistic image.
5. Mantentzea
To ensure the longevity and optimal performance of your Pisichen mini monitor, follow these maintenance guidelines:
- Pantaila garbitzea: Erabili lipurrik gabeko zapi leun bat dampened with water or a screen-cleaning solution. Avoid harsh chemicals, abrasive materials, or excessive moisture.
- C garbiketaasing: Garbitu monitorearen casinoihal leun eta lehor batekin garbitu.
- Biltegiratzea: Denbora luzez erabiltzen ez baduzu, gorde monitoreak leku fresko eta lehor batean, eguzki-argitik eta muturreko tenperaturetatik babestuta.
- Manipulazioa: Saihestu monitoreari erortzea edo kolpe gogorren eraginpean jartzea. Ez jarri objektu astunak gainean.
- Aireztapena: Ziurtatu monitorearen aireztapen-zuloak ez daudela blokeatuta gehiegi berotzea saihesteko.
6. Arazoak
Monitorearekin arazoak badituzu, jo ezazu honako arazo eta irtenbide ohikoenei:
- Pantailarik ez / Pantaila beltza:
- Ensure the power adapter is securely connected and the monitor is powered on.
- Verify that the video cable (HDMI or USB-C) is properly connected to both the monitor and the source device.
- Check if the correct input source is selected using the monitor's menu buttons.
- Test with a different video cable or source device if possible.
- Ukipenik gabeko funtzionalitatea:
- If using HDMI, ensure the USB-A to USB-C cable is connected from your source device to the monitor's USB-C port.
- For USB-C connections, ensure your device supports touch input over USB-C.
- Check your operating system's settings for touch screen calibration or driver status.
- Audiorik ez:
- Increase the monitor's volume using the side buttons.
- Check your source device's audio output settings to ensure audio is being sent to the monitor.
- If using external speakers/headphones, ensure they are properly connected to the 3.5mm audio jack.
- Image Quality Issues (e.g., lines on screen, distorted colors):
- Egiaztatu bideo-kablea kaltetuta edo konexio solterik dagoen.
- Adjust the monitor's display settings (brightness, contrast, color temperature) via the OSD menu.
- Ensure your source device's display resolution and refresh rate are compatible with the monitor's specifications.
- If persistent, try connecting to a different source device or using a different cable.
7. Zehaztapenak
| Marka | Pisichen |
| Modelo zenbakia | HD-8TS-800P |
| Pantailaren tamaina | 8 hazbetekoa |
| Ebazpena | 800 x 480 pixel |
| Aspektu-erlazioa | 16:9 |
| Ukipen-panela | 5-point Capacitive Touch |
| Konektibitatea | 2x HDMI, 1x USB-C (Power/Touch), 1x 3.5mm Audio Jack |
| Kolorea | Beltza |
| Produktuaren neurriak (x x H x D) | 206 x 130 x 20 mm (gutxi gorabehera) |
| Produktuaren pisua | 910 g |
| Ezaugarriak | HDR Mode, Built-in Dual Stereo Speakers |
8. Bermea eta Laguntza
Pisichen is committed to providing reliable and high-quality products. While specific warranty details are not provided in this manual, please retain your proof of purchase for any warranty claims. For technical support, troubleshooting assistance, or inquiries regarding your product, please contact Pisichen customer service through the retailer where you purchased the product or visit the official Pisichen brand store online.
We strive for continuous innovation, product content updates, and ongoing improvement in product quality. Our goal is to be a company loved and trusted by our customers.


