1. Sarrera
This manual provides detailed instructions for the installation, operation, and maintenance of your Luowice Solar Security Camera. This wireless outdoor camera features a 3W solar panel for continuous power, 360° pan and tilt functionality, 3MP color night vision, and is designed to be weatherproof for reliable outdoor use. Please read this manual thoroughly before use to ensure proper setup and functionality.

Image 1.1: Luowice Solar Security Camera with integrated solar panel.
2. Produktua amaitu daview
2.1 Ezaugarri nagusiak
- 100% Wire-Free Setup: Operates on WiFi and powered by a 3W solar panel, eliminating the need for frequent battery charging and complex wiring.
- Angelu zabaleko estaldura: Offers 355° horizontal and 90° vertical rotation for comprehensive area monitoring via the O-KAM PRO app.
- 3MP Color Night Vision: Provides clear, high-resolution video day and night, including full-color night vision with floodlights.
- Motion-Triggered Floodlights & Auto Tracking: Automatically activates floodlights and tracks human-shaped objects upon detection, enhancing security.
- Bi norabideko audioa: Allows real-time communication with visitors or deterrence of intruders.
- Tokiko eta hodeiko biltegiratzea: Supports micro SD card (up to 128GB, not included) for 24/7 loop recording and optional cloud storage services.
- Eguraldiaren diseinua: IP66 rated, ensuring reliable performance in various severe weather conditions.
- Multi-User Sharing & Data Encryption: Securely share camera access with family members with advanced encryption.
2.2 Osagaiak
Paketeak normalean barne hartzen ditu:
- Luowice Solar Security Camera
- 3W Solar Panel (integrated or separate with mounting bracket)
- Muntatzeko euskarria eta torlojuak
- USB kargatzeko kablea
- Erabiltzailearen eskuliburua
3. Konfiguratzeko argibideak
3.1 Bateria kargatzea
Before initial use, fully charge the camera's internal battery using the provided USB cable. Connect the cable to the camera's charging port and a standard 5V USB power adapter (not included). The indicator light will show charging status.
3.2 Aplikazioaren instalazioa eta kontuaren sorrera
- Deskargatu O-KAM PRO aplikazioa zure telefonoaren aplikazio dendatik (iOS edo Android).
- Ireki aplikazioa eta jarraitu pantailan agertzen diren argibideei kontu berri bat sortzeko edo saioa hasteko, dagoeneko baduzu.
3.3 Connecting the Camera to Wi-Fi
- In the O-KAM PRO app, tap the "+" icon to add a new device.
- Select your camera model or scan the QR code on the camera if prompted.
- Follow the app's instructions to connect the camera to your 2.4 GHz Wi-Fi network. Ensure your phone is connected to the same 2.4 GHz network during setup.
- Once connected, the camera's indicator light will change, and you will receive a confirmation in the app.

Image 3.1: The camera supports 2.4 GHz Wi-Fi for stable data transmission.
3.4 Kamera muntatzea
Aukeratu eguzki-panelarentzat eguzki-esposizio optimoa duen leku bat eta argia duen leku bat view of the area you wish to monitor. Ensure the camera is within range of your Wi-Fi network.
- Mark the drilling positions using the mounting bracket as a template.
- Beharrezkoa bada, zuloak egin eta hormako aingurak sartu.
- Lotu muntatzeko euskarria horman torlojuekin.
- Attach the camera to the mounting bracket. Adjust the angle of the solar panel to maximize sunlight exposure.

Image 3.2: Camera mounted outdoors, demonstrating continuous solar power.
4. Funtzionamendu-argibideak
4.1 Bizi View eta Pan/Tilt kontrola
Open the O-KAM PRO app and select your camera to access the live view. Use the on-screen controls to pan (355° horizontal) and tilt (90° vertical) the camera to adjust its viewangelua.

Image 4.1: Remote pan and tilt control via the O-KAM PRO app.
4.2 Bi norabideko audioa
Zuzenetik view, tap the microphone icon to speak through the camera's speaker. Tap the speaker icon to listen to audio from the camera's vicinity.

Image 4.2: Demonstrating two-way audio communication.
4.3 Mugimenduaren detekzioa eta alertak
The camera features advanced motion detection with human shape recognition. When motion is detected, the camera can automatically turn on floodlights, track the object, and send instant alerts to your phone.
- Setting Detection Sensitivity: In the app settings, adjust the detection sensitivity to minimize false alarms.
- Defining Detection Zones: Create specific detection zones to focus monitoring on critical areas and ignore irrelevant movements.
- Alertak: Receive instant app notifications and email alerts when motion is detected.

Image 4.3: Motion detection with intelligent recognition for humans, vehicles, and pets.

Image 4.4: Configuring custom motion detection zones.
4.4 Grabaketa eta biltegiratzea
Kamerak bi biltegiratze metodo nagusi onartzen ditu:
- Mikro SD txartela: Insert a micro SD card (up to 128GB, not included) into the designated slot for continuous 24/7 loop recording, even without network access.
- Hodeiko biltegiratzea: Optional cloud storage services are available through the O-KAM PRO app for secure, remote access to your footage.

Image 4.5: Micro SD card slot for local storage.
5. Mantentzea
5.1 Garbiketa
- Garbitu kameraren lentea eta eguzki-panela aldizka zapi leun eta lehor batekin.amp cloth to remove dust and debris. This ensures optimal image clarity and solar charging efficiency.
- Ez erabili produktu kimiko gogorrik edo garbigailu urratzailea.
5.2 Eguraldiaren babesa
The camera is IP66 weatherproof, designed to withstand rain, snow, and dust. However, extreme weather conditions may temporarily affect performance. Ensure all ports are securely sealed.
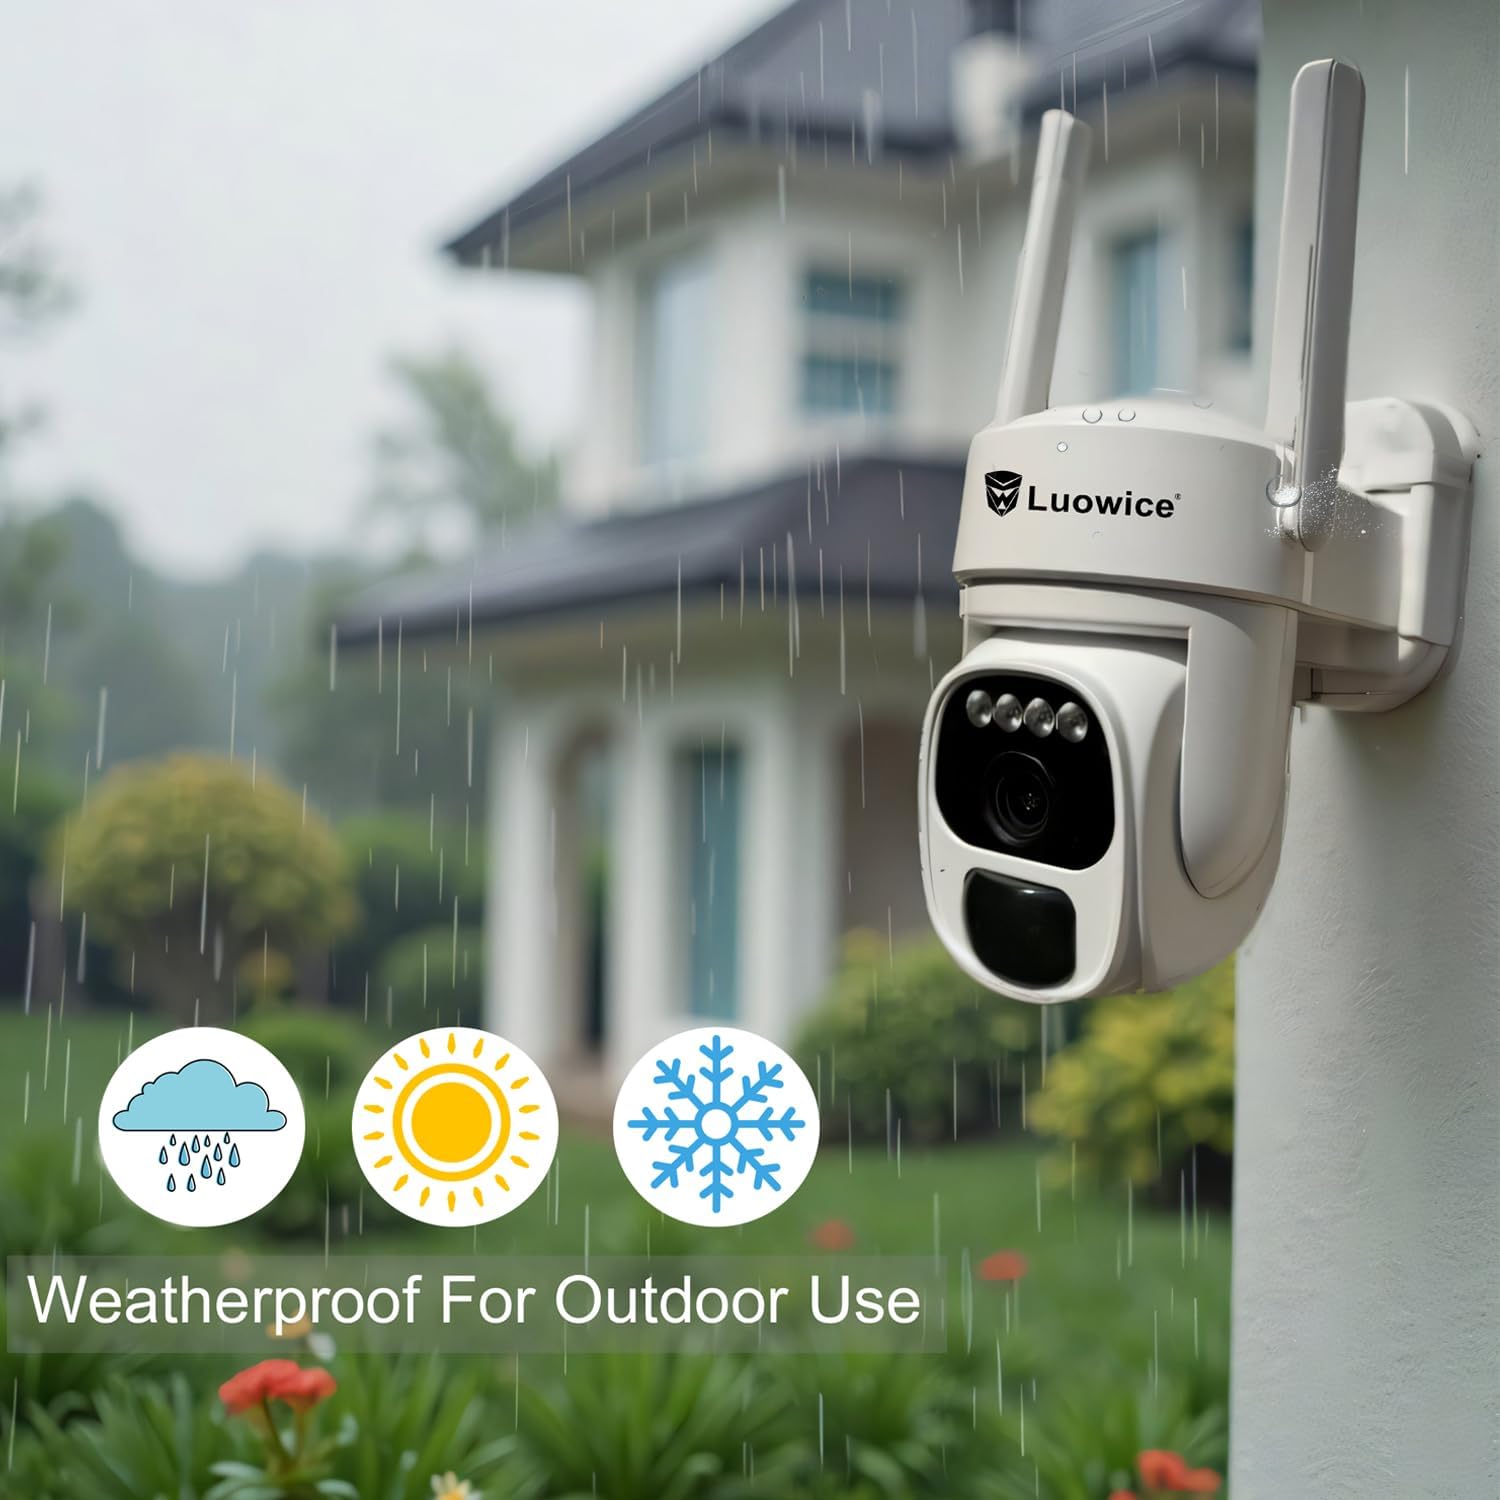
Image 5.1: The camera's weatherproof design for outdoor use.
6. Arazoak
- Kamera ez da Wi-Fi-ra konektatzen: Ensure your Wi-Fi is 2.4 GHz. Check Wi-Fi signal strength at the camera's location. Restart your router and the camera.
- Bateria ez da kargatzen: Verify the solar panel is clean and receiving direct sunlight. Check the USB charging cable connection. Ensure the ambient temperature is within the operating range for charging.
- Bideoaren kalitate eskasa: Garbitu kameraren lentea. Ziurtatu argiztapen egokia dagoela. Egiaztatu zure Interneteko konexioaren abiadura.
- False motion alerts: Doitu mugimenduaren detekzio-sentsibilitatea aplikazioan. Definitu detekzio-eremu espezifikoak garrantzirik gabeko eremuak baztertzeko.
- Pan/Tilt not responding: Check app connectivity. Ensure there are no physical obstructions. Restart the camera.
7. Zehaztapenak
| Ezaugarri | Zehaztapena |
|---|---|
| Bideo Harrapaketa Ebazpena | 3 MP |
| Energia iturria | Eguzki-energiaz elikatzen da (3W-ko eguzki-panel) |
| Konektibitate-protokoloa | Wi-Fi (2.4 GHz) |
| Panorama/Tilt barrutia | 355° horizontala, 90° bertikala |
| Gaueko Ikusmena | Color Night Vision with Floodlights |
| Biltegiratze-aukerak | Mikro SD txartela (128 GB arte), hodeiko biltegiratzea |
| Eguraldi Erresistentearen Balorazioa | IP66 |
| Beharrezko bateriak | 1 litio ioizko bateria (barne) |
| Elementuaren pisua | 1.85 kilo |
| Neurriak | 7.87 x 6.18 x 5.55 hazbete (Paketea) |
| Gailu bateragarriak | Smartphones, Tablets, Computers |
8. Bermea eta Laguntza
8.1 Bermearen informazioa
Luowice products typically come with a manufacturer's warranty. Please refer to the product packaging or the official Luowice website for specific warranty terms and conditions. Optional extended protection plans may be available for purchase.
8.2 Bezeroarentzako laguntza
For technical assistance, troubleshooting, or warranty claims, please contact Luowice customer support through their official website or the contact information provided with your product. When contacting support, please have your product model (B0DF4TVZ7Z) and purchase details ready.