1. Sarrera
The Xigmatek Aqua V AIR is a high-performance mid-tower PC case designed for gaming enthusiasts. It features a spacious interior, optimized airflow, and tempered glass panels on the front and side to showcase your components. Equipped with seven 120mm ARGB fans, it supports graphics cards up to 410mm in length and is compatible with motherboards featuring hidden connectors for a clean build.
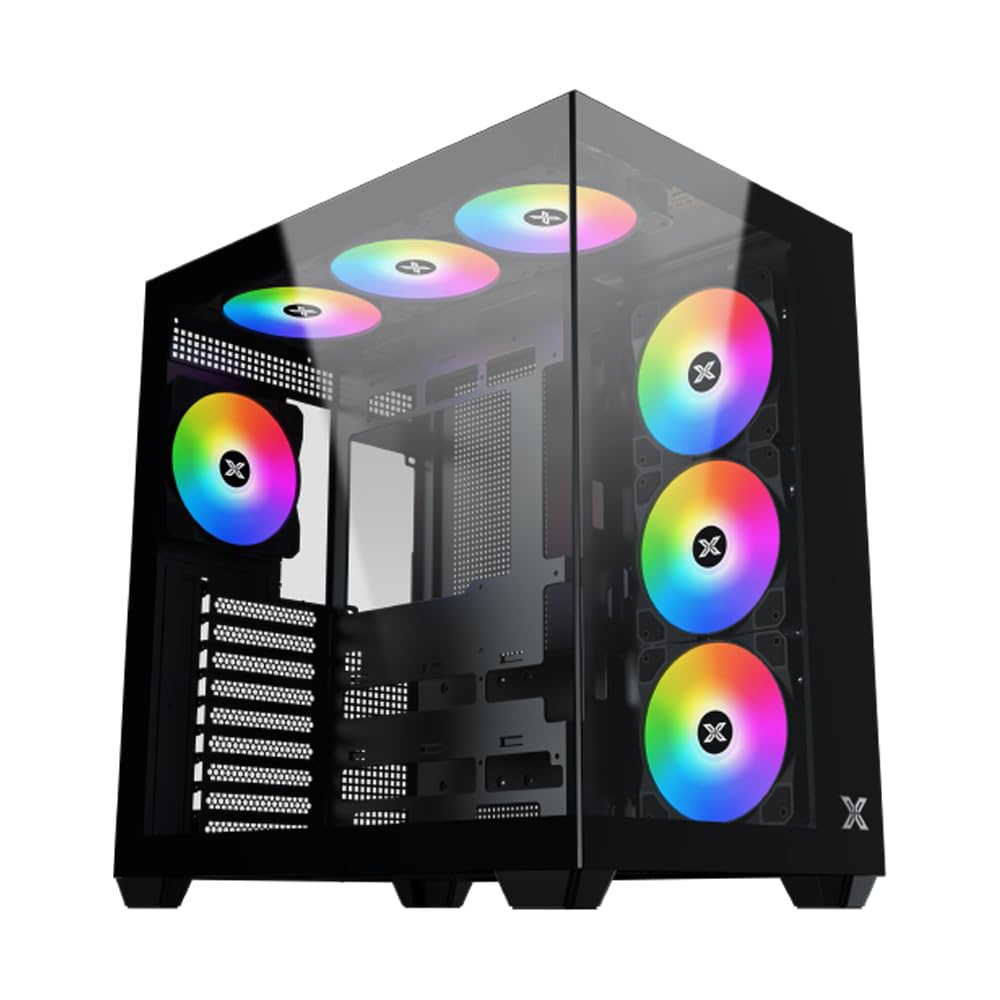
1. irudia: Orokorrean view of the Xigmatek Aqua V AIR PC Case.
2. Ezaugarri nagusiak
- Materiala: Constructed from high-quality steel for durability and reliability.
- Neurriak: 427 x 285 x 455 mm (L x W x H), offering a spacious interior.
- Hozteko sistema: Supports up to three 120mm or two 140mm fans for optimal cooling performance.
- Erradiadorearen euskarria: Compatible with 240/280/360mm radiators on the top, bottom, and rear for versatile cooling options.
- I/O panela: Features 2x USB 3.0 ports, 1x USB-C port, and HD audio for convenient connectivity.
- Plakaren bateragarritasuna: Supports ATX, Micro ATX, and Mini ITX motherboards, including those with hidden connectors.
- GPUaren luzera: 410 mm-ko luzera duten txartel grafikoak onartzen ditu.
- Biltegiratze euskarria: Ematen du ample space for multiple storage drives.
3. Zehaztapenak
| Ezaugarri | Xehetasuna |
|---|---|
| Marka | Xigmatek |
| Modelo zenbakia | EN45820 |
| Seriea | Aqua V AIR BLACK |
| Kolorea | Beltza |
| Neurriak (L x W x H) | 42.7 x 28.5 x 45.5 cm |
| Produktuaren pisua | 8.8 kilogramo |
| Materiala | Aleaziozko altzairua, beira tenplatua |
| Plaka amaren bateragarritasuna | ATX, Mikro ATX, Mini ITX |
| Kasu mota | Erdiko Dorrea |
| Gomendatutako Erabilerak | Gaming, High-Performance Computing |
| USB 3.0 Portuak | 2 |
| USB-C portuak | 1 |
| Hozteko metodoa | Water (Liquid Cooling Support) |
| Fan Tamaina | 120 Millimeters (Pre-installed ARGB fans) |
| PSU Muntaketa Mota | Beheko mendia |
4. Konfigurazioa eta instalazioa
This section provides general guidance for installing components into your Xigmatek Aqua V AIR PC case. Always refer to the specific manuals for your motherboard, power supply, and other components for detailed instructions.
4.1 Kasua prestatzea
- Unpack the PC case and remove all packaging materials.
- Carefully remove the tempered glass side panel(s) and front panel (if applicable) to access the interior. Store them safely to prevent damage.
- Identify the accessory box, which typically contains screws, cable ties, and other small parts.
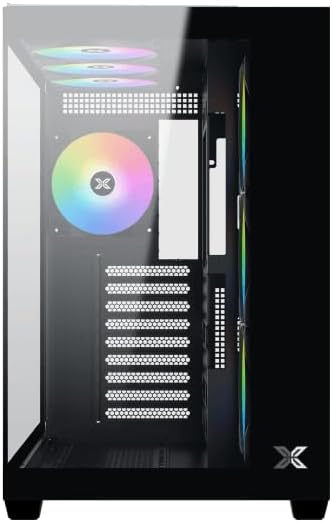
2. Irudia: Barrualdea view alboko panela kenduta.
4.2 Plaka amaierako instalazioa
- Install the I/O shield (if not pre-installed on your motherboard) into the rear opening of the case.
- Align your ATX, Micro ATX, or Mini ITX motherboard with the standoffs inside the case. Ensure all standoffs match the screw holes on your motherboard.
- Secure the motherboard with the appropriate screws provided in the accessory kit.

Figure 3: Motherboard tray and cable management area.
4.3 Energia hornitzeko unitatea (PSU) instalatzea
- Locate the PSU mounting area at the bottom rear of the case.
- Slide your PSU into position, ensuring the fan faces downwards (if the case has a bottom vent) or upwards.
- Lotu PSUa kaxaren atzealdeko torlojuekin.
4.4 Biltegiratze unitatearen instalazioa
The case supports various storage configurations. Refer to the case diagram for specific drive bay locations.
- Install 2.5" SSDs or 3.5" HDDs into the designated drive bays or mounting brackets.
- Secure the drives with screws.
4.5 Txartel grafikoaren (GPU) instalazioa
- Kendu beharrezko PCIe zirrikituen estalkiak kaxaren atzealdetik.
- Sartu zure txartel grafikoa plaka baseko PCIe zirrikitu egokian.
- Txartel grafikoa torlojuekin finkatu.
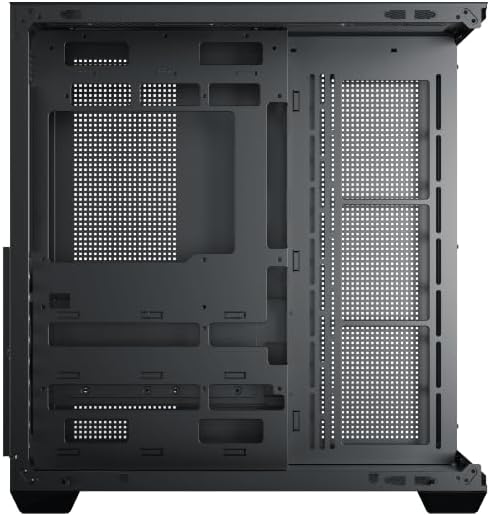
Figure 4: Components installed inside the case.
4.6 Kableen kudeaketa
Erabili plaka basearen erretiluaren atzean dauden kableen bideratze-ebakidurak eta lotzeko puntuak kableak kudeatzeko, aire-fluxua eta estetika hobetzeko.
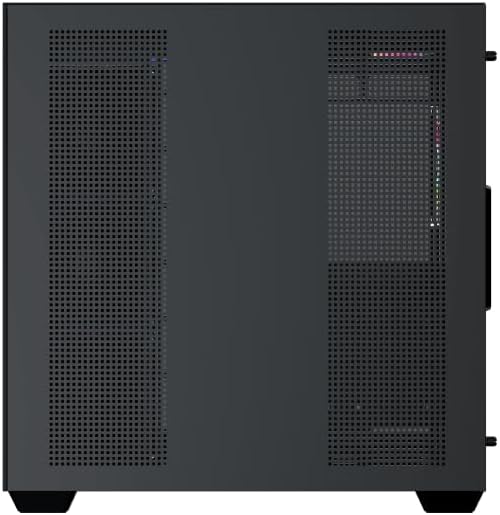
Figure 5: Top panel and I/O ports.
5. Funtzionamendu-argibideak
5.1 Piztea
Once all components are securely installed and connected, close the side panels. Connect your power cable to the PSU and press the power button on the case's front I/O panel.
5.2 ARGB haizagailuaren kontrola
The Xigmatek Aqua V AIR comes with pre-installed ARGB fans. These fans can typically be controlled via:
- Plaka basearen softwarea: If your motherboard supports ARGB synchronization, connect the fan's ARGB cables to the motherboard's 3-pin 5V ARGB header and use the motherboard's software (e.g., ASUS Aura Sync, MSI Mystic Light, Gigabyte RGB Fusion) to customize lighting effects.
- Integrated Controller: If your case includes a built-in ARGB controller, use the dedicated button on the I/O panel to cycle through various lighting modes and colors.
6. Mantentzea
Mantentze-lan erregularrak zure ordenagailuaren osagaien errendimendu optimoa eta iraupena bermatzen laguntzen du.
6.1 Hauts-iragazkiaren garbiketa
The Xigmatek Aqua V AIR case is equipped with dust filters to prevent dust buildup. Locate and gently remove the dust filters (typically on the top, front, and bottom). Clean them with compressed air or by rinsing with water. Ensure they are completely dry before reattaching.

Figure 6: Bottom dust filter.
6.2 Garbiketa orokorra
Use a soft, dry cloth to wipe down the exterior of the case. For tempered glass panels, use a glass cleaner and a microfiber cloth to avoid streaks. Avoid using abrasive cleaners or solvents.
7. Arazoak
Arazoak badituzu, kontuan hartu arazoak konpontzeko ohiko urrats hauek:
- Potentziarik gabe:
- Ziurtatu elikadura-iturria piztuta dagoela eta behar bezala konektatuta dagoela hormako entxufearekin eta plaka nagusiarekin.
- Check all power connections to components (motherboard, CPU, GPU, drives).
- Egiaztatu aurrealdeko paneleko etengailuaren kablea plaka basera behar bezala konektatuta dagoela.
- Haizagailuak ez dira biratzen / RGBak ez du funtzionatzen:
- Check if fan power cables are securely connected to the motherboard or fan controller.
- Ensure ARGB cables are connected to the correct 3-pin 5V ARGB header (not 4-pin 12V RGB).
- If using a controller, ensure it has power and is functioning correctly.
- Gehiegizko berotzea:
- Ensure all fans are spinning and oriented correctly for optimal airflow (intake/exhaust).
- Garbitu hauts-iragazkiak eta barneko osagaiak.
- Egiaztatu CPU hozkailua eta GPU hozkailua behar bezala jarrita eta funtzionatzen dutela.
8. Bermea eta Laguntza
The Xigmatek Aqua V AIR PC Case comes with a 2 urteko fabrikatzailearen bermea. For technical support, warranty claims, or further assistance, please contact Xigmatek customer service or visit their official webgunea.
Gorde erosketaren egiaztagiria bermearen ondorioetarako.


