1. Sarrera
Thank you for choosing the KEENSTAR 20Bar Espresso Machine, Model JH-C5210. This manual provides essential information for the safe and efficient operation, maintenance, and care of your new espresso machine. Please read these instructions thoroughly before first use and retain them for future reference.
2. Segurtasun-argibide garrantzitsuak
Etxetresna elektrikoak erabiltzean, oinarrizko segurtasun-neurriak jarraitu behar dira beti sute, deskarga elektriko eta/edo pertsonentzako lesio arriskua murrizteko, besteak beste:
- Irakurri argibide guztiak.
- Ez ukitu gainazal beroak. Erabili heldulekuak edo eskutokiak.
- Suaren, deskarga elektrikoaren eta pertsonen lesioen aurka babesteko, ez murgildu kablea, entxufeak edo aparatua uretan edo beste likido batzuetan.
- Gainbegiratzea beharrezkoa da aparaturen bat umeek edo umeen ondoan erabiltzen dutenean.
- Deskonektatu entxufetik erabiltzen ez duzunean eta garbitu aurretik. Utzi hozten piezak jarri edo kendu aurretik, eta aparatua garbitu aurretik.
- Ez erabili aparaturik kablea edo entxufea hondatuta dagoenean, edo gailuak gaizki funtzionatzen duenean, edo nolabait hondatu bada.
- Gailuaren fabrikatzaileak gomendatzen ez dituen osagarri osagarriak erabiltzeak sua, deskarga elektrikoa edo pertsonetan zauriak eragin ditzake.
- Ez erabili kanpoan.
- Ez utzi kablea mahaiaren edo erakusmahaiaren ertzetik zintzilik zintzilik, ezta gainazal beroak ukitu ere.
- Ez jarri gas edo erregailu elektriko bero baten gainean edo inguruan, edo berotutako labe batean.
- Beti konektatu entxufea lehenik etxetresna elektrikora, eta gero konektatu kablea hormako entxufean. Deskonektatzeko, jarri edozein kontrol "itzali" posizioan, eta gero atera entxufea hormako entxufetik.
- Ez erabili aparatua aurreikusitako erabilera ez den beste baterako.
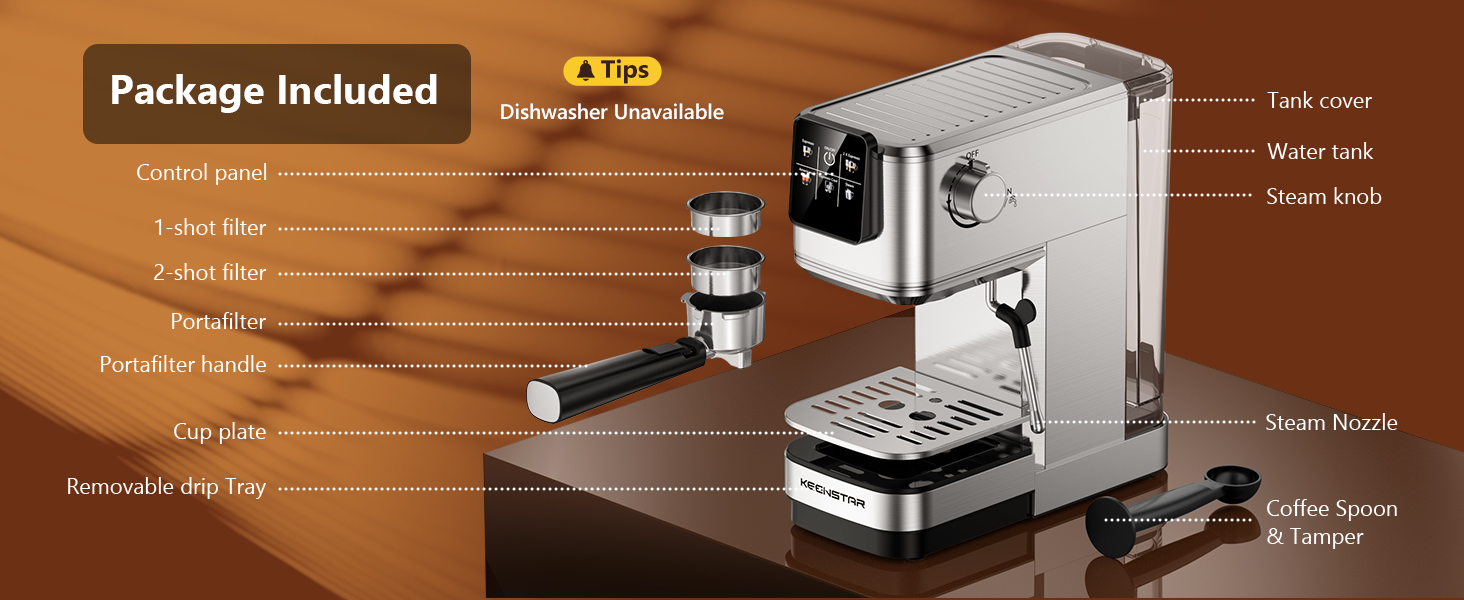
3. Produktuaren osagaiak
Familiarize yourself with the parts of your KEENSTAR Espresso Machine:
- Control Panel (Touch Screen)
- Water Tank (40oz / 1200ml capacity)
- Lurrun-mantoa
- Portafiltroaren heldulekua
- 1-shot Filter Basket
- 2-shot Filter Basket
- Steam Wand / Nozzle
- Tanta-erretilu desmuntagarria
- Cup Plate (Heated)
- Kafe koilara eta Tamper
4. Hasierako konfigurazioa eta lehen erabilera
Espresso makina lehen aldiz erabili aurretik, jarraitu urrats hauek:
- Desegin: Kontu handiz kendu ontziratzeko material guztiak eta ziurtatu osagai guztiak daudela.
- Garbitu: Wash the water tank, portafilter, and filter baskets with warm soapy water. Rinse thoroughly and dry. Wipe the exterior of the machine with a damp oihal.
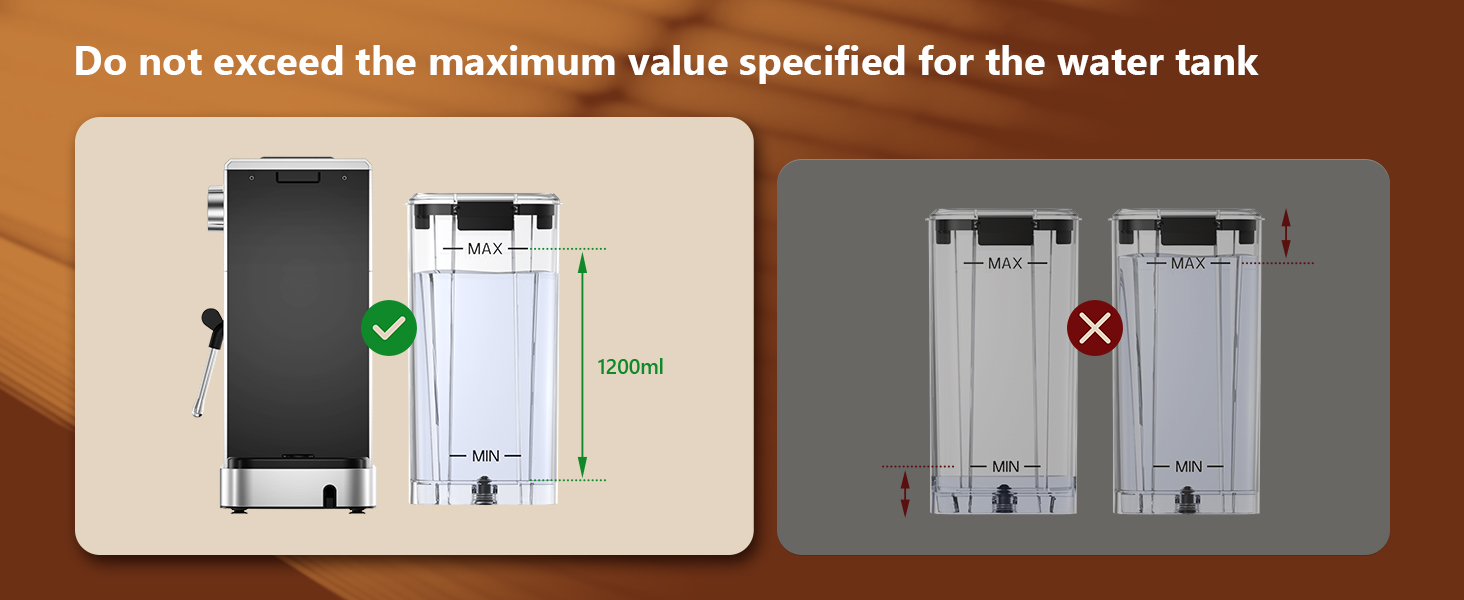
- Ur depositua bete: Fill the water tank with fresh, cold water up to the MAX line. Do not exceed the maximum fill level.
- Piztu: Entxufatu makina lurreko hartune elektriko batean.
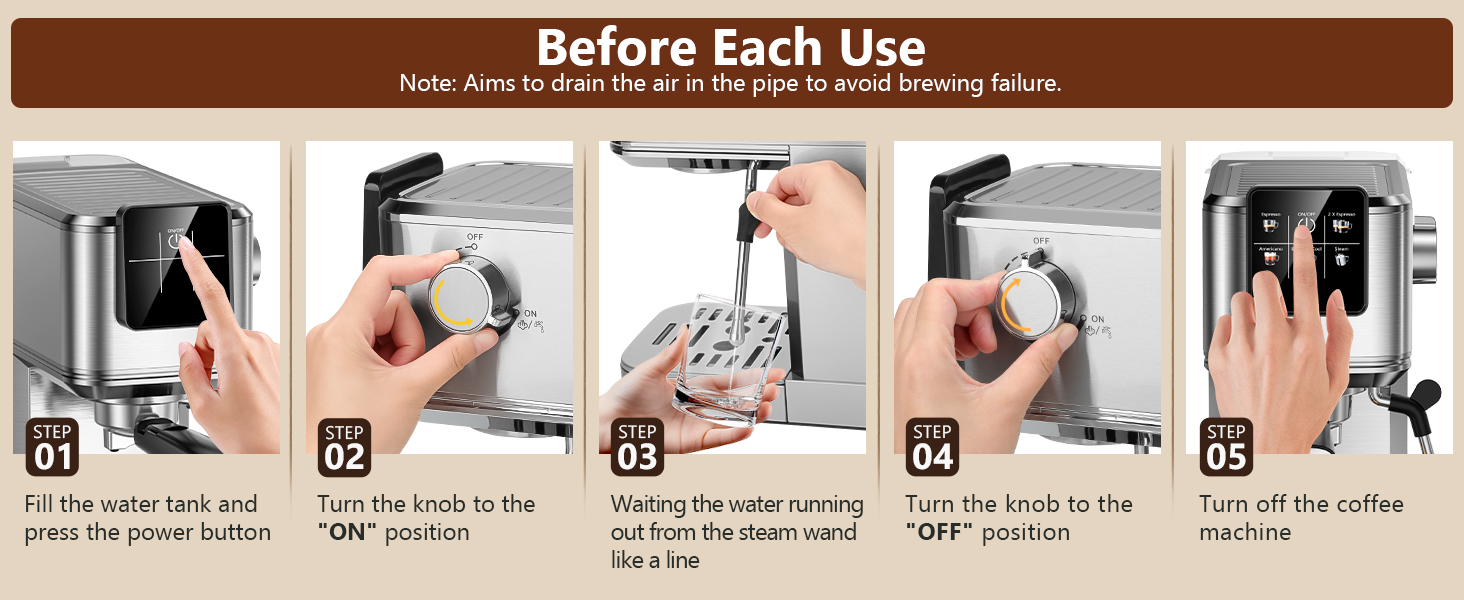
- Prime the Machine (Before Each Use): This step drains air from the internal pipes to prevent brewing failure.
- Sakatu kontrol paneleko pizteko botoia.
- Turn the steam knob to the "ON" position.
- Wait for water to run out from the steam wand in a steady stream.
- Turn the steam knob to the "OFF" position.
- Itzali kafe-makina.

5. Funtzionamendu-argibideak
5.1 Brewing Espresso (Single or Double)
Ensure the steam knob is in the "OFF" position before brewing coffee.
- Piztu: Press the power button on the control panel. The indicator will blink, signifying preheating.
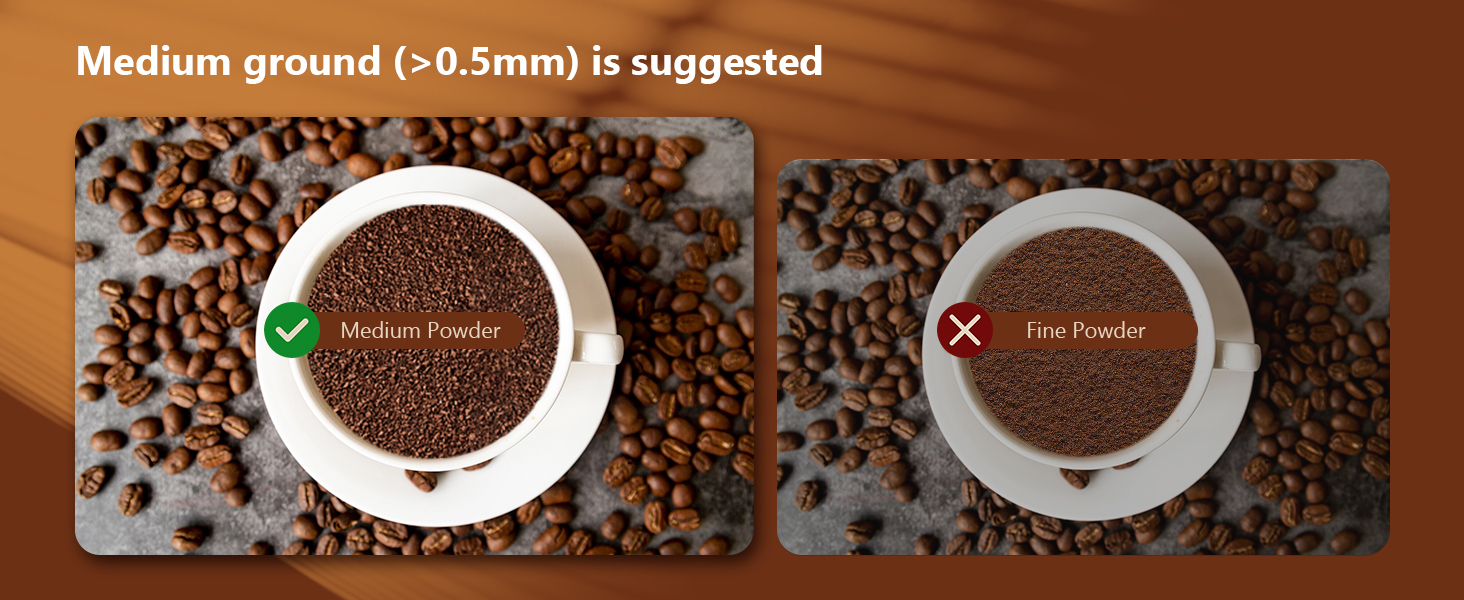
- Prepare Ground Coffee: Use medium ground coffee (>0.5mm). Load the appropriate filter basket (1-shot or 2-shot) with ground coffee (7g for single, 14g for double) and tamp it firmly with the coffee spoon/tamper.
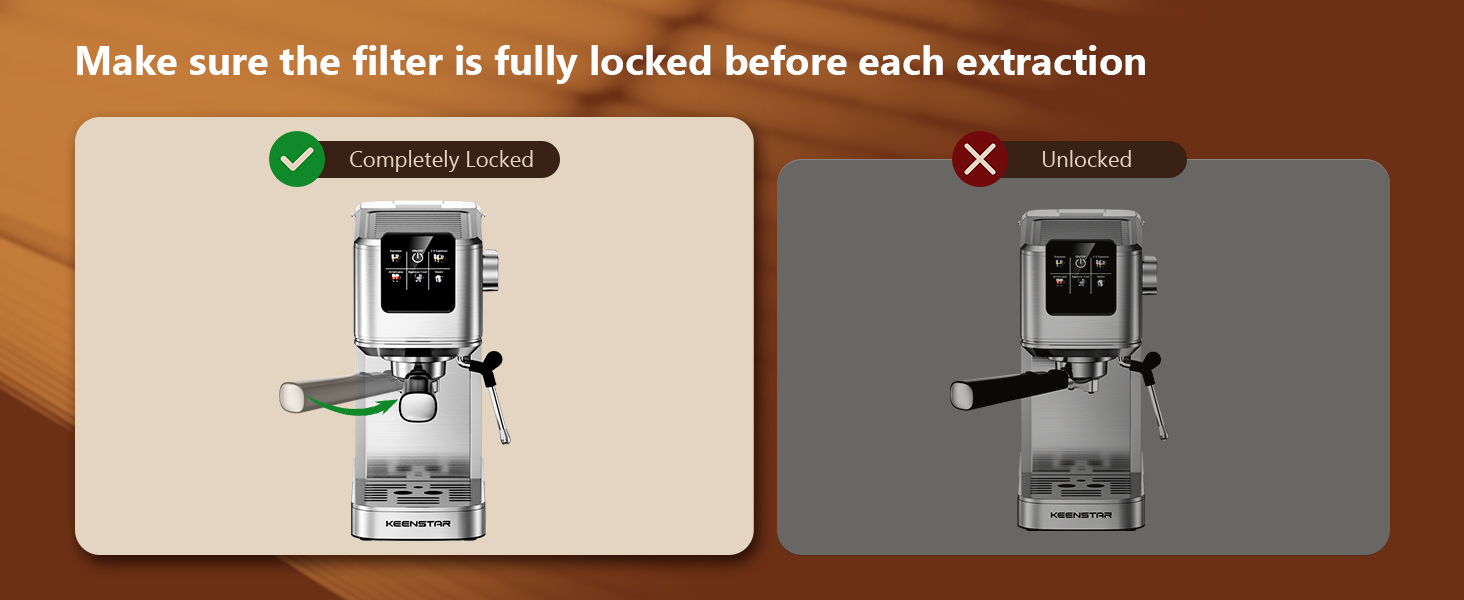
- Erantsi iragazki-portagailua: Insert the portafilter into the group head and turn it firmly to the right until it is completely locked. Place a cup(s) on the drip tray.
- Aurreberotu: Wait for the indicator light to become steady, indicating the machine is preheated and ready to brew.
- Garagardoa: Select "Espresso" for a single shot or "2X Espresso" for a double shot on the touch screen. The machine will begin brewing.
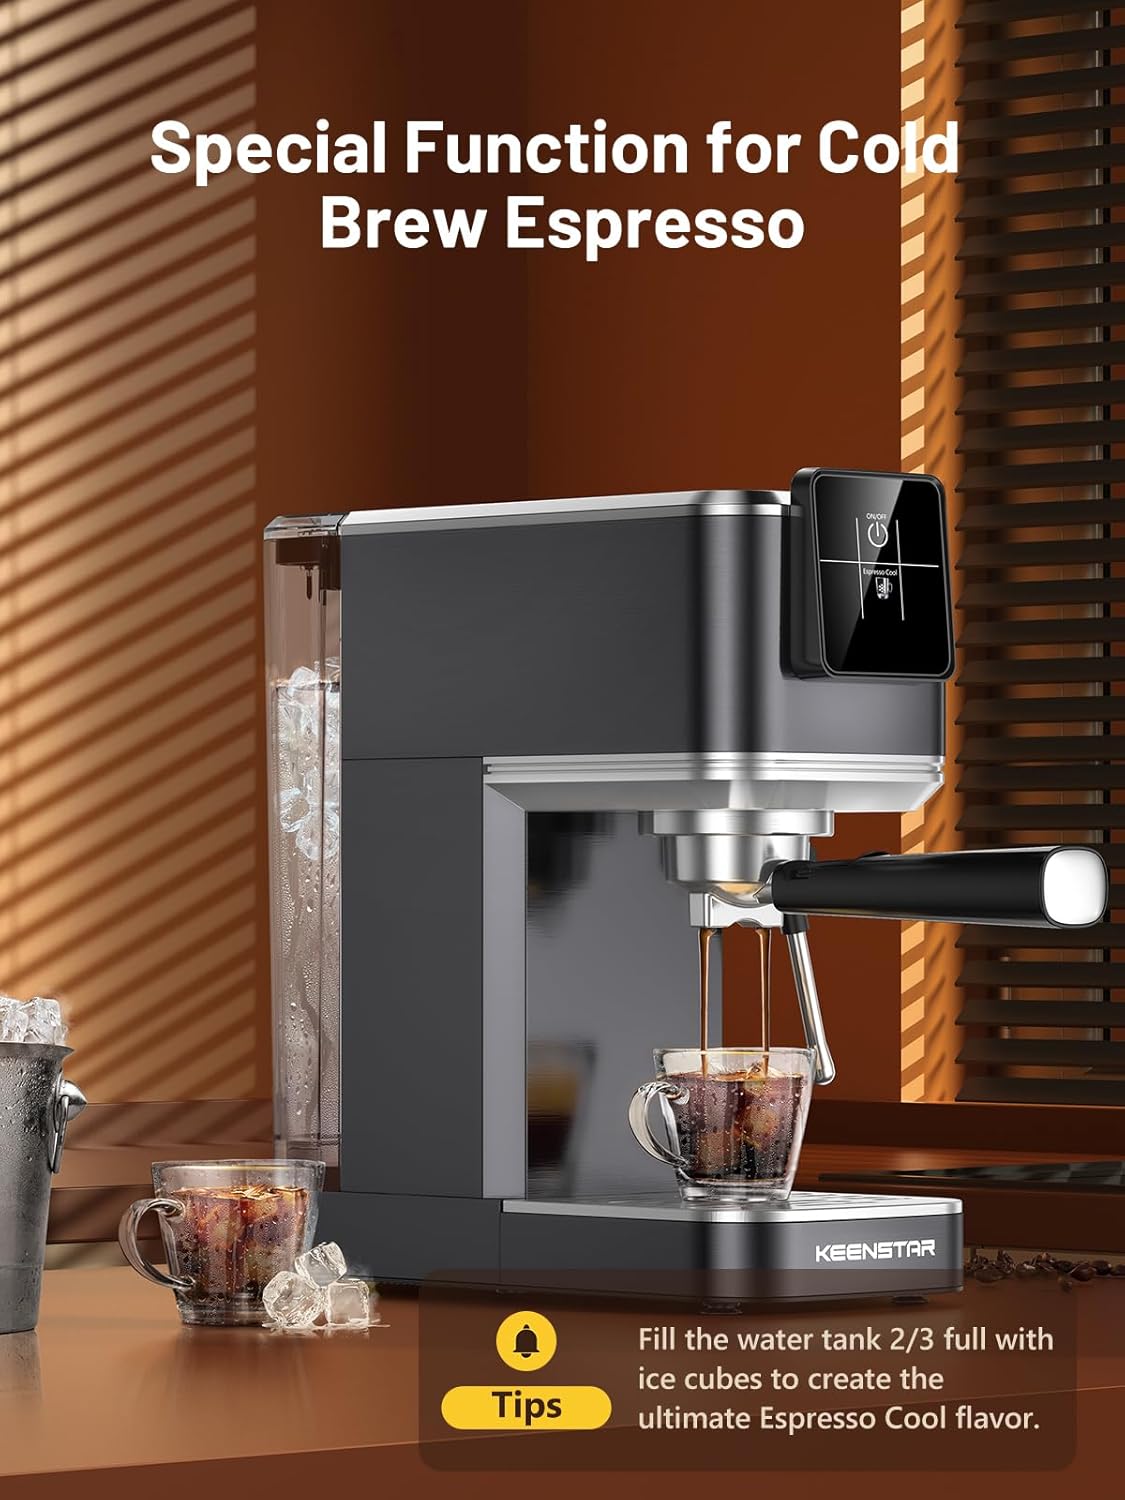
5.2 Making Cold Brew Espresso
The machine offers a rapid cold brew function:
- Prestatu: Fill the water tank approximately 2/3 full with ice cubes.
- Garagardoa: Follow steps 1-3 from "5.1 Brewing Espresso".
- Aukeratu kafe hotza: On the touch screen, select "Espresso Cool". The machine will brew a cold espresso shot.
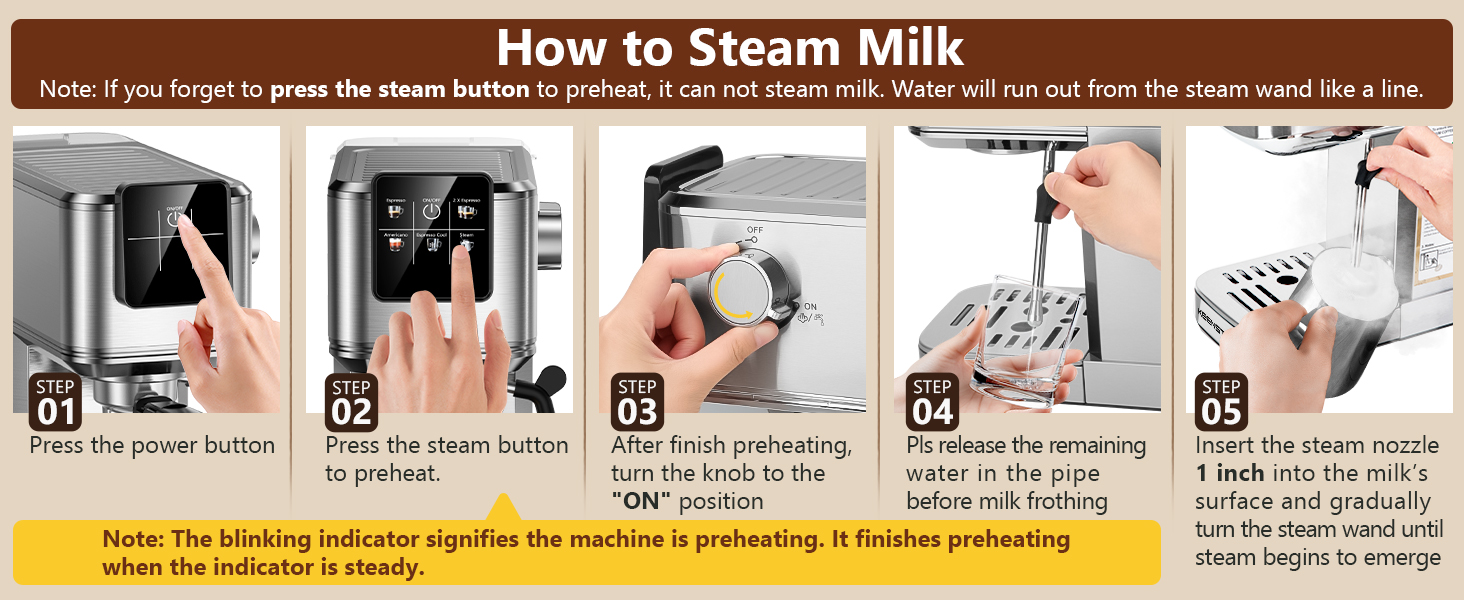
5.3 Esnea lurrun-makila erabiliz aparra ateratzea
To create creamy milk foam for lattes and cappuccinos:
- Piztu: Sakatu pizteko botoia.
- Preheat Steam: Press the "Steam" button on the touch screen to preheat the steam function. The indicator will blink during preheating.
- Lurrun-haga garbitzeko: After preheating is complete (indicator is steady), turn the steam knob to the "ON" position briefly to release any condensed water from the wand. Turn it OFF.
- Esne apartsua: Insert the steam nozzle approximately 1 inch into the surface of cold milk in a frothing pitcher. Gradually turn the steam knob to the "ON" position.
- Texture Milk: Move the pitcher up and down to create microfoam. Once desired texture is achieved, turn the steam knob to "OFF" and remove the pitcher.
- Makila garbia: Berehala garbitu lurrun-hagatxoa sprayarekinamp cloth to prevent milk residue from drying. Briefly turn the steam knob ON again to clear any internal milk.

5.4 Ukipen-pantailaren funtzionamendua
The machine features an intuitive touch screen for various functions:
- Espressoa: Espresso kafe bakarra prestatzen du.
- 2X Espresso: Espresso bikoitza prestatzen du.
- Espresso Cool: Brews a cold espresso shot (requires ice in water tank).
- amerikarra: Brews an Americano.
- Lurruna: Activates the steam wand for milk frothing.
- ON/OFF: Makina piztu edo itzaltzen du.

6. Mantentzea eta Garbiketa
Aldian-aldian garbitzeak zure espresso makinaren errendimendu optimoa eta iraupena bermatzen ditu.
6.1 Eguneko garbiketa
- Tantaketarako erretilua: Empty and clean the removable drip tray after each use or when the indicator floats up.
- Portafiltroa eta iragazki-saskiak: Remove spent coffee grounds and rinse the portafilter and filter baskets under warm water.
- Lurrun-makila: As mentioned in section 5.3, wipe the steam wand immediately after frothing milk.
- Kanpoaldea: Garbitu makinaren kanpoaldea leun batekin, damp oihal. Ez erabili garbitzaile urratzaileak edo zurgatzaileak.


6.2 Kalifikatzailea
Over time, mineral deposits can build up in the machine, affecting performance. Descale your machine every 2-3 months, or more frequently if you have hard water.
- Kaltziogabetzeko disoluzioa prestatu: Mix a descaling solution according to the manufacturer's instructions (or use a mixture of white vinegar and water, 1:1 ratio).
- Ur depositua bete: Bota deskalifikatzeko soluzioa ur deposituan.
- Exekutatu irtenbidea: Place a large container under the portafilter and steam wand. Run the descaling solution through the machine by performing several espresso cycles and activating the steam wand for a few minutes.
- Garbitu: After the solution has run through, rinse the water tank thoroughly and fill it with fresh water. Run several cycles of fresh water through the machine to remove any residual descaling solution.
7. Arazoak
Espresso makinarekin arazoak badituzu, jo ezazu honako arazo eta irtenbide ohikoenei:
| Arazoa | Kausa posiblea | Irtenbidea |
|---|---|---|
| Ez dago kafe-banaketarik / Fluxu motela |
|
|
| Water leaks from portafilter |
|
|
| No steam from wand / Weak steam |
|
|
| Kafea ez da nahikoa beroa |
|
|
8. Produktuaren zehaztapenak
| Ezaugarri | Xehetasuna |
|---|---|
| Marka | KEENSTAR |
| Ereduaren izena | JH-C5210 |
| Presio-sistema | 20 barrako ponpa profesionala |
| Boterea | 1350W |
| Ur deposituaren edukiera | 40 oz (1200 ml) |
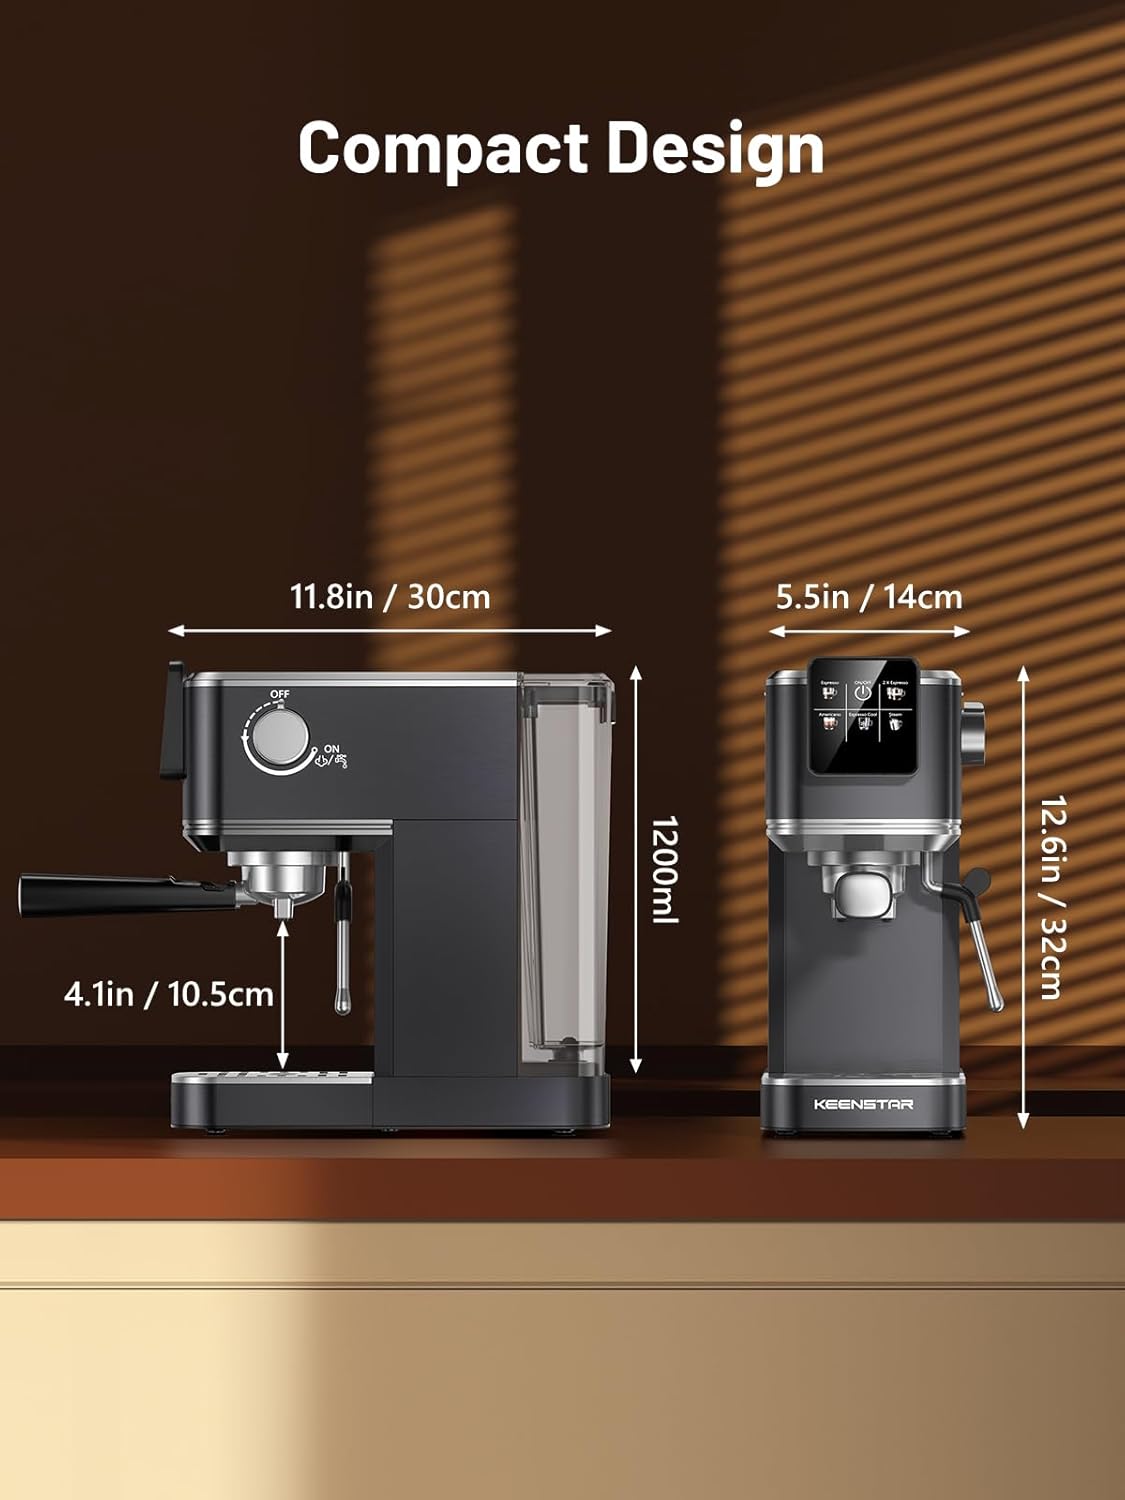
| Produktuaren neurriak (L x W x H) | 11.8"S x 5.5"Z x 12.6"A (30cm S x 14cm Z x 32cm A) |
| Elementuaren pisua | 10 kilo |
| Kafearen sarrera mota | Ground Coffee, Coffee Beans |
| Eragiketa modua | Fully Automatic (for brewing functions) |
| Ezaugarri bereziak | Rapid Cold Brew, Milk Frother Steam Wand, Touch Screen, Heated Cup Holder |
9. Bermea eta Laguntza
KEENSTAR offers the following support for your product:
- 30 eguneko dirua itzultzeko bermea: If you are not satisfied with your purchase.
- 1-Year Free Replacement: For manufacturing defects from the date of purchase.
- Lifetime After-Customer Service: For ongoing support and assistance.
For customer service inquiries, please refer to the contact information provided with your product packaging or visit the official KEENSTAR webgunea.


