1. Sarrera
This manual provides detailed instructions for the GODIYMODULES 1.5-inch Transparent OLED Display module. This display features a 128x64 pixel resolution, a self-luminous light blue display color, and a full viewing angle. It is equipped with a built-in LD7318 driver chip and supports both 4-wire SPI and I2C communication modes, offering good compatibility and high transmission speed for various applications.

1. irudia: Aurrealdea view of the 1.5-inch Transparent OLED Display module.
1. bideoa: Amaitu daview of the 1.51-inch Transparent OLED display, highlighting its 128x64 resolution, self-luminous light blue display, full viewing angle, and support for 4-wire SPI and I2C communication modes. It also shows connections to Raspberry Pi, Arduino, and STM32 boards.
2. Zehaztapenak
2.1. Zehaztapen orokorrak
- Bistaratzeko mota: OLED gardena
- Pantailaren tamaina: 1.5 hazbetekoa
- Ebazpena: 128 x 64 pixel
- Gidariaren IC: LD7318
- Komunikazio Interfazea: 4-wire SPI, I2C (selectable)
- Bistaratzeko kolorea: Urdin Argia
- Bolumen eragileatage: 5V / 3.3V
- Elementuaren pisua: 0.352 ontza gutxi gorabehera
- Paketearen neurriak: 3.94 x 1.97 x 0.39 hazbete inguru
2.2. Pin Functions

Figure 2: Pinout table for the LD7318 driver chip.
2.3. Dimentsio fisikoak

Figure 3: Technical drawing showing the dimensions and layout.

4. irudia: Aldea view technical drawing showing thickness and layers.
3. Konfigurazioa
3.1. Hardware konexioa
The 1.5-inch Transparent OLED Display module can be connected to various microcontrollers and development boards such as Raspberry Pi, Arduino, and STM32. Ensure proper pin mapping according to the selected communication mode (SPI or I2C).
- Elikatze-iturria: Connect VCC to 3.3V or 5V (depending on your board's logic level) and GND to ground.
- Communication Mode Selection: The module supports both SPI and I2C. The communication mode is typically selected by soldering resistors on the back of the module. Refer to the module's datasheet for specific resistor configurations.
- SPI Connection (4-wire): Connect DIN (Data In), CLK (Clock), CS (Chip Select), and DC (Data/Command) pins to the corresponding SPI pins on your microcontroller.
- I2C Connection: Connect SDA (Serial Data) and SCL (Serial Clock) pins to the corresponding I2C pins on your microcontroller.
- Reset Pin (RST): Connect the RST pin to a GPIO pin on your microcontroller for software reset control.

Figure 5: The OLED module with its flexible connector cable, ready for integration.
Video 2: This video demonstrates the correct procedure for connecting the flexible screen to a control board, including handling the screen carefully and adjusting display orientation.
4. Funtzionamendu-argibideak
4.1. Softwarearen konfigurazioa
To operate the transparent OLED display, you will need to use appropriate libraries and code examples for your chosen microcontroller platform. Comprehensive supporting materials, tutorials, and technical support are typically provided by the manufacturer to assist with software integration.
- Arduino: Utilize the SSD1309 library for Arduino IDE. Ensure the correct communication mode (SPI or I2C) is configured in the library or your sketch.
- Raspberry Pi: Use Python libraries such as
luma.oledor similar, which support the SSD1309 driver. Configure the SPI or I2C interface in the Raspberry Pi's settings. - STM32: Refer to the manufacturer's provided examples or community resources for STM32 HAL or LL library implementations for SSD1309.
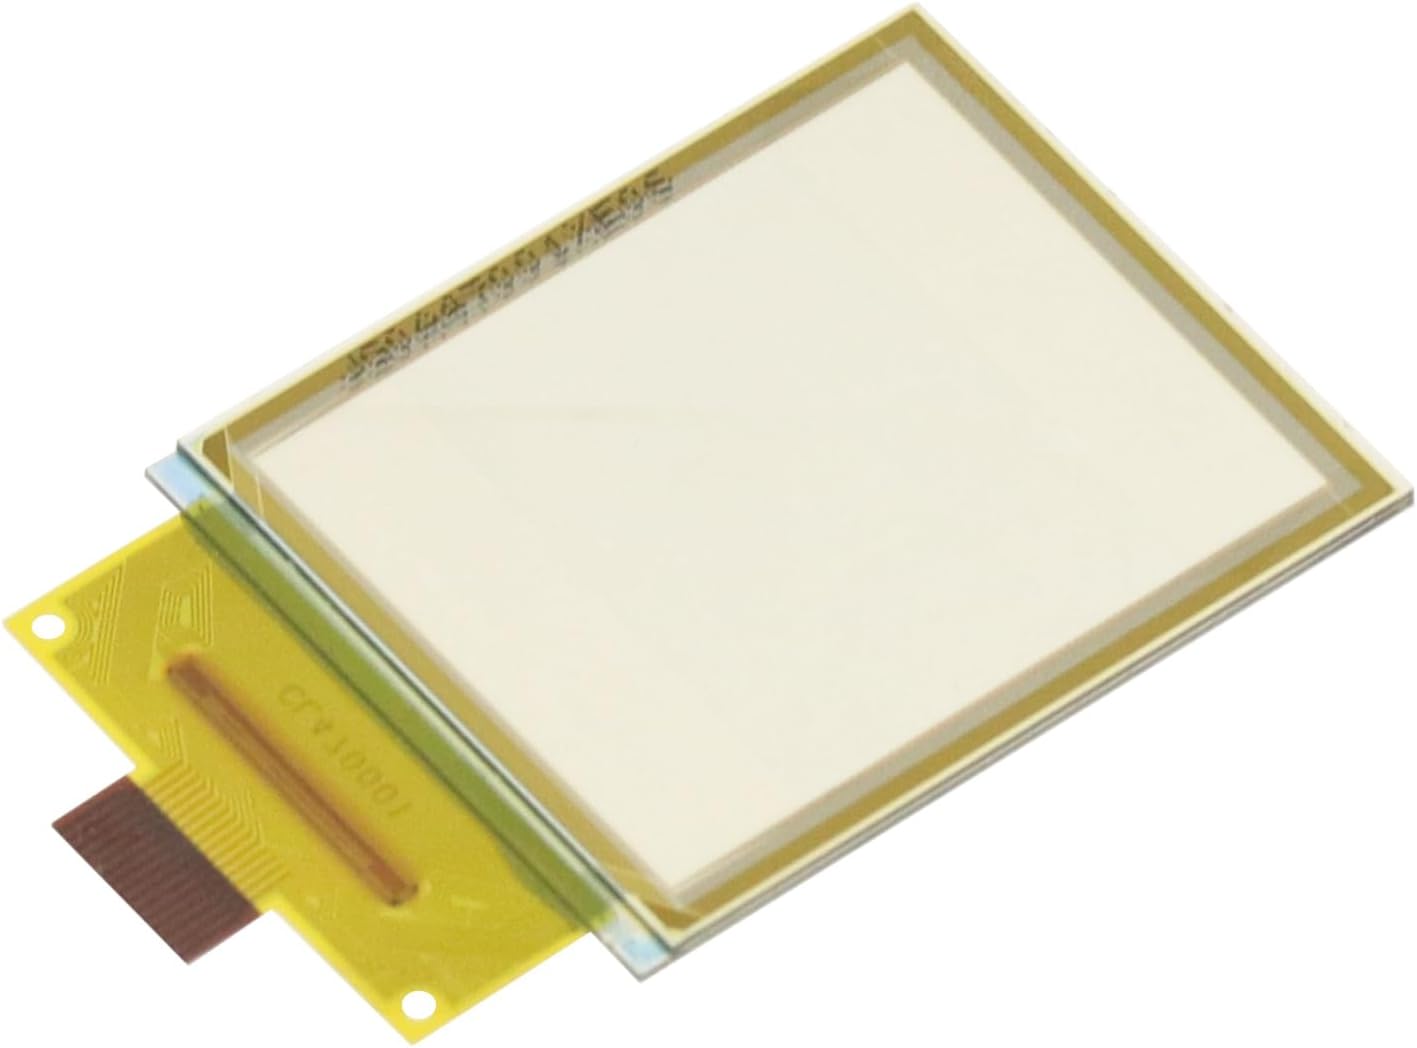
Figure 6: The transparent OLED display connected to a development board, demonstrating its operational state.
4.2. Displaying Content
Once the hardware and software are correctly configured, you can program the display to show text, graphics, or sensor data. The 128x64 resolution allows for clear display of small images and alphanumeric characters. The transparent nature of the screen enables unique applications where information can be overlaid on a real-world view.
Video 3: This video illustrates how to configure Aida64 and Wallpaper Engine to display system information (CPU, GPU, RAM) on a secondary monitor, which can be adapted for use with this transparent OLED display.
5. Mantentzea
5.1. Zainketa eta manipulazioa
- Avoid applying excessive pressure to the display surface.
- Handle the flexible connector cable with care to prevent damage.
- Store the module in a dry, anti-static environment when not in use.
- Protect the display from direct sunlight and extreme temperatures.
5.2. Garbiketa
To clean the transparent OLED display, gently wipe the surface with a soft, lint-free cloth. For stubborn smudges, lightly dampen the cloth with distilled water or a specialized screen cleaner. Avoid using harsh chemicals, abrasive materials, or excessive moisture, as these can damage the display.
6. Arazoak
- Ez dago pantailarik:
- Check all power connections (VCC, GND) to ensure they are secure and providing the correct voltage.
- Verify that the communication pins (SPI/I2C) are correctly wired and connected to the microcontroller.
- Ensure the communication mode (SPI or I2C) is correctly selected via the onboard resistors or software configuration.
- Confirm that the display library is correctly installed and initialized in your code.
- Check the RST pin connection and ensure it is being properly toggled or held high/low as required by the driver IC.
- Garbled or Incorrect Display:
- Verify that the correct display resolution (128x64) is set in your software.
- Check for any loose connections in the data lines.
- Ensure the correct driver IC (LD7318) is specified in your software library.
- If using SPI, confirm the correct SPI mode (e.g., CPOL, CPHA) is configured.
- Pantaila keinuka:
- Ensure a stable power supply is provided to the module.
- Check for electromagnetic interference (EMI) from nearby components.
- Adjust the refresh rate or contrast settings in your software, if available.
7. Bermea eta Laguntza
This GODIYMODULES product is covered by a standard manufacturer's warranty against defects in materials and workmanship. For specific warranty terms and conditions, please refer to the product packaging or the official GODIYMODULES webgunea.
For technical assistance, troubleshooting, or any inquiries regarding the 1.5-inch Transparent OLED Display, please contact GODIYMODULES customer support. Detailed tutorials, code examples, and community forums may also be available to assist with your projects.


