1. Sarrera
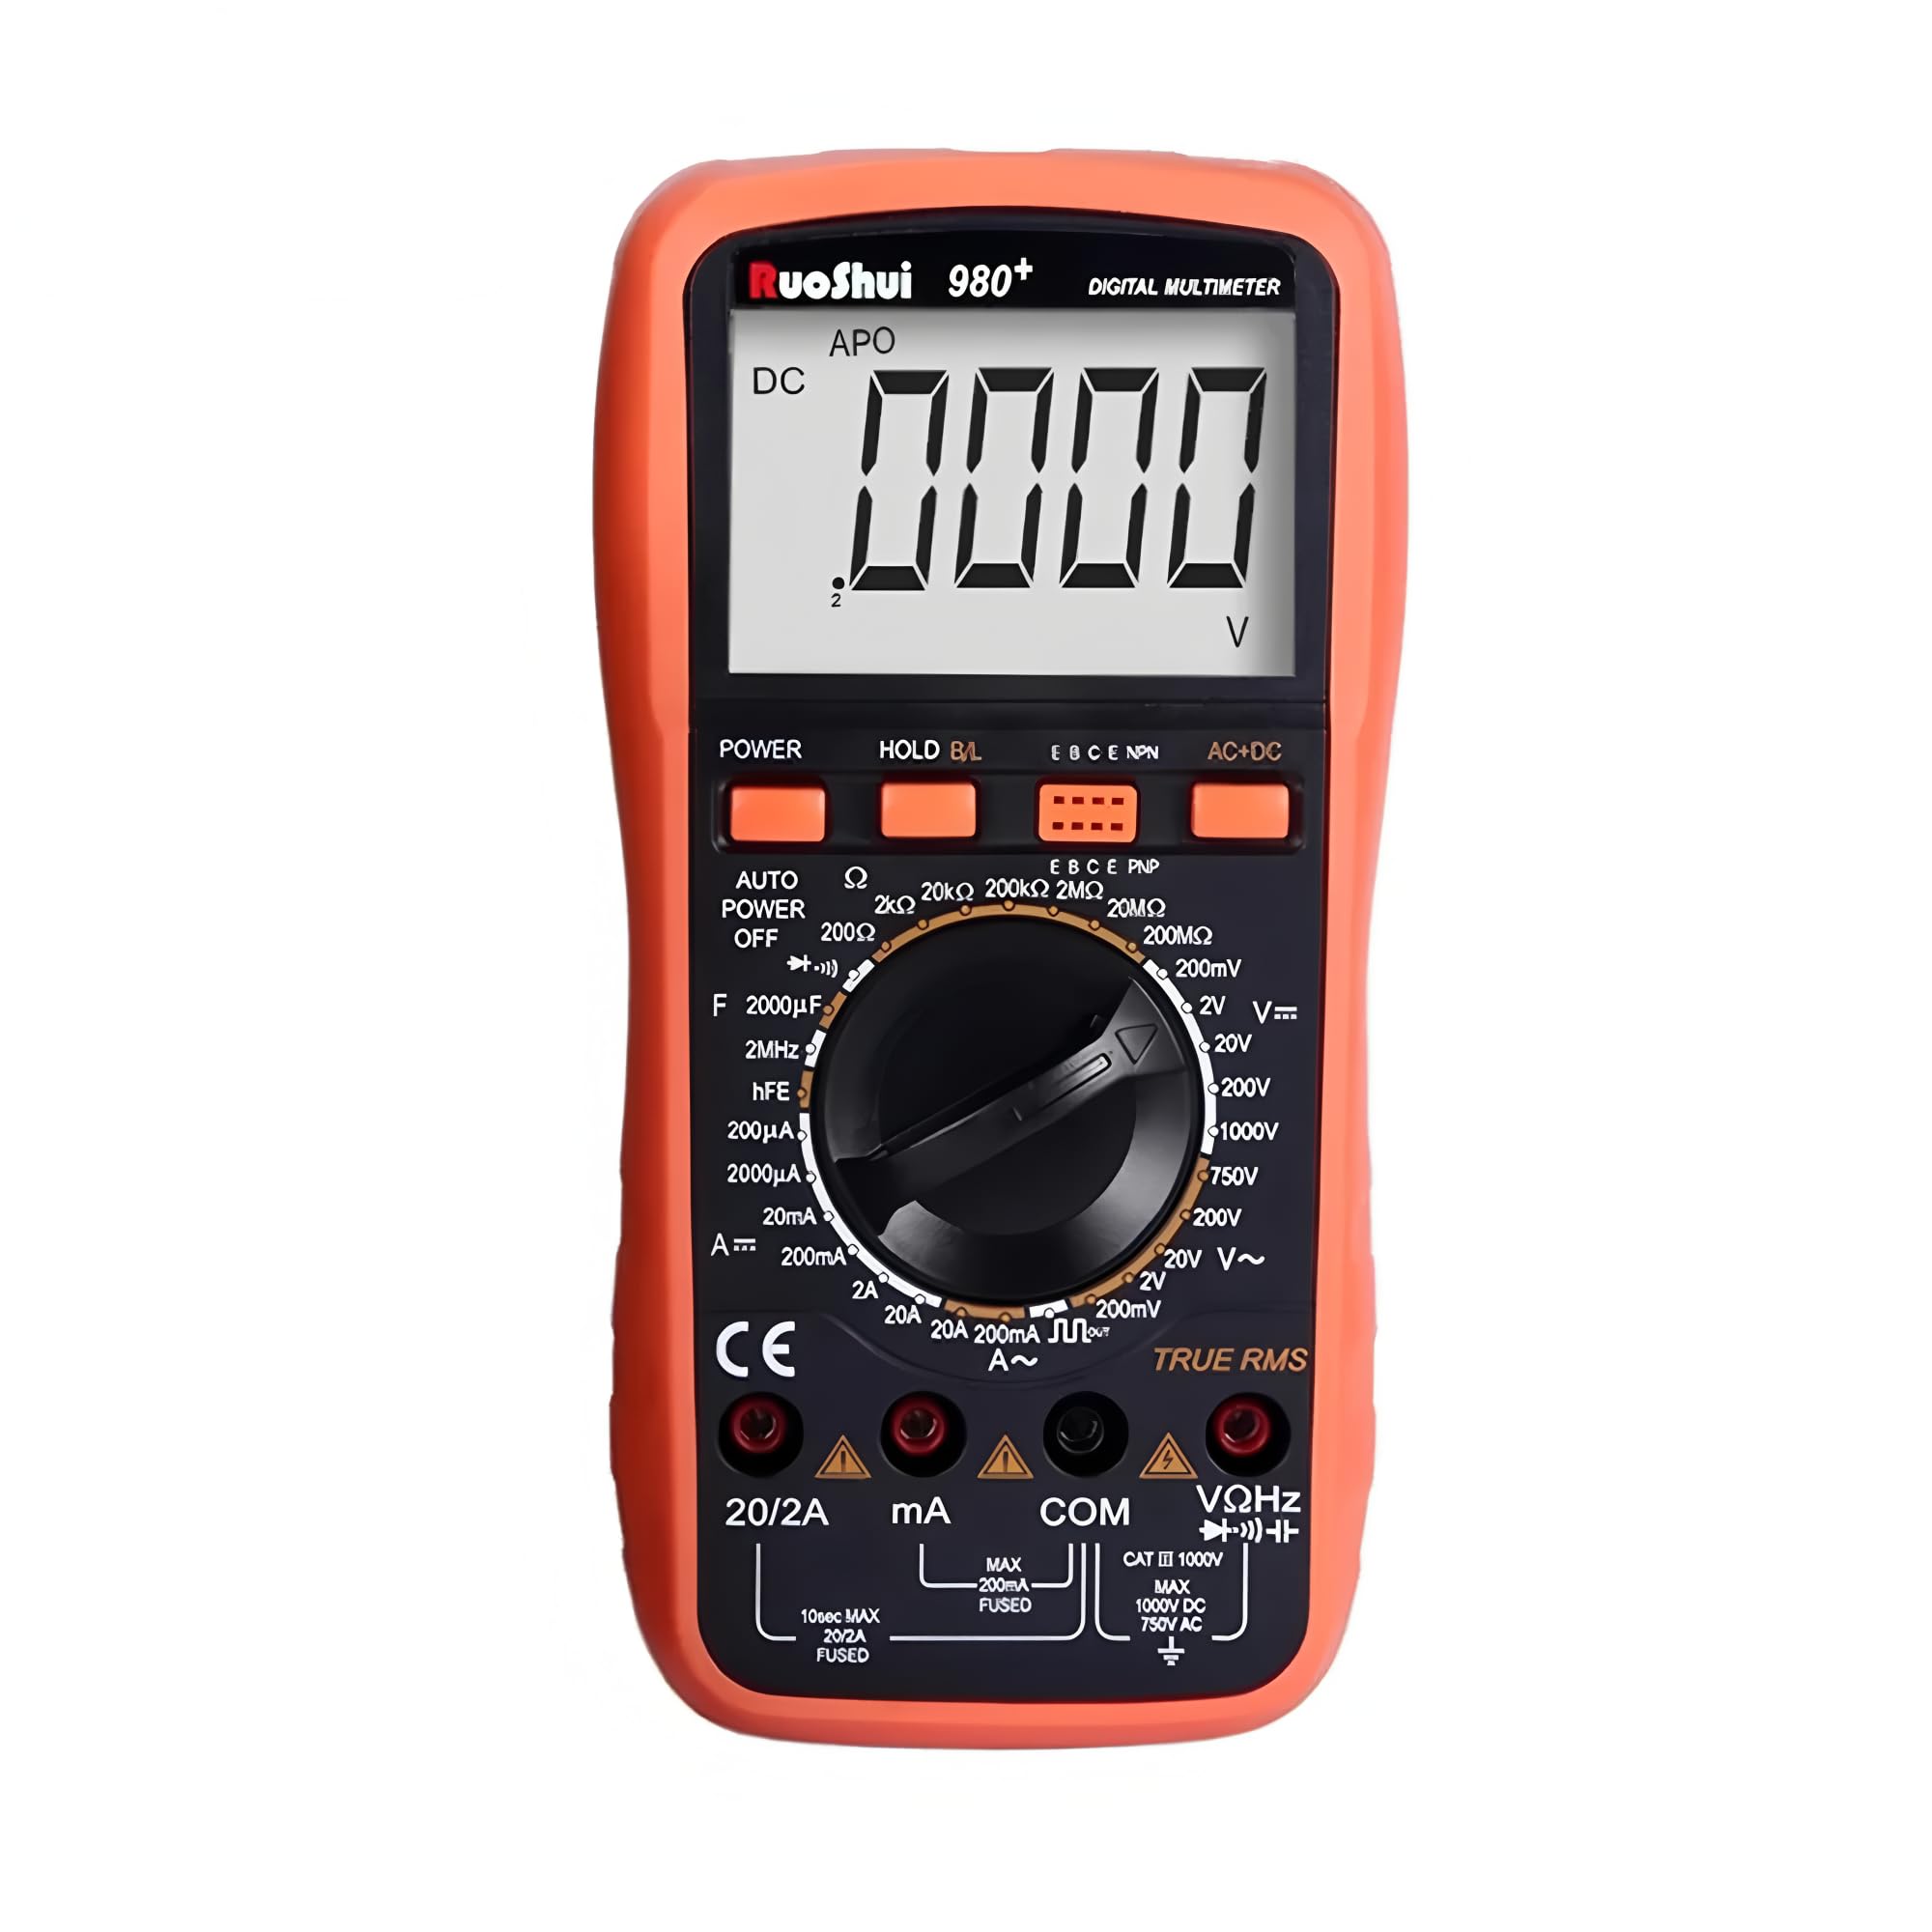
The RuoShui VC980+ is a stable and high-performance digital multimeter designed for accurate electrical measurements. Featuring a large 19999-count LCD display with a 42mm-high figure, it ensures clear readability. This instrument incorporates intelligent protection and overload protection, making it a reliable tool for various applications. It is capable of measuring DC voltage (DCV), AC voltage (ACV), DC current (DCA), AC current (ACA), resistance, capacitance, frequency, and includes functions for diode, triode (hFE), and continuity testing. The VC980+ utilizes a dual-integral A/D converter for precision measurements.
2. Segurtasun informazioa
To ensure safe operation and to avoid damage to the meter, please read this manual carefully before use and observe all safety warnings. Keep this manual for future reference.
- Neurketa egin aurretik, ziurtatu beti proba-kableak behar bezala konektatuta daudela eta funtzio-etengailua tarte zuzenean ezarrita dagoela.
- Ez aplikatu voltage edo tarte bakoitzerako zehaztutako gehienezko mugak gainditzen dituen korrontea.
- Kontu handiz ibili zirkuitu biziekin lan egitean. Bolumen handikotagarriskutsuak izan daitezke.
- Ez erabili neurgailua hondatuta dagoela dirudienez edo proba-kableen isolamendua hondatuta badago.
- Irakurketa zehatzak bermatzeko, ordezkatu bateria berehala bateria baxuaren adierazlea agertzen denean.
- Always disconnect the test leads from the circuit before changing the function switch.
- The meter is equipped with overload protection. However, avoid intentional overloading.
3. Produktua amaitu daview
The RuoShui VC980+ Digital Multimeter is designed for versatility and ease of use. Key features include:
- 19999 Display Counts: Neurketa zehatzak egiteko bereizmen handia eskaintzen du.
- Egiazko RMS: Accurate measurement of AC voltage and current, especially for non-sinusoidal waveforms.
- Atzeko argia pantaila: Ikusgarritasuna hobetzen du argi gutxiko inguruneetan.
- Datuak gordetzea: Freezes the displayed reading for convenient recording.
- Itzali automatikoa: Bateriaren iraupena aurrezten du, jarduerarik gabe egon ondoren automatikoki itzaltzen baita.
- Bateria baxuaren adierazlea: Alerts the user when the battery needs replacement.
- Barrutiaren gaineko adierazpena: Notifies the user when the measured value exceeds the selected range.
- Gainkarga babesa: Safeguards the meter against damage from excessive input.
- Intelligent Anti-Burn Protection Circuit: Segurtasuna eta iraunkortasuna hobetzen ditu.
4. Konfigurazioa
4.1 Bateriaren instalazioa
The VC980+ multimeter operates on a 9V battery. To install or replace the battery:
- Ensure the multimeter is powered off and all test leads are disconnected.
- Bilatu bateriaren konpartimentuaren estalkia unitatearen atzealdean.
- Erabili bihurkin bat bateriaren estalkia lotzen duen torlojua kentzeko.
- Kendu estalkia poliki-poliki.
- Konektatu 9V-ko bateria berri bat bateriaren kliparekin, polaritate zuzena errespetatuz.
- Jarri bateria konpartimentuan eta jarri berriro estalkia, torlojuarekin finkatuz.

4.2 Proba-kablearen konexioa
Connect the red test lead to the "VΩHz" or "mA" or "20A" input jack, depending on the measurement type. Connect the black test lead to the "COM" (common) input jack for all measurements.
5. Funtzionamendu-argibideak
Before taking any measurement, ensure the meter is set to the correct function and range. Refer to the markings on the rotary switch and the display for guidance.
5.1 DC Vol. neurtzeatage (DCV)
- Set the rotary switch to the "V=" (DCV) range.
- Connect the red test lead to the "VΩHz" jack and the black test lead to the "COM" jack.
- Konektatu proba-zundak neurtu beharreko osagai edo zirkuituan, polaritatea errespetatuz.
- Irakurri liburukiatagPantailako balioa.
5.2 AC Vol. neurtzeatage (ACV)
- Set the rotary switch to the "V~" (ACV) range.
- Connect the red test lead to the "VΩHz" jack and the black test lead to the "COM" jack.
- Konektatu proba-zundak neurtu beharreko osagai edo zirkuituan.
- Irakurri liburukiatagPantailako balioa.
5.3 Korronte zuzena neurtzea (DCA)
- Set the rotary switch to the "A=" (DCA) range (e.g., 200mA, 20A).
- For currents up to 200mA, connect the red test lead to the "mA" jack. For currents up to 20A, connect the red test lead to the "20A" jack. Connect the black test lead to the "COM" jack.
- Kontuz: To measure current, the meter must be connected in series with the circuit. Never connect the meter in parallel across a voltagkorrontea neurtzean, fusiblea erre edo neurgailua kaltetu baitezake.
- Open the circuit where current is to be measured and insert the meter in series.
- Irakurri uneko balioa pantailan.
5.4 Korronte alternoa neurtzea (ACA)
- Set the rotary switch to the "A~" (ACA) range (e.g., 200mA, 20A).
- Connect the red test lead to the appropriate current jack ("mA" or "20A") and the black test lead to the "COM" jack.
- Kontuz: Konektatu neurgailua zirkuituarekin seriean.
- Open the circuit and insert the meter in series.
- Irakurri uneko balioa pantailan.
5.5 Erresistentzia neurtzea (Ω)
- Set the rotary switch to the "Ω" (Resistance) range.
- Connect the red test lead to the "VΩHz" jack and the black test lead to the "COM" jack.
- Ziurtatu zirkuitua edo osagaia deskonektatuta dagoela erresistentzia neurtu aurretik.
- Konektatu proba-zundak osagaiaren artean.
- Irakurri erresistentziaren balioa pantailan.
5.6 Kapazitantzia neurtzea (F)
- Set the rotary switch to the "F" (Capacitance) range.
- Connect the red test lead to the "VΩHz" jack and the black test lead to the "COM" jack.
- Ziurtatu kondentsadorea guztiz deskargatuta dagoela neurketa egin aurretik, neurgailua kaltetu ez dadin.
- Konektatu proba-zundak kondentsadorean zehar.
- Irakurri kapazitantziaren balioa pantailan.
5.7 Maiztasuna neurtzea (Hz)
- Set the rotary switch to the "Hz" (Frequency) range.
- Connect the red test lead to the "VΩHz" jack and the black test lead to the "COM" jack.
- Konektatu proba-zundak seinale-iturrira.
- Irakurri maiztasunaren balioa pantailan.
5.8 Diodoaren proba
- Set the rotary switch to the "Diode" symbol.
- Connect the red test lead to the "VΩHz" jack and the black test lead to the "COM" jack.
- Konektatu zunda gorria diodoaren anodoari eta zunda beltza katodoari.
- Pantailak aurrerako bolumena erakutsiko dutage drop. Reverse the probes; the display should show "OL" (open loop) for a good diode.
5.9 Jarraitasun proba
- Set the rotary switch to the "Continuity" symbol (often shared with resistance or diode).
- Connect the red test lead to the "VΩHz" jack and the black test lead to the "COM" jack.
- Konektatu proba-zundak zirkuituan edo osagaian.
- If the resistance is below a certain threshold (typically <50Ω), the buzzer will sound, indicating continuity. The display will also show the resistance value.
5.10 hFE proba (transistore proba)
- Jarri biraketa-etengailua "hFE" posizioan.
- Insert the transistor leads (Emitter, Base, Collector) into the corresponding holes in the hFE socket on the meter, ensuring correct NPN or PNP type selection.
- Read the hFE (DC current gain) value on the display.
6. Mantentzea
6.1 Bateria ordezkatzea
When the "BAT" symbol appears on the display, the battery voltage is low and needs to be replaced. Follow the steps outlined in Section 4.1 Battery Installation.
6.2 Fusiblearen ordezkapena
If the current measurement function fails, the fuse may be blown. To replace the fuse:
- Ensure the multimeter is powered off and all test leads are disconnected.
- Remove the battery compartment cover and the battery.
- Kontu handiz ireki atzeko c-aasing of the multimeter (this may require removing additional screws).
- Locate the blown fuse(s). The VC980+ typically uses a 250mA fuse for lower current ranges and a 20A fuse for higher current ranges.
- Replace the blown fuse with a new fuse of the exact same type and rating. Using an incorrect fuse can damage the meter or pose a safety hazard.
- Reassemble the casing eta bateriaren estalkia.

6.3 Garbiketa
Garbitu kasua iragarkiarekinamp oihal eta detergente leun batekin. Ez erabili urratzailerik edo disolbatzailerik. Mantendu sarrera terminalak zikinkeriarik eta hezetasunetik libre.
7. Arazoak
| Arazoa | Kausa posiblea | Irtenbidea |
|---|---|---|
| Pantailarik ez edo pantaila ahula | Bateria baxua edo agortuta | Replace the 9V battery (refer to Section 4.1). |
| Irakurketa okerrak | Hautatutako funtzio/tarte okerra; proba-kablearen konexio txarra; bateria baxua | Verify function and range; ensure leads are firmly connected; replace battery. |
| Korrontearen neurketa ez dabil | Blown fuse; incorrect connection (not in series) | Check and replace fuse (refer to Section 6.2); ensure meter is connected in series. |
| "OL" (Gainkarga) bistaratzen da | Measured value exceeds selected range; open circuit (for continuity/resistance) | Select a higher range; check for open circuit in the component/wire. |
| Jarraitutasun-txirrinik ez | Open circuit; resistance too high | Check the circuit for breaks; ensure resistance is below the continuity threshold. |
8. Zehaztapenak
The following table details the general and measurement specifications for the RuoShui VC980+ Digital Multimeter.
| Ezaugarri | Zehaztapena |
|---|---|
| Bistaratu zenbaketak | 19999 |
| Egiazko RMS | Bai |
| Atzeko argiaren pantaila | Bai |
| Datuak gordetzea | Bai |
| Itzali automatikoa | Bai |
| Bateria baxuaren adierazlea | Bai |
| Barrutiaren gaineko adierazpena | Bai |
| Gainkargaren babesa | Bai |
| Diodo proba | Bai |
| hFE proba | Bai |
| Jarraitasun proba | Bai |
| Energia iturria | 9V Battery (Battery Powered) |
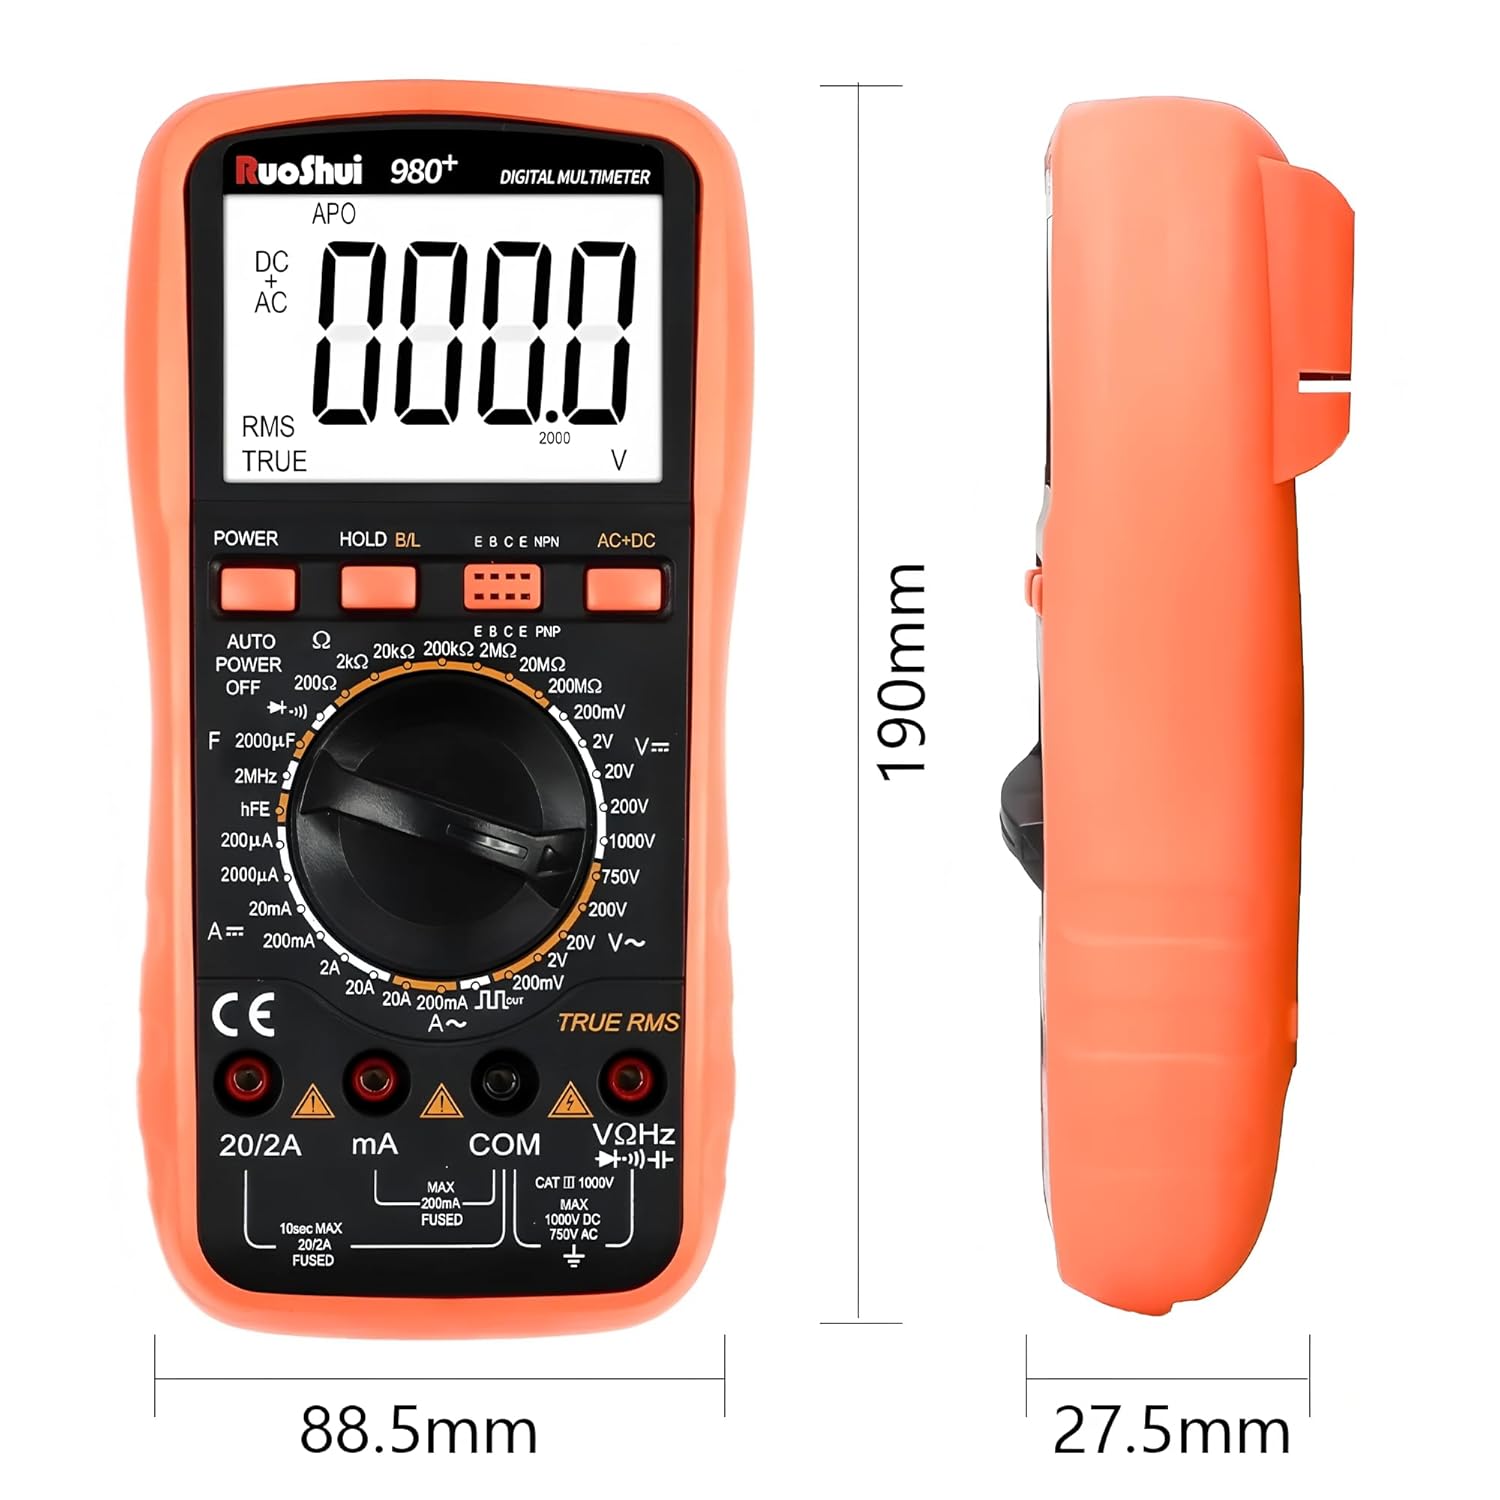
| Neurriak (L x W x H) | 7.87 x 5.91 x 7.09 hazbete (gutxi gorabehera 190 x 88.5 x 27.5 mm) |
| Elementuaren pisua | 2.2 libra (gutxi gorabehera 1 kilogramo) |
| Funtzionamendu-tenperatura | Gehienez 60 gradu Celsius |
| Ziurtagiriak | CE, RoHS, UL |
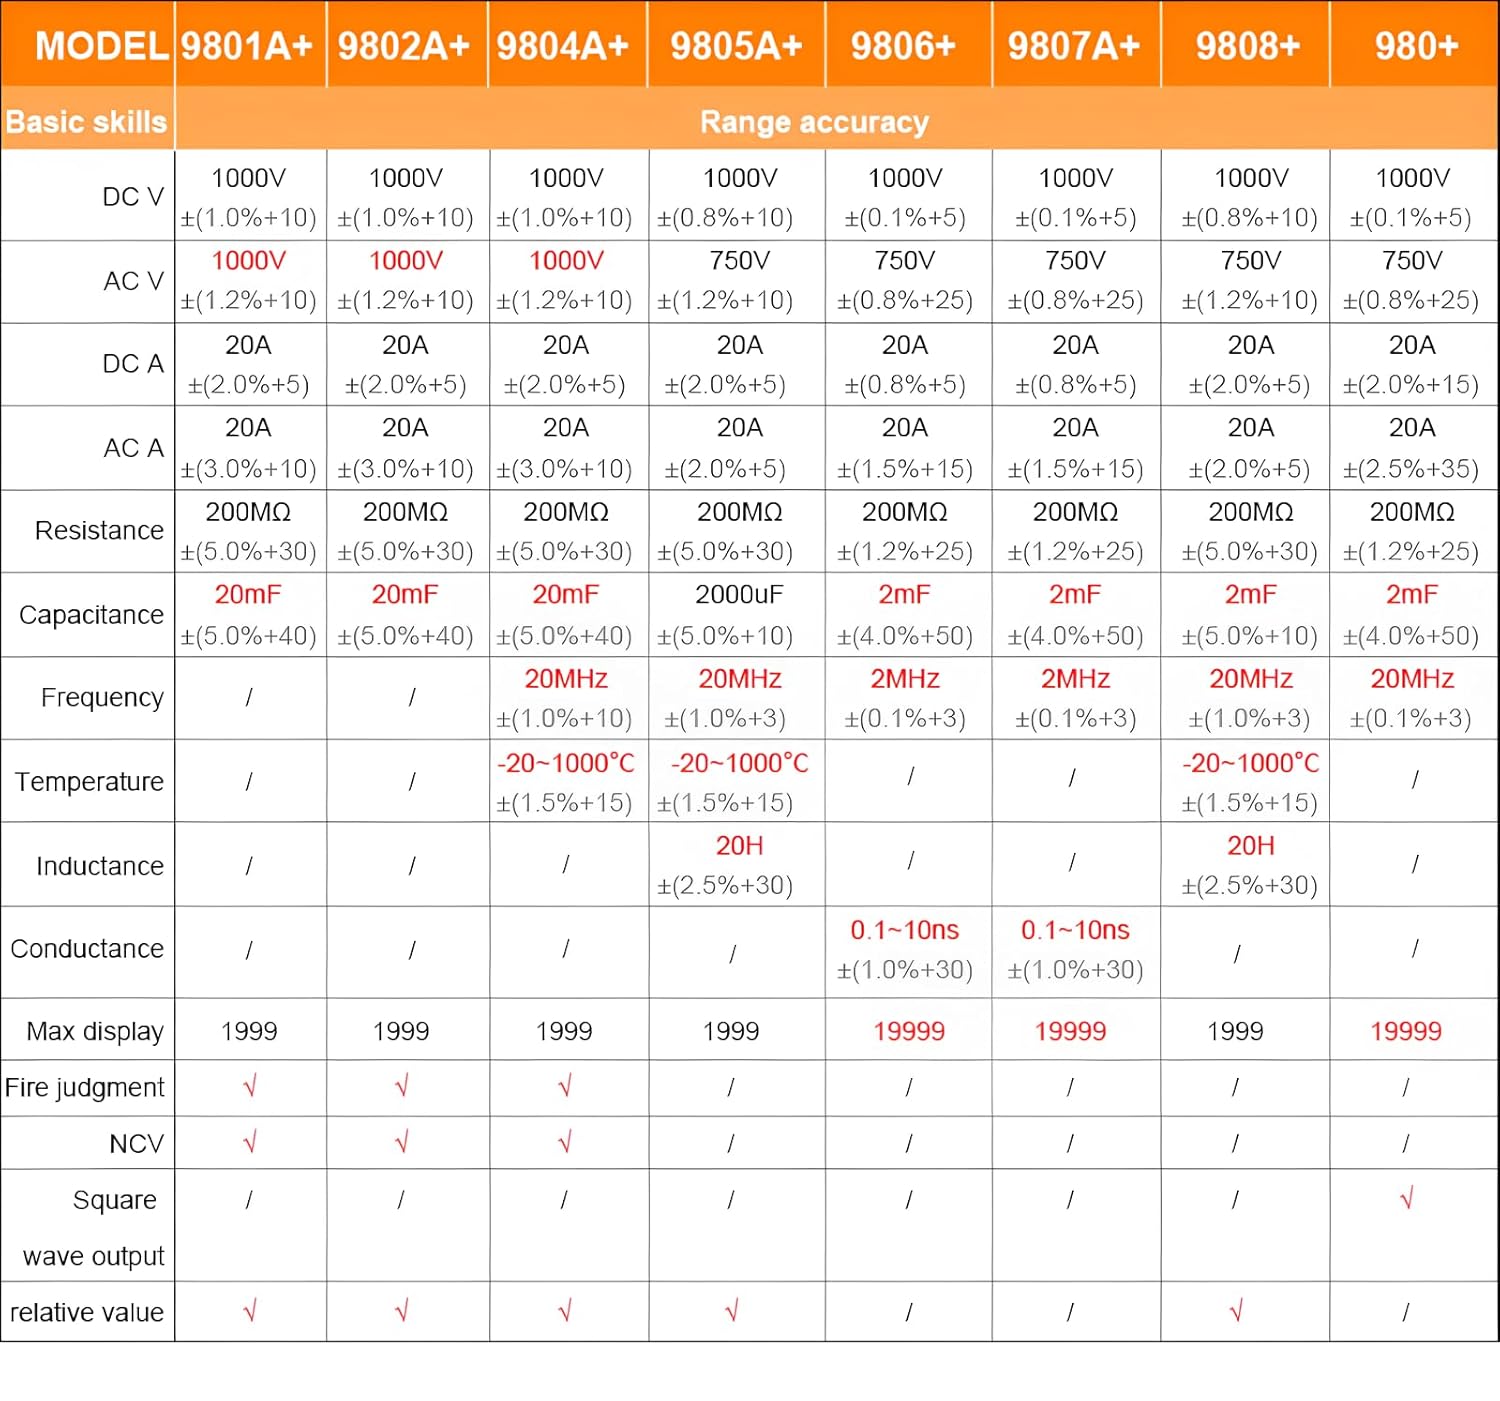
For detailed range accuracy, please refer to the following table:
9. Bermea eta Laguntza
The RuoShui VC980+ Digital Multimeter is manufactured by Xi'an Beicheng Electronics Co.Ltd (RUOSHUI). For support or warranty inquiries, please contact the manufacturer or your point of purchase. EU spare part availability duration is 1 year.
For further assistance, please visit the official RuoShui store or contact customer service through the retailer where the product was purchased.


