Sarrera
The GAMDIAS Aura GC10m V2 WH is a micro-tower computer case designed for Micro-ATX and Mini-ITX motherboards. It features a dual-chamber design, panoramic tempered glass panels, and comes equipped with three Addressable RGB (ARGB) fans to enhance system aesthetics and cooling. This manual provides essential information for the proper installation, operation, and maintenance of your computer case.
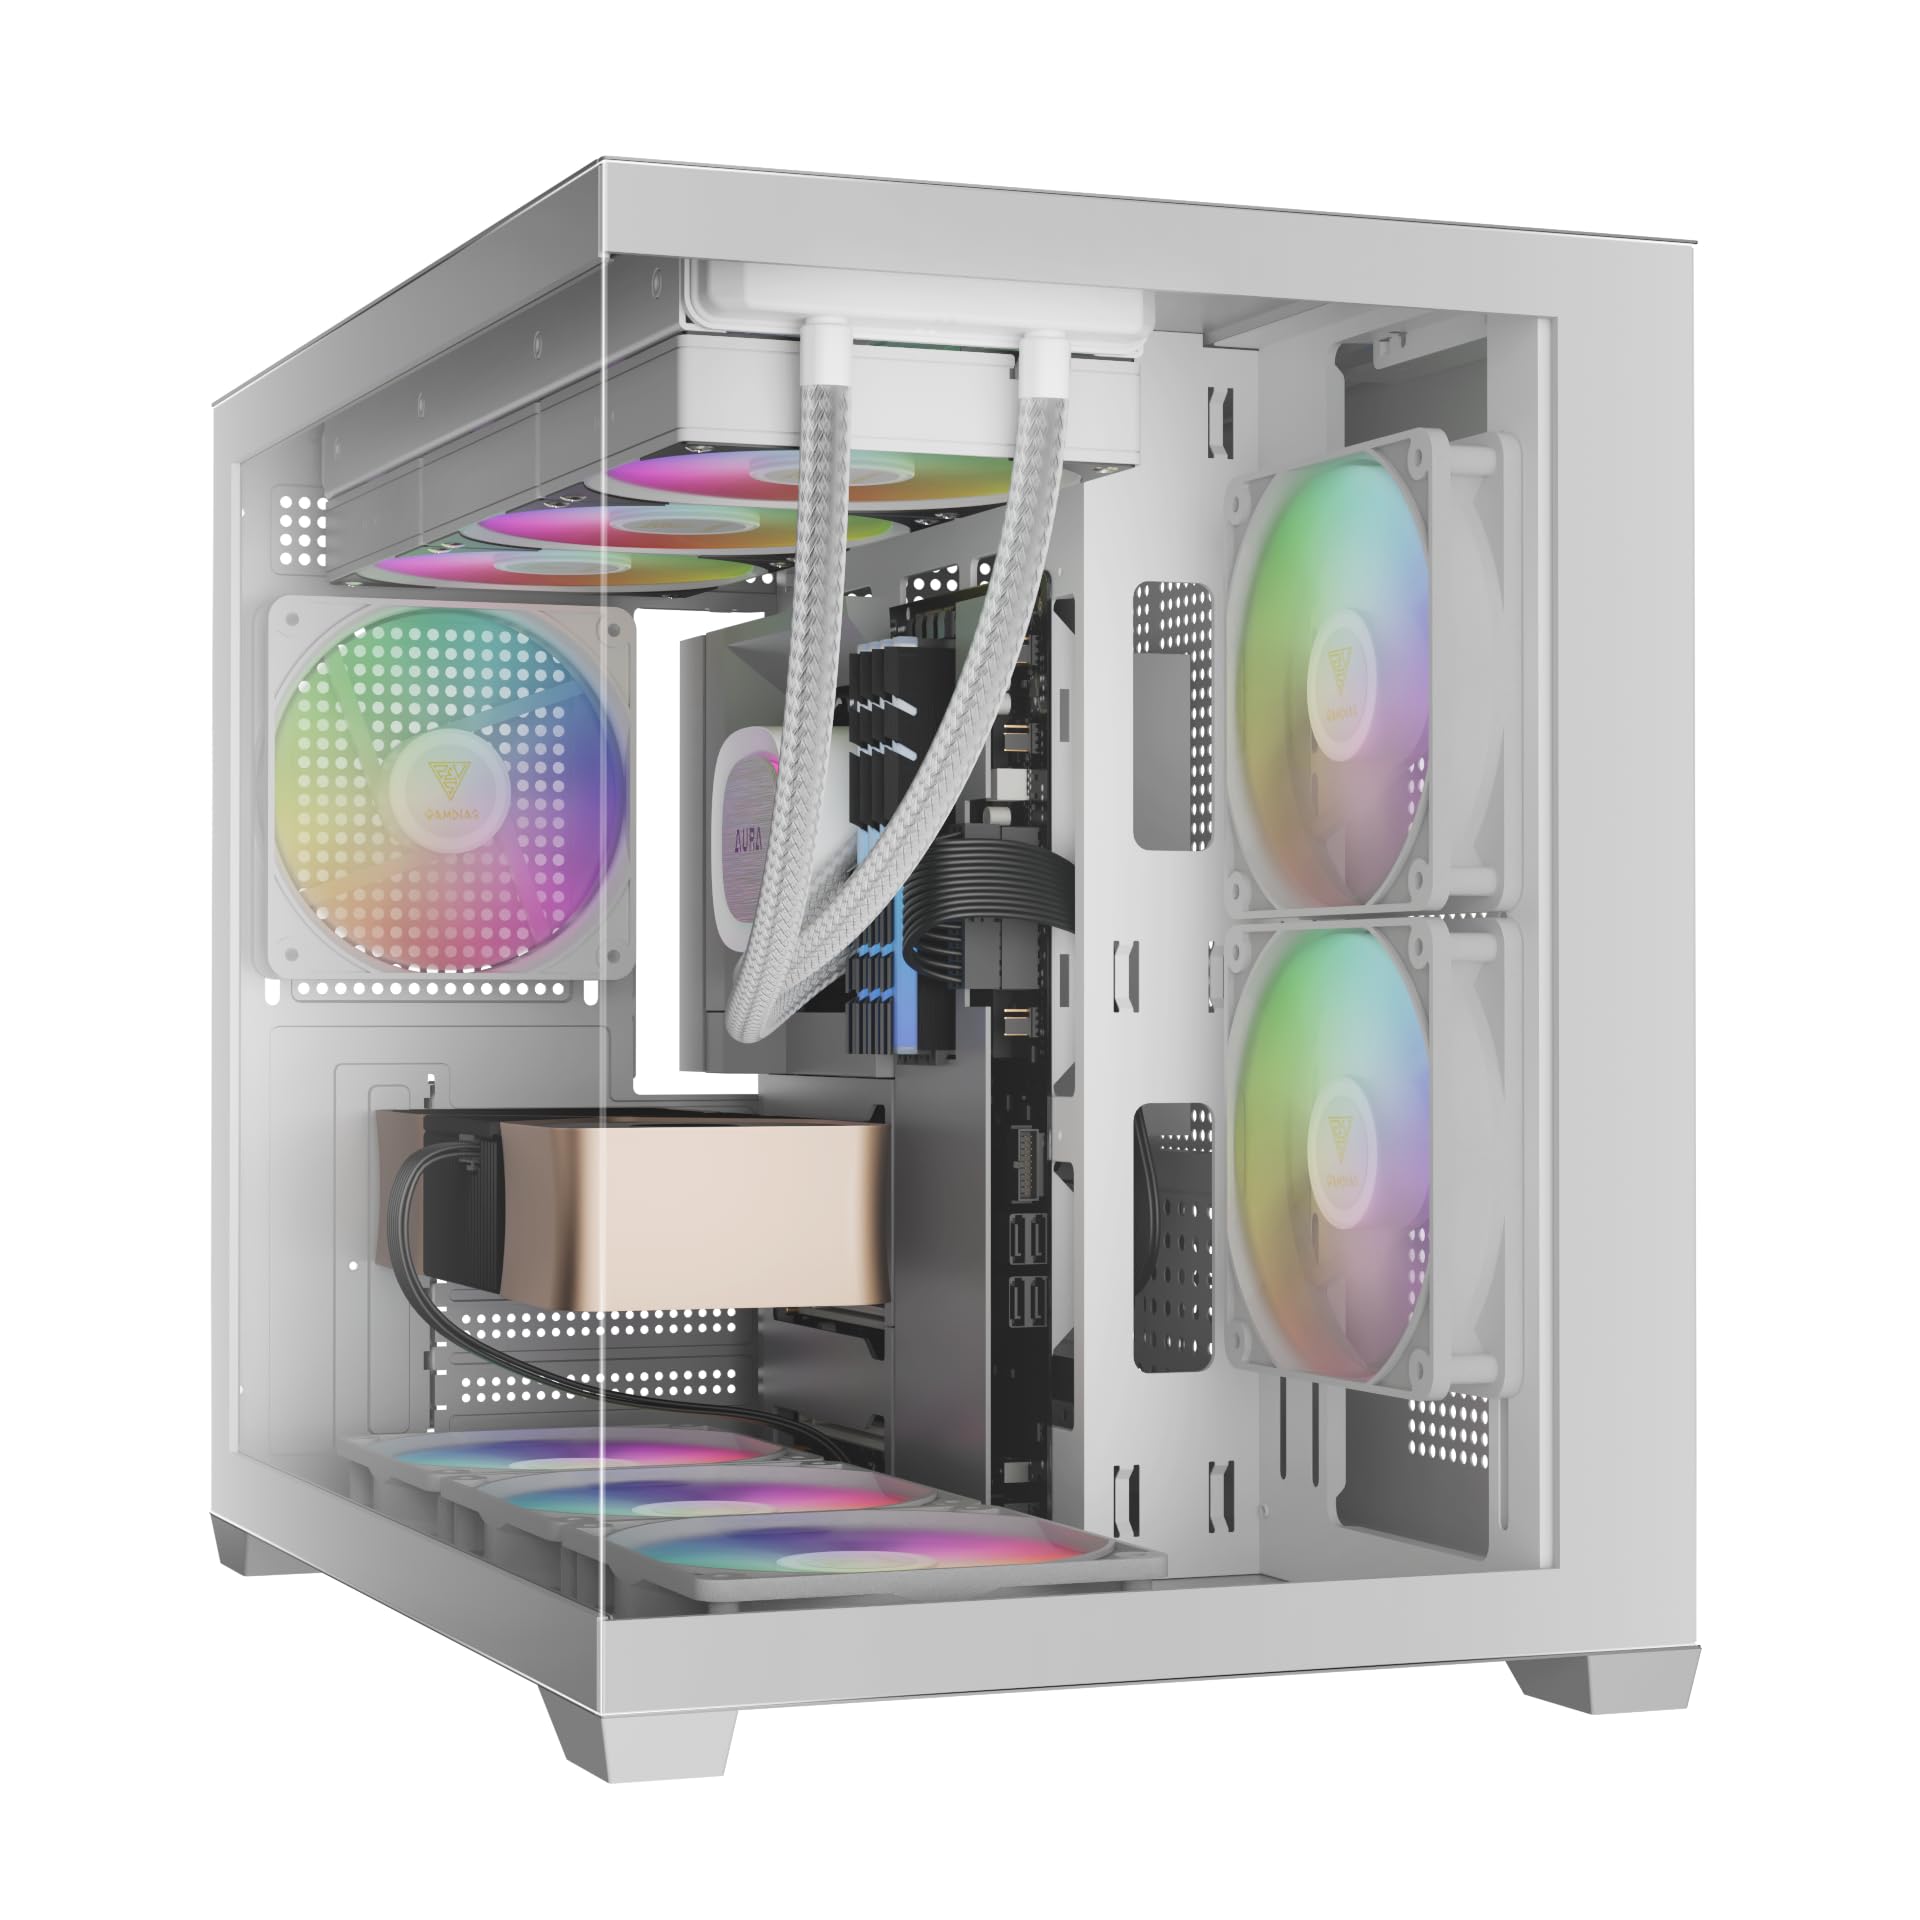
Irudia: Aurrealdea view of the GAMDIAS Aura GC10m V2 WH Micro-Tower Computer Case, showcasing its tempered glass panels and pre-installed ARGB fans.
Konfigurazioa eta Instalazioa
Before beginning installation, ensure you have all necessary components and tools. Refer to your motherboard and component manuals for specific installation instructions.
1. Kasua prestatzea
Carefully remove the tempered glass side and front panels. These are typically secured with thumbscrews or a latch mechanism. Place them on a soft, flat surface to prevent scratches.

Irudia: Angelua view of the case with the tempered glass side panel removed, showing the internal structure and fan mounts.
2. Plaka amaren instalazioa
- Instalatu E/S babeskia (aurrez plaka basean lotuta ez badago) kaxaren atzeko irekiduran.
- Lerrokatu zure Micro-ATX edo Mini-ITX plaka basea kaxa barruko distantziagailuekin.
- Lotu plaka nagusia emandako torlojuak erabiliz.

Irudia: Barnekoa view of the case, highlighting the motherboard tray area and fan mounting points.
3. Elikatze-iturriaren (PSU) instalazioa
- Install your PSU into its designated compartment, typically at the rear bottom of the case.
- Lotu PSUa kaxaren atzealdeko torlojuekin.
- Ensure the PSU fan faces the correct direction for optimal airflow (usually downwards if there's a vent, or upwards if not).

Image: Rear internal view of the case, showing the PSU mounting area and cable routing options.
4. Drive Instalazioa
- 3.5" / 2.5" Drive Bay (HDD Cage): Locate the HDD cage. Install one 3.5" HDD or one 2.5" SSD/HDD.
- 2.5" Drive Bays: The case supports three additional 2.5" SSDs/HDDs. Mount these drives to the designated brackets or locations within the case.
5. Haizagailuaren eta erradiadorearen instalazioa
The case comes with three pre-installed ARGB fans (two side, one rear). Additional fans or radiators can be installed in the following locations:
- Goia: Supports 3 x 120mm or 2 x 140mm fans; 360mm or 280mm radiators.
- Aldea: Supports 2 x 120mm or 2 x 140mm fans; 240mm radiators. (Pre-installed 2 x 120mm ARGB fans)
- Behea: Supports 3 x 120mm or 2 x 140mm fans.
- Atzekoa: Supports 1 x 120mm or 1 x 140mm fan; 120mm radiators. (Pre-installed 1 x 120mm ARGB fan)

Irudia: Barnekoa view showing the pre-installed ARGB fans on the side and rear, illustrating fan placement.
6. Connecting Front I/O Ports and ARGB
Connect the following cables from the case to your motherboard:
- USB 2.0: Connect the USB 2.0 header cable.
- C mota: Connect the USB Type-C header cable (if your motherboard supports it).
- HD audioa: Connect the HD Audio header cable.
- Power/Reset/LEDs: Connect the front panel power, reset, HDD LED, and power LED cables according to your motherboard manual.
- ARGB Zaleek: Connect the ARGB fan cables to your motherboard's 5V ARGB header or to the integrated ARGB controller (if applicable). The case includes an LED Switch Button for controlling ARGB lighting if connected to the case's internal controller.

Irudia: Goian view of the case, showing the front I/O panel with USB ports and the LED switch button.
Funtzionamendua
Piztea
Once all components are installed and connected, close the side panels. Connect your monitor, keyboard, mouse, and power cable. Press the power button on the front panel of the case to start your system.
ARGB Argiztapen Kontrola
The pre-installed ARGB fans can be controlled in two ways:
- LED etengailuaren botoia: If the ARGB fans are connected to the case's internal controller, press the dedicated LED Switch Button on the front I/O panel to cycle through various lighting effects and colors.
- Plaka basearen softwarea: If the ARGB fans are connected directly to a compatible 5V ARGB header on your motherboard, you can control the lighting effects using your motherboard's proprietary RGB software (e.g., ASUS Aura Sync, MSI Mystic Light, Gigabyte RGB Fusion, ASRock Polychrome Sync).
Mantentzea
Mantentze-lan erregularrak zure ordenagailuaren osagaien errendimendu optimoa eta iraupena bermatzen laguntzen du.
- Hauts-iragazkiak: The case features removable dust filters (e.g., on the top and bottom). Periodically remove and clean these filters with compressed air or water (ensure they are completely dry before reinstallation).
- Kasuen garbiketa: Erabili biguna, damp cloth to clean the exterior surfaces of the case. For tempered glass panels, use a glass cleaner and a microfiber cloth. Avoid abrasive cleaners.
- Barneko hautsaren kentzea: Every few months, open the case and use compressed air to remove dust from internal components, especially fan blades and heatsinks.
Arazoak konpontzea
Arazoak badituzu, kontuan hartu ohiko irtenbide hauek:
- Sistemak ez du pizten:
- Ziurtatu elikadura-iturria piztuta dagoela eta hormako entxufean behar bezala konektatuta dagoela.
- Verify all power cables (24-pin ATX, CPU, GPU, drives) are securely connected.
- Check that the front panel power button cable is correctly connected to the motherboard.
- ARGB Fans Not Lighting Up/Spinning:
- Confirm ARGB cables are securely connected to a 5V ARGB header on the motherboard or the case's controller.
- Ensure fan power cables are connected to appropriate fan headers on the motherboard or PSU.
- If using motherboard software, verify it is installed and configured correctly.
- Aurreko S/I atakak ez dira funtzionatzen:
- Check that the USB and HD Audio cables from the front panel are correctly connected to their respective headers on the motherboard.
For persistent issues, consult your motherboard manual or contact GAMDIAS support.
Zehaztapenak
| Eredua | AURA GC10 V2 WH |
| Kasu mota | Mikro-dorrea |
| Plaka amaren euskarria | Mikro-ATX, Mini-ITX |
| Neurriak (LxWxH) | 42 x 29 x 37 cm |
| Pisua | 5 kg |
| Drive Bays | 1 x 3.5" edo 1 x 2.5" (HDD kaiola), 3 x 2.5" |
| I/O Portuak | 1 x Type-C, 1 x USB 2.0, 1 x HD Audio, 1 x LED Switch Button |
| Aurrez instalatutako zaleak | 2 x 120 mm ARGB (alboan), 1 x 120 mm ARGB (atzealdean) |
| Zaleen laguntza |
|
| Erradiadorearen euskarria |
|
| CPU hozgailuaren altuera muga | 165 mm |
| VGA luzera muga | 400 mm |
| PSUren luzera muga | 160 mm |
Bermearen informazioa
Bermearen baldintza zehatzak ikusteko, jo ezazu GAMDIAS ofizialera. webwebgunean edo produktuarekin batera datorren berme-txartelean. Gorde erosketaren frogagiria berme-erreklamazioetarako.
Bezeroarentzako Arreta
If you require further assistance or have questions regarding your GAMDIAS Aura GC10m V2 WH computer case, please contact GAMDIAS customer support.
- Fabrikatzailea: GAMDIAS TAIWAN
- Helbidea: No. 113, Jian 2nd Rd., Zhonghe, Dist., New Taipei City 235, Taiwan
- Inportatzailea (India): Allway Distributions Pvt Ltd, No-49, H.B. Samajha Road, Baswangudi , Bengaluru- 560004
- Importer Contact (India): 8904307700
- Ofiziala Webgunea: www.gamdias.com (Mesedez, egiaztatu ofiziala) website for the most up-to-date support contact information and resources.)


